
Designing the Grabber
Tags: mechanical, innovate, and thinkPersonhours: 5
Task: Work on the grabbers more
With our single degree of freedom lift fastened to the robot we focused on the appendage that would grip to within an inch of its life any glyph we fed it. We initially toyed with simple tetrix channels to form a make shift rail that would hold axels for pivoting points, however we found tetrix to be a bit too cumbersome and decided to use rev rail instead. Using two tetrix U-brackets we built a makeshift grabber that used rubber bands and a servo to secure blocks without letting them slip through its grasp. To add extra grip to the long L-beams that formed the pincers of the claw, we added even more rubber bands, and moved on to testing.
Initial tests were very positive, the high strength servo coupled with a few rubber bands maintained enough of a grip on one or two blocks with ease, and because the entire system was mounted to a rev rail we could easily slide and size the pincers to the right distance. Feeling confident in our work we attached the grabber to the lift and attempted drive practice, which ended relatively quickly due to a surprising number of jams between the lift and glyphs.
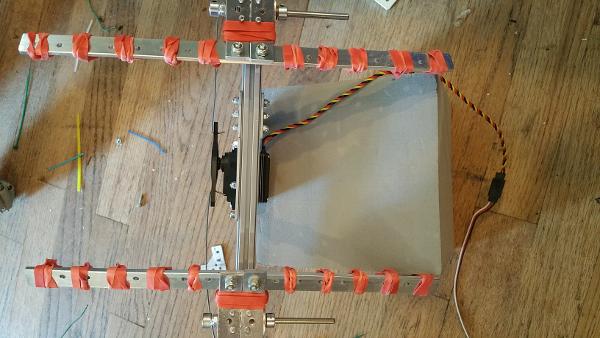
The key issue we now faced was that as the lift returned to its home state blocks were getting stuck beneath the retracting claw causing jams. To fix this relatively simple problem we added a back plate to the claw that kept blocks from slipping to far into the robot, this was easily fashioned out of a bit of thin wood board we had lying around from the decks of other robots. The overall performance of our glyph wrangling device was astounding, so long as whoever was operating the robot was a well-trained driver.