
Chassis Model
Tags: engineering, journal, design, think, and innovatePersonhours: 30
Task: Use Creo Parametric to CAD the chassis
After making significant development on our robot, we decided to model it. So far, we have developed the chassis of the robot seen below
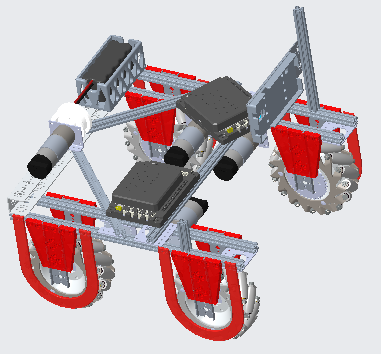
To develop this, many types of contraints were used.
The entire model is dependent on this tetrix bar. The bar was constrainted using the Default feature since it was the base of the model. To this, the lift motor was attached as well as the battery box. These two were constrained by the Distance feature to the end of the bar.
Four REV rails were attached to the TETRIX bar. These supported the wheels and their motors. They were constrianed through the Coincident to the bottom of the tetrix bar and Distance to the side of it.
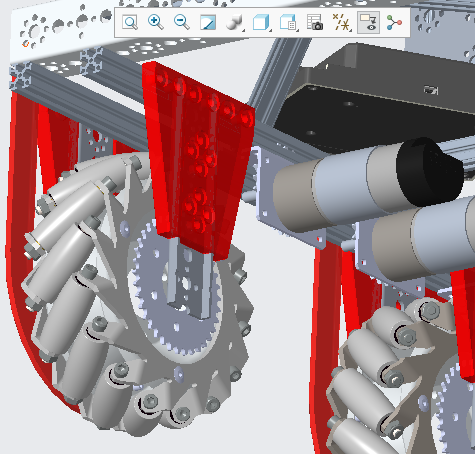
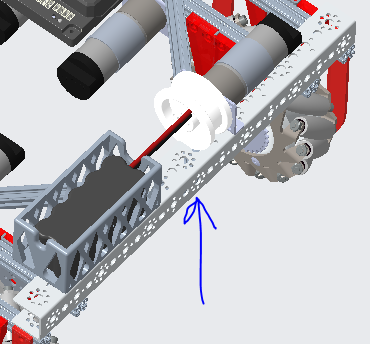
There are custom designed motor mounts constrained to th side of the REV rails using Coincident and Distance measurements. To this, there are TETRIX wheel mounts attached onto which the mechanum wheels are attached. On the outside, wheel guards were attached. The motors that drive the wheels are attached to REV motor mounts which were constrained to the underside of the REV rails. Attached to the motor is an axel which connects to a sproket to turn the wheel.
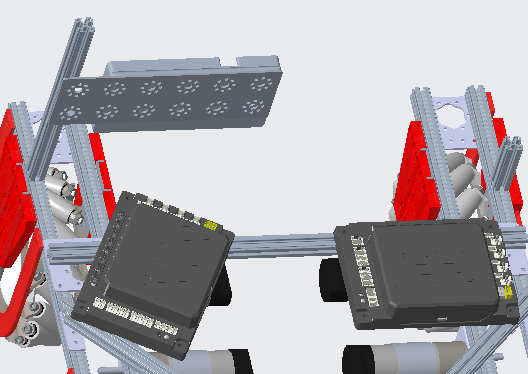
The REV hubs were the hardest to constrain in this model because they didn't have typical sides. To mount them, we used a combination of Distance, Coincident, and Angle Offset features. The final part of the model was the phone mount which was simply constrained using coincidents.
The next steps of this robot is to complete the robot model. This chassis was actually reused from last year. Due to licensing issues, we had to redevelop this model. We hope to experiment with this model to make space for the new, larger gripper arms.