Constructing Icarus' Elbow
Tags: think, design, and innovatePersonhours: 16
Task: Build the elbow for intake

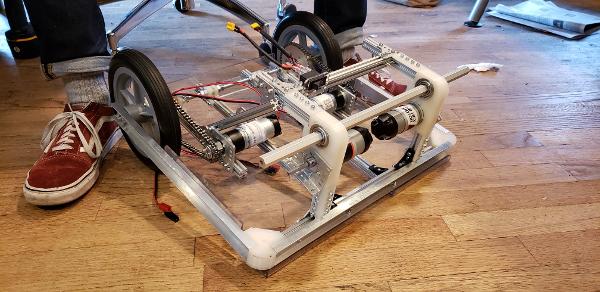
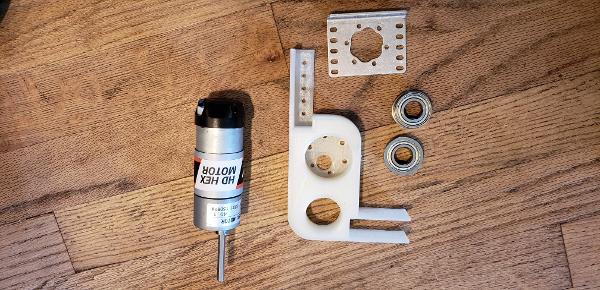
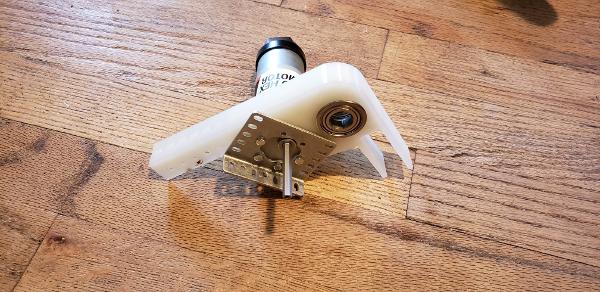
In the last Icarus' blog post, it was just getting the basic flat, support frame of the robot. The next step in the construction of Icarus' is the elbow joint that holds the intake. This time around, we simplified everything significantly as compared to BigWheel, reducing the excessive aluminum parts to two 3D printed parts. We attached these to the REV rail that runs across the front of the robot with two smaller REV rail parts we custom cut to fit the size of the 3D part. Then, we inserted the motors that each of them requires. Here we are using the same REV HD motors we used for our elbow on the last robot since they worked quite well. After inserting these, we went about supporting the elbow frame, which was done with two REV rails attached to the robot from the top of the 3D printed piece.


These were attached at a 30-degree angle and anchored to the robot behind the two drive motors we use for the wheels. Once both of these were secured, we began assembling the arm. The arm itself has remained mostly the same, consisting of two linear slides on either side for a grand total of four, extra smooth slides. We drilled out the correct holes on all of the arm pieces, created four custom metal parts for the slides, which took a while on the bandsaw, and then assembled the bottom slide of the arm. Three holes were drilled out in four REV 86 toothed gears, which work as the mounting point of the linear slides. Once these were attached, we attached all the other necessary parts for the arm and life on the elbow joint’s 6mm hex axle that protrudes from a ½ inch hex axle set on two bearing with ½ inch hex inlay for an insanely smooth rotation. After all the necessary hardware was set in place, we put a redesigned version of our 3D printed gear keepers on to keep the distance between the motor shaft and the rotating shaft the same, and the gears firmly interlocked. During the time frame of this article, the new superman lifting lever was put into place.
Next Steps
The next step in the saga of the robot is the hook and the new intake, which will be seen in upcoming articles. As well, if the robot is to score at worlds, we need to construct the arm lift for the intake and then the intake itself, which will be redesigned and improved. Also, some wiring would be nice.
