
Icarus' Arms
Tags: think, design, and innovatePersonhours: 12
Task: Install intake arms
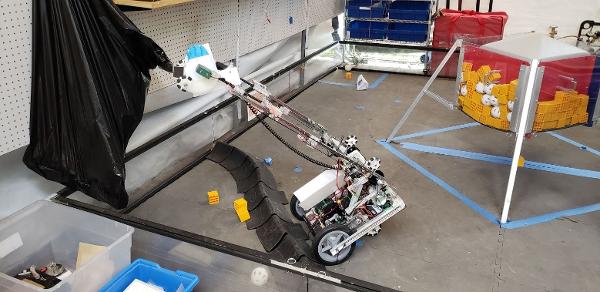
Since the last post, in which we installed the Superman Arm, we've installed the second stage of the linear lift and the belt drive that accompanies it. We began by drilling two holes in the linear slides that were exactly the space between the holes on the carriages for the linear slides using a drilling template we printed on the Tazbot printer. We did this to two of our linear slides, and then attached them. We realized that they were too long and sticking out of the 18x18x18 sizing box, so we detached them and cut off a centimeter from the top and ground off the edges. They were reattached successfully, and the 3D mounts for the belt system were installed at the same time since they use the same point of attachment as the linear slides.
Those custom pieces that were mentioned in the Joint Operation article were now utilized, attaching to the top of the first linear slide and to the carriage of the second linear slide. These parts are used for the attachment of the pulley bearings that the belt drive relies on to function. We installed these pieces rather easily but struggled on some of the tighter fits that were done to reduce wiggling in the arms, a problem that the last robot had. The next thing we added was the physical belt which drives our lift. The belt was tied off on the final carriage on the second linear slide on either side. The next step was to create the mounting for the motors that would drive the lift. To do this we set up a REV rail under each of the elbow motors, and then topped it off with another rev rail that we connected to the elbow frame supports that run from the front to the back of the robot. Then we mounted the motors, two Orbital 20 andymark motors, which at first didn't fit. The issue was that there was no way to mount them close enough for a belt to be put in place with the current gear keepers we had on the robot. They were attached, and then the motors were mounted, and the belts were put on. The lift has the same ratio as last time, which is further explored in the article Bigwheel Upgrades. The whole system is much more cleaned up and simplified, and generally looks a lot better.
Next Steps
The next challenge for us is going to be making the hook, attaching said hook, and redesigning the intake in time for effective driver practice.