
CNC a New Polycarb Robot Base
Tags: innovate, design, and ThinkPersonhours: 5
Task: CNC a new robot base
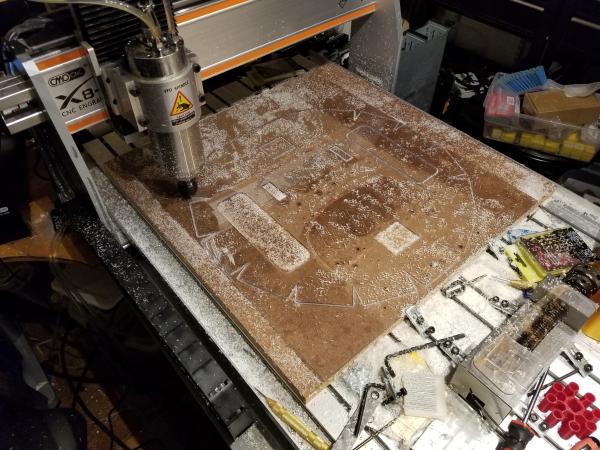
We finished manufacturing our new base today, with very little difficulty, but a few flaws. The CAM was already designed so all we had to do was run the operations on the CNC. We drilled out the various sized holes, cut out the inner wheel slots and cable holes. Next was the groove along the edge to fold the side flaps along, which was a leap of faith because the orientation and position of polycarb on the CNC had shifted, which meant we didn't know exactly where we had it originally. We got it as close as we could remember and then ran the funky groove operation, which turned out to have pretty close to perfect alignment. Finally, we cut out the outline of the base, with flaps to fold down to increase the strength of the polycarb and to reduce flex. After looking at our finished project we noticed that the center slip ring hole was not cut. The hole is for general cable management and for the slip ring wires to reach the REV hub under the robot. We checked the CAM and found that it had been left out of the inner contours, so we made an operation for it, and cut it out separately. The build plate was finished on the CNC side of its production.
Next we used attempted a new way to fold down the side flaps to make the structural ring of the base: some tasty oven baked aluminum. The plan was to heat the aluminum above the working temperature of polycarb, then place the edge of the hot aluminum in the groove and use the edge to make a straight 90 degree bend. We found that aluminum and polycarb just don't transfer heat very well, and ended up with a hot piece of aluminum and cold polycarb. Our less preferred alternative solution was the classic torch bend, which was prone to bubbling if rushed. We took our time and were very careful about how much heat we applied, so we only ended up with a few bubbles. Regardless, this was a major improvement over our previous build plate.
Next Steps
We are now ready to start mounting our subsystems onto the new base. We should first start with the drivetrain and the turntable. We also should document any errors we encounter with the new build plate, so we can fix them in CAM and make another more polished attempt. Our next CNC parts include boring out gears to fit on our big wheels, and cutting out more banana shaped mounts for the turntable.