
NinjaFlex Belt intake system
Tags: design and innovatePersonhours: 3
Task: Design an intake with the NinjaFlex belt
So far we have made a few Intake assemblies including the belt intake and the Tetrix tread intake. However, as is Iron Reign tradition, we like to make systems that utilize custom parts to both help our robot’s aesthetic and functionality. To do this, we took aspects from the other two intakes to better design and make the one that is discussed in this post. To recap, the belt intake was a sanding belt on to barrels that spun at high speeds to pull in rings and the tread intake was made with Tertis tank treads with rubber bands and spun, in the same way, to grip and pull in rings.
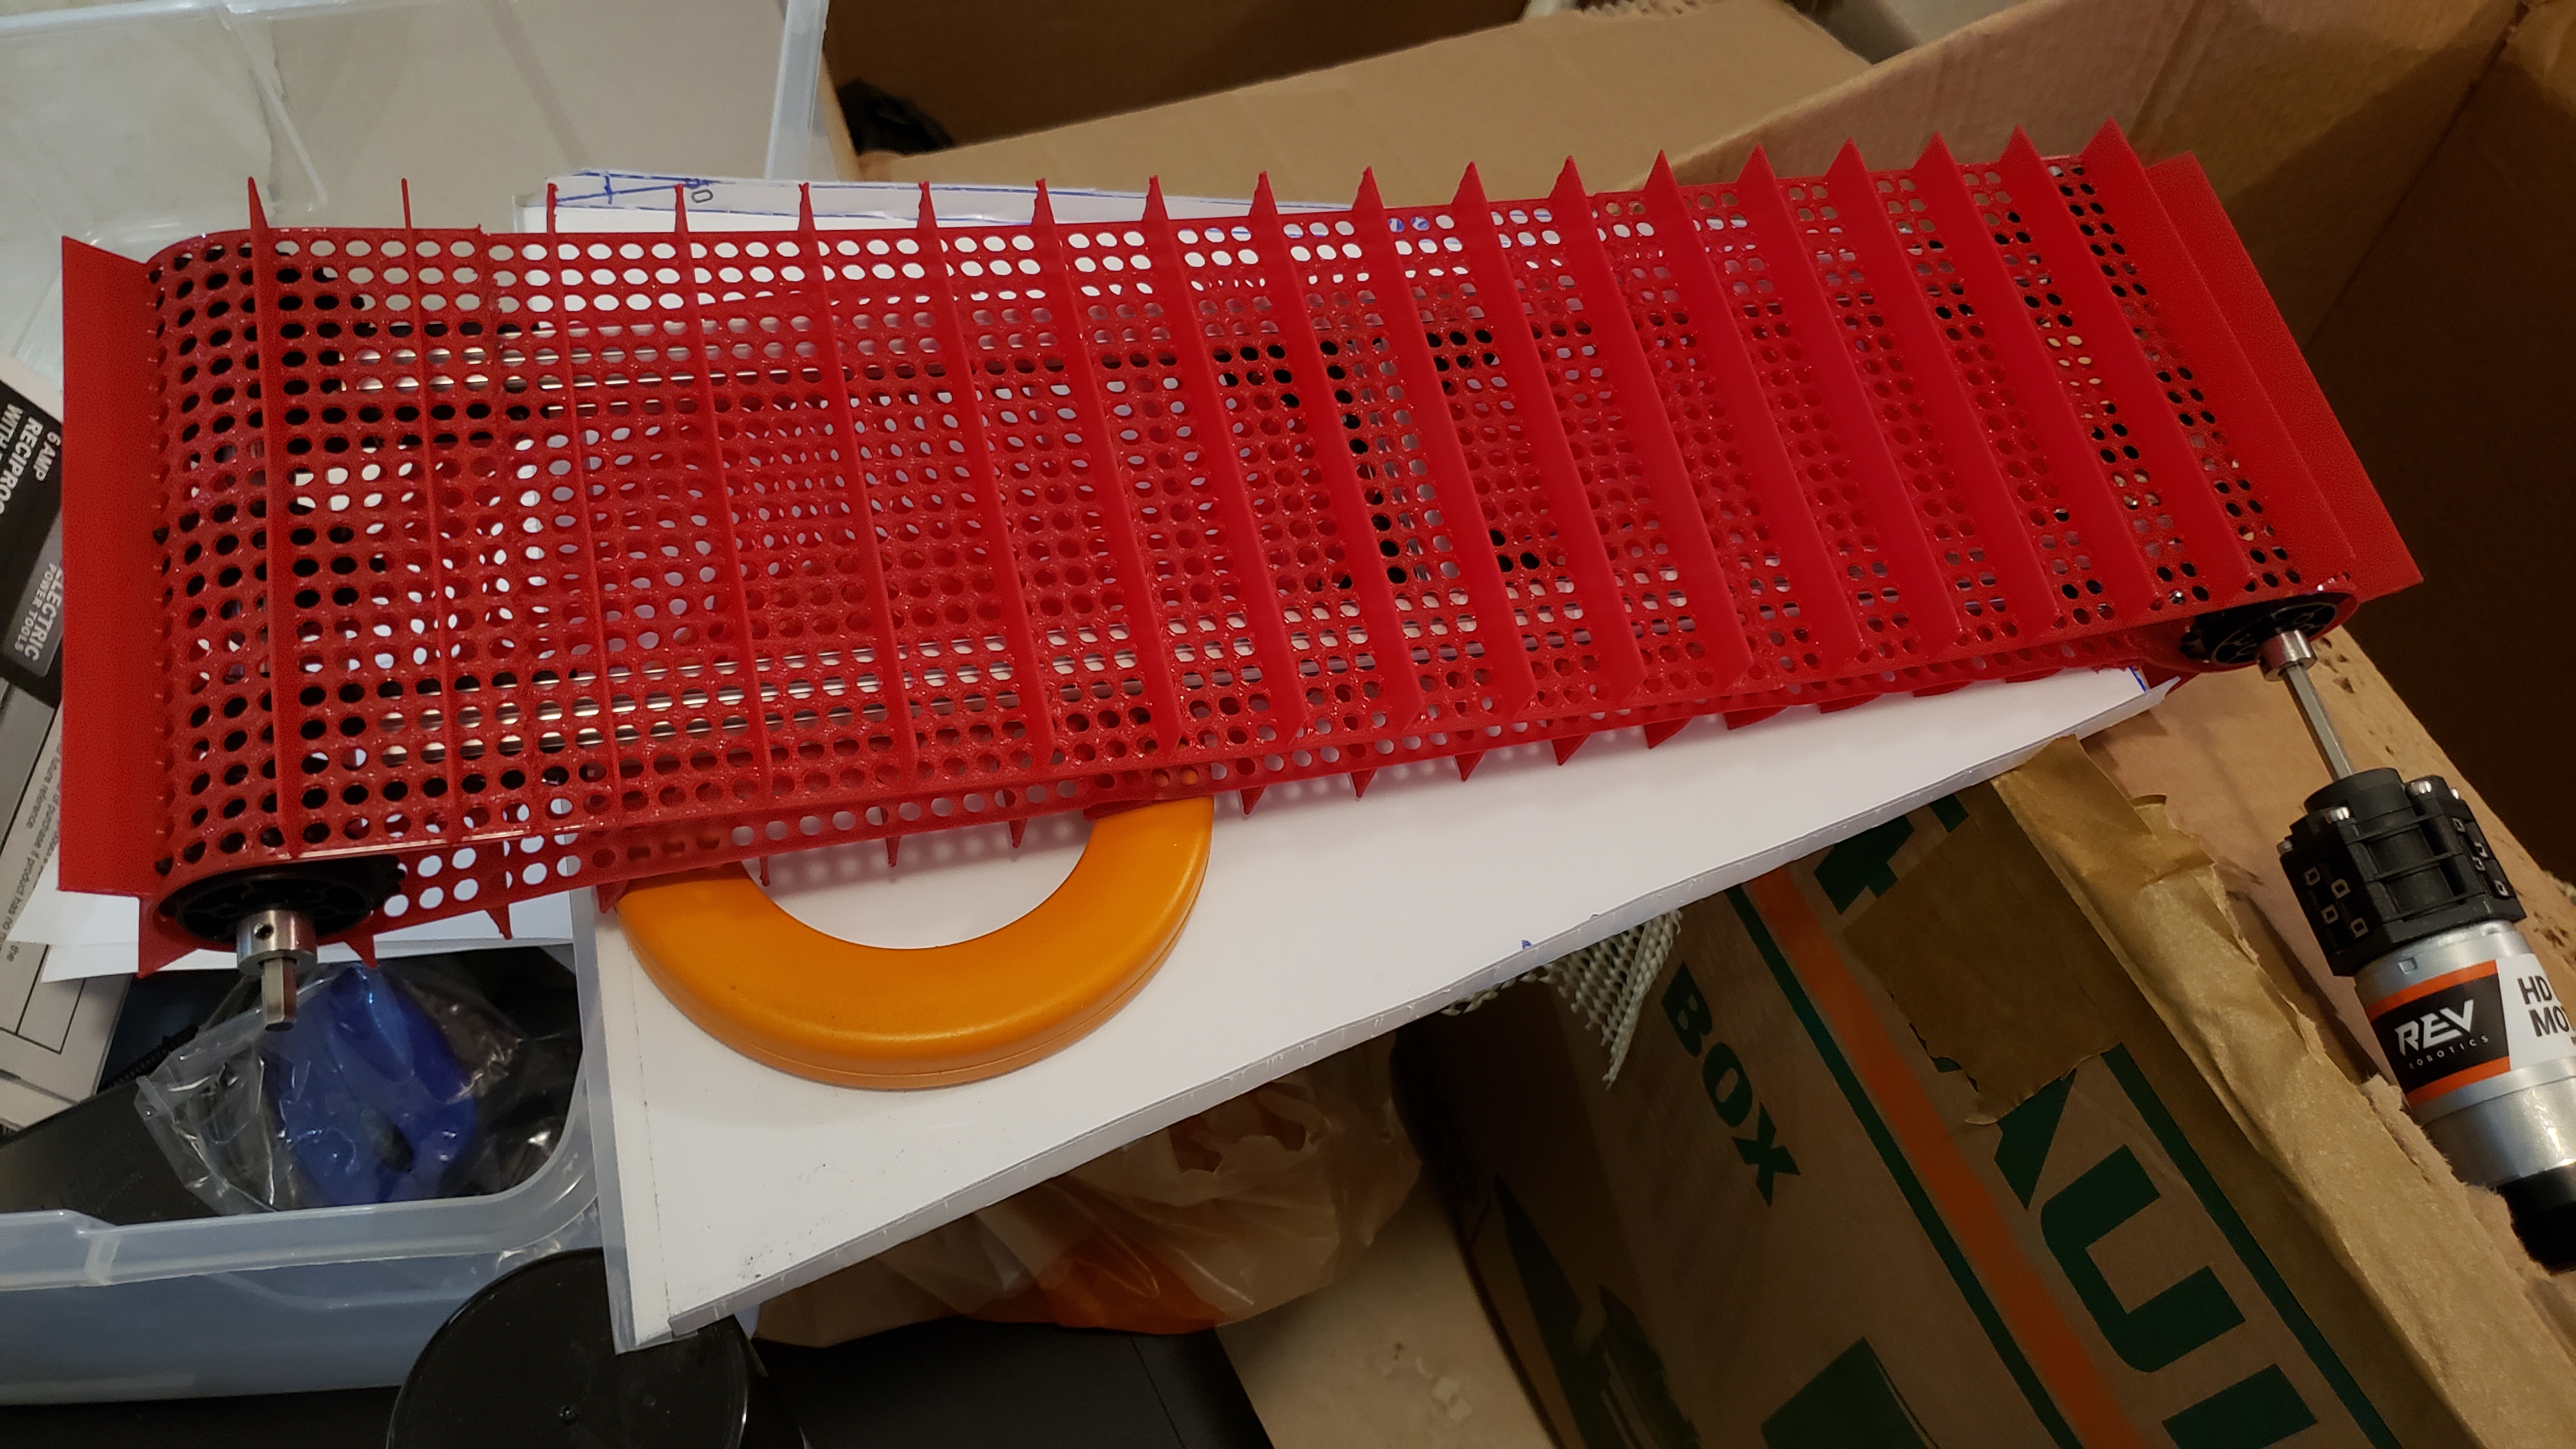
The NinjaFlex belt intake takes the benefits of both systems without generating their issues. The NinjaFlex intake has the narrowness and form factor of the belt intake without the issues of the belt derailing which is caused by uneven pressure on the belt. Instead, the NinjaFlex belt intake is sprocket-driven with a custom belt to ensure that the belt stays on the rollers at all times as long as the two ends are aligned properly. Derailing was a big issue with the belt intake. Personally, I remember spending at least a few hours in total trying to get the belt to not fall off, with little success. That system would have needed much more work and improvement before we would have seen any results.
The NinjaFlex belt intake system also yields the benefits of the tread system in that the 3D printed belt provides sufficient grip on the rings in order to pull them onto the robot. Additionally, the NinjaFlex belt system also doesn’t use rubber bands as gripers that can tangle with nearby screws or protrusions, possibly causing the system to break. Instead, the belt has flaps which can also be changed or molded into different lengths or shapes. This brings up one of the biggest benefits, customizability. When we use 3D printed or CNC parts we enter this space of customizability which is always a good aspect because if a change needs to be made to a part, we can usually make a new custom part in a matter of days if not hours with our machinery which gives us a lot of flexibility in how we can build our robot.
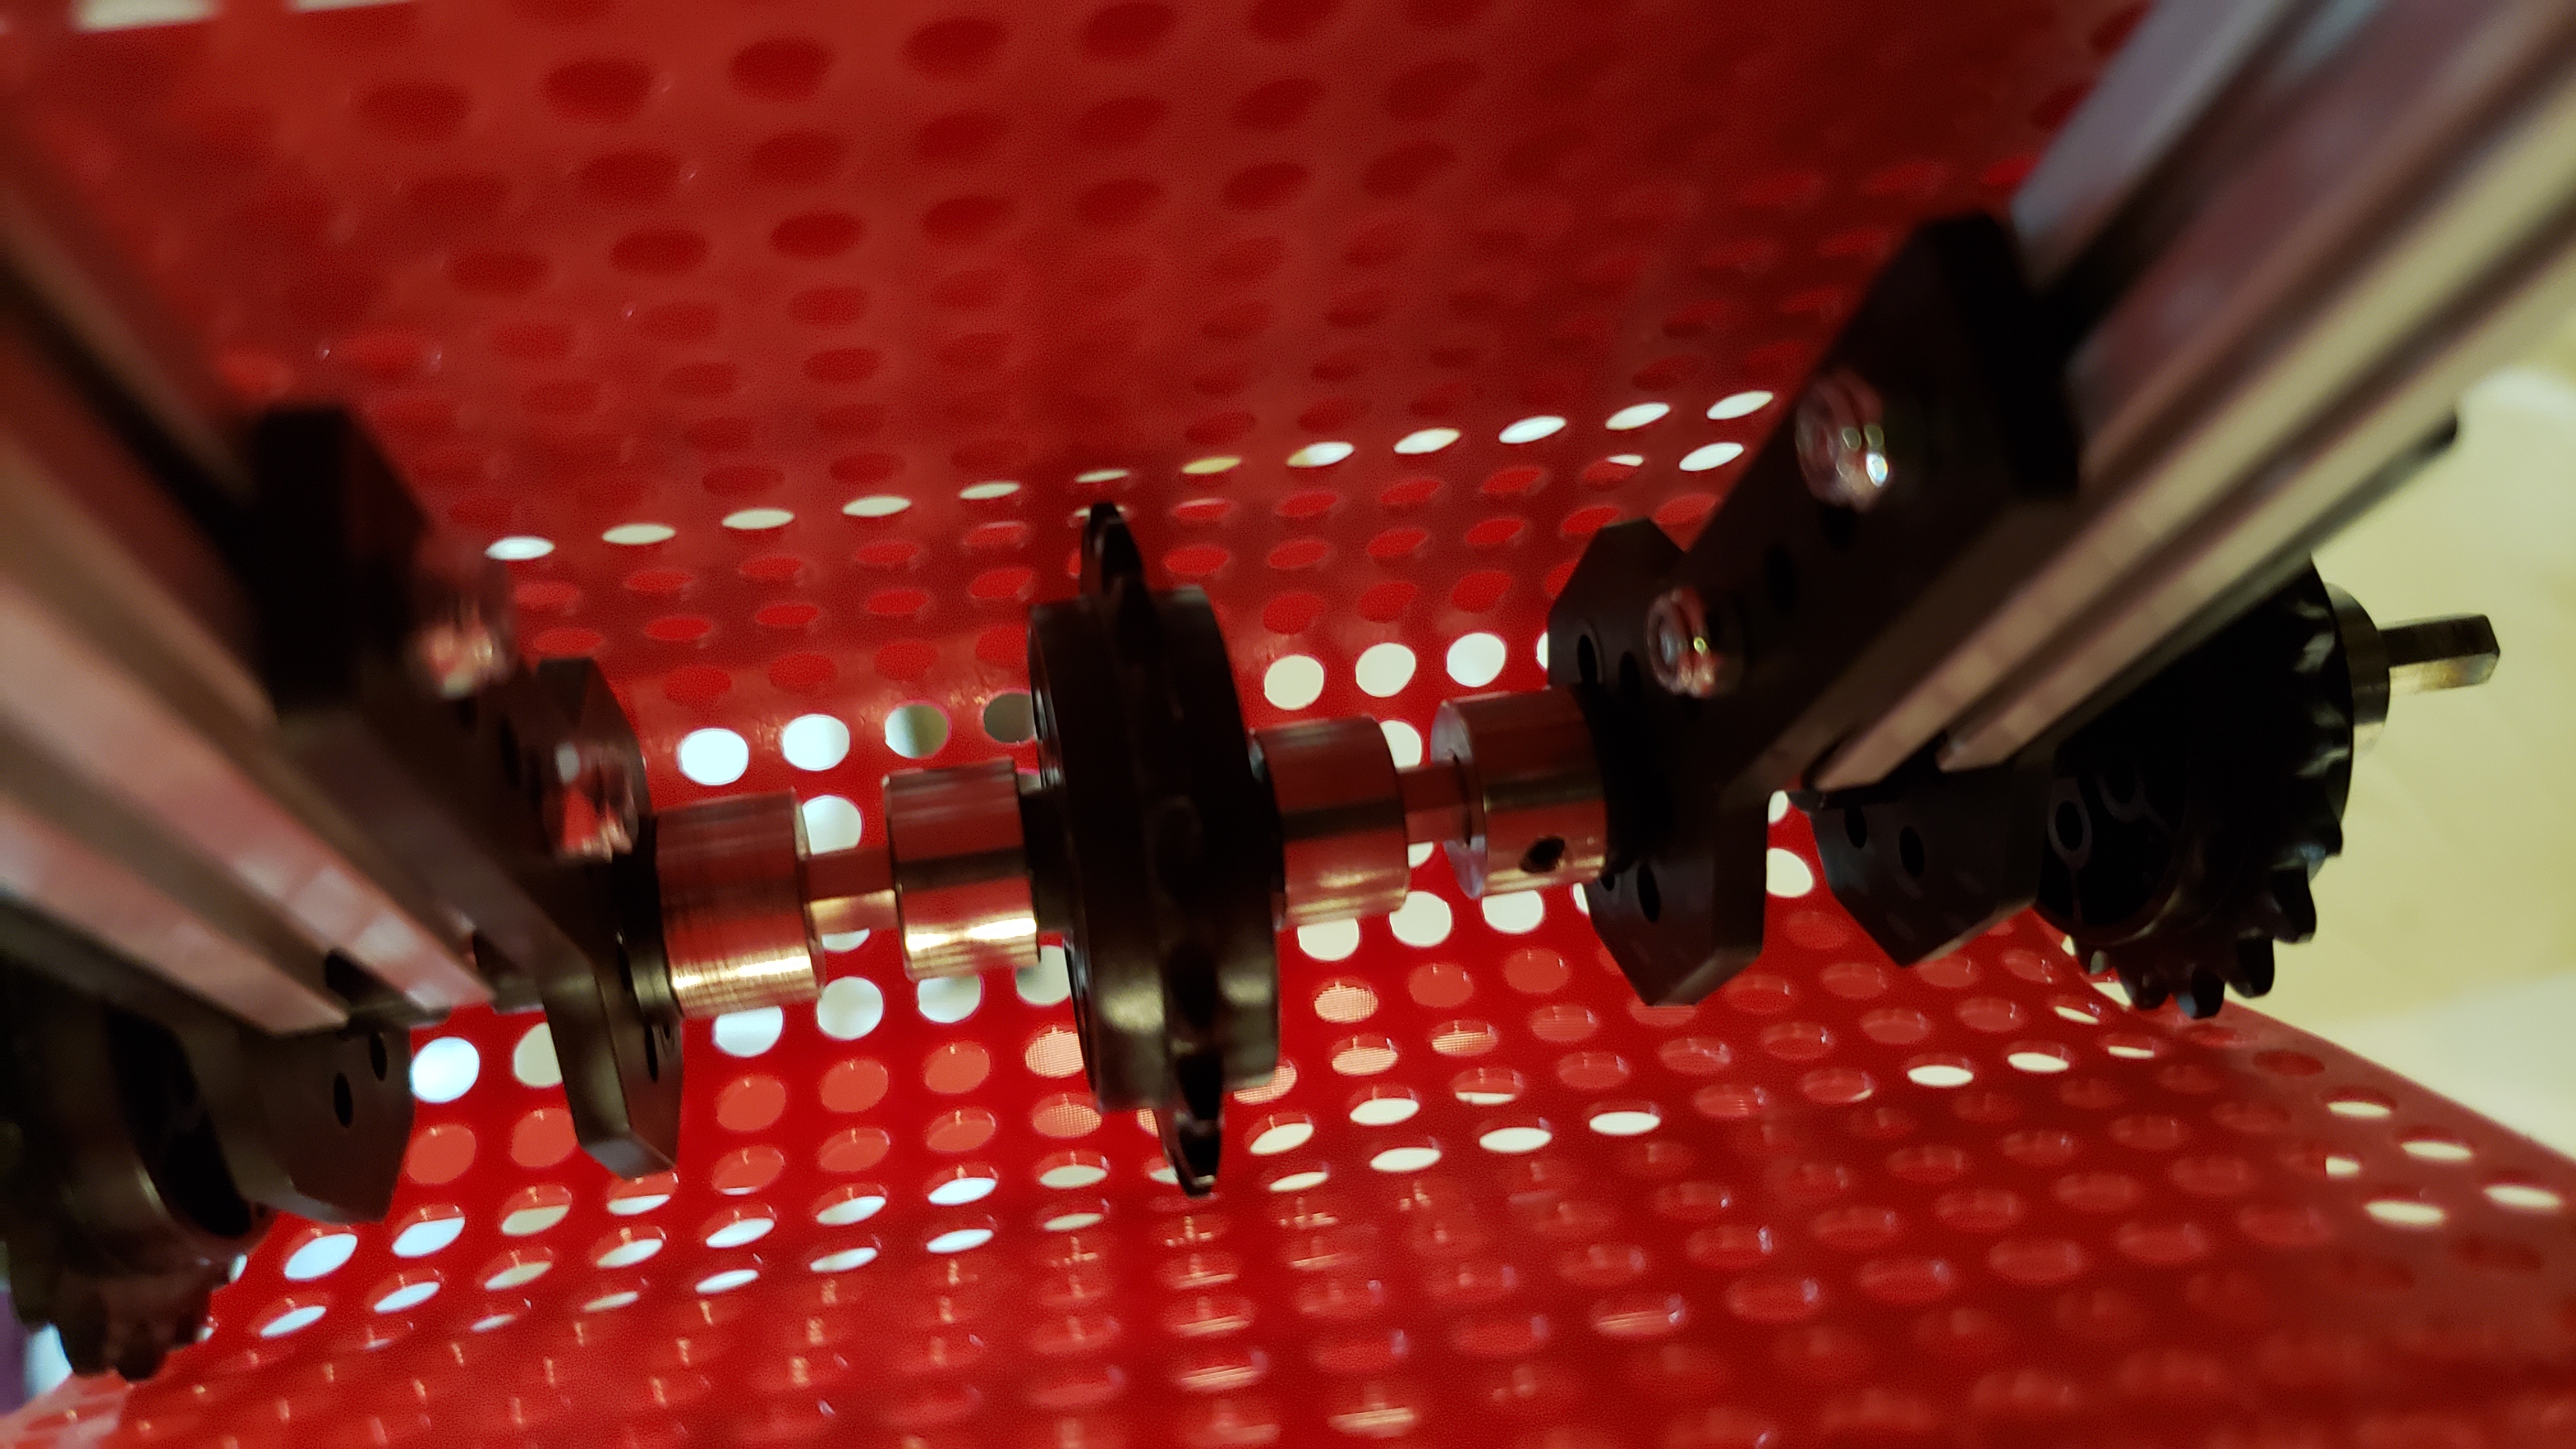
Assembly-wise the intake is also super simple right now. It consists of 6 sprockets, 3 on each side that drive a belt with the sprocket spacing sits on to pulls in rings. The dimensions and specifics of how the belt was designed and made are in the post “NinjaFlex intake belt” but basically it’s just a belt with holes in it with the specific spacing of the REV sprockets. The motor right now has just been placed on one of the shafts but will be secured in a better location in the future, either parallel to the guide rails or perpendicular depending on how much space we have. If the motor is mounted parallel to the guide rails, then it will drive the belt with beveled gears, otherwise, it will be directly fitted onto the shaft.
Next Steps:
As mentioned previously, the motor has yet to be permanently mounted so that would be the next clear step and after that, there will likely be more testing and comparing of different intake systems. Then, we will interface the new intake with a ramp to see how we can assemble the two together to finish our intake system and start planning to put it on the robot. For now, though, we have made good progress.