
Launcher V1
Tags: journal and thinkPersonhours: 12
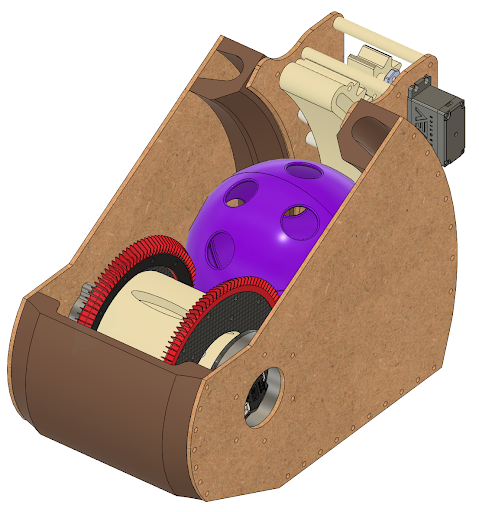
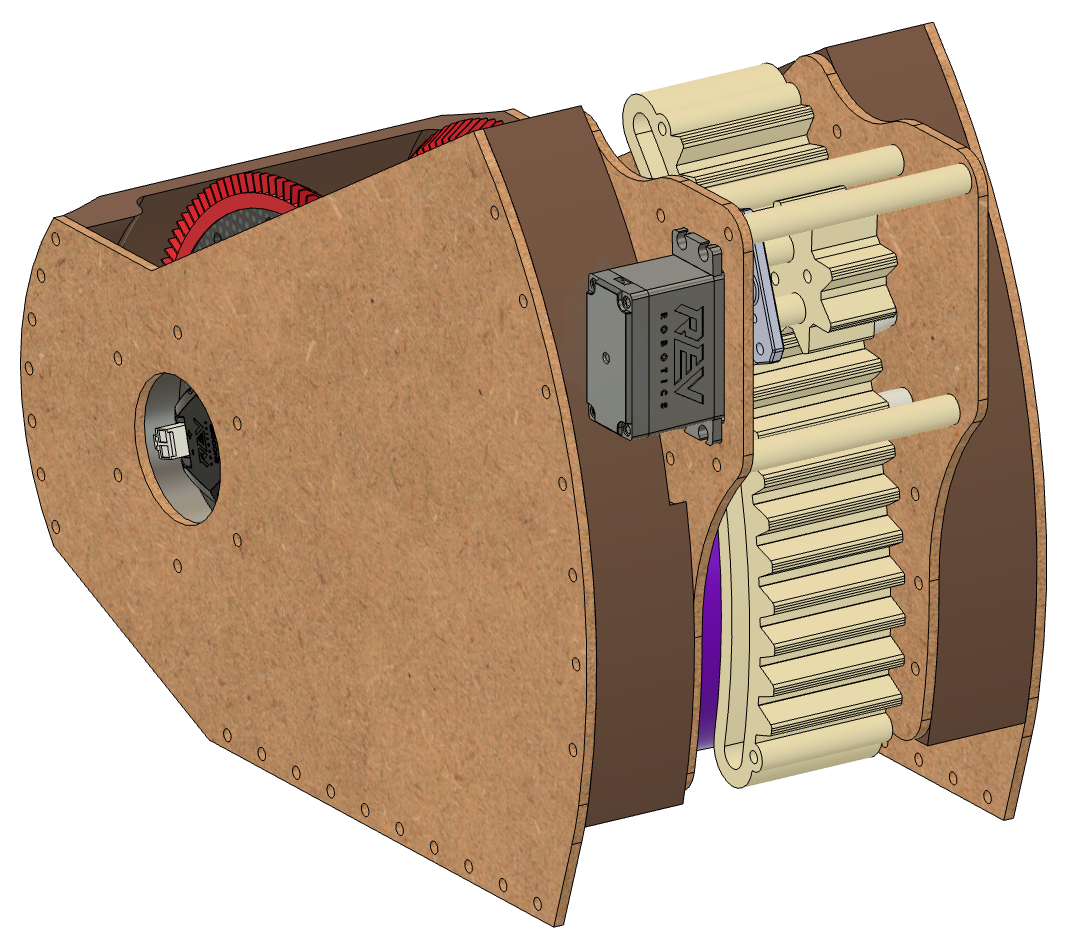
This is v1 of our actual launcher. With this iteration we’ve moved away from the large testing rig and over to a smaller and more standard launcher design/formfactor. Since we are still in the testing phase we’re continuing the use of MDF due to it being cheap and easy to manufacture with. For large parts that are highly subject to change we’re using PLA. Testing from our v0 launcher, and physics in general, we decided to continue to use a 45 degree angle for our launcher due to it being the middle-ground for max x and y displacement. Launcher v1 uses our new and improved v2 flywheel (check out that blog post for more info!). Additionally, it features an adjustable hood in order to control the launch angle and has side guide rails in order to introduce increased compression for more powerful shots.
The test results for v1 revealed some glaring issues and confirmed our suspicions about certain possible problems. First of all, we knew we would have issues with launch power due to the shorter distance for which the artifact was in contact with the flywheel compared to the v0 launcher. Slow motion videos revealed that a lot of the energy was going into ball spin instead of forward velocity. Additionally, a lack of ball compression could be playing a major role in this issue. Secondly, immediately after finishing the build for this version of the launcher we could tell that we had not designed the hood properly. Its installation was more complicated than it should have been. It was also far too flimsy, didn’t quite work as intended, and added a lot of bulk to the back of the launcher. Once we realized our errors with the hood, we decided it would be best to remove it in the meantime, especially as there was no real benefit in having it due to varying the flywheel speed performing essentially the same task with less mechanical complexity.
After our initial testing, we went back and made some minor, but important, changes. We took out the moving parts of the hood and left the purely structural components in order to simplify the build. We also printed a couple different sets of guide rails in order to test different levels of compression on the artifact. The most important change of all was suggested by the DPRG (check out our previous blog if you want to know more!). They suggested we use TPU in order to make the surface of the guide rails more grippy in order to reduce ball spin and use that energy for forward velocity. We designed and printed TPU strips with flaps that would glue onto the front face of the guide rails. The effect of the TPU strips was instantly noticeable as we were getting much closer to the goal in both the x and y axis; however, we weren't quite there yet.This made it clear that we would have to improve on our current flywheel design.
All in all, we made some great strides forward with this version of our launcher, but we still have a long way to go before reaching a working and consistent launcher. While our testing method wasn't full proof due to launching balls from the floor instead of a more realistic height, it made some things quite clear. For v2 of our launcher we’ll have to move onto v3 of our flywheel. In addition to that we’ll transition any PLA parts over to Nylon (our go to material) and simplify the back of our launcher by removing any remnants of the adjustable hood. We will also have to continue to play around with how much compression we introduce into the system until we get a good balance between power and speed.