
Launcher V2
Tags: journal and thinkPersonhours: 16
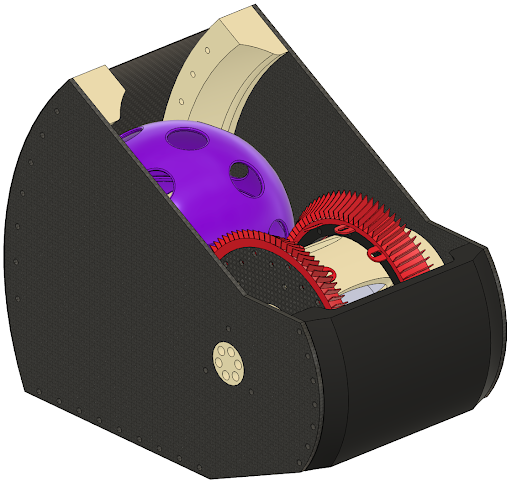
V2 of our launcher has proven to be significantly better than v1. The main difference between the two being the switch over to using Rimfire (v3 of our flywheel) on v2 of the launcher. Make sure to check out our blogpost on Rimfire in order to learn more about what we changed in regards to that. Initially, we started off by using the exact same launcher structure as v1, but using Rimfire instead. After using the testing platform and observing incredibly positive results we made the change over to the final iteration of our v2 launcher. The outer MDF plates were replaced by 3mm CF plates, our complex and finicky hood system from v1 was replaced by a curved 0.5mm cf plate, and the guide rails were reprinted out of nylon. Additionally, we replace the TPU flaps on the guide rails with silicone tape. This not only did a good job at reducing spin, but also made it easy to tune compression by allowing us to increase it in increments of 2mm on top of the default compression created by the guide rails. While we may have removed the adjustable hood from the launcher, we are still able to manually change the launch angle (outside of matches) in order to find the sweet spot for us thanks to how we mounted the launcher to the chassis.
Initial off-bot testing went really well, the launcher had more than enough power to score from the far launch zone. Quick consecutive shots aren’t really possible due to having such a low moment of inertia. It can maybe shoot two consecutive artifacts with little recharge time in between if close enough to the goal but definitely cant due a volley of three consecutive balls. The initial goal behind this flywheel was to make it as lightweight as possible in order to reduce spin up times and the straight on the motors; however, over the course of our testing we’ve learned that having a good middle ground is important when it comes to the weight of the flywheel.
After running this launcher for the past two league meets we’ve learned some pretty important information that we’ll need to act on over winter break. Rapid consecutive shots aren't possible due to the flywheel having such low inertia due to its weight of 260g. We think that using a hub motor design for an application like this is incredibly cool, unique, and good for conserving space; however, we believe that we’ve reached the limits of the design. In order to increase the mass of the flywheel while also maintaining a good balance with the spin up times and low motor strain we’ll have to switch over to a simplified flywheel design that uses two external motors. During our league meets we noticed that it took about 7 seconds to get our first shot off and about 3-4 seconds between consecutive shots, which are both quite slow times. This is primarily due to an inefficiency in the code for the shoot sequence (make sure to check out our blogpost over that!). However, changing over to a heavier flywheel will enable us to reduce those times even further. Moving away from flywheel issues, we believe it would be a good idea to add LEDs to the back of the hood in order to make the job of the driver and human player easier. A mix of LEDs and sensors inside the robot's channel will make it much easier to know how many balls are loaded and how many balls are still needed.