Lessons Learned From CNC Failures By Fernando, Ren, and Sol
On December 20th, Iron Reign began cutting carbon fiber to assemble our redesigned Arm and Shoulder for V3 of our Into the Deep robot.
We underestimated the time it would take to CNC as we did not allocate enough time for errors. Our inexperience with the CNC led to numerous time-consuming mistakes we did not account for in our planning. Our coach had to step in and run the remaining operations to ensure that...
V3 Sampler: Problems and (maybe) Solutions By Anuhya, Nalin, Sol, Fernando, Jai, and Krish
After working with V2 of our Sampler for a while, we decided it was time to get to a more streamlined building process, involving a template for the polycarb base of the Sampler. However, because we needed to get this new version of the Sampler on the robot ASAP, we essentially moved over everything that wasn’t the polycarb base from the old version onto the new version....
Task: Create a reliable intake system for the Submersible
We developed an intake system using a 3D printed beater bar out of ninjaflex. The beater bar is used to pull the sample onto the platform. We used clear 1 mm polycarb to form the walls of intake. The walls curve slightly allowing samples faced in many angles to correctly position itself to enter the intake via the beater bars....
We’ve made progress on the 2nd version (V2) of the roller claw that is more structurally sound and has an improved intake. To improve the structural stability we added a second standoff between the plates of the claw halves to stop them from twisting while intaking. Additionally, we added a large pyramidal structure in the center of the claw in order to help align samples during intake....
Today we built a proof of concept for a roller claw concept that we came up with. This claw took inspiration from a passive rubber band pincer gripper designed by a team on the unofficial FTC Discord server. It also took inspiration from a previous roller/beater intake designed by Iron Reign for the Relic Recovery season (see below).
9/28/24 Meeting Log By Nalin, Krish, Elias, Anuhya, Sol, Fernando, Jai, and Aarav
Task: Make Progress in Prepreation for the Early Qualifier
Today, the team made substantial progress both in building and portfolio development. We began working on the Ideas Festival page (previously known as Robot in Two Days) and brainstormed fresh ideas to enhance our portfolio. We also engaged with new team members about outreach strategies and portfolio improvements. To boost our presence, a new Instagram post was created,...
9/21/24 Meeting Log By Nalin, Anuhya, Ren, Sol, Fernando, and Elias
Today, Anuhya started modeling the full bridge and then moved on to designing the plate that attaches to the bridge structure. The next steps will be refining the attachment to ensure it integrates seamlessly with the rest of the design.
Nalin and Ren filled up two Motivate pages in the portfolio in preparation for the Early Qualifier. They also took photos for our upcoming jewelry catalog and shared...
Robot in 2 Days Gripper By Anuhya, Sol, and Fernando
One major component of the intake system we designed during robot in two days was a pincer gripper claw. Attached to a linear slide outtake, there is a claw with two separate 3-d printed parts that pinches the specimen. This design worked fairly well and it effectively secures the samples. The second part to the intake system was a beater-bar to intake the samples from the field....
Robot in 2 Days Chassis By Aarav, Anuhya, Sol, and Fernando
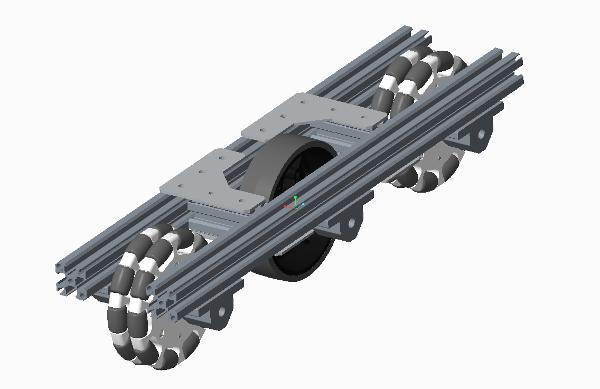
Robot in two days (Ri2D) is an ideation process Iron Reign goes through to explore the new seasons and brainstorm designs and ideas for the game. One key aspect of this year's robot in two days was the chassis. A part of the chassis included was the system too ascent onto the first level, so we repurposed the Skyhooks from last year's Center Stage season to...
Lessons We’ve Learned Switching from CAD to a Physical Model By Anuhya, Sol, Krish, and Fernando
Task: Overview the issues with PPE V3 and the changes that need to be made.
This past weekend, we had our regional competition! We were incredibly fortunate to have gotten Inspire 3 and were the 5th advancements to the FTC Texas State Championship in a couple weeks! However, we went into Regionals with a robot we had barely finished...
Task: Explain how we arrived at our current drone launcher design
The first iteration of the drone launcher is a simple servo-powered elastic launcher that is controlled like a switch. A linear slide has a servo mounted to the back end and a V-shaped nylon airplane holder is attached to surgical tubing which is attached to a zip tie held by the servo. The system is...
10/7/23 Meeting Log By Aarav, Anuhya, Tanvi, Sol, Vance, and Jai
Assemble and Test our Pixel Intake System
Today, Iron Reign focused on turning our ideas and designs on CAD into real-life prototypes in preparation for our first scrimmage on October 28th. We began assembling our beater-bar intake system that relies on a custom ninja-flex belt with protrusions that bring in pixels from the ground and from the stack. The ninjaflex belts on the prototype are controlled by a motor...
CenterStage Introductory Meeting & 9/16 Meeting Log By Aarav, Anuhya, Krish, Tanvi, Sol, Alex, Vance, and Georgia
Task: Welcome Recruits to the Workshop and begin Robot Ideation
Today, Iron Reign hosted our introductory meeting for all new recruits at our workshop. We also began planning and brainstorming for our competition robot and potential subsystem ideas.
We had approximately 20 recruits in attendance, and we initially showed them the Center Stage reveal video and...
Throughout this month, Iron Reign has been presenting its recent work at DPRG(Dallas Personal Robotics Group) meetings on Tuesday evenings. On August 22nd, Iron Reign presented our summer project, R2V2, to DPRG. We received lots of great feedback about improving and expanding our project, including vision-based object tracking to allow the RV to follow specific objects. You can watch a recording of that linked below:...
Center Stage Game Reveal and Ri2D Day 1 By Aarav, Anuhya, Georgia, Sol, Tanvi, and Alex
Task: Assess the Center Stage Game and begin Ri2D
Today, Iron Reign attended the season reveal for the new FTC season and began working on this year’s Robot in 2 Days, a tradition where we prototype a preliminary robot the weekend after the reveal to experiment with ideas and concepts. Unfortunately, because of the complexity of this year’s field,...
An Overview of the R2V2 Braking System By Aarav, Tanvi, Krish, Sol, and Gabriel
Task: Design a subsystem to control the braking of R2V2
An essential part of effectively remote controlling R2V2 is the developing a method for controlling the brake autonomously. We decided, for safety reasons, to not involve the accelerator at all, so the movement of RV2V would be reliant on the application of pressure on the brake.
A Deep Dive into the Shoulder and UnderArm By Aarav, Anuhya, and Krish
Describe our Implementation of the Shoulder and Turret Subsystems
With our primary game strategy for this season being to limit our movement around the playing field, the ability to quickly and easily rotate our intake and deposit systems is vital. Additionally, the ability to reach a variety of poles and scoring options is also crucial if we are to remain stationary. This is why we implemented...
Overview of the past 3 weeks By Anuhya, Aarav, Leo, Vance, Trey, Gabriel, and Georgia
Task: Recount the developments made to the robot in the past 3 weeks
The past three weeks have been incredibly eventful, as we try to beat the clock and finish TaBbot: V2. We had a lot of work to do in build and code, since we were putting together an entirely new robot, coding it, and getting it competition-ready...
October 29th Screamage Overview By Georgia, Aarav, Anuhya, Trey, Gabriel, and Leo
Screamage at Marcus High School Overview
Today, Iron Reign attended the Screamage at Marcus High School to play a couple of practice matches. This event allowed us the opportunity to better understand the game flow and further develop a strategy, finally get some drive practice, and point out any flaws in the robot and its design to help improve the next iteration of TauBot.
A Prerequisite Chassis to Robot In 3 Days By Trey, Cooper, and Aaron
Task: Build a robot that can be adapted to any challenge
The challenge reveal is going to be quite soon. In the weeks leading up to the challenge reveal we began to wonder if there was anything we could do that would make our transition from preseason to prototyping any better. And obviously, there are many things we could do that would make our work...
Task: Review our failure of rushed build leading up to the UTD qualifier
As discussed in the post "Making the Ringevator Legal" there was a lot of rushed build leading up to this qualifier. As a recap of that post, the Ringevator was too wide and too tall to be legal, so we had to cut off the front of the robot, split the omni wheels, shorten the assembly, and shorten...
Task: Make the Ringevator legal so we can use it in competition
We’re at the point now where we have a lot of our systems ready to be put on the robot, but we have to face another big challenge, which is making everything legal. Since the robot is a circle, we don’t exactly have any space to put an intake in the sizing cube. We can...
Task: Describe the construction and development of the Ringevator intake
This year we have done a lot of work on intakes and launchers. The purpose of this post is to go over the function and overall design and build of the Ringevator intake. It doesn’t go too far in-depth so if you are looking for something more specific I would recommend that you look at specific posts discussing different parts...
Task: Create a flow chart to analyze all our intake designs so far in this season.
Iron Reign has seen several iterations of our intake over this past build season. With our first qualifier being 2 days away, its finally time to come full circle and identify the different iterations of our intakes coming together. To do this, our team used a flow chart. A morph chart...
At today's meeting, Paul worked on the ringevator, with the guidance from Mr. V. The intake mechanism required a motor to be installed, which at first glance seems like light work. However, the intake is composed of two separate parts that move independently, connected by a hinge. The motor had to be attached to the static, robot part, however, the power had to...
Today’s meet consisted of Cooper working on code, Paul burning polycarb, and Trey working on the intake with Paul. We were able to get the ringevator-esque intake working with some level of reliability, at least off the robot. The design is quite ingenious, using the friction of the rings against the floor and a polycarbonate scoop-type thing to integrate the flipping of the...
Ringslinger 9000 Step-by-Step Guide By Anisha, Paul, Trey, and Cooper
Task: assemble different intake prototypes
The Ringslinger 9000 is a crucial part of the robot and requires careful planning to build. Although we have a relatively simple intake and launching mechanism, their components are a bit more complicated. After getting the individual pieces of our launcher system ready, we were able to start putting them together to form the system. This post will serve as a...
Meeting Log By Ben, Bhanaviya, Cooper, Jose, and Trey
Task: Prepare the portfolio and intake before the qualifier
The three of us worked on the engineering portfolio, discussing what we needed to get done in these 3 weeks between now and the qualifier. It was agreed that Ben, Bhanaviya, and Jose would be largely responsible for the portfolio and having other team members add information when necessary. We also began drafting an email to a physics professor who may help...
Task: Summarize the key components of Ring Launcher 9000
A ring launcher is more than just a flywheel; it needs a barrel to give the ring a path to move through. A 90 degree barrel is the best fit for ROBOT as the intake will take up the other half of the robot. The plan is to later on add an indexer to transport rings from the intake to the barrel in a way...
Task: Create a system to test our materials to better understand their grip potential
Here at Iron Reign, we're used to using off-the-shelf materials for our robot. For this season, these include pillowcases (front and back) and an Einstein wig, since we are looking for materials with lesser grip. However, we need to do a thorough investigation of these materials before we can determine their efficacy on the robot.
This season, we experimented with 5 gripper models - both for our robot in three days project and for our competition bot. While we do not plan on using all 5 of these models, they allowed us to effectively implement the engineering process within our build season. Experimenting with each intake helped us to identify the potential of each design as well as...
Today we worked on different intake systems to place the rings in the launcher. We finished our first prototype for a belt type intake and lift. The 3d printed belt was able to slide rings along a vertical piece of polycarb to place rings into the launcher. The speed of the motor and belt makes this one of our quickest intake and delivery prototypes. Our other...
Task: Design new parts to better mount the ring launcher and encoder
First thing to do in this CAD session is to design a secondary mounting point for the ring launcher. To do this, the existing mount was projected and any unecessary parts were removed. Only the holes for adding the REV extrusion as well as the holes for encoder pivot were left.
The main thing here is a huge wall on the left to guide rings to their resting position at the back of the ring launcher. But before that, the ring trigger needs to be made first, as it needs to be worked around. The trigger contours the ring perfectly by design, and only needs to rotate about 40 degrees to put a ring within contact of...
Task: Expand the ring launcher to begin accomadating for a controlled system of firing the rings
The first step in accomplishing this task is to expand the center aluminum plate to almost a complete semi-circle. From there the back of it was expanded to allow for a place for the rings to sit. Offsets were added to accomadate for any new walls that will be added. Finally, at the back is a...
With our first qualifier being around a month away, Iron Reign is currently in the midst of trying to put together a functional (or semi-functional) robot. In a previous post, we detailed the earlier stages of our CAD design. As of now, Iron Reign is still testing our intake systems but before we finalize the system we want to...
Task: Assemble the flywheel with the readily manufacured parts
Following the milling of the aluminum plates and the 3-D printing of the core of the flywheel, it is time to put it all together. The first step was to sandwich the ninjaflex core with the aluminum plates, and secure them together with long m3 screws. The plates have a spot for bearings, and those...
The initial vision for the ring laucher was to be a semi-circle in order to give the ring as much acceleration as possible. In this meeting, it was decided that instead it would be a quarter-circle for the following reasons: to save on space, since there will eventually also be an intake on the robot and a quarter-circle has been proven to give the ring enough...
Task: Physically build the ladder intake, based on the design in CAD
For the intake system of this year's challenge we first brainstormed several ways which a ring could be collected and transferred to the launching system. Through that and experimenting with CAD, the ladder intake system was developed. Essentially it functions by using the series of Omni wheels on its edge to collect the ring, and then pivot back up to...
With our first qualifier being less than 2 months away, Iron Reign embarked on an ambitious project to create a robot with a circular chassis, an elevator-like intake system, and a fully automated launcher. While this robot is still in construction, we do have a name for it - Proteus. Named after the early-prophetic sea god who was also known...
So far we have made a few Intake assemblies including the belt intake and the Tetrix tread intake. However, as is Iron Reign tradition, we like to make systems that utilize custom parts to both help our robot’s aesthetic and functionality. To do this, we took aspects from the other two intakes to better design and make the one that is discussed in this post....
Caterpillar Track Intake By Ben, Bhanaviya, Trey, and Jose
Task: Build and prototype an intake system
One of the first intake systems we made was the Caterpillar intake assembly (Tetrix tread intake). The inspiration for this design came from an earlier bekt drive comprising of a sander (which you can read about in our earlier post). This was originally built off a c-channel extrusion with...
Task: Design a mechanism to trasfer rings from the ground to a future ring launcher
The initial vision for this intake design was inspired by FRC team 1983’s Ultimate Ascent robot. The “ladder” pivots from the back of the robot to rotate out. The wheels in the front are very similar to the simple roller design, except here they extend out of the robot. The intial CAD was a very simplified model in order...
Instead of using a grip wheel to launch rings we went with the approach to make a custom flywheel. The key concept of a flywheel is to maximize rotational inertia. This is done by putting as much mass towards the edge of the wheel as possible. To do this, a ring of ninjaflex was designed, from there, 5mm flaps were added as an experiment to see if it would...
One of the centerpieces of any robot this year is going to be the disk launcher. It’s likely that most robots in the competition are going to be built around their launchers, so one could logically conclude that that’s a good place to start when building a robot. This is no different for us; however, we didn’t just want to build a flywheel like...
This intake design is the most plain of them all, just compliant wheels on a shaft. The idea with this is to have it low to the ground, and drive up to the rings. This design has been tried and tested on many robots by many teams, but it will not work on ROBOT as there is no realistic way to transport rings so low to the...
Task: CAD a robot for the Ultimate Goal Challenge quickly in order to get ideas for a final robot design and prototypes
A new season, a new design challenge, and more opportunities to compete. Last season we participated in the Robot in 3 Days Challenge where teams race to build a robot for the new season as quickly as possible in order to accelerate the brainstorming and prototyping phase...
Task: Print some game elements to get a kick start on the season
Recently, this year’s competition details were released, and while we couldn’t quite get started on a robot immediately like we did last year we were able to do some prototyping for ring launchers. The thing that we made which enabled us to do this was a rendering of the game element for the year. This was done by taking the...
Summer Summary July 11, 2020 By Bhanaviya, Jose, Anisha, Paul, Shawn, Trey, Justin, Aaron, Ben, Mahesh, and Cooper
Talking Heads: Summary July 11, 2020
Task: Prepare for the 2020-2021 Game Reveal season
Today kicked off our first meeting for the new Ultimate Goal season. Since the actual challenge for this year hasn't been released, the most we can do is to speculate what the new challenge might pose, and what we can do to prepare for it....
Task: CAD, 3D print and test new, better, and more aesthetically pleasing gripper triggers
Since our gripper follows a design similar to a slap-band it needs a trigger to close it, for too long we have used a bent REV beam with screws on the end to hit the nubs of a stone. This proved to be very inconsistent as proven by driver practice before and at regionals since the screws were too...
We finished manufacturing our new base today, with very little difficulty, but a few flaws. The CAM was already designed so all we had to do was run the operations on the CNC. We drilled out the various sized holes, cut out the inner wheel slots and cable holes. Next was the groove along the edge to fold the side flaps along,...
A long time ago in a galaxy far, far away there was a robot named TomBot. TomBot was a circle, a spinning circle with a turret and an arm that could extend to glory. Sadly, his reign was not destined for longevity - his cruel creators cut it short before he could enrich the FIRST world with his greatness. But TomBot remained scheming for many, many...
Milling The Side Shields By Jose, Justin, Trey, Paul, and Shawn
Task: Mill the spicy side shields for the competition tomorrow
In typical Iron Reign fashion we are making our side shields the night before regionals, as with many other things. The paper side plates look too jank on our robot that we are trying to make look professional, so we are going to use aluminum instead (a post covering the CAD and CAM of these can be found...
In order to increase the spice factor for TomBot, we need to custom machine our own side plates out of aluminum using our CNC. The design is pretty simple, just a plate with our team number, but there are some other features such as the curved top. This keeps the side plates from being sharp and add some aesthetic to the design. Also, since the team...
The renowned architect Frank Lloyd Wright once said, “The longer I live, the more beautiful life becomes.” This, however, is not the case for our build plate. Throughout the course of the season the plate has seen extensive use and has endured much abuse, which can be seen in the large cracks forming on the plate. Although there are many temporary remedies,...
Final Weekend Before Regionals - Meeting Log By Anisha, Cooper, Trey, Paul, Aaron, Bhanaviya, Karina, Justin, Shawn, Mahesh, Jose, and Ben
Task: Use feedback from our presentation at DPRG and get ready for regionals
A couple hours ago, we presented our robot at the Dallas Personal Robotics Group (DPRG), and we received insight on not only our robot, but also on our presentation, codebase, and our engineering journals. With this feedback in mind, and considering that we...
Task: Calculate the friction coefficient of various off-the-shelf materials
Before our last qualifier, we ran a couple material tests to find the friction coefficient of different materials. Now, since we've upgraded to a new gripper - the Snapdragon - a passive-intake gripper - we will need a newer material with much better grip than the ridged silicone oven-mitt we used for our previous 3-finger gripper. Since our new gripper works...
Last week, we prototyped a new gripper called the Snapdragon. Now it's time to give it more complexity. The Snapdragon is a passively-triggered gripper which closes down on a stone upon an impact-heavy contact with it. The main issue we're focused on solving is the impact which triggers the gripper - the gripper needs to be able to close only...
Task: CAD an engineering notebook binder that is to be custom made
We want to utilize our new CNC as best as we possibly can. Since we plan to CNC the second version of our current robot TomBot for regionals, the only companion that could serve a CNC-ed robot is a CNC-ed engineering notebook! Plus an aluminum-plated journal would also help us emphasize the iron part of our name to the judges (hi...
As you could probably tell from our plethora of gripper articles, here at Iron Reign we have one too many grippers. And now its time for another one! We could do a whole post-mortem analysis on what went wrong about our build at our last qualifier, but for the most part, the design was consistent, with one underlying exception - our gripper....
Just as Iron Reign was at the point of getting driver practice started and hunkering down to do autonomous, the turntable stopped working. The issue was that there was heavy skipping of teeth between the planetary gear and pinion gear which drove the turntable. Still, there was no obvious reason for why the gears had suddenly disengaged.
Task: Analyze torque at the turn-table and how it affects our choice of motor sets
We want to know if we are using the best possible motor set on our turntable. Since our turn-table is programmed to rotate at the fastest possible speed, we are not too concerned with a motor that turns faster but rather one that has a higher level of control and produces a higher output torque. A...
As the design and build of the robot progresses, many components must be updated to be compatible with the current design. The logarithmic spiral, which was used to linearly decrease the load on the elbow with a bungee cord, is one of these. The article for the original design is numbered as the 45th post in the engineering section and is dated 15-11-2019. Prior to updating...
Task: Design an equation to model the torque at the elbow linearly
In order to maximize our robot performance, we need to be able to use motors and gears with the most ideal gear ratios. This means having the right amount of torque to produce the most efficient performance out of our robot arm. As the arm extends, there is quite a bit of torque on the elbow. We want to...
Assembling the Turntable Bevel Gears for a REV Motor By Trey and Justin
Task: Assemble the bevel gears to the turntable to fit a rev motor
Today we assembled a second version of our bevel gear assembly for the turntable. Our previous design used an Andymark motor, which was very fast but couldn't provide enough torque for precise movement. The custom geared REV motors allow us to power the turntable with our desired torque. This is further explained...
Sliding Foundation Grabber By Trey, Jose, and Aaron
Task: Design and create a more efficient and compact foundation grabber
Moving the foundation throughout a match is an important part of the overall gameplay of a team. The builders on Iron Reign went through many different designs before reaching the one we have now. Early in the season, we simply settled for a simple hook attached to a servo on the front of the robot; however,...
Task: Measure the coefficient of friction of our potential gripper materials
We want to measure various constants of materials on our robot. These materials serve to improve the grip on our gripper. But before we can decide which material will be most effective on our gripper, we need to find the friction coefficient of these materials through a slip test. The slip test is detailed in a separate post in Read More
Task: Create a system to test our materials to better understand their grip potential
Here at Iron Reign, we're used to using off-the-shelf materials for our robot. For this season, these include silicon oven-mitts and ice-cube trays, since we find these grip skystones pretty well. However, we need to do a thorough investigation of these materials before we can determine their efficacy on the robot.
Task: CAD a slightly different capstone version to improve upon v3's issues
On this minor update to our flat gripper design a dropper for the latest capstone was added. Our capstone design (which can be seen here: E-65 ) is minimalistic to allow it to be placed on the gripper and only deployed until the last stone in the match is placed to cap it....
So far, we have experimented with 3 capstone models. While we do not intend to use all 3 of these models, they allowed us to effectively implement the engineering process on our robot. Although the capstone isn't physically a part of a robot, its various iterations influence the model of the gripper being used since the ideal gripper must be able to pick up both...
Task: Design a minimalistic capstone that can be deployed by the stone gripper
This version of our capstone is to be 3D modeled and printed as well as be as compact as possible to be deployed by the gripper. The basic idea is that the capstone is flat while meeting the minimum size for length and width. The capstone will be an 'I' shape to fit around the nubs of a...
Task: Create a list of parts needed for the new robot
To determine all the materials we need for the new robot, we started a Bill of Materials. To do this, we first analyzed TomBot sub-system by sub-system. We determined the parts used for each sub-system and placed it into a spreadsheet. Upon doing this, we needed to get each part's exact measurements so that we could save time...
Task: Design a more comapct and efficient gripper design
This version of the finger gripper is going to be mostly custom made to make it as simple and as compact as possible. This is just the CAD model of the actual design and we plan to update a little more before we can actually make the physical change on the actual gripper. The design remains the same but the...
Prior to updating the model, the model purely consisted of the chassis and the primitive turntable. Since then, both the turntable and chassis have been updated to reflect the current state of the robot, along with the addition of the elbow and slide. The elbow component consists of GoBILDA shafts, gears, and connectors, along with the logarithmic spiral. The elbow can be seen below.
Task: Design a swivel and add ninjaflex parts to improve the finger gripper
From what we learned at the Allen Qualifier the gripper needs some major improvements before it will work at its max performance. The first change that needs to be made is replacing the current grip material with some more flexible material, such as ninja flex which we have used before as a gripping material. The print...
Task: Design a swivel mount to improve the degrees of freedom on the gripper
After the recent competition, we realized that a good way to increase precision would be to add, of course, another axis of rotation. This was the most efficient way to be more precise and pick up a stone from all angles. With a swivel mount, the gripper would be able to rotate on the y axis, via a...
Task: Begin analyzing long-term build improvements
Moving on from the Allen qualifier, there are a couple issues we need to fix. Aside from the usual wear and tear a robot experiences in it’s relatively short life-span, there are some specific opportunities we have for optimal robot performance which we hope to act upon.
First, our grippers don’t have enough degrees of freedom to rotate fully. Being able to rotate gives...
Night Before Competition Build By Aaron, Cooper, and Trey
Task: Transform a mass of metal into a functional something in the span of one night in time for the qualifier tomorrow.
Twas the night before competition and the robot was most definitely not competition ready. This is what usually happens, but once again we found ourselves scrambling around to get everything together before the end of the night. We ended up mounting the gripper, setting up the belts,...
Task: Create a morph chart to analyze all our designs so far in this season.
Iron Reign has seen several iterations of several subsystems over this past build season. With our first qualifier being 2 days away, its finally time to come full circle and identify the different iterations of different subsystems coming together. To do this, our team used a morph chart. A morph chart shows the various...
Task: Design a system that could linearly reduce torque.
Since last season, we have conducted a significant amount of experimentation on our elbow and slide mechanism. We are using a similar design because we have prior knowledge on how to construct and maintain the subsystem; however, our slide this year is larger due to our desire to stack the stones higher. Although our elbow could lift the entire slide, we want to reduce the...
Task: Model and CNC way to mount the turntable to the chassis
Today we worked on creating a 3d model for a CNC cut part to mount the turntable to the chassis. Since the turntable already has bolts sticking out of the bottom, we decided to use those as mounting points for our part. The most efficient solution to mounting the turntable is to cut a plate that attaches to the turntable bolts...
As our 8th gripper design we are trying out a compact design known as the 3-fingered gripper. This was 3-D modeled before being built as a proof of concept. The back of the gripper has two bars to orient the stone before being grabbed. One bar contacts the stone and the other does too as TomBot continues to approach it. The actual grip...
As our 8th gripper design we modeled a stub gripper, inspired by 7129’s Ri30H. Several of our previous grippers were designed with the intention of being mounted our scrimmage/Robot in 2 Days bot Frankendroid. This is our first gripper design modeled with the full intent of being mounted on our circular chassis bot, TomBot. In essence, this gripper has some bars to align the gripper...
Today we finished assembling the round chassis for our circle robot, TomBot. The most important system we added was the omni wheels to the front and rear of the robot. Without the omni wheels, the robot would tilt like a seesaw around the central 2 big wheels. These omni wheels lightly touch the ground in the front and rear of the robot to...
With our first qualifier being less than a month away, Iron Reign embarked on an ambitious project to create a robot with a circular chassis named TomBot (which was, for reference, named after our coach's cat, Tom). Before we began the build of the robot, we planned out the chassis design in an earlier post on CAD. Now, with...
In order to spin the turntable on TomBot we need to use a motor with a specific gear to make it spin and as a bonus we can use a slip ring to transfer power to it. Slip rings can prove to be useful since there would be no need to worry about wires getting tangled after the turntable spins a certain amount...
We've decided to design a suspension for our circular chassis for one reason. Under the neutral bridge, there is a 15mm lip on the floor plate to connect the bridge support. Traveling over this plate can cause significant depreciation of the chassis and connected subsystems.
We have currently made 3 different versions of possible prototypes. We will...
Task: Invest in a CNC router using our grants from the previous season.
Last year was a very successful season for Iron Reign, financially speaking. We earned around $11,000 in grants and funding from FIRST in Texas, Texas Workforce Commission and Mark Cuban, to name a few sponsors. In addition, this year we received a $200 Gobilda product grant. Most of this money was invested in last season's expenses. But...
Autonomous and TomBot Robot By Karina, Jose, and Bhanaviya
Task: Autonomous coding and TomBot progress
DISD students have been blessed with a long weekend, which we plan to take full advantage of as our first scrimmage is closing in. Just as we started to test drive Frankendroid, we began to notice some faults with the robot. Lots of these were common errors, which can likely be attributed to the fact that we sped through the...
Here is us testing the gripper we designed to pick up the blocks in this years SkyStone challenge. This gripper combines the Pivoting Accelerated User-Friendly Locker, P.A.U.L, one of our earlier gripper designs, and Aaron's Super Cool Gripper, a design from our Robot in 2 Days Challenge. It has a backplate similar to that of P.A.U.L's but instead of polycarb flaps, it utilizes the smaller...
A challenge we face this year is running into other robots. Last year, it was possible to easily get around other robots; however, this year it will be difficult to get around other robots, as there will be a lot more cross traffic in the building zone.
Our solution to this is designing a circular chassis. This will...
Last season, we designed a ninjaflex gripper for Icarus, our World championship robot. This season, we are experimenting with different intake designs. One of our intake designs is Aaron's Super Cool Gripper, which uses the ninjaflex gripper wheels we designed. The problem with this system is that the wheels are very large, and increase the total size...
After the end of the two day robot build, we had come up with two main gripper designs. One was consistent, however heavy and large, (Wheel Gripper) and one was lighter but wasn’t quite as versatile or controllable (Aaron's Super Cool gripper That Worked 100% of the Time). P.A.U.L (Pivoting Accelerated User-friendly Locker) is the best of both worlds....
Robot in 2 Days Grippers Comparison By Jose and Bhanaviya
Task: Analyze all our grippers from the Robot in 2 Days challenge
During the making of our Ri2D we prototyped and designed several gripper designs to collect stones. These designs varied in the method of manipulating the stone, how many servos they required and how compact they are. All of these gripper designs have their own post describing them in...
Robot in 2 Days - Day Two By Bhanaviya, Aaron, Cooper, Jose, Ben, and Paul
Task: Finish Robot in 2 Days
Since the reveal was released yesterday, Iron Reign embarked on a project to build a skystone-specific robot in 2 days. Yesterday was a planning ground, during which we began prototyping 4 robot grippers, and 2 chassis designs. With less than 24 hours to complete our robot, we started today off by getting build-specific decisions out...
While there are many different solutions and gripper designs, one of the most common is the parallel gripper. The purpose of a parallel gripper is to grip objects, in our case stones, parallel to the object instead of at an angle. Since this was a rational idea to start off with, this was one of the gripper designs we experimented with in the duration of our Robot in...
Task: Build a gripper system for the 2019-2020 Skystone Challenge
The rack-and-pinion gripper system is one of the 4 gripper systems we built this weekend for our Robot in 2 Days project. Since we’ve never used a rack-and-pinion system before, we realized that it would be a creative idea to start off the new season. Going for simplicity, we made a box such that we...
Robot in Two Days - Day One By Karina, Bhanaviya, Aaron, Jose, Ben, Trey, Cooper, Sam, Sterling, Beau, Mahesh, and Shawn
Task: Build prototype subsystems that pick up the stone elements
This season Iron Reign decided to take on the robot-in-two-days challenge. Given that our team had never done this before, and we are primarily a team of underclassmen, we knew we would have to be organized in our efforts and that we would probably reuse...
Task: Design an intake for the stones based on wheels
Initial Design: Rolling Intake
The first idea we came up with for gripper designs during our Robot in 2 Days (Ri2D) challenge was a rolling intake with the wheels coming from the top and spinning to intake the stone. Since the wheels needed to spin they were placed on shafts which required two extrusions since the pillow bracket for them...
Aaron’s Super Cool Gripper That Works 100% Of The Time By Aaron
Task: Prototyping a rolling gripper
During the 2 day robot challenge, one of the gripper designs that we built on the first day was Aaron’s Super Cool Gripper That Works 100% Of The Time. While it did work most of the time, it was a bit too bulky to be implemented effectively in the two day period we had.
Big Wheel, Iron Reign’s first iteration of our Worlds competition robot Icarus, had been sitting outside in the tent for months and we needed parts for new robots - specifically for our Robot in 2 Days robot. Once the season reveal is released, Iron Reign plans to build a working robot within the weekend of the release. The need for parts was a pressing concern,...
Task: Prototype a Leg Drive for next year's (possible) stacking game
Although most teams go for a traditional chassis, a different type may be needed for next season as speculations suggest a stacking game. A leg drive would be an apt idea to test out for such a game For this chassis, two motors spin their respective "leg" attached to a gear. The point is move the robot using the rotation...
Meeting Log June 08, 2019 By Bhanaviya, Jose, Anisha, Paul, Shawn, Trey, Justin, Aaron, Ben, Mahesh, and Cooper
Talking Heads: Summary June 08, 2019
Task: Prepare for the 2020-2021 Game Reveal season
Today kicked off our first meeting for the new Ultimate Goal season. Since the actual challenge for this year hasn't been released, the most we can do is to speculate what the new challenge might pose, and what we can do to prepare for it....
Meeting Log June 08, 2019 By Bhanaviya, Jose, Paul, Aaron, Ben, Evan, Trey, and Justin
Meeting Log June 08, 2019
Task: Prepare for the 2019-2020 Skystone season
Today kicked off our first meeting for the new Skystone season. Since the actual challenge for this year hasn't been released, the most we can do is to speculate what the new challenge might pose, and what we can do to prepare for it.
Ninja Flex Intake V2 By Jose, BenB, Karina, Evan, Abhi, Ethan, Charlotte, and Aaron
Task: Design, implement, and test a newer version of the ninja flex intake
The new ninja flex intake is good, but it has room for improvement. One issue is that it is too big and minerals have some problems entering the intake tray, Another issue is that the spacing of intake gears is too much and cuases minerals to be intaked slower....
Shortly after creating the new Tetrix gear system, we got a response from one of the CNC shops we'd reached out to, offering to machine the 15 and 125-tooth REV gears from the STEP files. So, we took the Superman system off of our old robot, BigWheel, and sent some of the broken 15-tooth gears from UIL.
Task: Custom design an intake to improve intake times
In testing, we found that the intake didn't perform adequately - the balls would slide back out in the inverse articulations. So, we designed attachments for the corn-cob intake out of ninjaflex, figuring that small tabs would hold the minerals in better. It failed - they were too compliant - but we found it was much easier to intake minerals than before due to...
Task: Redesign the Superman arm to be more robust for Worlds
In posts E-116, we found that we were putting pressure on the individual teeth of the Superman gears on the order of mPa. We designed gearkeepers to ensure that the gears would interlock and reduce pressure, and these worked for awhile. However, under tournament pressures at UIL, the teeth on the smaller gears broke entirely - between the teeth...
Task: Design and test intake flappers to speed up mineral intake
Due to our new intake articulation involving the superman wheel the ice cube tray intake is slightly too elevated to intake minerals. To fix this we designed small flappers out of ninja flex(the Iron Reign way) to help the intake reach further. Tests prove this intake to be quicker than the ice cube tray alone and it should...
Task: Wire Icarus to be functional and move utilizing code
With the construction of Icarus nearing completion we need to start connecting wires from the motors and servos to the REV Expansion Hubs before it becomes impossible to do so.
As soon as the expansion hub were placed on the chassis, servo wire extenders were connected before anything blocked us from doing so
Since the last post, in which we installed the Superman Arm, we've installed the second stage of the linear lift and the belt drive that accompanies it. We began by drilling two holes in the linear slides that were exactly the space between the holes on the carriages for the linear slides using a drilling template we printed on the Tazbot printer. We did this to...
In post E-116, I showed all the big wheel articulations. As we shifted our robot to Icarus, we decided to change to a new set of articulations as they would work better to maintain the center of gravity of our robot. Once again, we made 5 major deployment modes. Each articulation is necessary to maintain the robot's center of gravity as its mode of operation shifts.
Fix camera mount, attach lift motors, make custom cables for the drive motors, and forge the hook
Today's Work Log
Fix camera mount on BigWheel
We've had a problem for while where the camera on BigWheel gets loose, and falls out. Cooper decided that a clamp, like the one we had before, just better executed. Cut out of...
At the same time as the elbow joint was being done (which can be found in the article "Constructing Icarus' Elbow”) the Superman lift was being installed in the back half of the robot. The old superman system was difficult to install, but we designed it to be slightly easier. Mounting brackets were already pre-set in the robot so we...
Constructing Icarus' Elbow By Evan, Aaron, and Ethan
Task: Build the elbow for intake
In the last Icarus' blog post, it was just getting the basic flat, support frame of the robot. The next step in the construction of Icarus' is the elbow joint that holds the intake. This time around, we simplified everything significantly as compared to BigWheel, reducing the excessive aluminum parts to two 3D printed parts. We attached these to the REV rail that...
Task: Design an elbow for bigwheel that we can 3d print
To speed up the build process of the new robot, we made a 3D printable part of the elbow joint. The design simplifies the complex assembly of the elbow mounting point and makes it a single printable part. The old elbow contains many different parts that would need to be spaced precisely in order for the gears to mesh properly, while...
Task: Create a list of parts needed for the new robot
To determine all the materials we need for the new robot, Karina and I started a Bill of Materials. To do this, we first analyzed Big Wheel sub-system by sub-system. We determined the parts used for each sub-system and placed it into a spreadsheet. Upon doing this, we needed to get each part's exact measurements so that we could...
Task: Perform the final steps to complete Icarus' base
Since we finished the polycarb base, our robot went through some major changes. We last left our robot in the post-bend stage, just a piece of polycarbonate. The first thing we did was to square the whole robot with side brackets. These cleanly ripped aluminum C channel side brackets now serve as the highly accurate frame of our robot, which...
New Robot Base - Icarus By Evan, Justin, Aaron, and Ethan
Task: Build the base for the new robot
Since BigWheel was never intended to be a competition robot, we decided to build an entire new robot based off of it. This means that the base plate of the robot is going to have to be the most accurate part of the robot since everything after that has to be built upon it. To do this,...
VEX 393 Motor Testing By Jose, Cooper, Aaron, and Janavi
Task: Test VEX Motor 393 as a faster servo for intake
We need to speed up our intake to spend less time in the crater collecting minerals. We can accomplish this using VEX 393 Motors with high speed gears integrated, these motors are great since they count as servos, not motors. In terms of progress, this is what we did:
Updating the Bigwheel model to the robot’s current configuration was a challenge. The new linear slides are not standard parts, so we had to model them from scratch. There was some cleaning up that was needed on the drivetrain of the model. This was mainly attaching floating motors to motor mounts and axles to bearings. These were mainly cosmetic changes, but they help define the purpose of...
Task: Analyze past successes and failures in our latching system
Version 1
The first version of the latch worked decently. We started out with the idea of a one-way, passive latch. This idea involved mounting smaller bearings and gears between them, with a spring-like nylon piece that moved only when downward pressure was placed upon the gears. This design was only fully realized before the Wylie Qualifying tournament, and only...
Task: Rebuild the elbow after total gear annihilation
In a previous post, we detailed the extent to which we had stripped our gears - they were missing teeth in several places and the black anodization layer had completely stripped away. So, we had to replace them. The first order of action was to design gearkeepers for them. We've designed gearkeepers before, for the Superman arm, but these have different...
Task: Design and implement pulley spacers to prevent belt interference
We had an issue where the belts that allowed our arm to slide upward were misaligned, resulting in the belts frequently slipping. We narrowed the slippage down to a single point, at this pulley.
We had to create a new spacer to keep that section of the belt inline with the rest. As usual, we took...
Task: Fix some issues on BigWheel before the build freeze
We made more secure way of activating our hook, so we switched our piece of wire attaching the servo to the hook with a much stronger and less likely to bend strip of polycarb, which greatly improved the reliability of the hook.
As well, we limited the back and forth motion of our slides at their attaching points. I achieved this by inserting a small...
We are updating our bigwheel model to represent our current robot. We had a model of just the chassis from the chassis study, so we are currently adding all of the changes we made throughout the season.
Our latching system is too complicated to use quickly; it requires too much reliance on driver control and becomes jammed. So, we forged an iron hook to replace it. We started by taking an 8mm iron rod and placing it into the forge that we have, heating it up and bending it into shape over the course of an hour. We...
Task: Test robot performance at the STEM Expo to inspire younger kids and practice
An FLL team gathered around Iron Reign’s robot
We had the privilege of being a vendor and representing SEM at DISD's STEM Expo this weekend. Thousands of people cycled throughout our area during the day, so we had the opportunity to show off our robot to many people. Some of these people...
Fixing Mineral Dropper Components By Jose and Evan
Task: Fix any issues with the mineral dropper
At the STEM expo we saw a clear issue with the mineral dropper: it is very poorly geared and doesn't deposit minerals well. A quick look at the gear configuration revealed that the gears were attached in a poor manner such that there was a lot of gear skippage. To remedy this, we attached a gear-box to the dropper to keep the gears interlocked.
Task: Assemble the V.3.5 latch and attach to the robot
We assembled the fourth version of the latch today. Some of the improvements on this latch include using bigger bearings and thrust bearings inside. This latch is designed to be stronger and more reliable. After cleaning the parts and trimming some edges, we assembled the pieces. Upon assembly, we discovered an issue: the gears required a different amount of pressure to catch the lock. If left...
Task: Create a mechanical deposit for our selective deposit
To relieve driver stress, we decided to put a mechanical release mechanism that would drop the minerals into the passive sorter to then further deposit them. The lever that activated the release mechanism was made of thick wire attached to a small gearbox that reversed the direction of rotation for the release gate. The lever activated the gearbox when it was pushed into the...
Task: Create and install gearkeepers to reduce slippage
We need to install gearkeepers on the Superman arm to prevent gear skippage which damages gears over time. We designed a simple rectangle in PTC Creo and cut holes to fit bearings, 3D-printed them, and attached them.
Now it was time to test for gear skippage. Unfortunately, we had one or two gear skips with every attempt of...
Task: Calculate torque and other values of the Superman arm on our robot
We want to have our robot completely replicable through the journal. So, we found it necessary to include the power calculations of various subsystems on our robot.
Superman Arm
The Superman arm uses two REV Core Hex motors to lift the robot upward, outputting a base 125 RPM and 6.4 Newton-meters of torque. Then, we have 15-tooth gears attached to...
Our first attempt at a latch was made out of flat metal L brackets that would slide into the hook, but they slid off under any stress. We decided to make a latch with a ratchet and sprocket system. The easiest way to accomplish this was to 3d print it. There are two sprockets and the lander hook will slide in between them. This causes...
Task: Design a quick intake for the robot before competition
The night before our final qualifier, we decided that the intake system on the robot was not up to our standards. To fix this issue, we poked some holes in a pool noodle, and put surgical tubing through it. While this was a quick and semi effective fix, it did have some problems, mostly due to the rushed nature of its construction....
Task: Design a new sorting mechanism for gold and silver particles
The differentiation between the different shapes of minerals has been something we’ve been thinking about since day one. At the time we designed a box that allowed us to sort out blocks and balls by size, but weren't able to implement it. Our original selective intake only accepted balls so we only have to go to the one loading area, but our...
Iron Reign has access to an Epilog Mini laser-cutter through our school, so we decided to use it to create side shields to protect our robot during defensive play, display our team numbers, and prevent wire entanglement
We created our original design in Illustrator. The canvas size was 12"x18", ensuring that our design stayed within the size limits. Then, we found the side height...
Task: Install a belt lift on our robot for depositing
The most recent addition to BigWheel has been the addition of a belt drive lift on either side of the linear slides. We chose a belt lift over a string and pulley lift because it is a much more secure, closed system, and doesn’t require stringing. For these reasons, we switched to belt drive. While more complicated to build, it requires...
Early in the season, we made a hook, Although it was durable, it required a higher amount of precision than we would have liked to have, especially in the rushed last seconds of the endgame. As a result, we designed a latch that is completely 3D printed and placed it on the robot.
This is the general model of it fit together (excluding left panel)....
Task: Create barriers to prevent the linear slide from falling
Recently, we added polycarb barriers to our linear slide system. They were created as a temporary measure by bending the polycarb with a blow torch and are less exact than we would like.
I originally tried to overlap 3 rectangles, and Creo didn't register it as an enclosed shape and wouldn't extrude. For any geometric shapes you want to extrude,...
Task: Allow the robot's arms to stand on their own
The issue with the lift is that many of the pieces that need to be made require specificity that’s hard to obtain using aluminum parts, so we chose polycarb. The key to making these specialized parts is a small butane torch held at just the right distance. Run the torch back and forth across the part where you want to bend, in the...
We now have a lift and an intake system, but we're missing a way to hold onto and deposit the minerals after intake. To achieve this, we created a prototype.
We wanted to create a box-like shape that can be attached to a moving axle to hold the minerals when lowered. When the lift is up in the air, the axle can rotate...
Task: Create locks to keep BigWheel's intake arms in an extended position
An important part of this year's challenge is scoring minerals in the lander. Additionally, our upright elbow cannot raise the scoring mechanism to the lip of the lander alone. Thus, we had to create a way to get those additional inches to score.
First, we tried a REV linear slide design. This worked, but...
Task: Detail TIG welding plans and why they failed
At the beginning of the season, we saw that our robot base was not as well crafted as we originally thought it to be. While we have worked to correct it over the season, it’s still not what we wish to see in a functional robot, and we came up with the idea of making the frame from light aluminum instead of...
Objective: Determine the type of intake system that will allow us to efficiently obtain and deposit minerals within the lander
In our post "Selecting Lift System" we decided that the linear slide system that we will use is the MGN12H rails also referenced to as the Ball-Bearing slides. These slides while heavy provide the smoothest option. now that we have chosen the Lift system we need to determine the intake system that will allow us to...
Task: Test the amount of wear on a moving nylon part over time
After our last tournament, we noticed several 3D-printed sprockets that had worn down significantly. So, we wanted to measure how much wear one of our nylon sprockets takes per second.
First, we printed out a model of one of the REV sprockets, using the STEP file here. We printed it with ~45% infill, our average...
This is a follow up to Post E-64, Code Issues Break the Superman Arm. We made some hustles and got them fixed. We reinforced Superman by ganging up multiple gears (as seen above) and repeated a similar process with the elbow arms. Hopefully this will make BigWheel more secure, especially with software limits in the code.
Task: Analyze the code issues that led to our robot breaking
After constant use, our robot's Superman arm broke. At this point, it is important to analyze our failures. This error was not because of a build issue but rather a code and driver control issue.
When testing, we always heard the gears grinding some times and we thought it wasn't an issue. There were instances like once when...
We've had some issues with our nylon sprockets, mainly through excessive wear and tear. So, we want to test what circumstances cause what deformation.
Linear Deformation
This one was simple. We printed this block with 60% infill (the highest infill we tend to use), measured its length (3.75") and hung one end from our deck. On the other end,...
Objective: Determine the type of lift system will allow us to delatch and reach the lander
In our past post Choosing Drive Train we decided that we will use the chassis BigWheel. After deciding the base we need to now think about the lift system that we want to use to allow us to both deposit into the lander and latch onto it. Evan and I have been experimenting with linear slides to use for our...
Task: Measure the coefficient of friction of our oven mitt intake
We want to measure various constants of materials on our robot. Earlier this season, we found that a nylon-mitt collision on our intake sapped the rotational energy of our intake. But, that was just a build error, easily fixable. But now, we plan to measure the energy lost from particle-mitt collisions, and the first part of this is to find the coefficient of friction...
So, Iron Reign is used to using off-the-shelf materials on our robot: silicone oven gloves, ice cube trays, nylon 3D-printed parts, and more. But, we've never actually done a thorough investigation on the durability and efficacy of these parts. Because of this, we've had some high-profile failures: our silicone blocks breaking on contact with beacons in RES-Q, our nylon sprockets wearing down in Relic Recovery, our gears grinding...
Today, we built mounts to attach both types of intake to the rack; the rack-and-pinion corncob intake and the red-flapped intake. We also created a new way of mounting the arm to the chassis. The idea is that since it’s attached to the rack and pinion track, it reaches high enough for the robot to put the minerals in the lander. We made the arm with a 12-86 gear ratio....
For extension both into the crater and lifting our robot up to the crater we have decided test a linear slide system. We plan to utilize linear slide system for both vertical and horizontal extension on MiniMech.
After seeing how well the robots that could latch onto the lander performed at the scrimmage, Iron Reign knew that we had to be able to score these points. We originally tried lifting with a linear slide system on MiniMech, but it was not strong or sturdy enough for the small chassis, and would definitely not be a functional system on BigWheel in time for competition. And so we...
Bigwheel’s intake arm is one of the most important parts of the robot. Since our scrimmage, we have learned how to make this arm much more efficient, starting with some supports. The original intake arm was made of two scrap Tetrix rails. The result of this was that the two sides of the arm would be out of sync, creating a twist in the arm that caused...
We created the corn-cob intake a few weeks ago. Unfortunately, it was a little too big for the Minichassis, so we had to downsize. So, we designed Intake Two. Continuing our history of using kitchen materials to create robot parts, we attached two silicone oven mitts to a beater bar equipped with Iron Reign's REVolution system. Then, we attached a...
Over the summer, we designed many robots for the North Texas Chassis Project, including one based off of last year's Worlds robot, Kraken. The robot chassis had 6" mechanums. But, based on what we know about this years challenge we have decided that this chassis does not utilize the 18-inch cube effectively.
We have chosen to design a chassis that is similar in function to Kraken, but smaller...
BigWheel has gone through a few major changes. First and foremost, it now has a flipper arm, AKA Superman. Since the robot itself is the lift mechanism, we had to put a lot of work into Superman's design. Right now it is a 10 inch REV rail attached to two 125-tooth gears for redundancy, with a custom 3D printed mount housing an pair of omniwheels on the other...
So, our dream this year is to create a static robot. Last week, we found out about a rule change that would prevent our mining robot from staying within the crater. Naturally, we found a way around this, leading us to the Mining Base 2.0.
The robot will be fixed under the lander's hooks, and have a horizontal and vertical linear slide attached to...
At one point, we were thinking about creating a "mining facility" robot that stays static within the crater and delivers the blocks into the mining depot. In our eyes, it was legal as it would hold as many blocks as possible inside the crater but only deliver two at a time outside. It would be super-efficient as we would be able to stay within the crater, and not...
Last week, we decided to take up the task of creating the team marker, a simple project that would surely be overlooked, but can score a significant amount of points. We wanted the marker to be meaningful to the Iron Reign, but also follow the team marker rules. To start, we made a list of ideas:
Last season, Ducky (as seen in idea #4) brought...
Right now, we're working on a static-deposit system. The first part of this system is having an intake mechanism that passively differentiates the balls and cubes, reducing complexity of other parts of the design. Thus, we created the corn-cob intake.
First, we bought ice-cube trays. We wanted a compliant material that would grip the particles and be able to send them...
The ice cube tray is 9 holes wide and each hole is 16.50mm wide and long. Using these measurements, we created an aligner that would cause the ice cube tray to roll into a cylinder.
We're designing an intake that will allow the robot to intake particles, and this is a major portion. This will allow us...
Task: Create wheel mounts for our Mini-Mecanum chassis
Today, we modeled two possible designs for mini-mecanum wheel mounts. The purpose of the mounts is to hold a churro or hex shaft in place to mount mecanum wheels to. The first design was a 6cm by 6cm square with rounded edges that was 5mm thick. A hexagon was removed from the center to hold the churro that supports the mecanum wheel. This design,...
To increase the efficiency of our robot, we looked into ways to passively sort minerals during intake and deposit. It is important to sort because it requires less precision under driver control allowing a faster and more efficient robot. Though bulky, we designed an initial design to sort the minerals.
When this piece is mounted and both blocks and balls are...
We've been toying around with the idea of using BigWheel, our Summer Chassis Research Project bot, in this year's competition with a few modifications. The idea for this robot is that it has a collection system that extends into the crater, and folds up on top of the robot. It reaches in with the collection arm, and grabs the blocks/glyphs, drives backwards and flips vertically using the drive wheels as a...
Hanging Hook Prototype By Abhi, Ethan, Justin, and Janavi
Task: Design a hook for pulling the robot on the lander
To get a head-start on latching and delatching from the lander during autonomous, we got a head start and made some hook prototypes. If your robot can just do these two things, you can score 80 points. When making this hook, it needs to be modular enough to not require much accuracy but also needs to be...
At the moment, we've used the same chassis base for three years, a basic mechanum base with large wheels. However, we don't really want to do the same this year. At the time, it was impressive, and not many teams used mechanum wheels, but now, its a little overdone.
Thus, we have BigWheel. We used this as a practice design, but we ended up really...
We had another brainstorming session today, which allowed us to break down into some new building tasks.
Intake System 3 - TSA Bag Scanner
This part of our robot is inspired by the bag-scanning machine in TSA lines, more specifically the part at the end with the spinning tubes. The basic design would be like a section of that track that flips over the top of...
Objective: Determine the type of wheel that best suits the chassis
In the Choosing Drive Train E-16 we decided that we will use the chassis BigWheel. We know that our wheels need to be light weight but we need to determine the size of the wheel that will keep our robot far away enough from the ground for us to provide enough clearance to allow us to climb over the crater rim. But, if we choose wheels...
In our last post, we created a chart where we listed each task asked based on point value and the level of difficulty, separated by autonomous and teleop. Our goal is to find a drive train that will allow us to build a robot to accomplish all of these tasks efficiently and consistently, but this matrix will allow us to determine what to focus on first.
In our first practice, we brainstormed some intake and other robot ideas. To begin testing, we created a simple prototype of a one-way intake system. First, we attached two rubber bands to a length of wide PVC pipe. This worked pretty well, but the bands gave way a little too easily.
For our next prototype, we attached a piece of cardboard with slits to...
Rover Ruckus Brainstorming & Initial Thoughts By Ethan, Charlotte, Kenna, Evan, Abhi, Arjun, Karina, and Justin
Task: Come up with ideas for the 2018-19 season
So, today was the first meeting in the Rover Ruckus season! On top of that, we had our first round of new recruits (20!). So, it was an extremely hectic session, but we came up with a lot of new ideas.
Task: Present in the Inviational Presentation Series
Today, we participated in the Chassis Presentation workshop for teams all around the North Texas region; the project was to design robots and perform various tests with them, then present findings. We presented our chassis, Garchomp, a mechanum wheel chassis as can be seen in the slide photos below.
As a new freshman on Iron Reign, I took on the responsibility of a robot we called Bigwheel. Karina and I worked on getting the robot into something that could be put through load tests, meaning tightening the chain, fixing misaligned sprockets, and getting the wiring together. We participated in the Chassis Presentation workshop hosted by technicbots for teams all around the North Texas region to work on one or more...
We've been working on a design for the chassis workshop for quite a while now. We already presented it at the first meeting, and now we need to work on the other components of our presentation: the weight testing, torque calculations, speed testing, and finally, a chassis model. To do the last one, we made a simple model in PTC Creo.
In our last post, we thought that we had finished Garchomp. However, as we came back to the next practice, we realized that Garchomp's chains were incorrectly linked.
So, we started to diagnose the problem. We noticed that the old REV rails we were using had dents in them, which caused the motors to shift, therefore causing the chains to come off the gears.
C.A.R.T. Bot Summer Project By Evan, Abhi, and Janavi
Task: Enhance our robot-building skills
At Iron Reign, we hate to waste the summer since it’s a great time to get all the ridiculous builds out of the way. Thus, we created C.A.R.T. Bot (Carry All our Robotics Tools). Our constant companion these last few seasons has been our trusty Rubbermaid utility cart which has been beaten and abused, competition after competition, as it carried all our tools...
Summer Chassis Project - July Meeting By Kenna, Ethan, Charlotte, Karina, Shaggy, and Abhi
Task: Compare & Collaborate on Chassis
At Big Thought's offices in downtown Dallas, three teams met. Technicbots (Team 8565), EFFoRT (Team 8114), Schim Robotics (12900), and Iron Reign are all part of the North Texas Chassis Project. The goal is for each team to create any number of chassis and improve their building skills by learning from the other teams.
This is Iron Reign’s world-championship robot from last season. The basic rundown is this:
Weight - 42 lbs
Size - 18x17.8x17.5 inches
Drive - Mecanum
Main parts kit - REV
Iron Reign uses two design processes in conjunction with each other to create efficient and reliable parts: iterative, continual improvement and competitive design.
An example of these design processes working in conjunction is the process of...
This summer, we're working on creating unique chassis that are outside of our comfort zone. Often we choose safe bases - opting for ones that we have tried in the past and know work. But, taking the opportunity to explore unique bases allows us to see their performance. One of our ideas is for a two-wheeled robot, with two large wheels and one, smaller, non-motorized omniwheel. We think that...
Over the past week, I worked with Christian and another member of Imperial to prototype a drive train. Due to the limited resources. we decided to use Tetrix parts since we had an abundance of those. We decided to make the swerve such that a servo would turn a swerve module and the motors would be attached directly to the wheels.
Last season, we saw many robots that utilized a swerve drive rather than the mecanum drive for omnidirectional movement. To further expand Iron Reign's repertoire of drive bases, I wanted to further investigate this chassis. Swerve was considered as an alternative to swerve because of its increased speed in addition to the maneuverability of the drive base to allow for quick scoring due to its use of traction wheels at...
We have been working on this chassis for over 3+. In out last post, we had thought the wheels were ready to go. However, various parts, such as wheel mounts, had been put on backwards or were unusable so we had to do everything over again. Now that the robot has wheels, we started on attaching the REV expansion hub and battery....
After a season of work, Iron Reign has the final version of Kraken ready for Championships. With it comes a video showing off its features. We filmed it moving in all sorts of ways. We also found pictures from this season of the team's design growth and outreach events, including having fun. You can view it here below!
Task: To have a working relic arm in time for Worlds
For weeks now, Team 6832 has been working hard to have a functional relic arm designed and mounted on the robot. We feel that it is absolutely necessary to be able to complete relic recovery at Worlds if we do not want to be crushed by the competition. Well, fear not, our relic arm is here!
Task: Determine the acceleration and max velocity experimentally
To find the acceleration and maximum velocity of our robot we decided to use a method we have learned in our physics class at school: video analysis with Logger Pro. The procedure is like so: Take a video of the robot head on with a still camera. In the video, in the same frame of movement as the robot, hold a known measuring device (ruler/meter stick). Insert the...
With FIRST Champs right around the corner, we needed to update our CAD model to match our current Kraken. After all, Kraken can't be lackin' any features. I decided to reopen Creo and make some modifications.
One of the most important things I needed to put on was the Relic arm. After planning on it for the whole season, we finally finished it recently. I...
Building. It seems so simple but alas I was wrong, so wrong. During our post mortem, when we discussed our roles on the road to worlds, Kenna and I volunteered for building a pushbot. We both wanted to get more experience in building and thought this would be a perfect way to becoming well-versed in building. Our task was to create a drive base that, when placed on...
This is the fifth or so article in our series on robotics testing. Today's spotlight will be on the constants of our robot's bungees, and how they're affected by various wear and tear. So, we took three bungees from the same set as the ones on our robot, and placed them in various places: stretched outside, stretched inside, and a control sitting in the...
Task: Find constants for the motors for future calculations
In order to better predict how our robot will work, we first need to find a few constants to do calculations. Luckily, our school has an engineering class, so many of us have the skillset to do these calculations.
The base data we needed was: NeverRest 40s: &tab;160 rpm\16.755 rad/sec &tab;369 oz-in\2.6057 Nm NeverRest 60s: &tab;105 rpm\10.996 rad/sec &tab;593 oz-in\4.188 Nm REV Servos:...
When we went to Super Regionals, we forgot about where to put our flag with the new design. That led us to strapping a zip tie to a side shield, ruining the aluminum aesthetic. We decided we need a specially designed part to put our flag in since duct tape didn't look nice (we're classy like that). I embarked on a mission to create a...
We always struggle a little with describing our robot to the judges. So, this post will be the third in a series of posts describing the physics of our robot (four if you count the coefficients of friction). First, we have the free body diagrams of the gripper.
Next, to further describe this, we created an expiriment in which we determined the maximum...
After continual development and adding the fifth grabber, it became time to make a new model.
With some sick upgrades, Kraken has become reborn just in time for Super-Regionals. With some new mechanisms and constraints, we developed a better and more efficient robot.
Gripper v5 was added to the chassis via 4 small REV rails which could keep the grippers attached to the conveyor belt....
So, its Supers time again! And that means its time to design our tents and pick a theme for ourselves. Last year, when Iron Reign went to Supers for the first time, we got to see all of the other teams' displays; before, we had only been to regional level competitions and weren't ready for the displays at Supers. We saw the coolest tents and got some really cool trinkets. For example, one...
Progress of the Octopuckers Over Time By Ethan and Tycho
Task: Chart the progress of the octopuckers over time
This design was too rigid, we overlooked the fact that triangles tend to be the strongest shape, and therefore this octopucker wasn't as compliant as we wanted, damaging the blocks. This design was really good, and we used it for 3-4 tournaments. Our initial design of these wouldn't damage the blocks significantly at the levels...
Recently, we've been having an issue with our gripper in that the shielding for the sides of the intake have been bending torsionally, so that they deform and interfere with our glyph take-up. So, we created a lab to find the torque required to cause this deformation.
We cut a length of polycarb with a similar width but different length to test this (thickness...
As were continuing development of the relic arm, we realized we needed to make several modifications. That resulted in the following design.
This demonstrates the latest version of the relic recovery arm. You may be saying "WOaH that doesn't fit in sizing cube!" Good news: The servo in the middle folds out the second part of the arm to that the entire mechanism fits in the sizing...
We've talked to REV before about our unique REVolution system that we've detailed in other posts, but for those who are unaware, its a system that we've personally designed to turn REV extrusions into axles, which enable us to have more flexibility in design. But now, we've designed a flyer to get people on board with the system.
Recall the discussion and design strategy regarding our wheel mounts
The side shield design process involved much thought and discussion. We have experienced difficulty with the wheel mounts we have been using, which are the ones from last year. These are made of a composite of nylon and aluminum, but they are too thick and consume a lot of space on our already large robot. Also, the our new Mecanum wheels are thicker...
Our grabber is good, but it isn't achieving 100% of the potential it could. One thing we're doing is creating the Grabber V.5 previously blogged about, but we also want to increase the speed of the grabber in other ways, in order to get every single bit of performance out of our robot, since we want to really impress at Supers. So, we designed star-grabbers. The purpose of...
Now that we had developed a glyph game and a stable autonomous, it has come time for Iron Reign to conquer the true challenge of the 2017-2018 competition: Relic Recovery.
After seeing that many record setting teams have built "dump truck" robots that can fill both cryptoboxes with incredible speed and accuracy, we realized that if we developed an accurate relic arm, such teams would ally with us and our...
After analyzing the lack of speed from our last competition, we decided to continue the journey of attaching the gripper arms to a conveyor belt as previously designed. To do so, we realized that we needed to utilize the REVolution system to make the grippers work better. Also, we needed two points of attachment for our robot after seeing that one didn't work with the first version of the...
Friction Coefficients of Various Materials By Ethan
Task: Test Friction Coefficients of Various Materials
Introduction:
Iron Reign has used many different materials in years past. In those years, we usually preferred materials which were more durable. We started with ABS, but while hard, it was relatively brittle. We attempted to use Filoflex and Ninjaflex, and they were more durable, but too soft. Finally, we had used nylon for the past seasons, as it was extremely durable but...
Over the course of this past season, I have been learning how to use Creo Parametric to learn 3-D modeling. Since this is Tycho's last year on the team (so far he has been our main modeler), I decided to learn from him so the modeling legacy would continue.
The first project I was tasked to design was the wheel guard on the robot....
After making significant development on our robot, we decided to model it. So far, we have developed the chassis of the robot seen below
To develop this, many types of contraints were used.
The entire model is dependent on this tetrix bar. The bar was constrainted using the Default feature since it was the base of the model. To this, the lift...
We have finally completed assembly modeling Kraken, Iron Reign's Relic Recovery robot. Named after the sea creature due to the robot's OCTOPUCKERS, Kraken stands as a fierce competitor in FTC.
To the chassis, we added the glyph system mounting. We first designed a linear slide replica and constrained that to a small TETRIX U connector piece which attached to the REV rail base. On the other side...
Washers can be used as spacers. They are also used to smooth out the rough top layers. Keep the bed very clean and smooth and the bottom surface of parts should be very slippery against other nylon. Put these in between the rough top bearing surface of one part (with rough surface facing rough) and the smooth bottom surface of the next part, and the friction...
This shows customized version of the Dual Rail Plate. This is for our 4th generation rolling gripper system. The small ears are designed to hold a long M3 bolt that have a stack of mini ball bearings on them. These ball bearings squeeze our timing belts together, forcing them into a more oval shape, but still allowing them to glide. This reduces friction quite a...
This is the standard bearing / bushing that allows a REVrail to rotate inside a plate. It is typically coupled with a glide washer and two stops to bind it to an attachment plate or pillow block.
End caps are stops placed at the end of a REVrail. Five of the holes are for M3 bolts that can be screwed into the standard holes in the cross section of the extrusion. We highly recommend tapping these holes and then using threadlock to retain the bolts. So far we’ve only had to use a single bolt since we haven’t experienced very large forces The...
This is our REV0lution 20 tooth sprocket for #25 chain. This took a lot of trial and error to get right, because it was the component most sensitive to our print settings. We had to inset the tooth profile quite a bit because any extra material created by perimeter settings would cause the gaps between teeth to be too small for the chain to fully engage,...
This is a standard pillow block. We had to add adhesion pads to the ends because the nylon would curl away from the print bed. But these are easily cut off with a hobby knife.
The dual rail plate allows you to couple the rotation of two REVrails together. The distance between the holes should be based on how you are coupling them together. This model is designed to use GT2 5mm pulleys and a 46 gap timing belt.
This GT2 pulley has rounded teeth that engage nicely. GT2 pulleys and timing belts are the most common in use with 3D printers - but those are usually of the 2mm pitch variety. We didn’t think our printer would be able achieve the fine detail accuracy needed to print at that size, so we went for the 5mm pitch belts. On our printer we can take this...
Version 2 of our gripper arms worked much better than our original. Due to their silicone material and trianglular shape, we definitely had more control over the glyphs than our one degree of freedom grabber arms. However, we still had issues we needed to address. When glyphs were taken in, since the silicone surface did not have much mobility and compressibility, glyphs would often fall. Due to slight...
Task: Learn how to Assemble parts in Creo Parametric
In addition to making parts to print in Creo, it is sometimes useful to combine multiple parts to make a model. For example, we can make a robot model by assembling parts in Creo. We have conducted a video on how to do so.
For this tutorial, we first created two simple parts...
Task: Determine building strategy for Relic Recovery
Any well-versed team understands that, depending on the competition for the year, a robot will either be modified to compete or be built from the ground up. In any case, however, a robot often starts at its chassis, and teams have multiple companies that provide solutions to the common robot chassis’ needs and specifications. To name a few: AndyMark® has its standard kits that include all the...
The jewel thief, the mechanism for knocking off one of the jewels, was going to be one of the tougher parts of our bot to integrate, based on the chassis we began with. But, with a little engineering and some long thought, we came up with a few ways to implement it. First, we began with a side mount, and it was alright...
PTC Creo Parametric is one of the best software to 3-D model tools that we can print out. I will detail how to create a part in Creo for both our team and any other teams who need help creating a piece. For this demo, Creo Parametric Academic Edition was used along with a pre designed model of the part.
Refering back to the design of the wheel guard, we decided it was time to actually mount it on the robot. At first, it seemed like the part was perfect for the robot since it fit just snug with the screws on the wheel. However, upon mounting, we discovered the following:
Turns out that the part is acutely shorter than the real height of wheel relative to the horizontal axis superimposed upon the vertical plane. As a...
Since damaging field elements is a huge no-no, we needed to fix this, we decided to create a 3-D part to protect the glyphs from our wheels
Model:
During the first attempt, I had just self taught Creo hours prior to construction. As a result, I was not very precise nor efficient in my design. Nevertheless, we recognized that there were some basic shapes we could use for construction such as a semicircle for the bottom half and two rectangles on the...
Because our robot at this point has merely become a collage of prototypes that we compete with, there are often subtle improvements that need to be made. Starting with the wheelbase, Abhi has written a blog about the shields we printed to protect the glyphs from the gnashing bolts of our mechanum wheels, and we also tensioned all our set screws and motor mounts to make sure that our...
Task: Design the grabber design and make future plans
The grabber has been evolving. A column made of a turkey baster and a wooden dowel attached to servo has come into fruition. The first drawings and designs are coming along, and some 3D printed parts have been thought up to allow the square dowel to become a hexagon. An adapter of sorts. The grabber and lift have been outfitted with a...
Though our current gripper is working sufficiently, there are some issues we would like to improve in our second version. The mounting system is unstable and easily comes out of alignment because the rev rail keeps bending. Another issue we've encountered is the cervo pulling the grippers so that they begin to cave inwards, releasing any blocks being held at the bottom. By far the biggest problem is...
The games have begun and it’s time to build. So that’s what Austin and I did. A war had been declared. Legions of the indentured collided on the battlefield. Millions were slaughtered during this new age armageddon. Austin had his army. I had mine. Two different ideas to do the same task: lift glyphs into their correct positions. A simple job but one that caused a rift in...
After determining that the treaded channel was much too buggy to perfect with the time we had, we shifted attention to other scoring systems like grabbers, however before finding the right grabber we decided we needed to get the track for it completed first. We’ve had experience in the past with all sorts of rails from Tetrix kits that convert their standard channels into lifts, to the newer...
In an attempt to get a working lift system before the coaches meeting we will be presenting at, a linear slide has been attached to the robot, along with a pair of grabbing arms. They work surprisingly well and aren’t as complicated as my idea. Plus the importance of speed has really taken hold on me this year. We need to be as fast...
Over the past couple of days we’ve experimented with a horizontally mounted track system that we had hoped would serve to move blocks through the entire length of the robot and into the crypto box. Immediately we noticed a few issues, the primary one being that the tread was static in terms of mounting and therefore wasn’t accepting of blocks when feed at an odd...
The sun came out and it was back to the field. We got started right away, both of us building our designs. Since the cryptoboxes were wider than the 18 inch sizing cube, we started by designing a fold out for the conveyor belt. This was entirely proof of concept, purely to see if it was at all aplicable in the game...
Task: Compare build designs for the cryptobox intake system
The block scoring system is going to be an integral part of the competition this year, and it will have to built sturdy. It’ll have to be reliable for us to have any shot of winning any matches. So we got to brainstorming. We spent a while at the whiteboard, drawing up various mechanisms and ways to pick up blocks. One idea was the idea...
Super Regionals Booth Design By Lin, Austin, and Omar
Task: Design a theme and layout for super regional pits
A year or two ago Imperial advanced to Super Regionals, bringing along a few Iron Reign members. While teams get excited and have a lot of fun at Regionals, it's nothing compared to the displays found at super regionals. We've grown into our cyber-Roman theme this season, and Omar is currently working on a logo to match our new color...
Building the Fly Wheel Launcher By Jayesh, Omar, Darshan, Evan, Tycho, and Max
Task: Create a particle launcher with a higher scoring rate
The first particle launcher we saw by another FTC team was actually a crude flywheel and rail design back in October where the rail was a cut up PVC elbow. Back then we considered a number of different designs including impact launchers, catapults, flywheel + rail systems and dual flywheel shooters like our sister team built. We decided to go with a catapult design because Max...
Task: Create a backer rail to guide the particle as it fires
Our work on the flywheel design has been an effective proof of concept, and now we need to work it in to the rest of the robot. However, just like with the catapult, there’s a couple issues to iron out before all the pieces can start moving in a way that doesn’t make the robot implode.
Most notably to the 3D modeler in me, I fear that our current...
I was going to make a Windows 10 joke but then we stopped using the catapult at version 8.
Task: Design a flywheel for a new system replacing the catapult
So while our catapult was good, we needed something better. It frequently missed and had other issues due to it being dependent on elastic bands that can lose tension over time. It would occasionally miss balls from areas it would usually be able to shoot from. As well,...
Motor Controller Mounts By Ethan, Darshan, Max, and Tycho
Task: Prevent static shocks to our robot
Throughout the year, we've dealt with static issues with our robot, as shown here and here. And, now that we've pretty much gotten autonomous and the lift out of the way, the static was our only remaining issue.
To prevent the static shocks, we needed to isolate the motor controllers and other...
Cap Ball Lift By Omar, Jayesh, Darshan, Evan, and Max
Task: Build a lift to try cap-ball scoring
Although we're confident in our robot's ability to shoot balls and press beacon buttons, we decided that in order to be competitive, we should try to score the cap ball. The lift would have to be strong enough to lift the surprisingly heavy ball, but also not take up too much space. Our robot, as like every year, is very close to the 18 inch size limit in all directions, so we...
Mapping Out Autonomous By Janavi, Tycho, Omar, Evan, and Darshan
Task: Mapping Out Autonomous
To tell the robot how far to move forward we had to calculate our motors RPM. We did this by telling the robot move to 10 rotations forward and calculating how far it travelled. After he RPM we created a model field upon which we designed a set path for the robot during autonomous. One path for red and then one for blue....
This shows a test of our encoder issues. It might have been a month ago that we noticed a strange behavior in our autonomous code when the robot was moving forward at low speed. It would curve to the right when we were telling it to go straight. We probably would have noticed the problem...
Beginning the build for the Cap Ball Trapper By Jayesh and Omar
Task: Give Deadshot flexibility in end game scoring by designing Cap ball launcher
One of the issues we saw in Arkansas was in the lack of flexibility we had in terms of the end game. We efficiently scored balls and beacons, but when our teammate for a specific match could do the same, we lost possible points scored. This led us to conclude that a Cap Ball Trapper,...
Chaos reigns as the world is thrown into peril; whole nations are thrown into anarchy by the second; and the superpowers of the world, once bitter enemies, have no choice but to band together as a horrid product of our own hubris, a threat more devastating than any which mankind has ever before seen, appears to put a grisly end to humanity:
Up to this point, we hadn't given much attention to a beacon scoring mechanism that we could use in both autonomous and tele-op. At the scrimmage we learned that scoring the beacons was almost vital to winning the match, and we couldn't do that. We rigged up a short u-channel on a plate and attached it to our robot, hoping we could just ram...
Robot Frame and Rewiring By Jayesh, Omar, and Evan
Task: Build a frame to increase available surface area on robot to rewire current configuration
The wiring, which had been on the robot, had been a constant issue. The wiring tangled, interfered with the scoring mechanism, and led to some inefficiencies in electrical output. In order to increase the available space to reconfigure the inner workings of the robot, we built a second testrix layer, which also conveniently serves as a handle.
Today marks six days until Doomsday (AKA Little Home, Arkansas), so we needed to finalize everything. For the catapult, Jayesh and Omar fixed my catapult "fixes". However, with the new fixes, the catapult was more powerful, and required recalibration. To adjust to the new fixes, we removed the old stop-mechanism, and replaced it with a wooden one that stops it on the 2nd level of...
Get Nostradamus on the horn, there’s a new prophet in town.
Task: Imbue the catapult bowl with infinite power
As I predicted in the article about the first version of the catapult bowl, it’s gonna need a rework. There’s enough room for the catapult system and the conveyor system to fit together on the robot, but the lip of the bowl is too high for a ball to roll into the slot. This is a tough issue to solve: we’ll have to slice a chunk...
Task: To bring the catapult within size limits and improve it
What Actually Happened: Abject failures
So, the original catapult, when not stuck, performed pretty well at the scrimmage. However, since we opted not to measure our robot at the scrimmage, we didn't realize that our robot was not within the FTC size limits. When measured after the fact, it was 18x19x20 in x, y, and z axes respectively, due to the catapult's position on the robot. To rectify this, we decided to cut the catapult down,...
Task: Replace rubber bands with smaller versions and add wider intake area
New intake area is wider than before
At the Scrimmage we noticed that the rubber bands would get tangled as they rubbed against the underside of the catapult bowl, and so didn't reach as far down at the bottom. We untangled them before each match but decided to test out the smaller ones when we had the chance at...
We've spent the last few practies creating a ball collector. The idea was to have our track with the gripping rubber bands reach from the bottom of the robot to our 3D designed ramp. The path would guide the balls to a higher position on our robot to the launching mechanism. We needed to adjust the correct orientation of the support beams guiding the balls, needing...
Task: Make a conveyor shaft to guide particles to the catapult
We’ve thoroughly proven that the tread of rubber bands is an effective method of ball collection, but as of yet it can only move the balls along the ground. We’ll need a way to move them upwards to the catapult bowl’s level. While we could use another motor to push the particles up and over the belt, it could get caught and we’d rather not take up another motor port. We decided...
First and foremost, we now have one completely functional, terrifying, catapult. The motor mechanism is cannibalized from our sister team's attempt at a catapult, which broke apart on testing.
Flywheel
So, while we don't have a functional flywheel as of...
Stabilizing Our Driving Base By Jayesh, Omar, Max, and Darshan
Task: Stablize Meccanum wheel base so the driving is more stable and consistent
Our Meccanum wheel base idea started off on a shaky note. While we had a good amount of success in the tass we wanted to complete, like driving right or let without turning the entire robot, including the basic driving functions. However, as we went on with testing, we found that over time, the force the meccanum wheels...
Task: Design a bowl for our upcoming catapult system
We've been experimenting with catapult systems for a little while now, but we're still sorely lacking one of the core ingredients of any catapult system: the ability to throw things. I mean, technically we're lacking the ability to hold what we're trying to throw, but it's the same effect.
In any case, it's an issue we have to deal with, and our solution is good ol' nylon. I went through a few designs for a...
Task: To build a launching mechanism for the particles
For the 2016-2017 season, particle scoring is really important. During autonomous, balls that are launched into the center vortex earn 15 points each, and balls that are launched into the center vortex earn 5 points. If done quickly enough, the particle scoring can negate most of the advantages another team has - just 8 particles scored during the driver-controlled period is equivalent to scoring all 4 beacons. With a good scoring mechanism, the only thing that your team...
Task: Make a case for the ZTE Speed controlling the robot
While we are still in the early stages of design and it's not wise to make a permanent decision about where the robot's controlling phone will be, we can't let it float freely around the robot like a brain in a jar for much longer or it'll start getting caught in the developing systems. Normally, we could solve this easily by drilling a few holes in an off-the-shelf...
Building the Robot Base By Jayesh, Omar, and Darshan
Task: Design and test implementation of a driving base
We have spent the last few practices formulating a new driving base for our robot this year. We went through various possibilities: tank-based drive using both tracks and the omni-regular system (both of which are systems that we have utilized in previous years). However, both systems showed inefficiencies with this year's competition. We decided to go to a system using mainly Mecanum...
Geb Fixes and Adjustments By Jayesh, Omar, and Lin
Task: Prepare Geb for competition and get it into running condition
With all of the large projects and events that Iron Reign have been commiting to (with more still to come), we have unfortunately been neglecting Geb and as we came to find a few weeks ago, many of the running parts that give us the majority of points in competition were falling in disrepair. We found that the tape measure system...
New tread material test By Lin, Tycho, Max, and Evan
Task: Initial tests for new tread material
The standard Tetrix treads and tread inserts aren't nearly as sturdy as we would like. When they snap it's a real effort to put back together stretched over the idlers, and the inserts peel apart, bringing our traction down. The new material is a rubber conveyor belt material from Andymark, and the underside track chain is 3D printed in nylon to mesh with the...
Let's assume you are building a LEGO Mindstorms or Vex IQ based Sumobot, but you want to skip some of the basic mistakes beginners will make. Here are some tips and tricks.
Know the rules. It's silly to get disqualified because you didn't pay attention to the rules. Know the size and weight limits. Know the allowed construction materials and techniques. Know the startup behaviors. For example, your robot must not move...
Fixing Up Our Climber and Trough Attachments By Jayesh, Max, and Omar
Task: Replace servo on CliffHanger with a motor
At both competitions we've been to so far, we've noticed that the servo that controls the cliff hanger's elevation often stresses and heats up due to the strain being put on it, especially near the end of the match. It has already scorched quite a few of our fingers. To remedy this, we decided to replace it with a...
Today, we realized that the tape-measure attachment that's supposed to push the buttons on the beacon could have multiple functions instead So, we designed an attachment to the tape measure that can push any buttons, including people's. Max designed it in PTC and then printed it. We have yet to actually test it on the robot, but it works in-hand.
The Double-Wide Experiment By Jayesh, Max, Dylan, and Evan
Task: Strengthen our tape-measure climber against folding and sideways forces
Our tape measure is constantly under stress, which usually isn't a big problem if the driver is positioned with a straight 90 degree angle, but when twisted can result in cracks.
While our tape-measure design worked decently at our competition last week, with multiple mid zone scores and one high zone score, we are going to need more consistency to be a valuable ally in our matches. At...
Since we have a semi-reliable form of going up the ramp (which we are working on to make closer to 100% efficiency), a priority for our team robot-wise is to establish an effective method of scoring blocks. We've designed a preliminary model with our old plastic trough that uses a conveyor belt made of fabric and foam sewn together that we tried to use before but decided not to. The foamy...
Cliff Hanger - Tape measure based climber By Trace and Max
Task: Creating an attachment to climb the mountain
We have recently been working on a new approach to climbing the mountain. Our strategy so far was to have one system customized for climbing the mid and upper mountain (Churro Climber), and a separate system for climbing the cliff (Crossbow Grapple). The Churro climber system was beginning to work but it was floppy and we were thinking about stiffening the nylon extensions with...
Prototyping and Making the Flipper By Jayesh, Omar, Darshan
Task: Design an apparatus to deposit the climbers in the beacon bucket.
One of the methods to score in this year's competition is depositing the two climbers in the bucket behind the beacon. This being relatively simple, we decided to concentrate this practice on creating something to get us these easy points. We discussed possible ways to deposit the climbers and came up with a design that used some of the scoring mechanism we already had on our robot. The idea was to...
Rebuilding the Churro Climber System By Omar, Darshan, Max
Task: Fix bending axle on churro climber permanently
After further testing of the churro climbers, we noticed that the axle the gear is rotating on had been bent severely due to the strain on it of the arms pulling. If we left the axle as it was, it might wreck something else later and become unusable, so we tried to figure out a way of creating something that served the same function as the axle but wouldn't bend as easily. We decided...
Task: Model a part to keep the slide from going too far forward
Since we mounted the beater bars on a slide, we have been keeping them from going too far and falling off their rails either by obstructing them with a couple of bolts or with a bent piece of steel wire, but neither method is fool proof. The wire can get bent out of shape as the slide moves forward and collides with it, and...
Task: Model a part to keep the churro climber cable ties on path
As we continued to work on the churro climber mechanism today, we decided that the cable ties bowing out would be a big issue that needed fixing. By making a small guide piece, we could ensure that the cable tie actually extends from the front of the robot instead of flopping around like overcooked spaghetti on the other side. So, I've made a rather...
Improvements to Churro Catcher and Ramp By Jayesh, Lin, Omar
Task: Make improvements to Churro Catcher and Ramp and make blog more accessible
Iron Reign held our first of two meetings before the New Year season to concentrate on improving our main designs to ensure they worked as expected. Starting with our Churro Catcher, we found that as the motor moved the two arms down, the tension in the two churro climbers was two low to actually push out the latches forward from the robot. We built two small metal segments...
Optimizing the Churro Catcher By Jayesh, Omar, Darshan
Task: Improve and fix our Churro Catcher + finalize design for trough
The team met up on Sunday and we focused our meeting on finalizing our trough design and making our churro catchers usable. Beginning with our trough prototype, we put in an angled metal piece to the main box compartment and shortened the height of the box. This height was specific to the height of the blocks, allowing us to shave off blocks that become stacked upon those that we've already collected and...
Task: Model a part to help the robot climb the churros on the mountains
Most of the big-value items in terms of points have to do with the mountains, so climbing mechanisms are a must have. Since the tank treads have problems scaling the churros on the middle and upper mountains, we need another way to pull the robot higher. Our solution was to put hooks on the ends of long, heavy-duty cable ties that we could...
Task: Prototype the trough using materials such as cardboard to give us a baseline
'
The team had a meet before the busy Christmas period to focus on the main part of of our scoring mechanism: the trough. We discussed possible courses that would be easiest for us to score points and code at the same time. We went through multiple ideas of how the trough would work. One idea was to have our trough consist of rotatable base to account for...
Improving the Catcher Design By Dylan, Darshan, Omar, Jayesh, Evan, Alisa
Task: Add Improvements to the Catcher Design
Today our team worked on improving the methods of capturing and holding blocks and balls. Our first design involving zip ties had major difficulties including that it had little strength to pull objects in. For this reason, we redesigned the beater bar using a 3-D printer that had stronger materials to capture materials along with frictionless tape which did not cause the blocks to become stuck. Through our tests we can see that...
Task: Model a part that lets us hold back the slide with a trigger to release it
The beater bar mechanism was put on a slide so that we could restrain it until some point during the match, but we had yet to actually build a restraint and trigger to serve this purpose until now. Since the mechanism would likely include rubbing pieces and need customized parts, we chose to model and 3D print the part in...
Task: Think about our robot's design both for now and for the future
Today, I decided to list our different options when it comes to design and on how much effort they would take on a numerical scale from 0 to 7. 0 means no effort would be needed at all (none of our options are currently here), and 7 means that the option is almost not practical based on the work we'd need to put in, but would be a huge benefit on our...
Design and prototype a churro latch mechanism By Lin, Darshan
Task: Design an alternative churro climber mechanism
Currently Max and Tycho are working on a beater bar 3D part that is stiff enough to pull in blocks, and will hopefully double as a churro catcher when spinning. However, since the parts take 4 hours per set to print, and are harder to rapid-fire test and change and tweak relative to some other options we're going for other options till they're tested. The churro catchers help us to secure holding up the ramp but...
Prototyping the ramp for the intake system By Jayesh, Omar, Ethan, Evan
Task: Make a physical prototype to plan out the next step in our ball/block intake system
We held a post-Thanksgiving meet to focus on the mechanical side of our robot, as we had been devoting a majority of our time to software and other such things. The problem we faced with our beater bar being installed on two sliding extrusions is that we had to have an incline adjusted to going up two levels and not...
As the point values make clear, managing to get the robot to hang on the end of the "cliff" is likely worth the effort. As such, we've worked on making a strange grappling-hook type contraption to pull the robot up. This first version works rather like a crossbow. A telescoping fishing pole has its largest loop hooked up to a long "bolt" which extends beyond the pole to a bungee cord tied to a pair of arms on...
Today we continued working on the code involved for the first ten seconds of motion in the tournament known as autonomous. In this period we hope to reach the other side of the field towards the Res-Q beacon to dump our figures from the beginning and then trying to go as high as we can up the mountain. We coded this using our IronDem and the Pose classes to calculate the range and angle of our current...
We needed to create bumper shields because the debris on the field interfered with the tread. We had a prototype on the left, Evan and I cut the bumper shields out of polycarbonate with two made for the front and two for the back. To do this, we were trained how to use a bandsaw. We cut them down so that they will be moveable.
Meeting other Teams at the Scrimmage By Lin, Omar, Darshan, Jayesh, Tycho, Max, Evan
Task: Get a feel for where we are and the progress of other teams
Whether or not we were allowed to compete, we felt that it would be worthwhile to go to the scrimmage, if only to see how we compared to other teams. Climbing the mountain is the hardest mechanical design challenge so far, and we were able to see their solutions.
Reflections
Many teams had treads like ours, with different arrangements of idlers, while...
Addition of Beater Bar to Robot By Omar, Ethan, Darshan, Lin
Task: Fix and alter robot to include sliding beater bar
Since the robot's last run, several fixes and adjustments had to be made in order to make the robot operational again. All we had to do was tighten a couple of bolts, so it wasn't that big of a deal. We'll probably have to do a quick check from now on to make sure nothing's falling off. Afterward, we set to using the same beater bar we used last year (the first...
A few weeks back, I designed a new chassis. It was a combination of the rocker bogey and a tank to make the rocker boogie tank! With the advantage of sturdiness from a tank and the ability to adjust to surfaces from the rocker boogie. This combination is unstoppable!!!
Reflections
The task proved to be easy (just added tank treads to a rocker boogie) but worked. After I tested the prototype on a number of surfaces, it...
Task: Improve our 3D Printable case for the Adafruit BNO055 IMU
Last week I designed a case for our IMU sensor in Creo and wrote up how it could be improved. I've fixed most of those issues and we are ready to share the results. There is one version with Tetrix hole spacing and another that works for Actobotics channels. Either can be used with aluminum extrusions though you might have to drill out the mounting holes depending on your bolt size.
Task: Make a 3D Printable case for the Adafruit BNO055 IMU
We're used to having gyros to help maintain heading, but we've never been fans of the Hitechnic gyro sensor. Now we have more options and the BNO055 looks pretty good. But our testing has been off robot so far and we need a way to securely attach the sensor to our robot which bounces around like crazy when climbing the mountains. So in PTC Creo, I'm designing a 3D printable case for this sensor that we...
Arrangement and Rearrangement of Motor Controllers By Omar, Darshan
Task: Find better configuration of motor/servo controllers and power distribution module on the robot
Today, we tried to figure out the best possible way to stick all the motor controllers and the PDM together to minimize the amount of space they take up on the robot. Fitting the finished product into the gap on the back end of our robot would also be a bonus. We had previously thought of one way of doing it: When placed on the robot,...
Task:Discuss multiple possible solutions to climb steep incline on field
We held a team meeting outside on the field discussing multiple possible solutions to the problem of the robot ascending to the top of the ramp. While we are already able to climb the ramp, the robot strafes significantly as it climbs above each rung on the ramp. This can be accounted for during the driver-controlled period, but the strafing can't be accounted for during autonomous, unless we have each side of the...
Post Kickoff By Jayesh, Omar, Lin, Ethan, Alisa, Evan, Max, Tycho
Task: Build FTC field and begin tank tread mirror side
After the 2015 kickoff, Iron Reign conducted a meeting to construct our game field and also construct our mirror side for the tank treads. Taking turns on placing the grips on our treads, we managed to get a good portion of the grips placed as well. Construction of the field also commenced and the majority of the field is finished, providing an important recource for us in testing the robot for competition....
Task: Insert grips into alternating treads to boost traction of driving system
I am so done with these treads. For the past three hours I have worked to soak the treads and tread inserts in dish soap. *takes deep breath* The process is painstakingly slow and also literally painful. The process itself seems simple but after soaking both pieces the insert must be pushed in with a considerable amount of force. This is not user friendly and is not what the company...
Task: Design a new build platform more suited to this year's challenge
Since the robot game for this year came out about a week ago, we were thinking about which kind of drive system would work best for the challenge, which mostly involves climbing. Some of the concept we came up with were rocker bogies, rubber-banded tires and a tank drive with treads. Since we already had the preliminary design started for a tank drive, I started modeling that.
Meeting After Game Reveal By Dylan, Darshan, Alisa, Ethan, Evan, Lin, Tycho, Max, Trace
Task: Discuss robot design
Now that the game has been released, we as a group discussed the different amount of points per each possible game strategy that would give us the most ample amount of points during the given time limit. We also discussed the different ideas on the tracks and wheels that are possible for our design. The arm attachment was discussed for the grabbing of the highest mount of the mountain which would give us the...
Task: Create preliminary designs for a new robot using a new build platform
After we got the new mechanum wheels, I had to start thinking about a new design that would be able to use them.
Reflections
Not much progress was done on the design based on the mecanum wheels, but I remade part of the design based on our old robot from previous years. We will build one robot based on our proven omniwheel-drivewheel-omniwheel nacelle design, only...
Task: Create preliminary designs for a new robot using a new build platform
Today I started making new designs for a competition robot based on extrusions and the new software platform.
Reflections
I decided to make two different possible designs, one based on our robot that we had used for the past few years with 1 regular wheel on each side in between two omni wheels, and another based on our sister team's newer platform, which had one standard wheel on each corner. After...

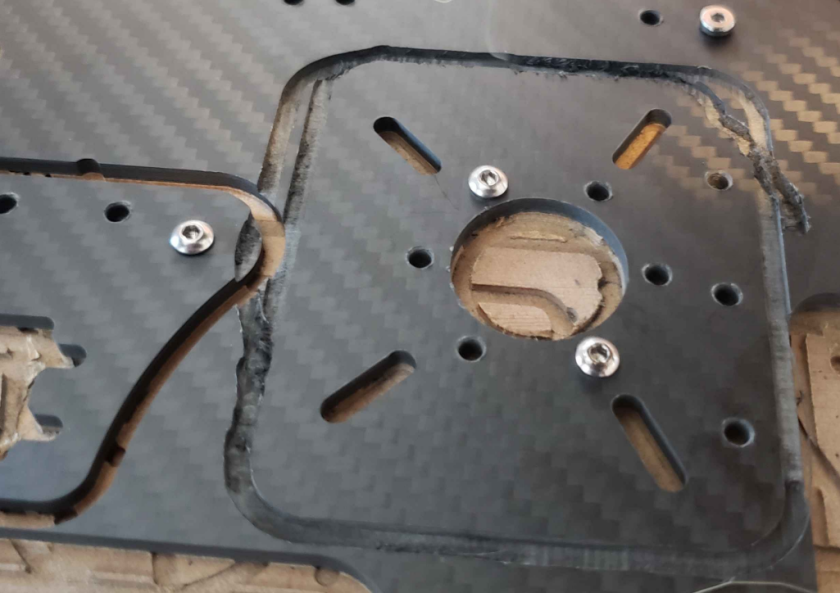
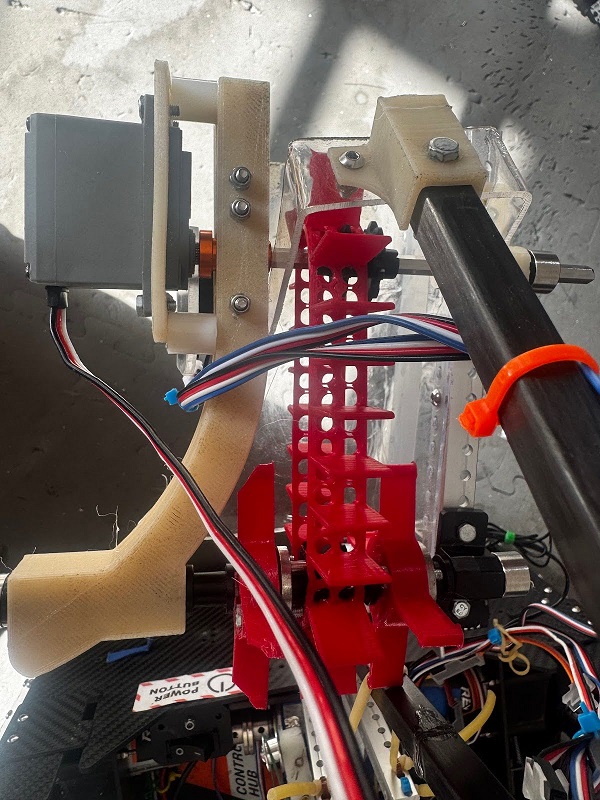
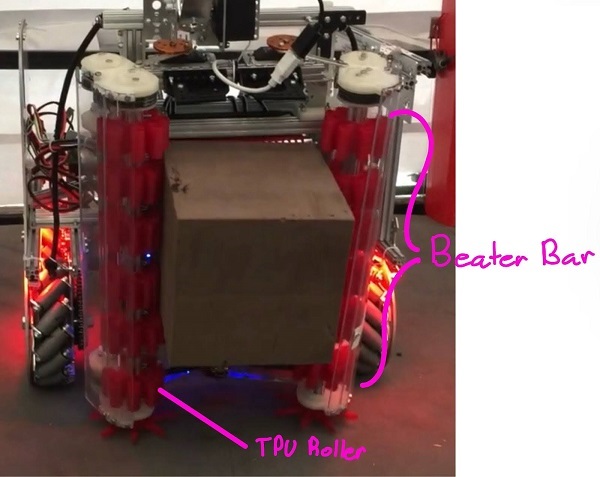
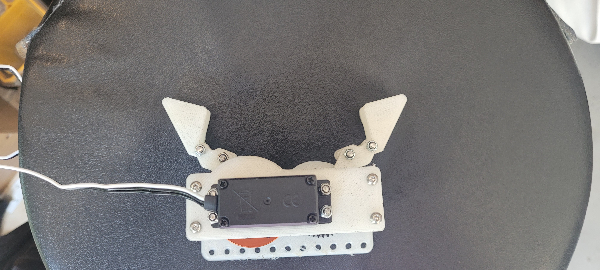
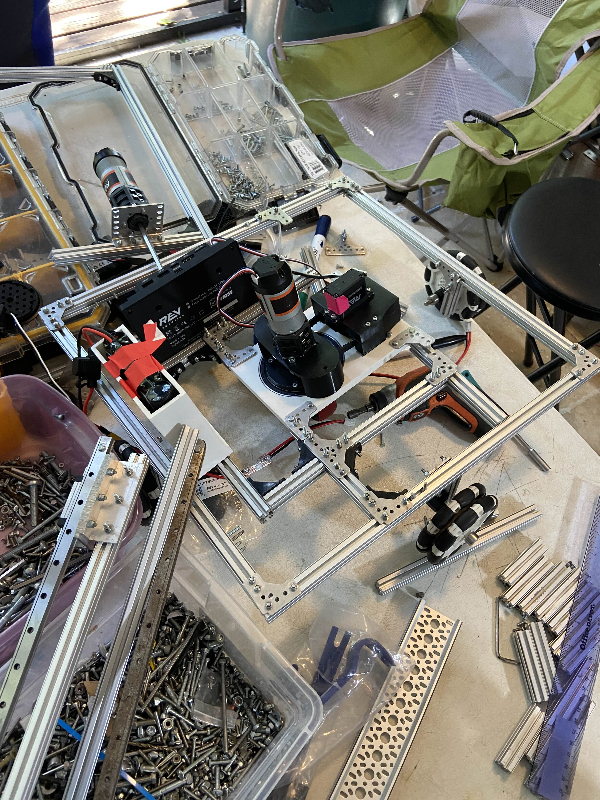
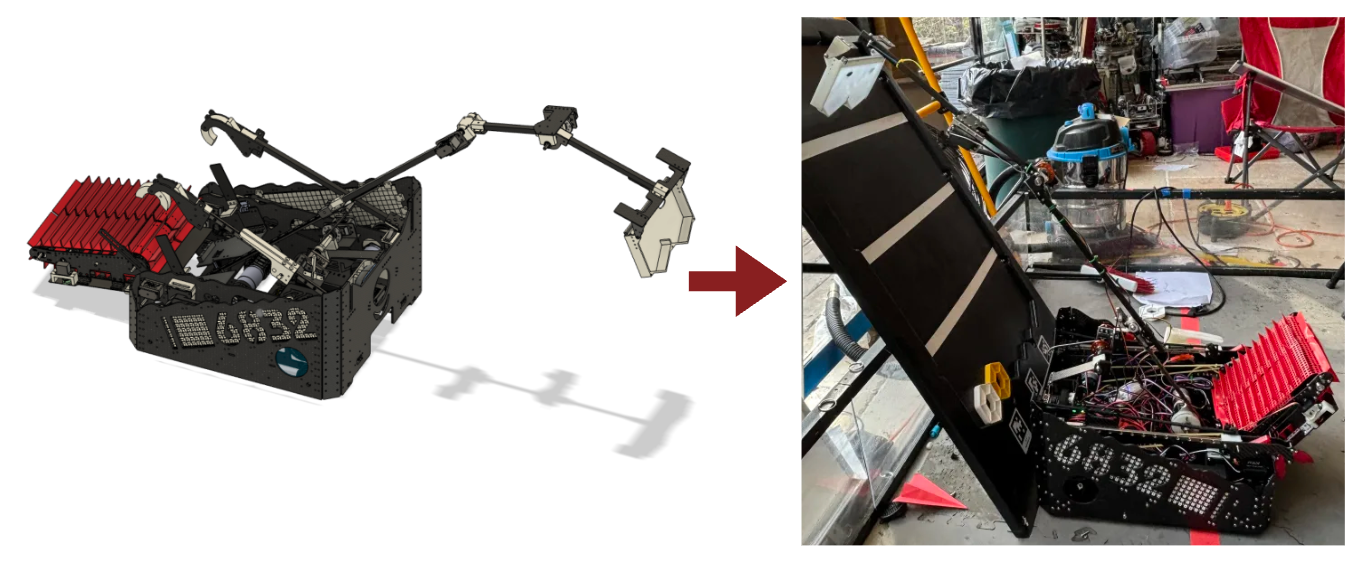
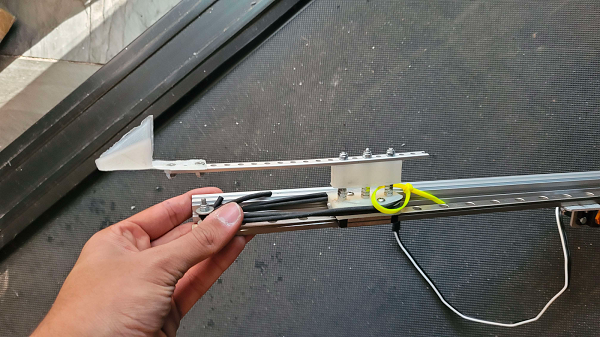
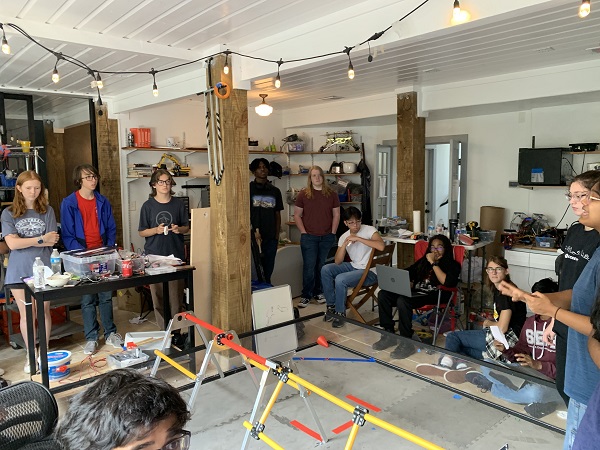

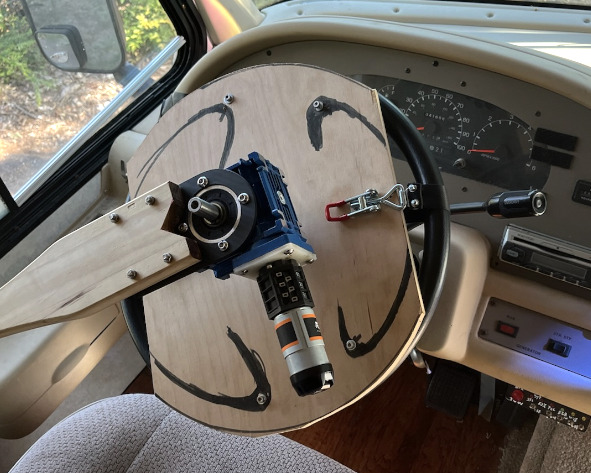
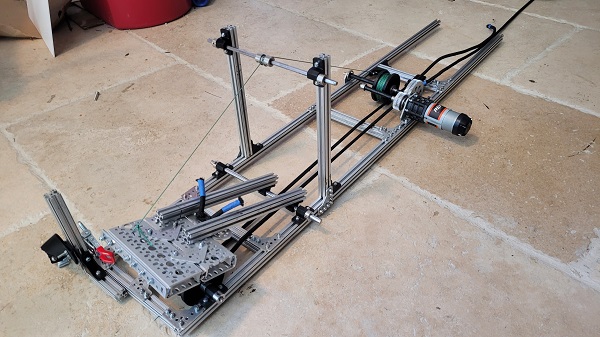
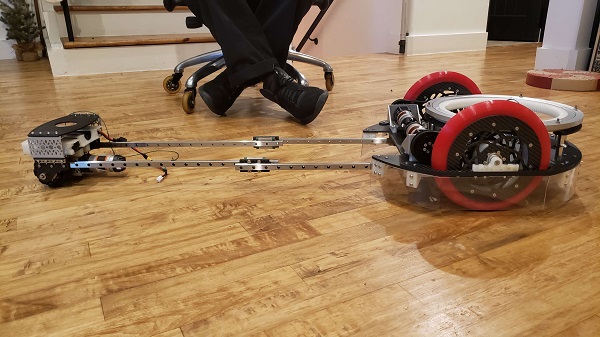
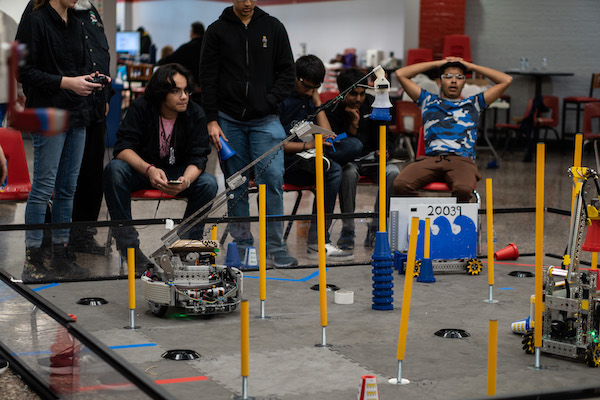
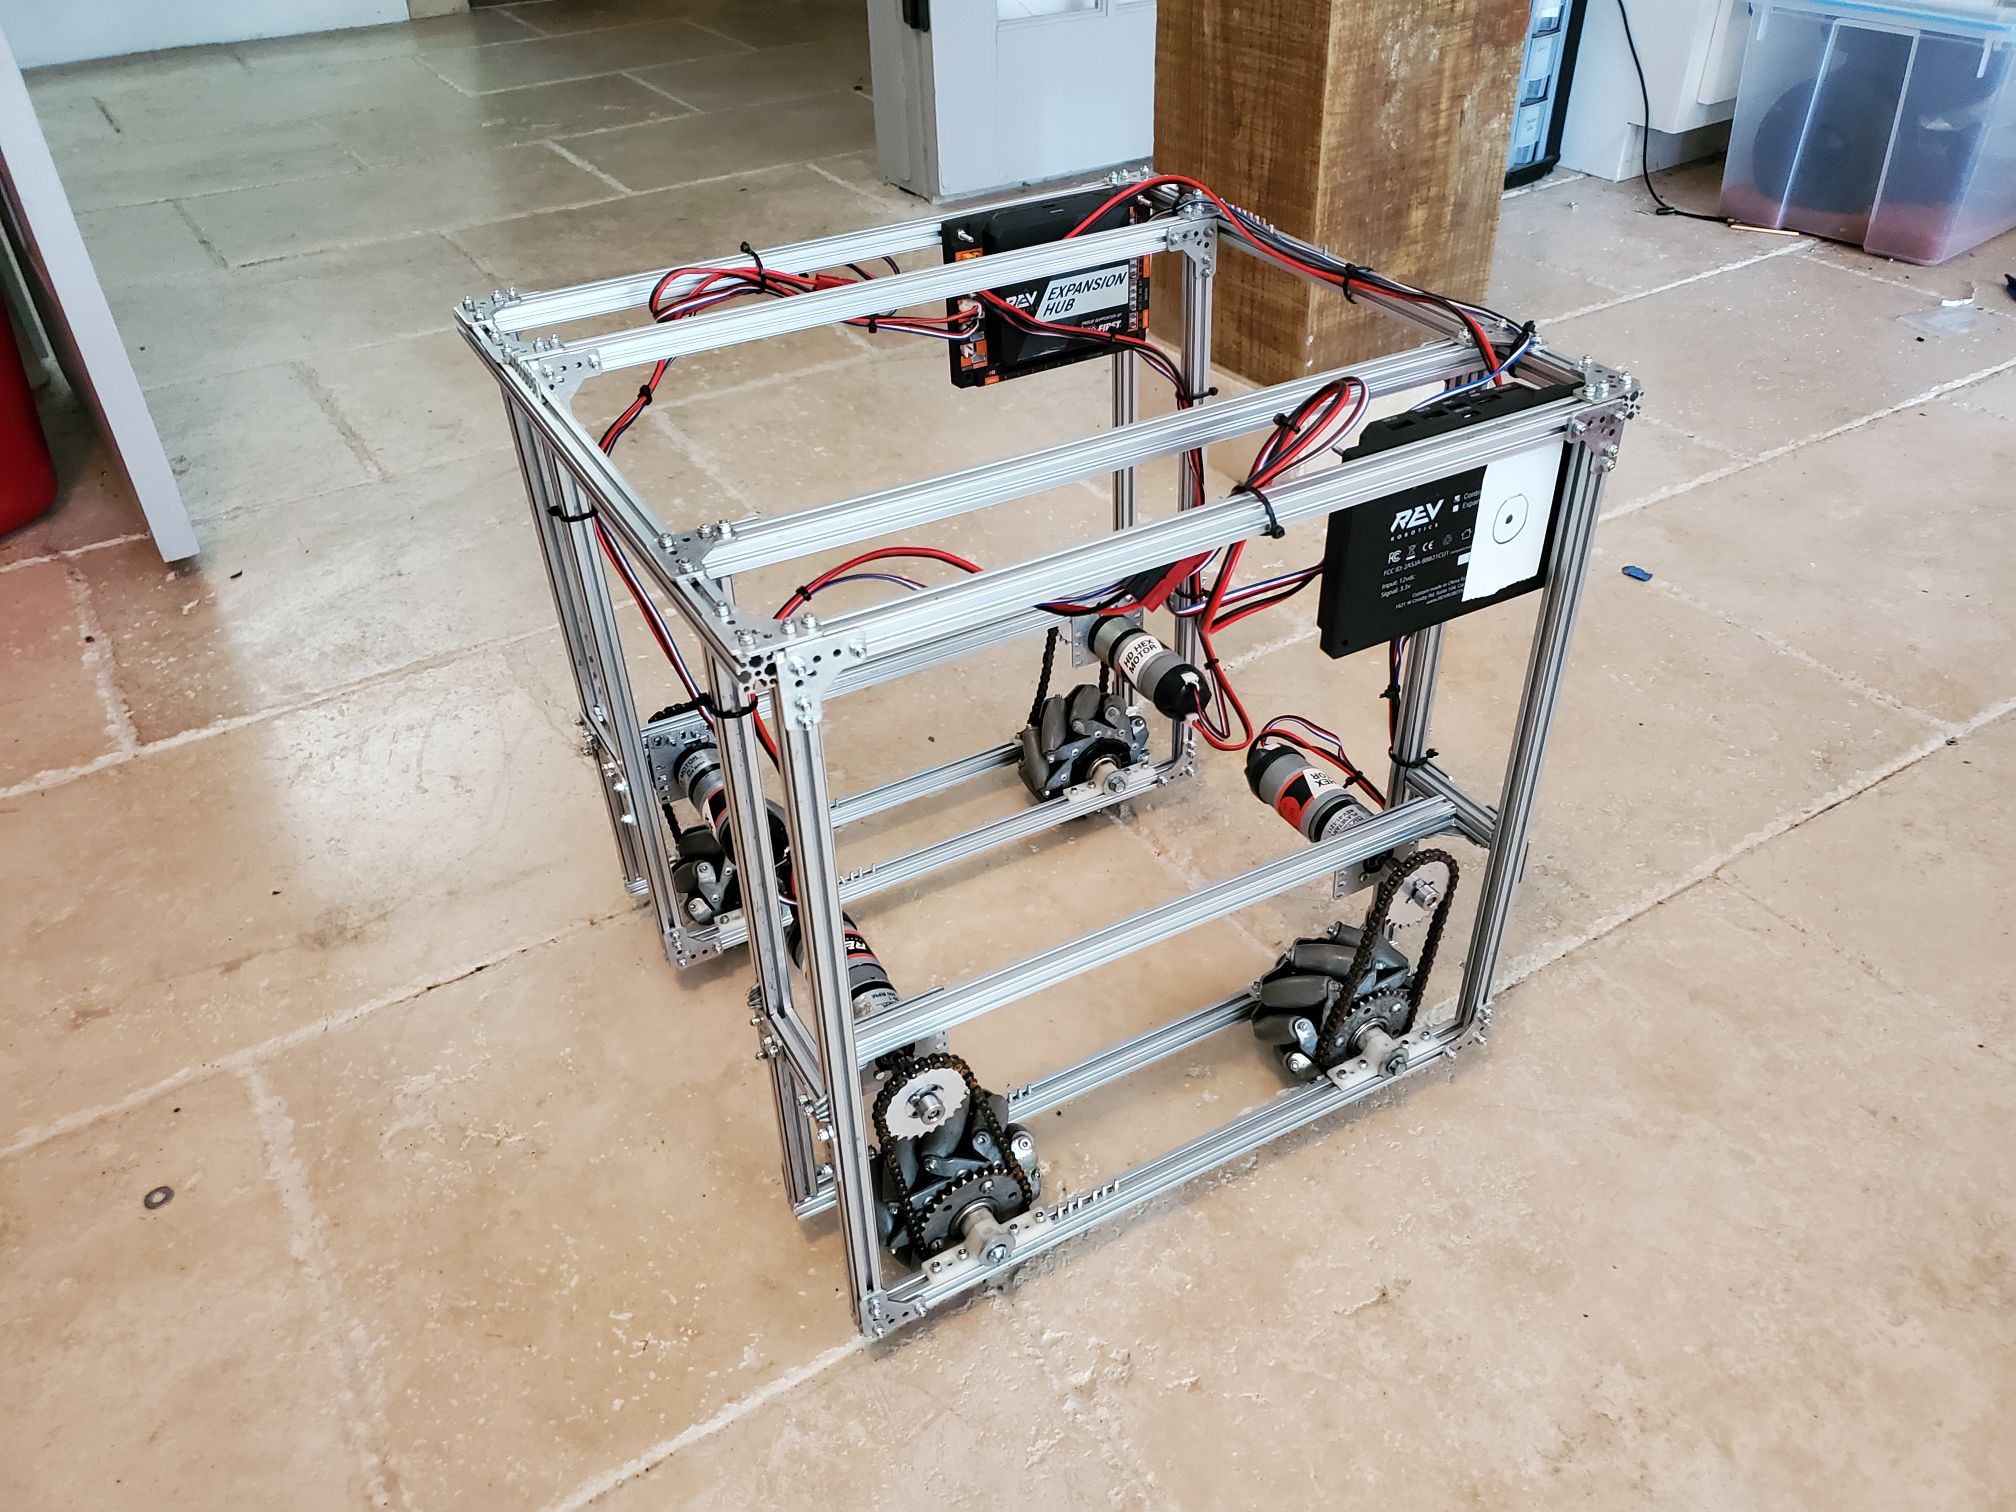
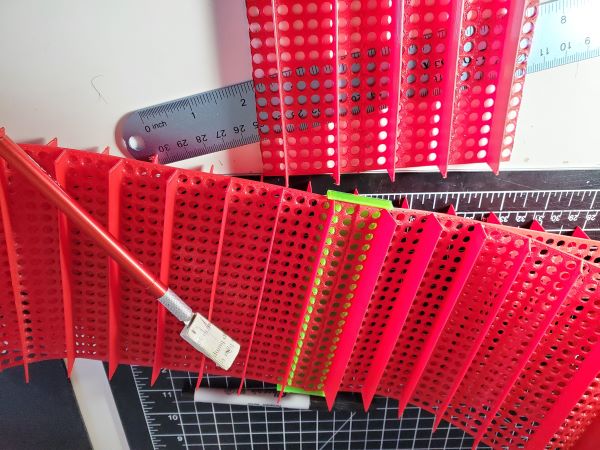
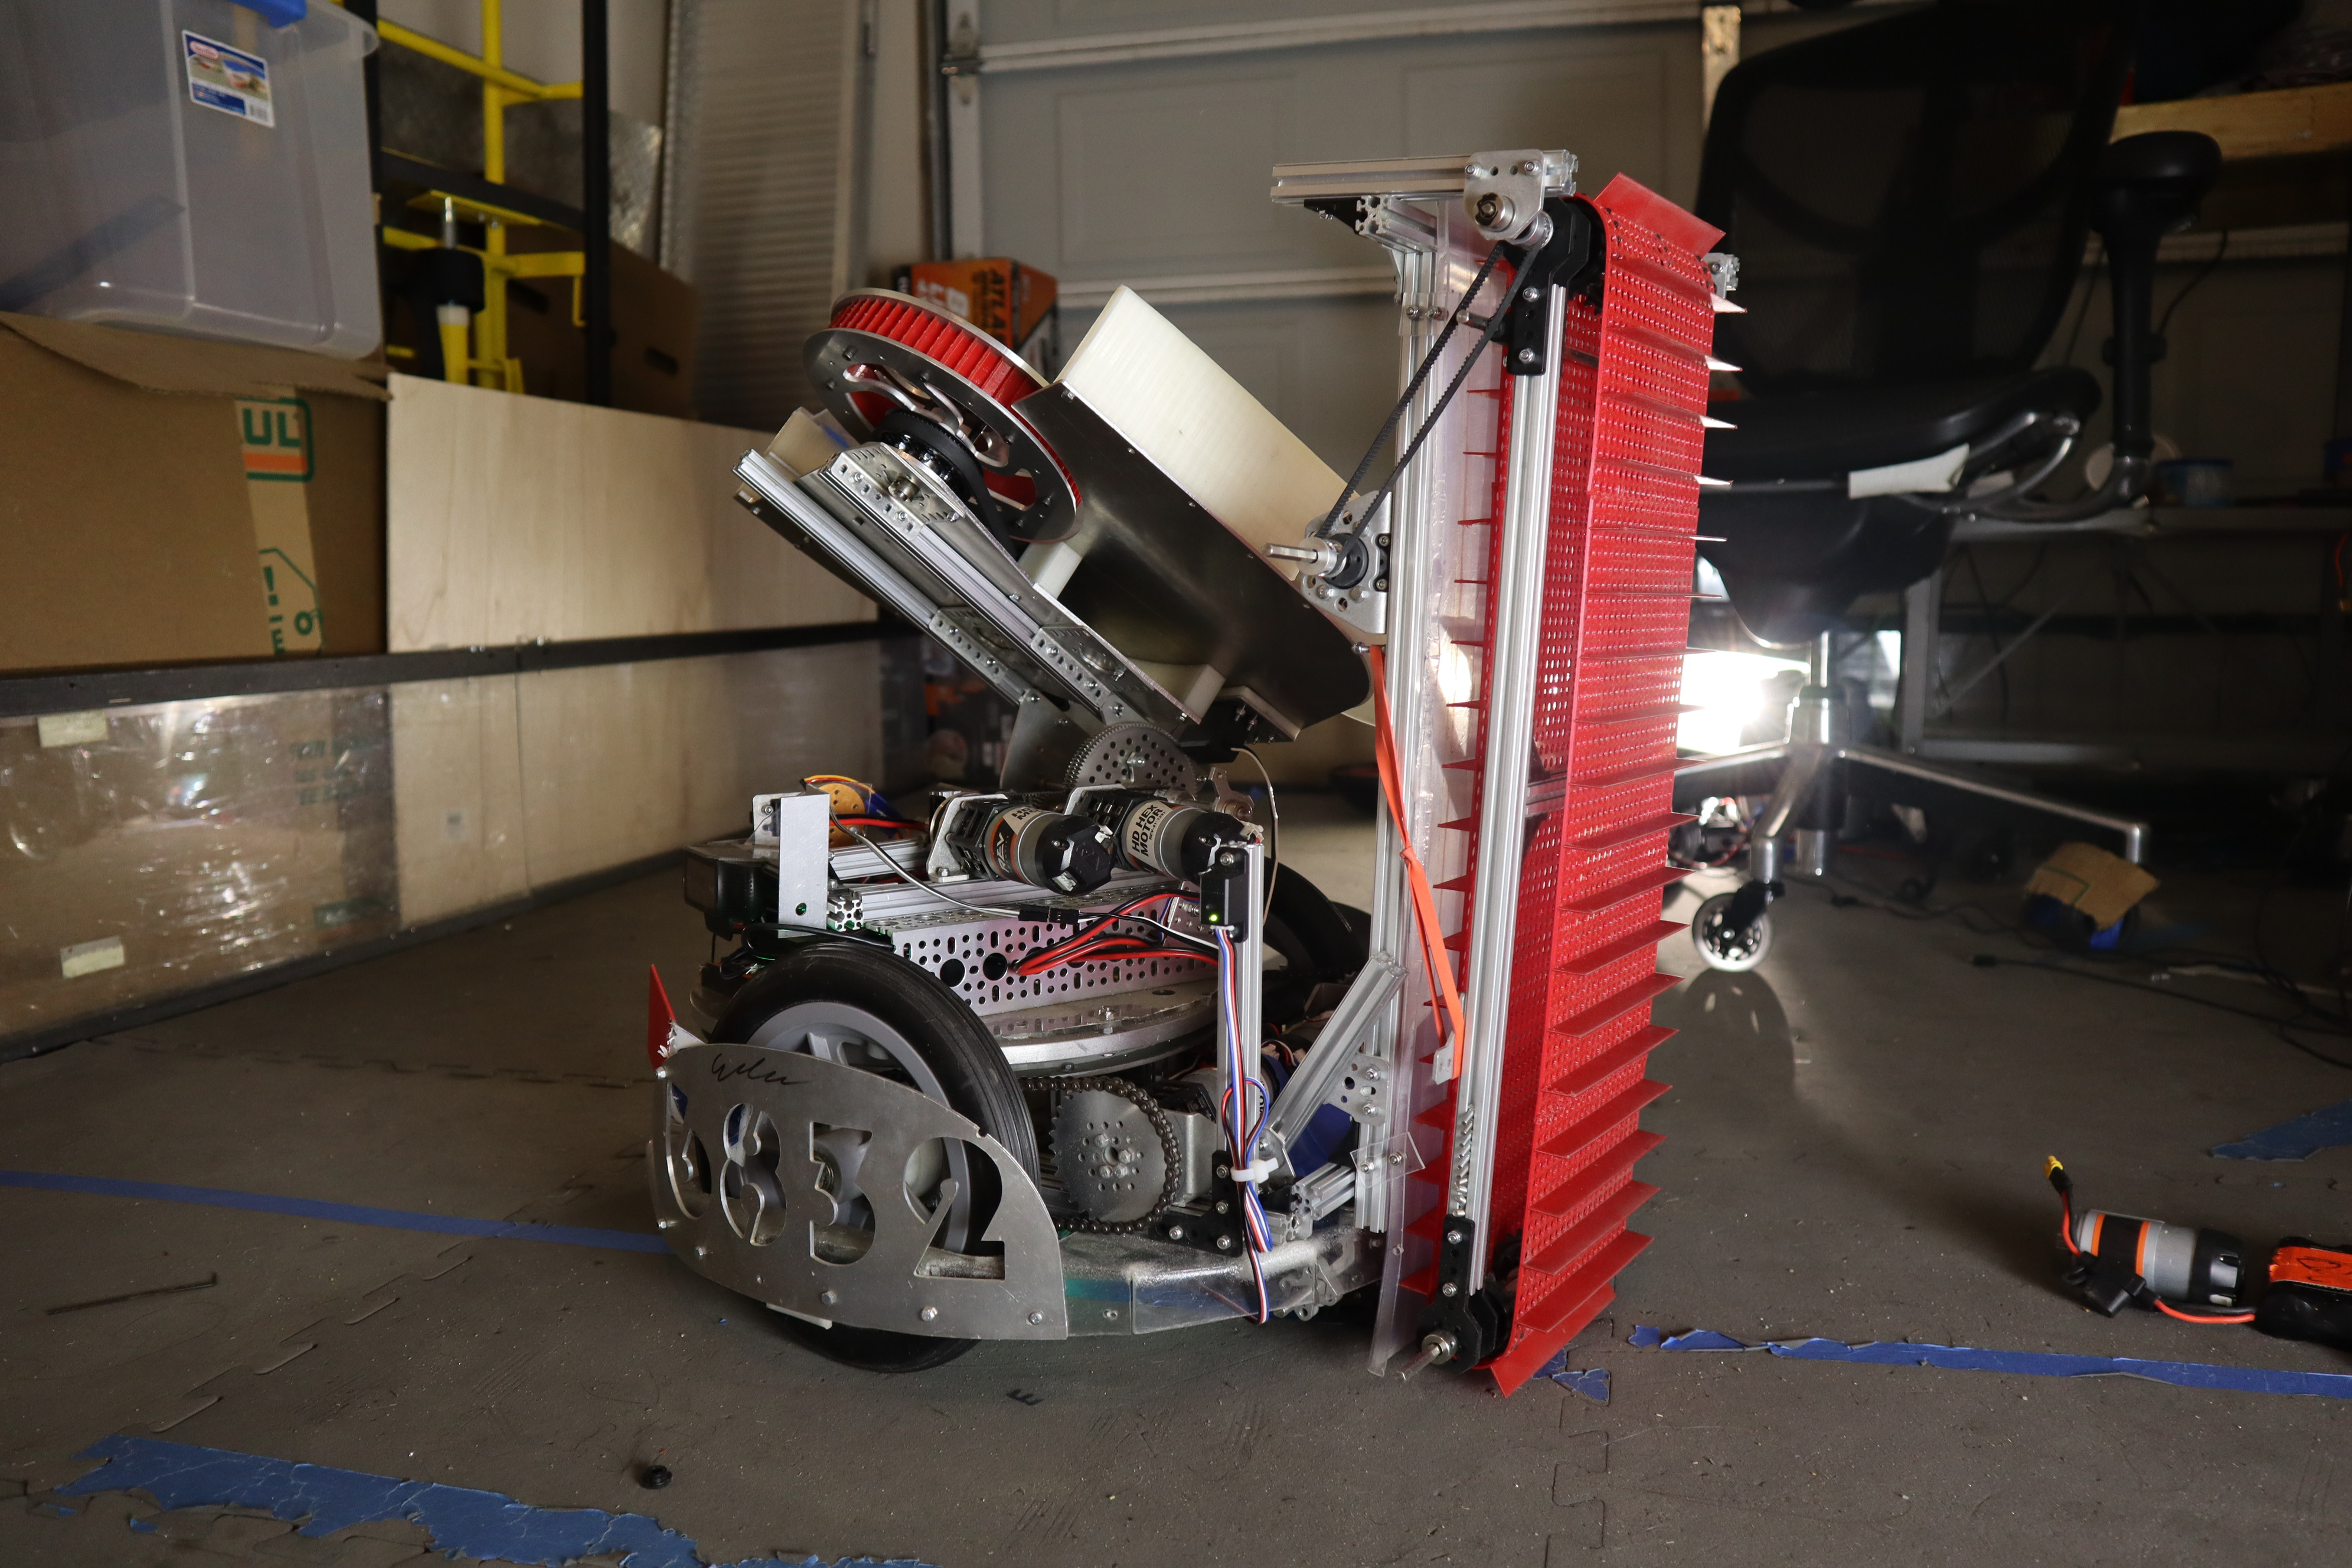
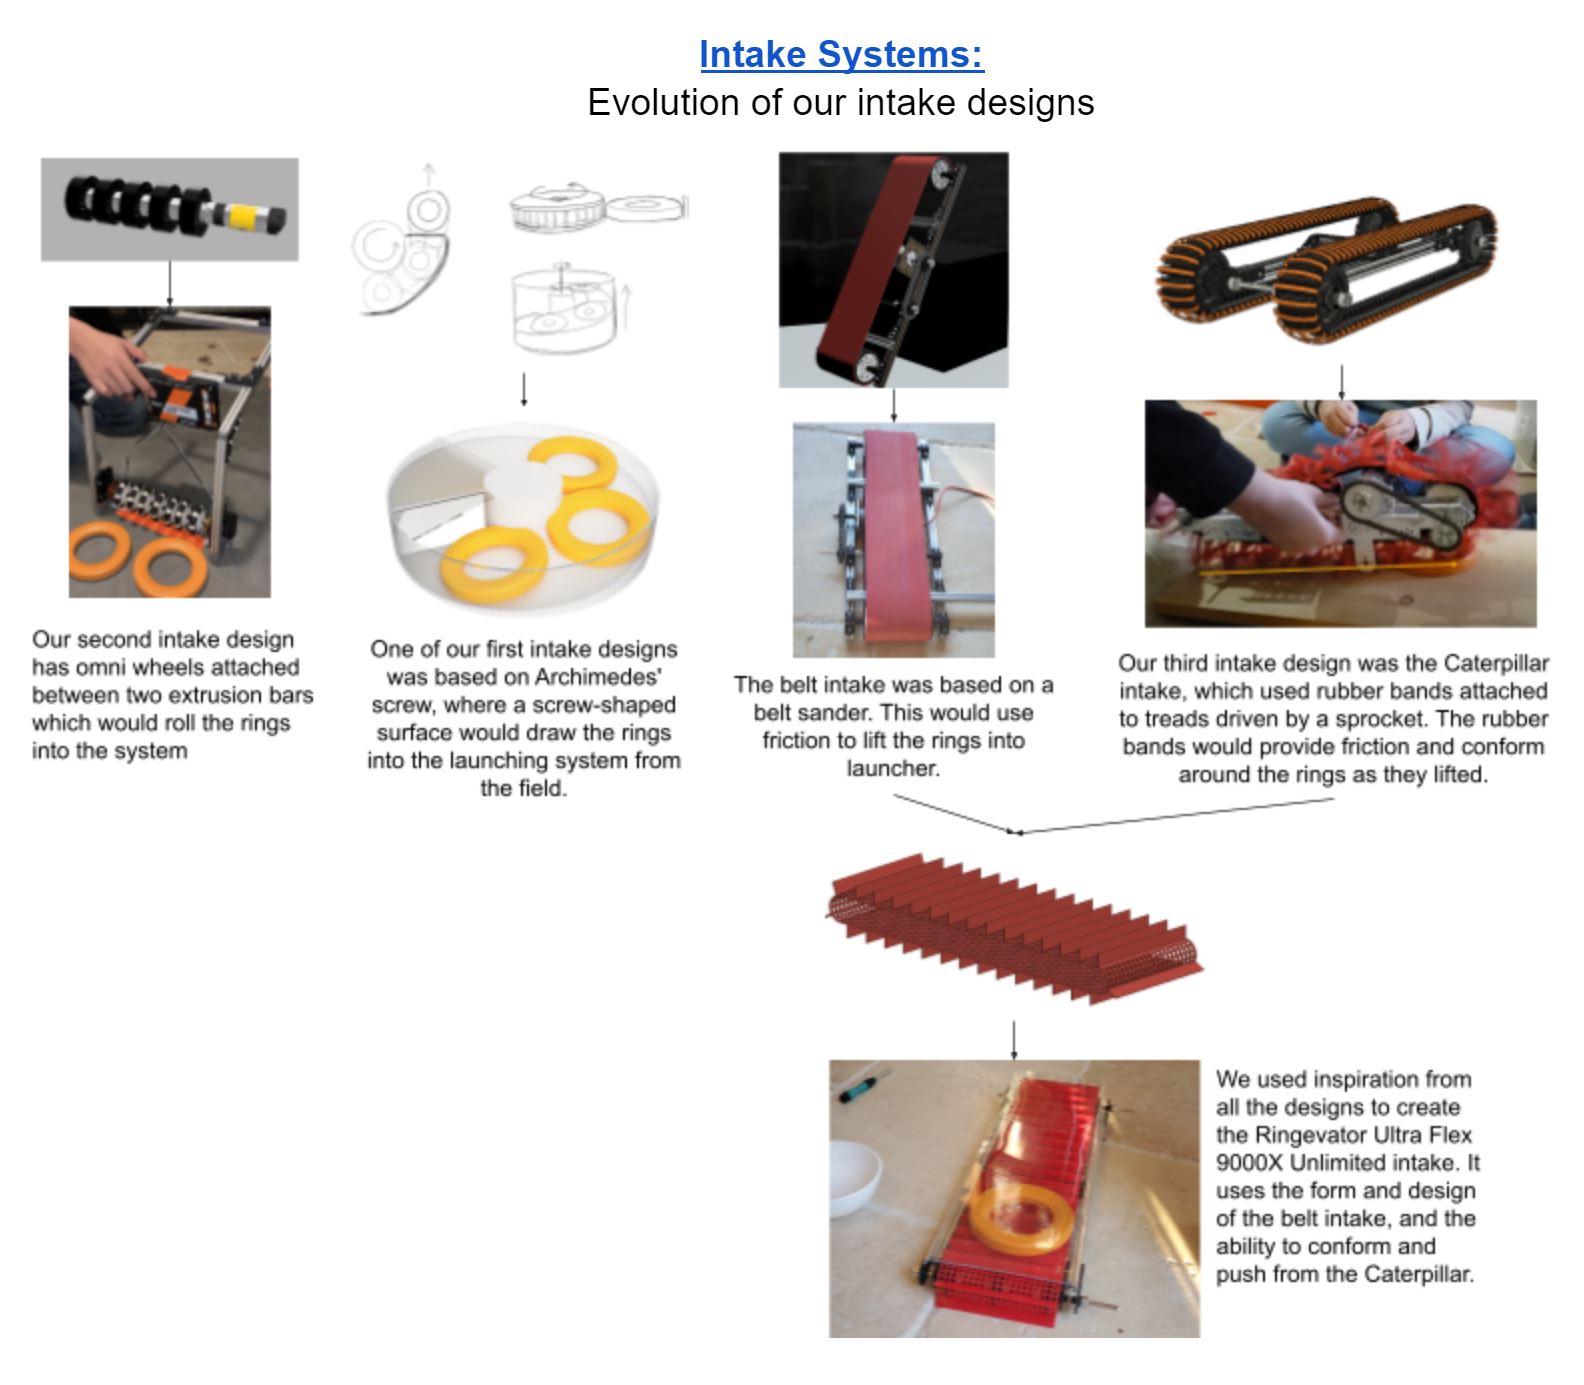
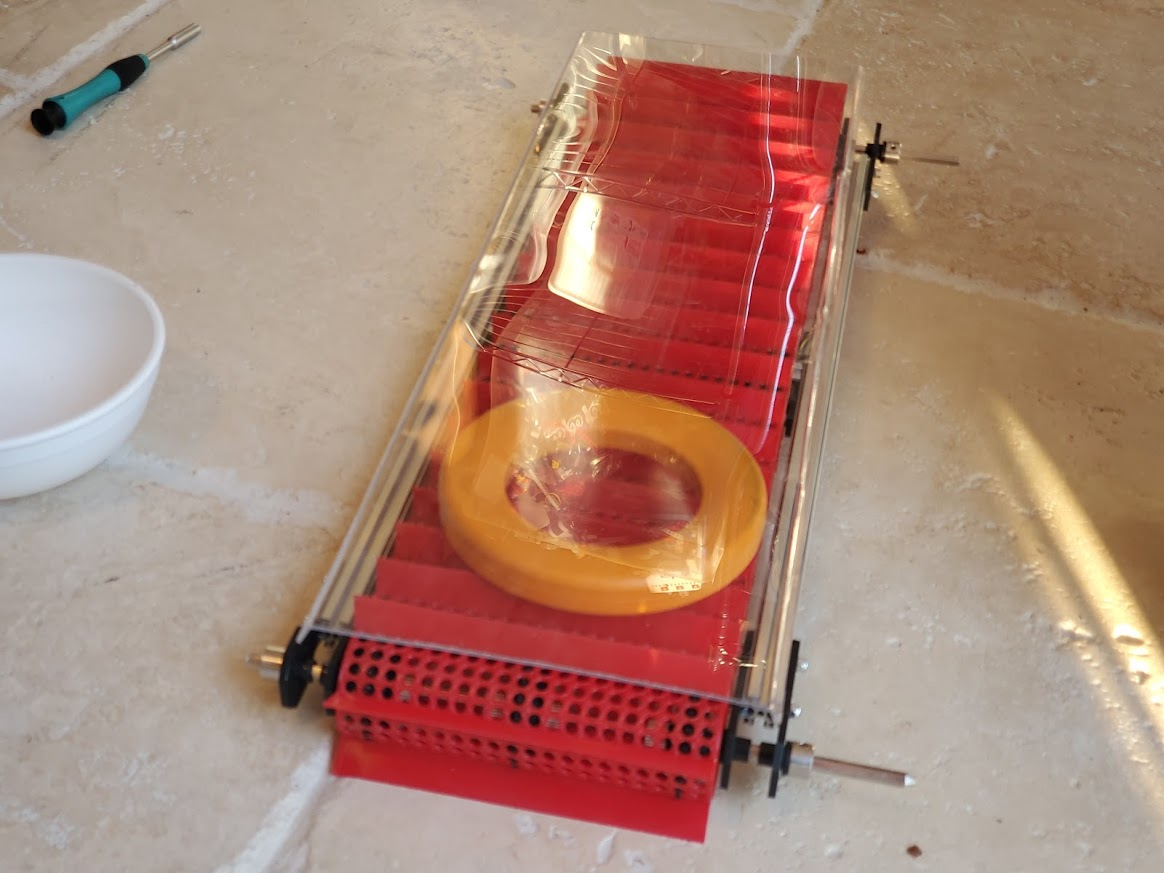
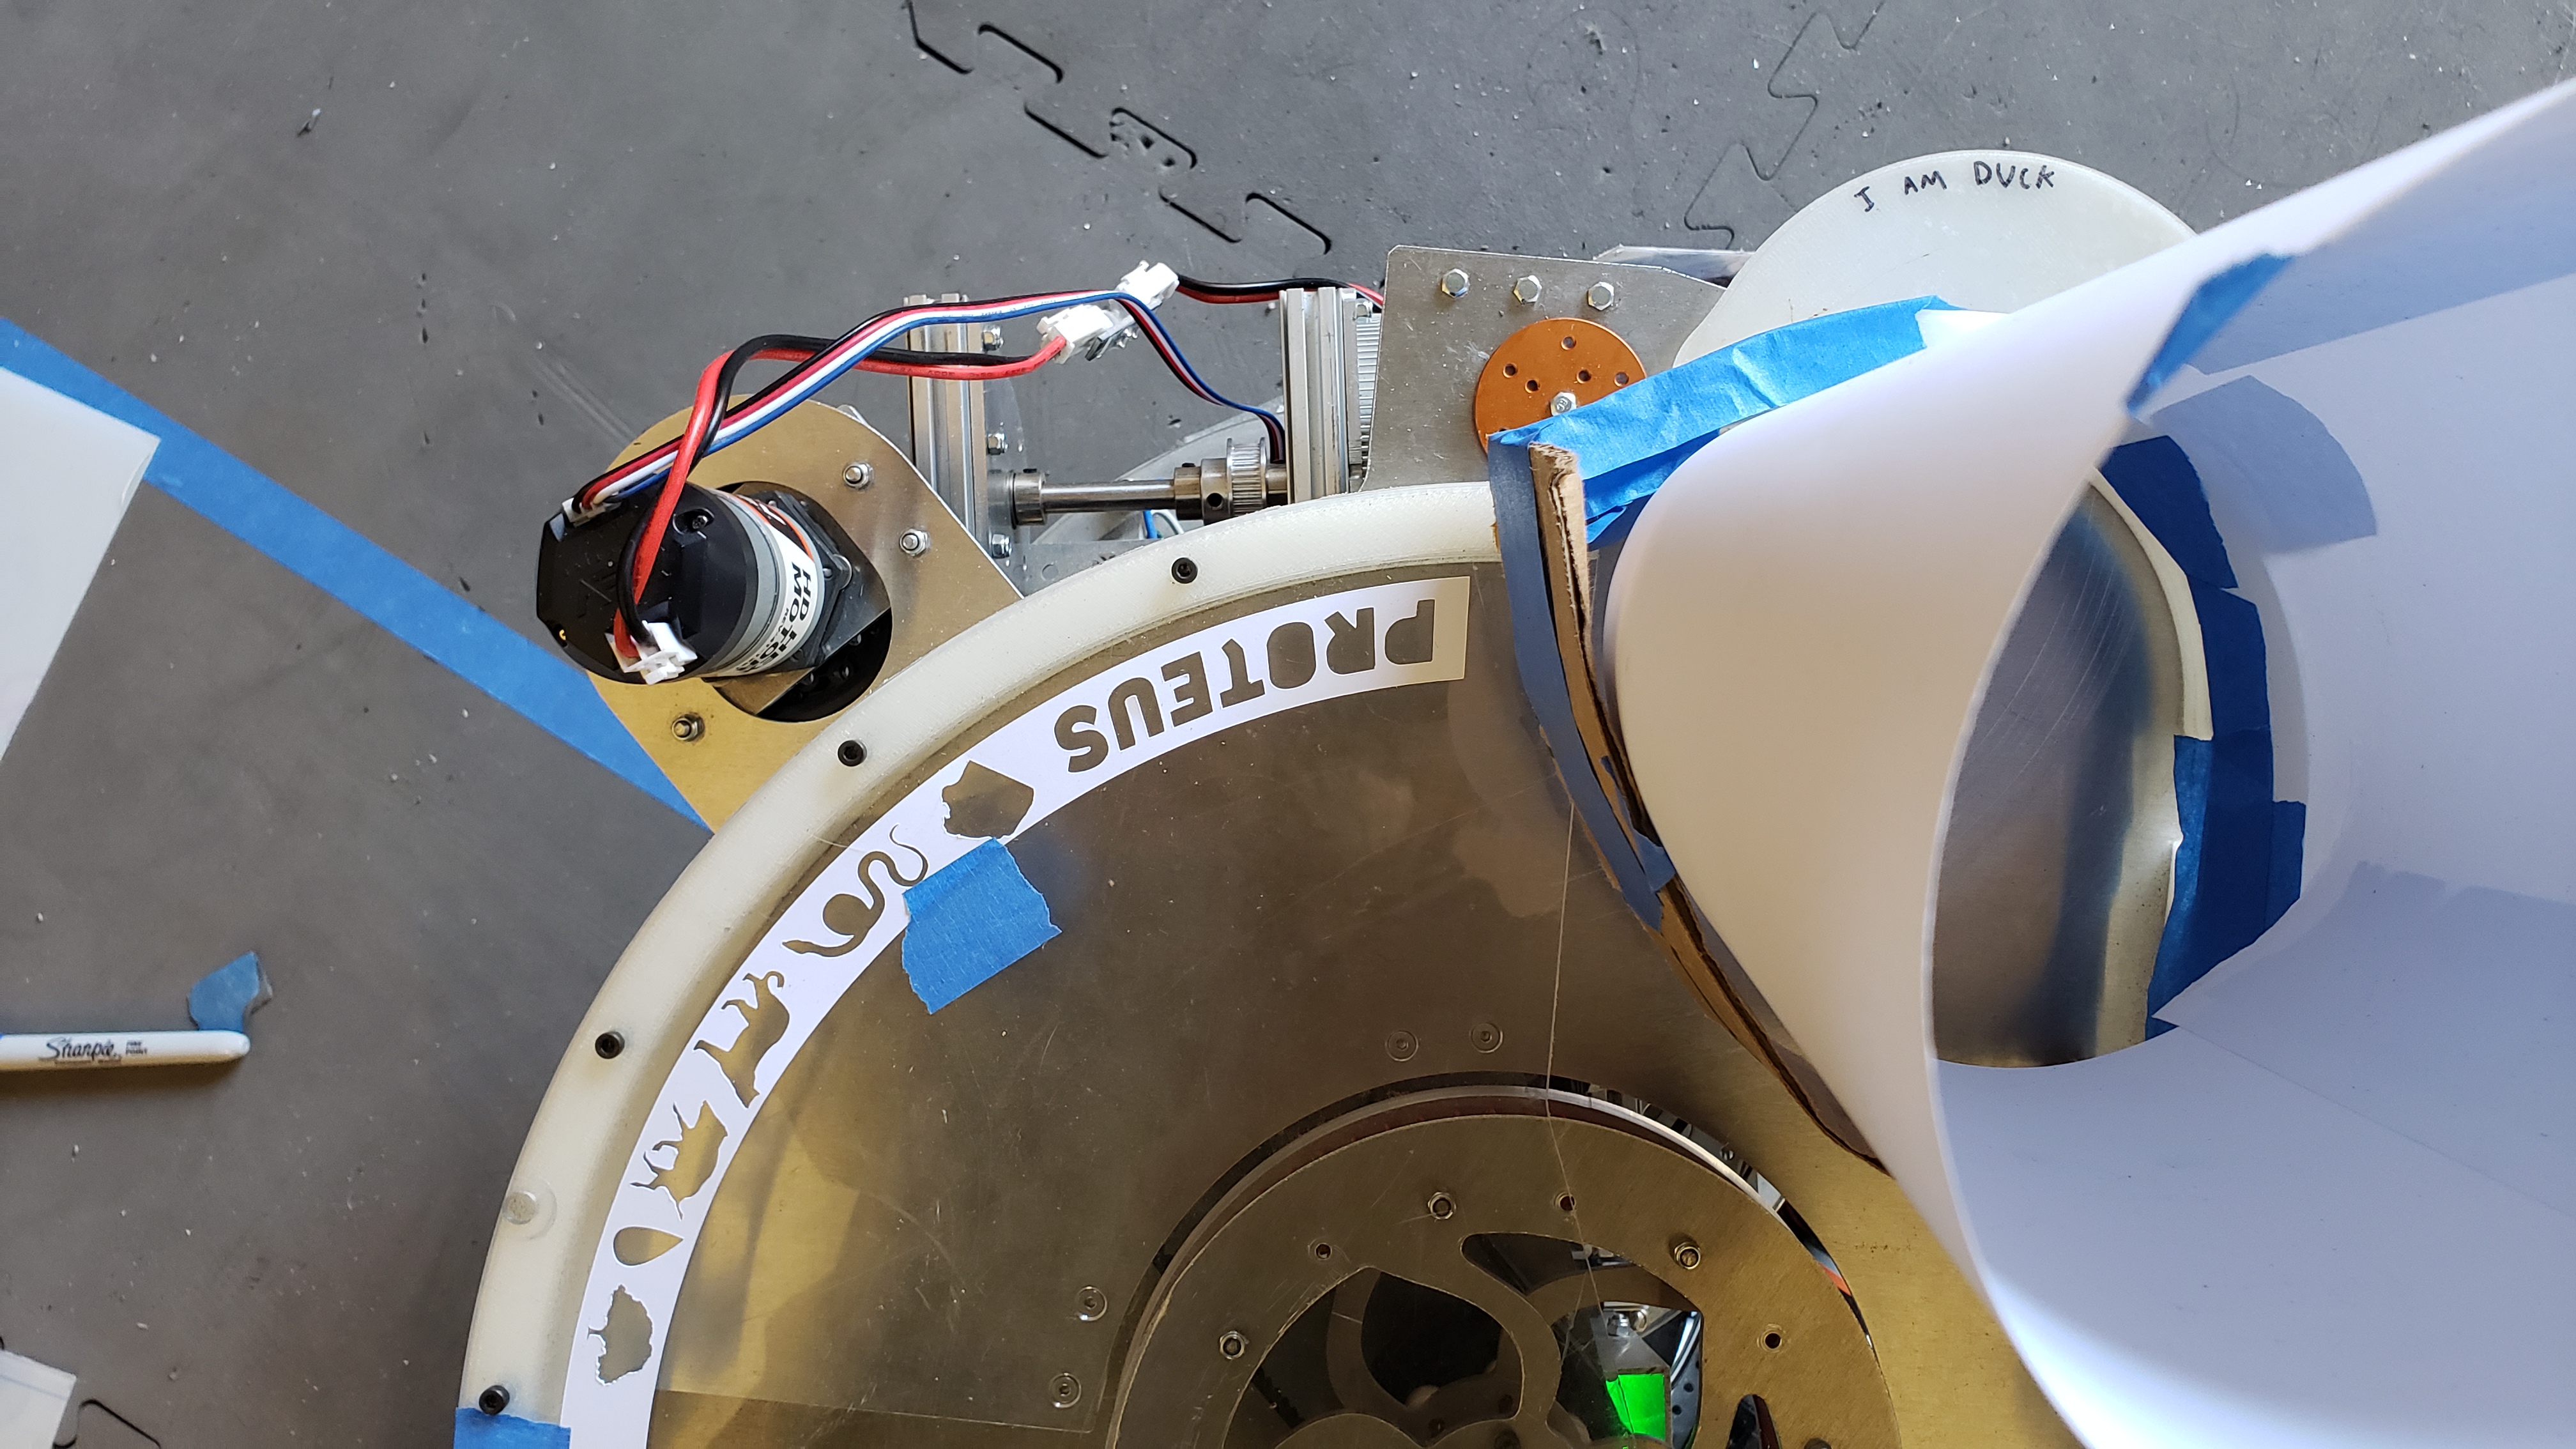
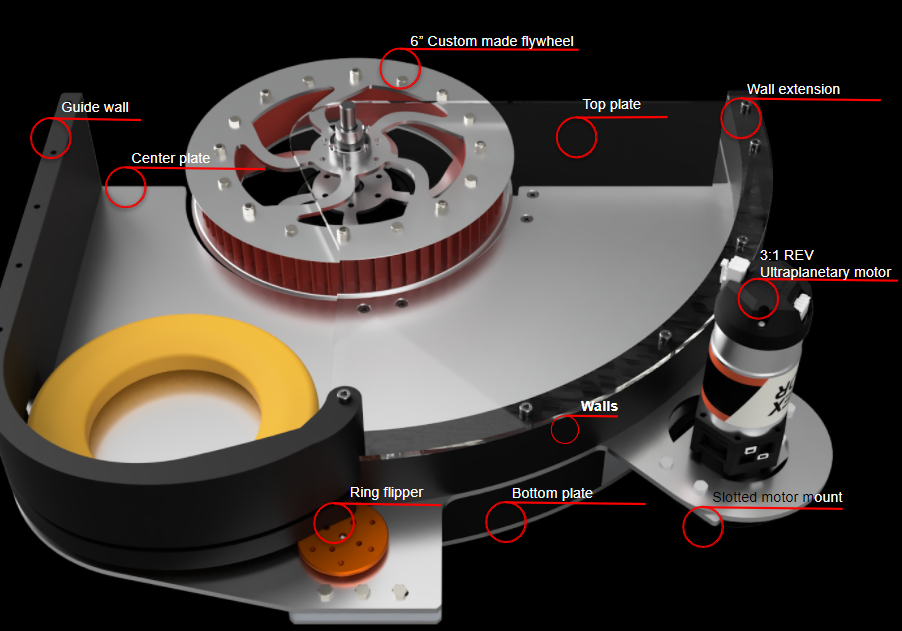
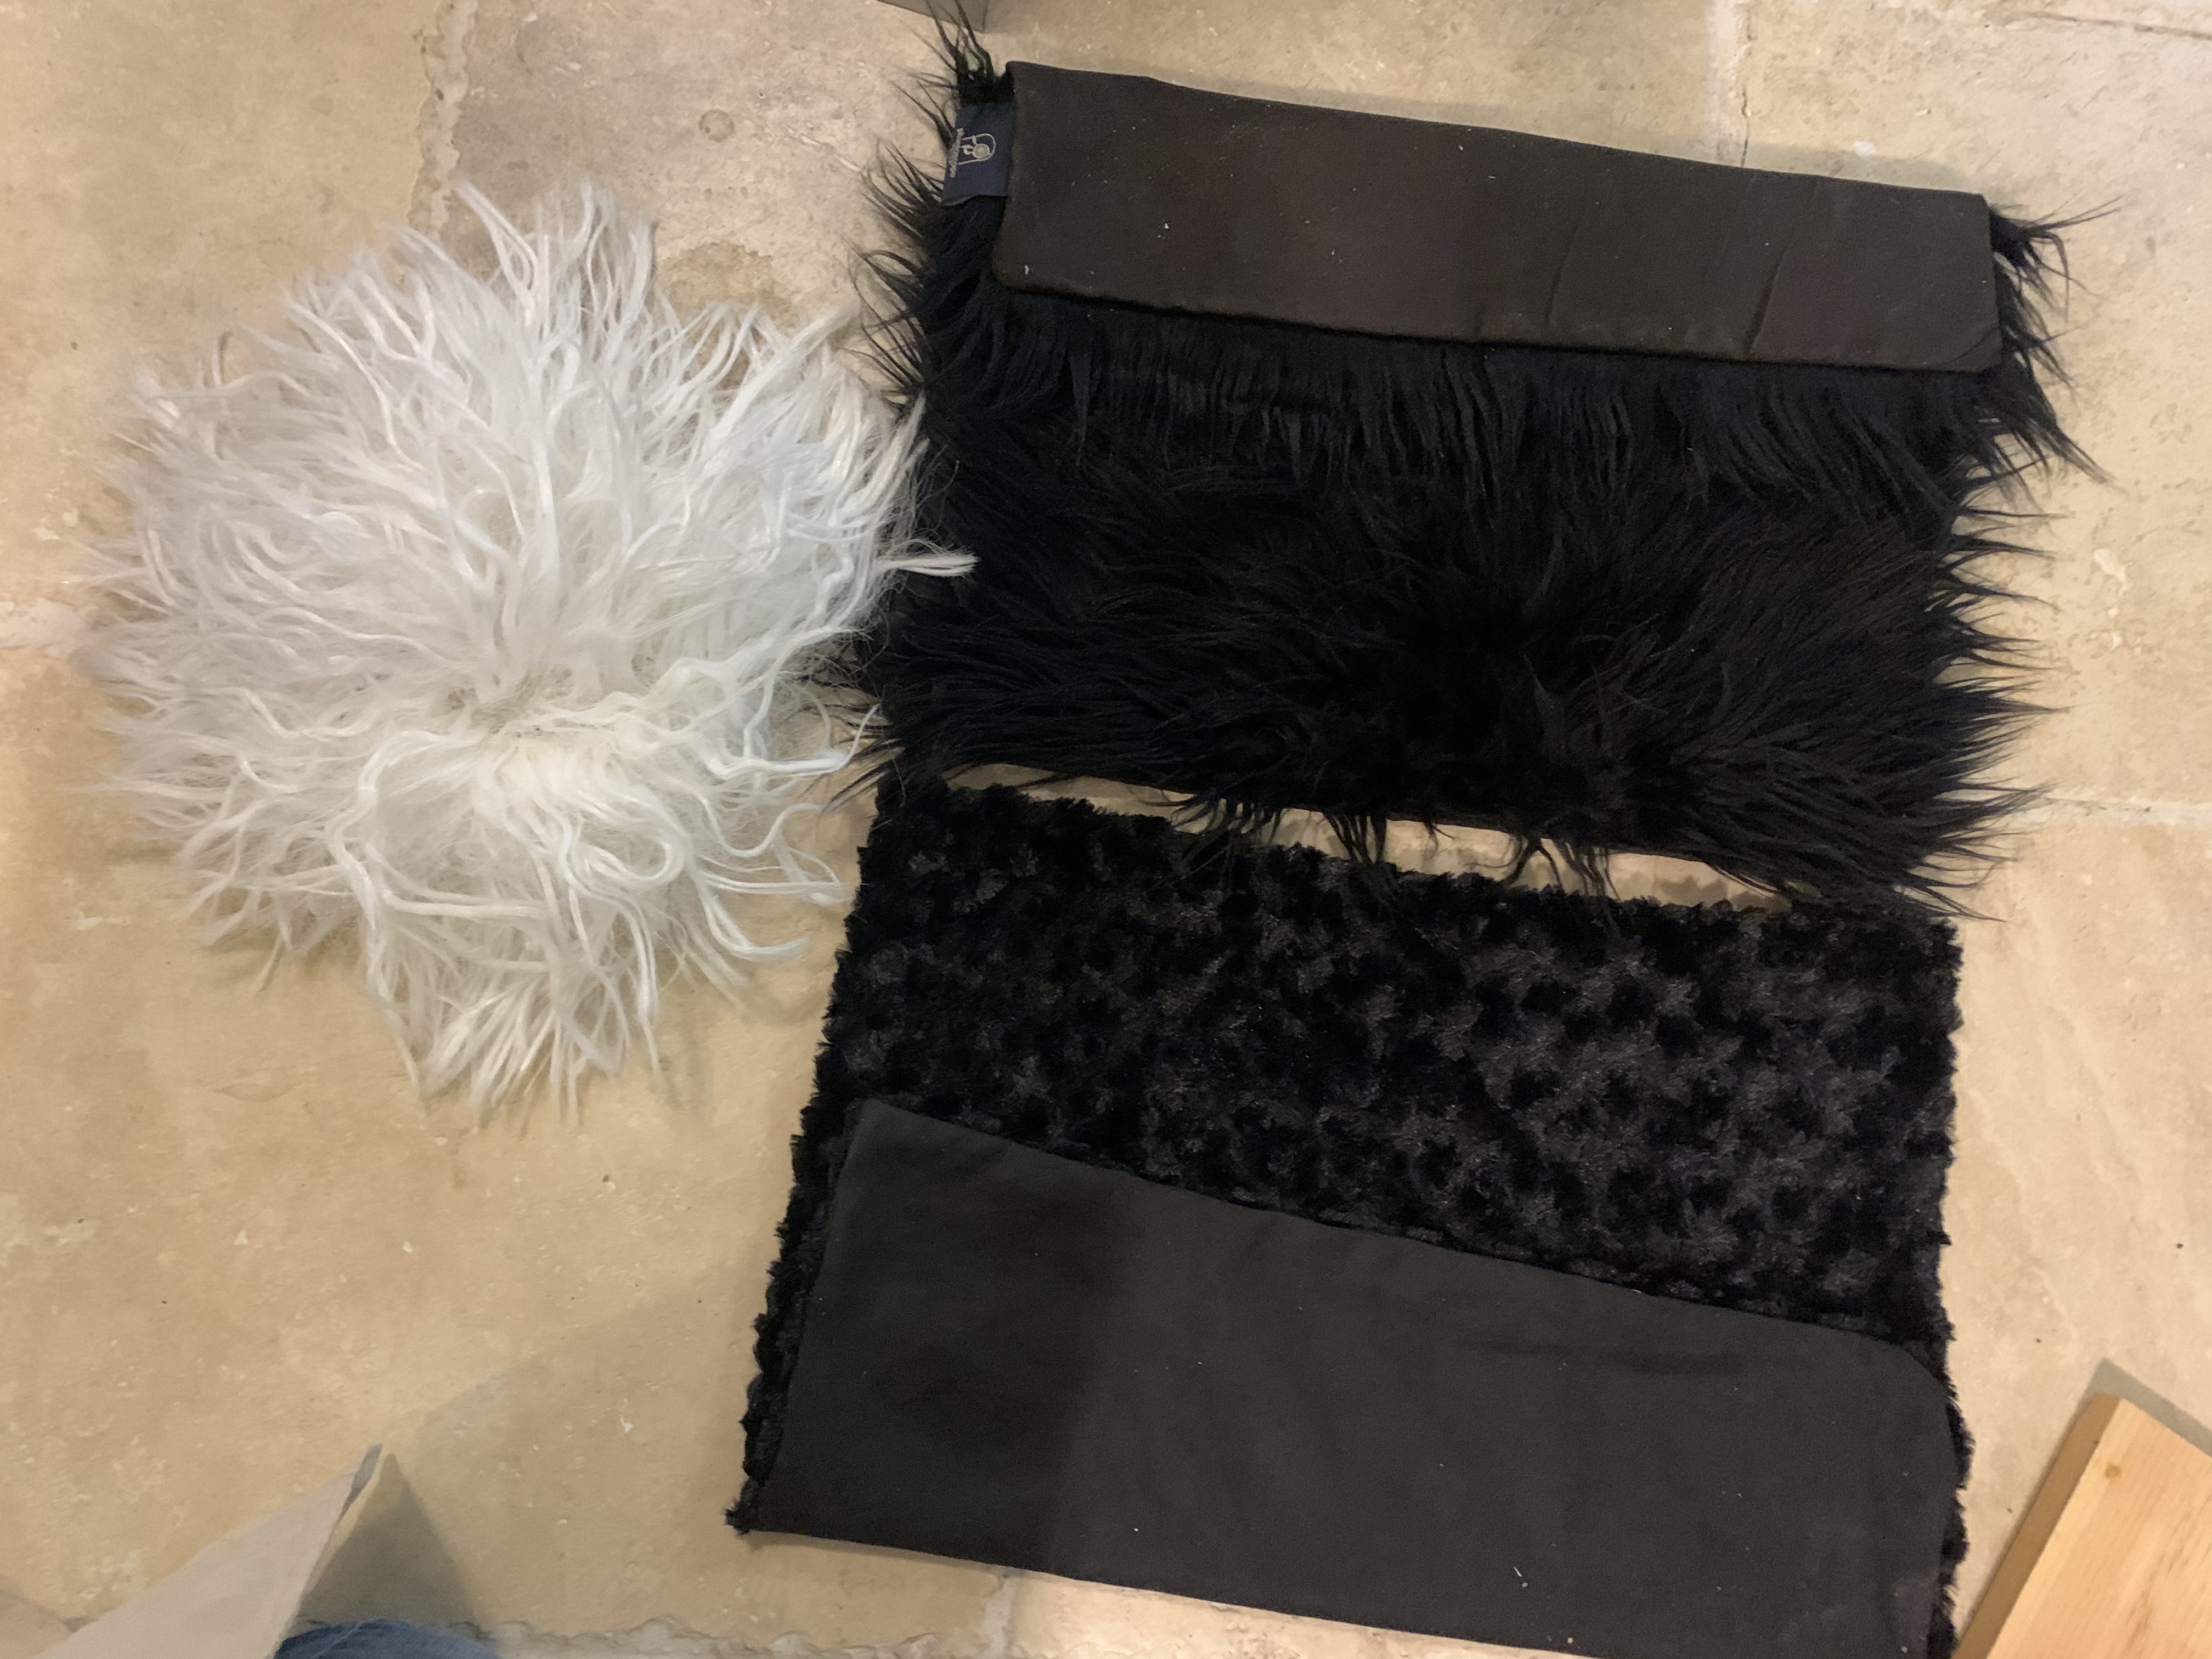
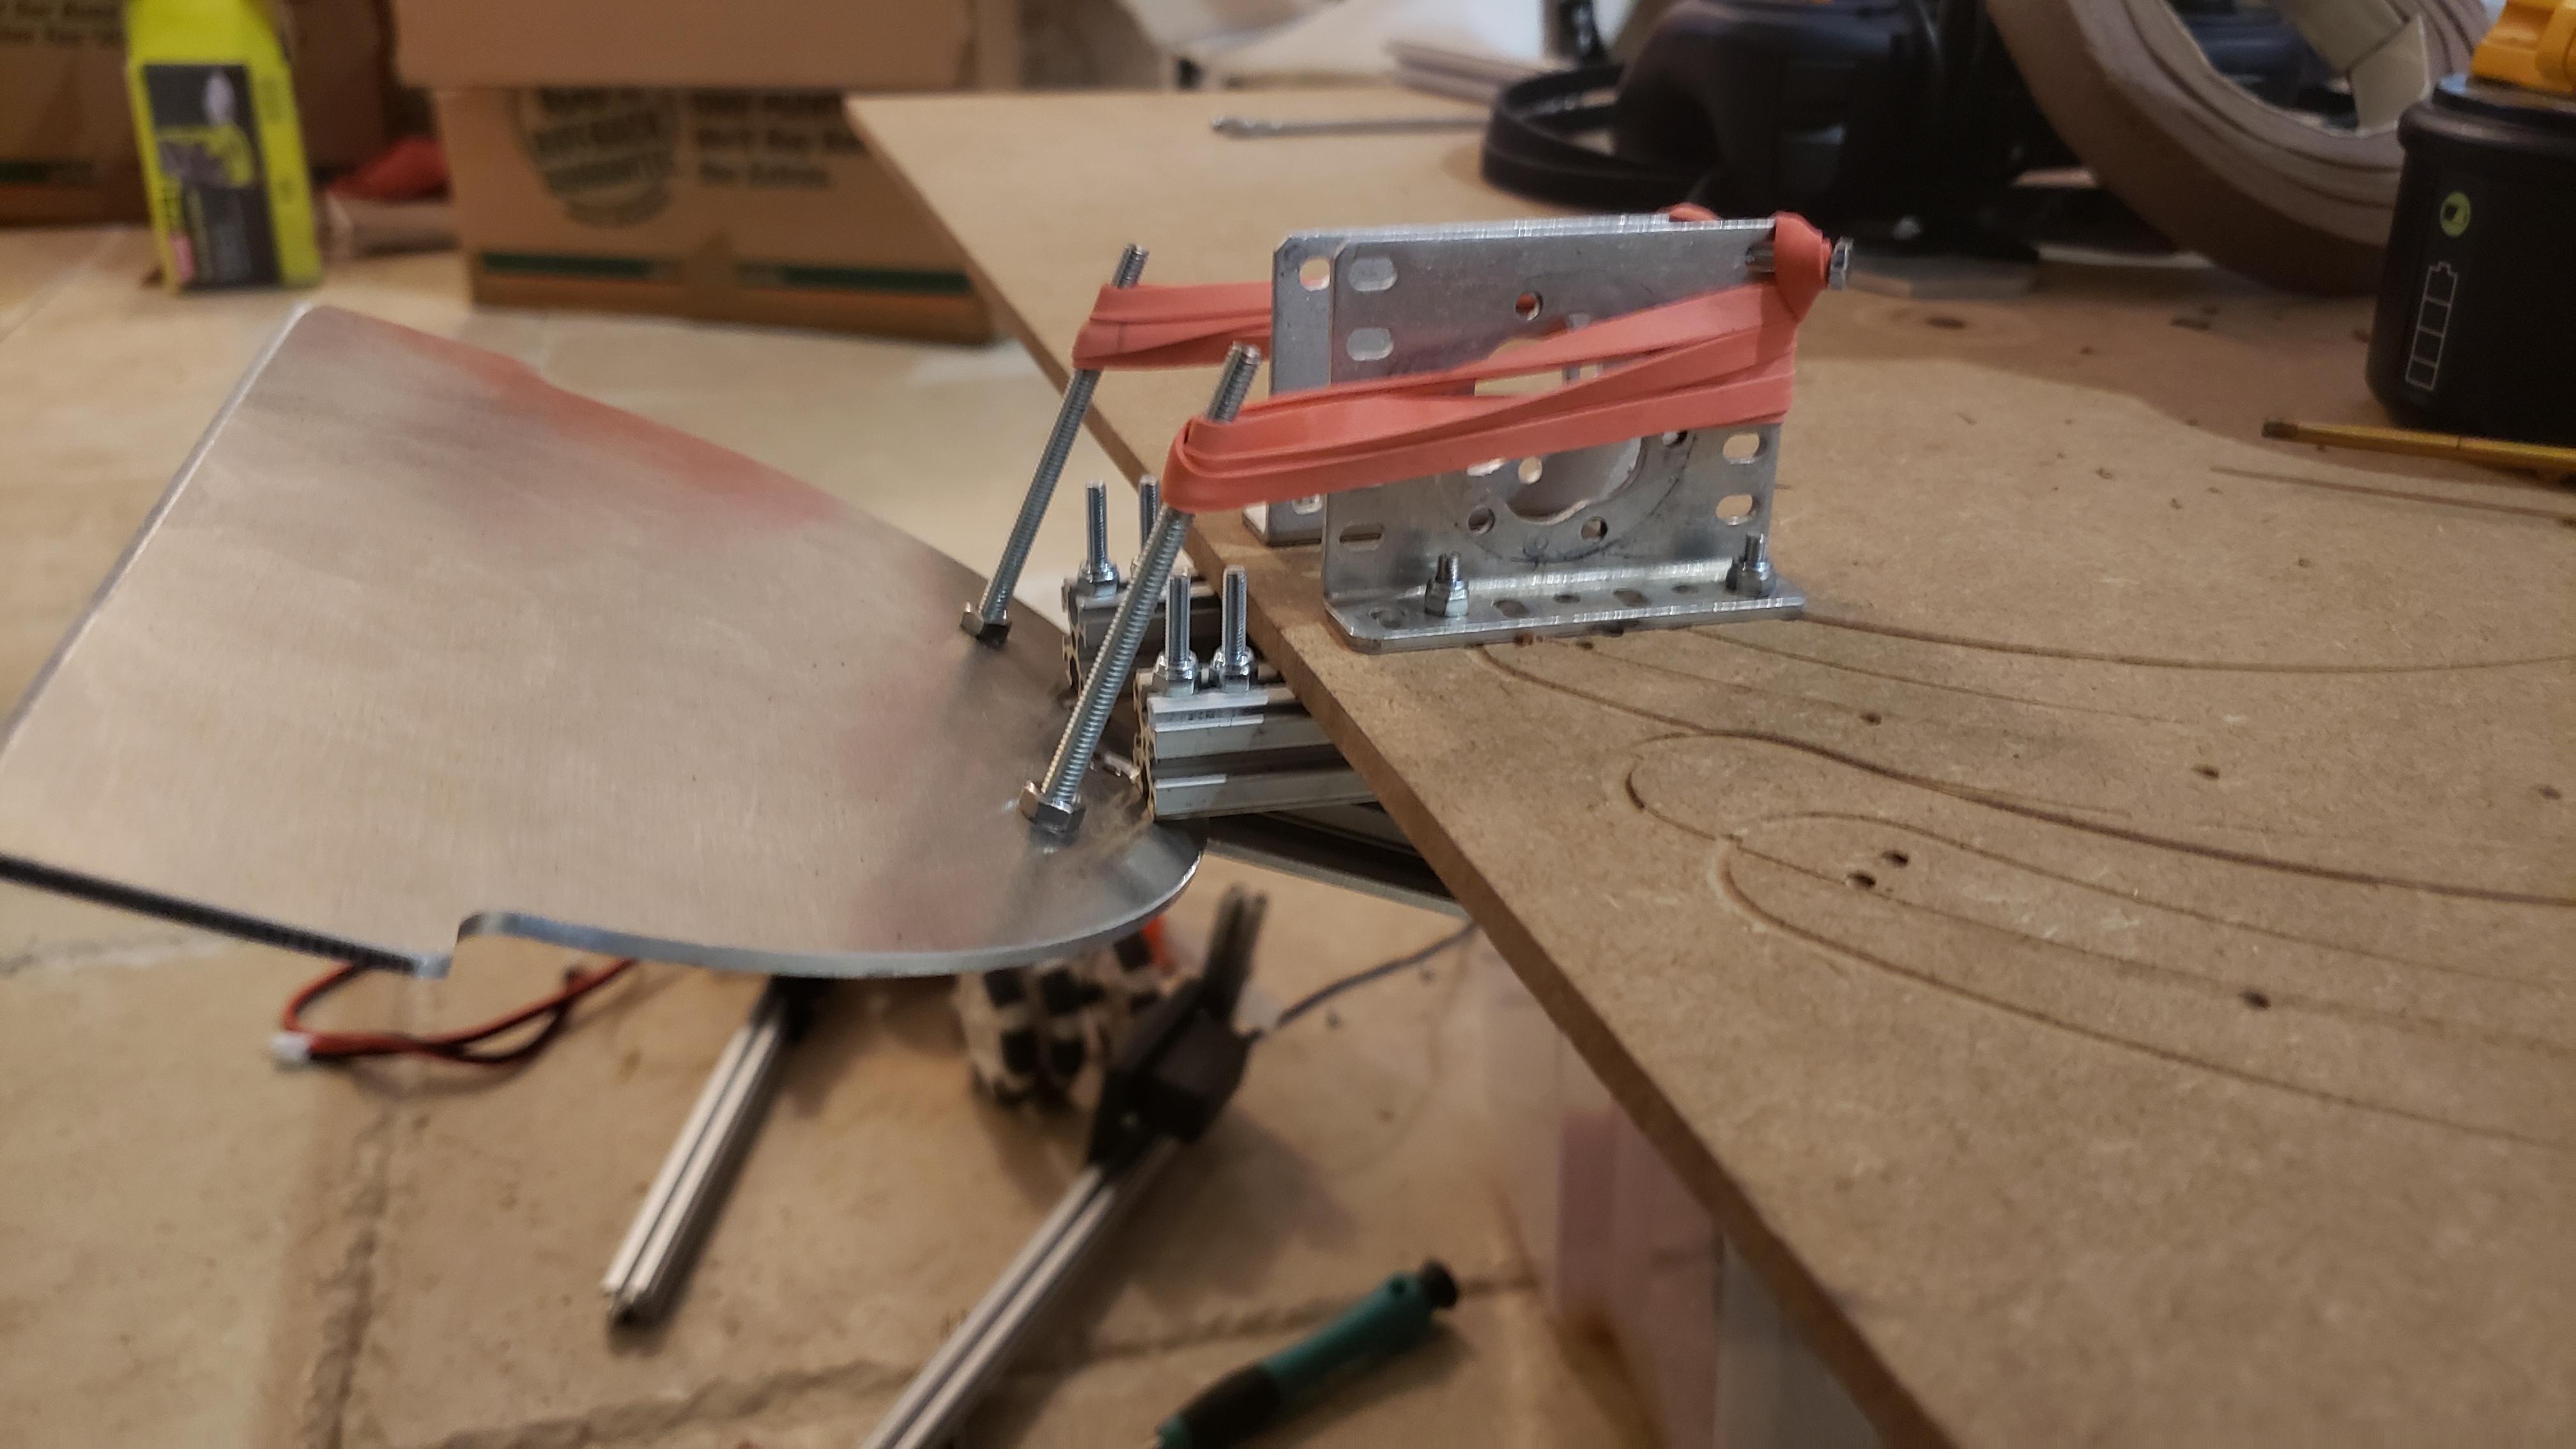
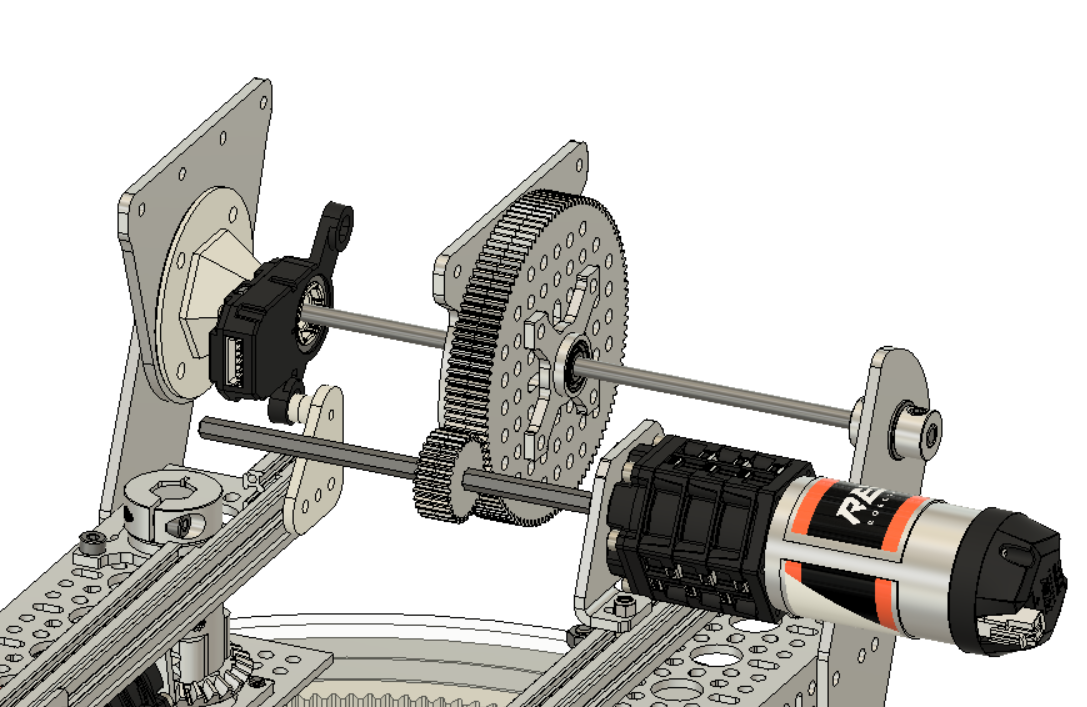

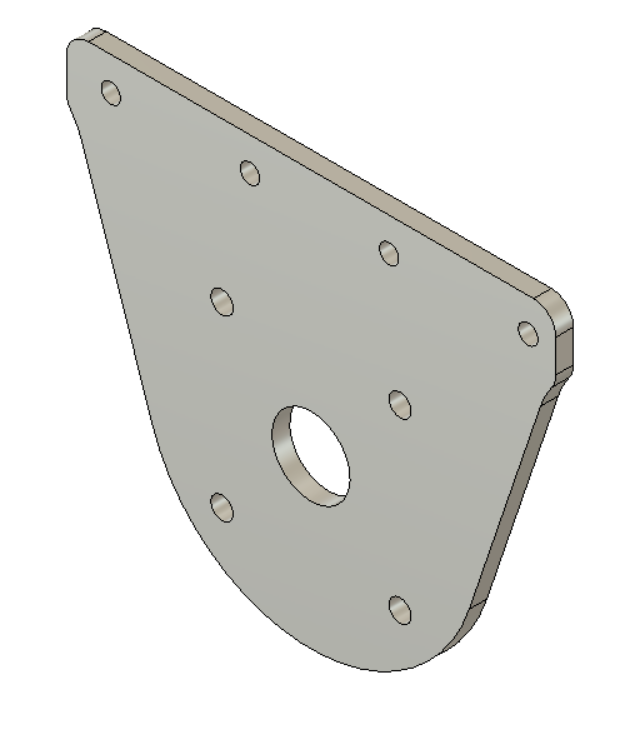
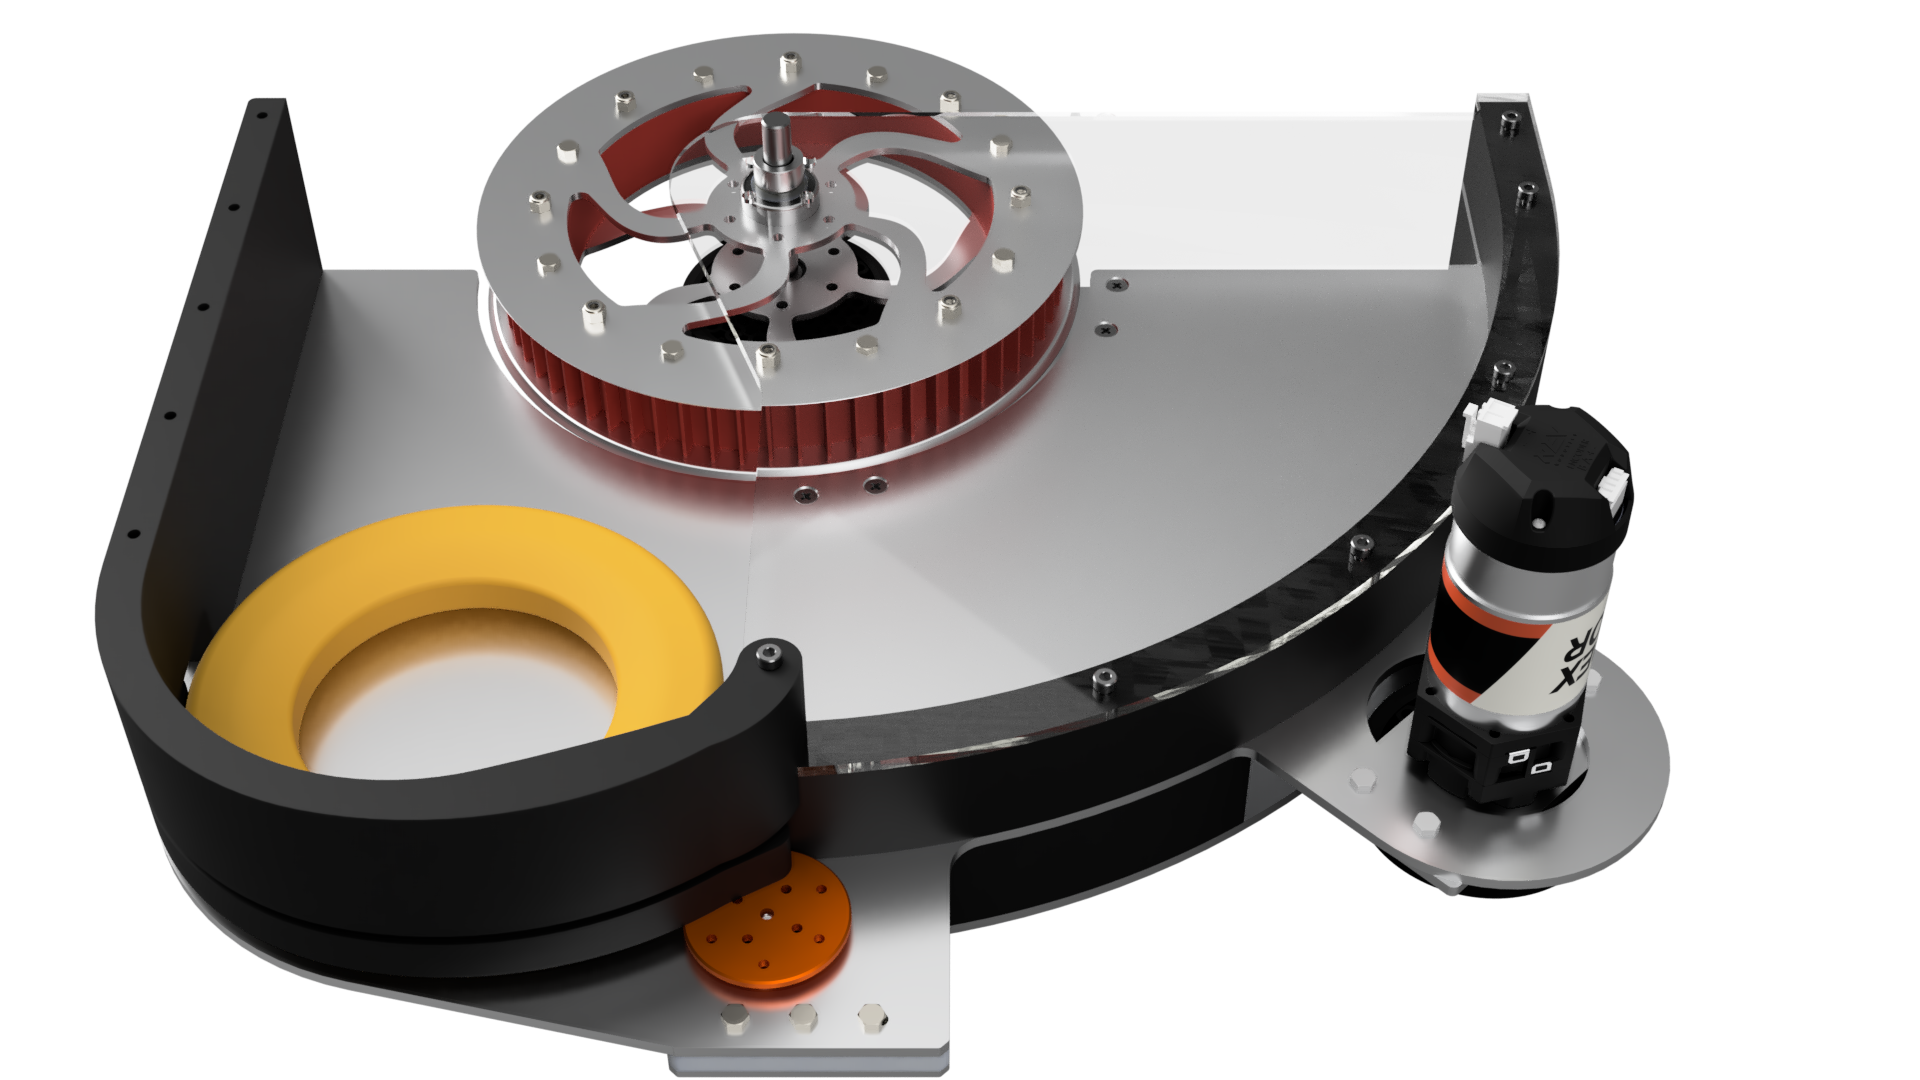
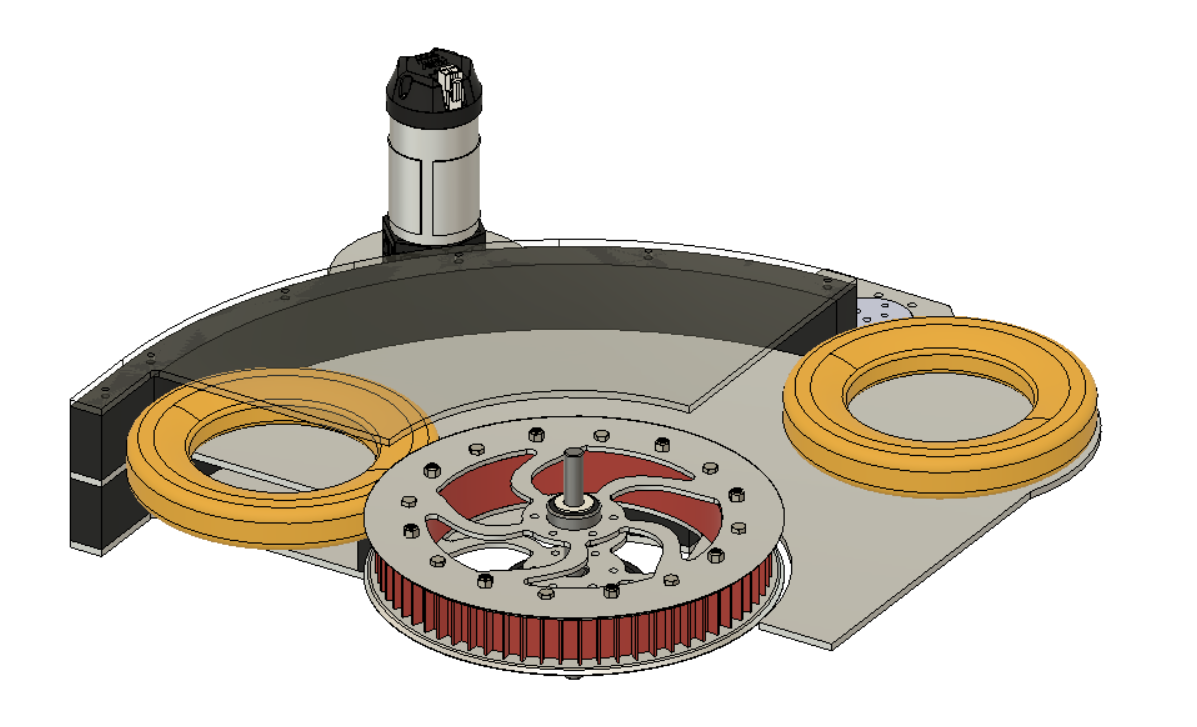
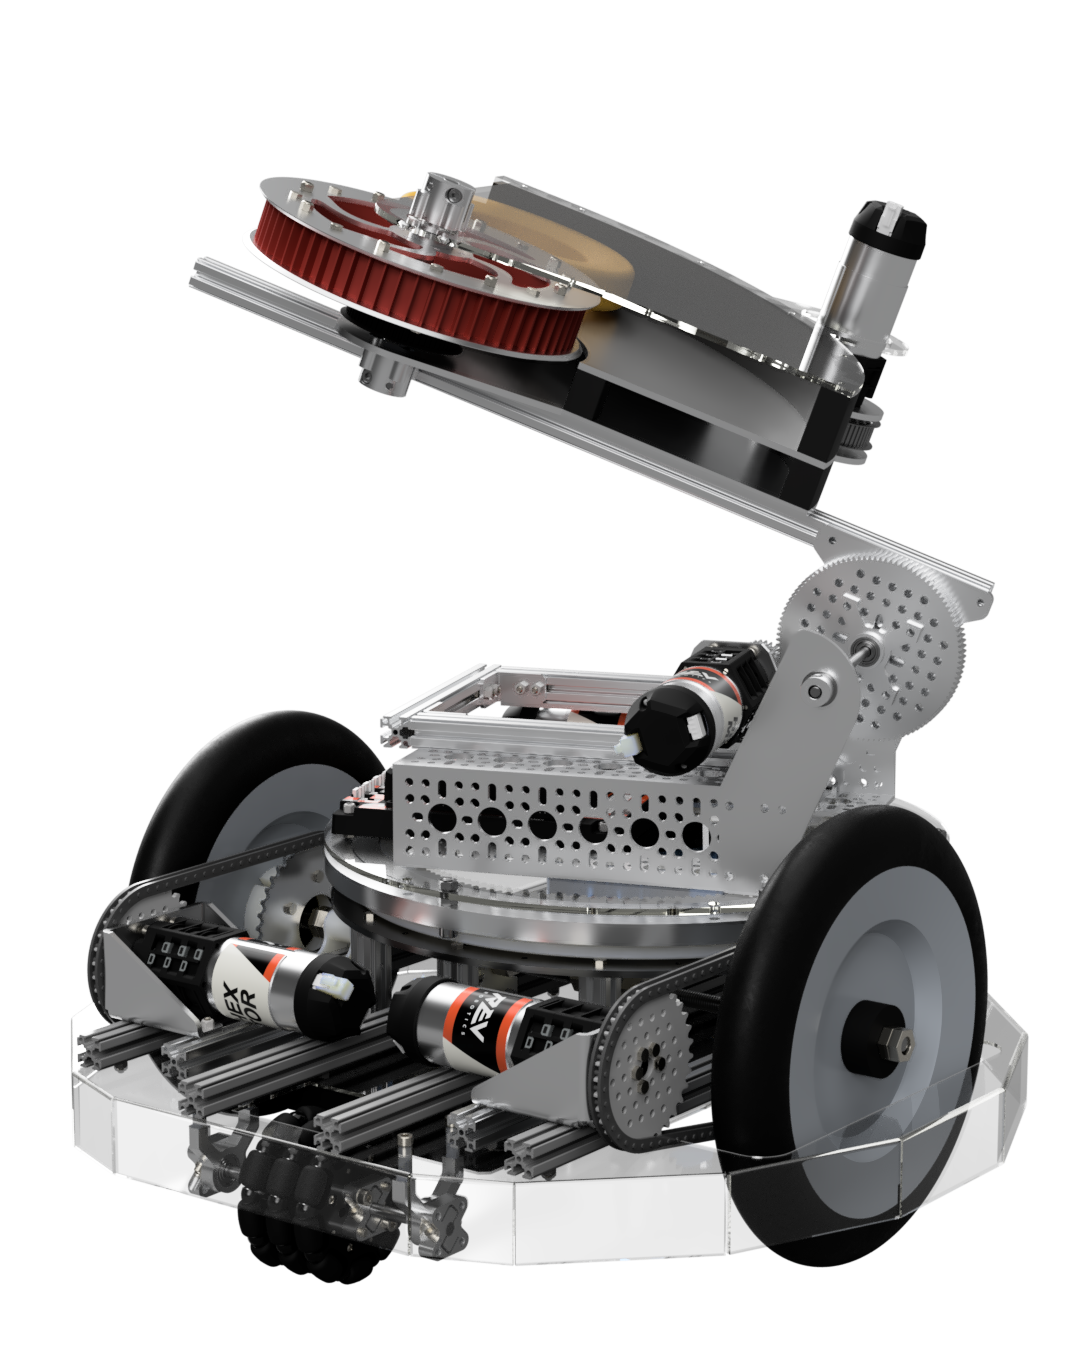
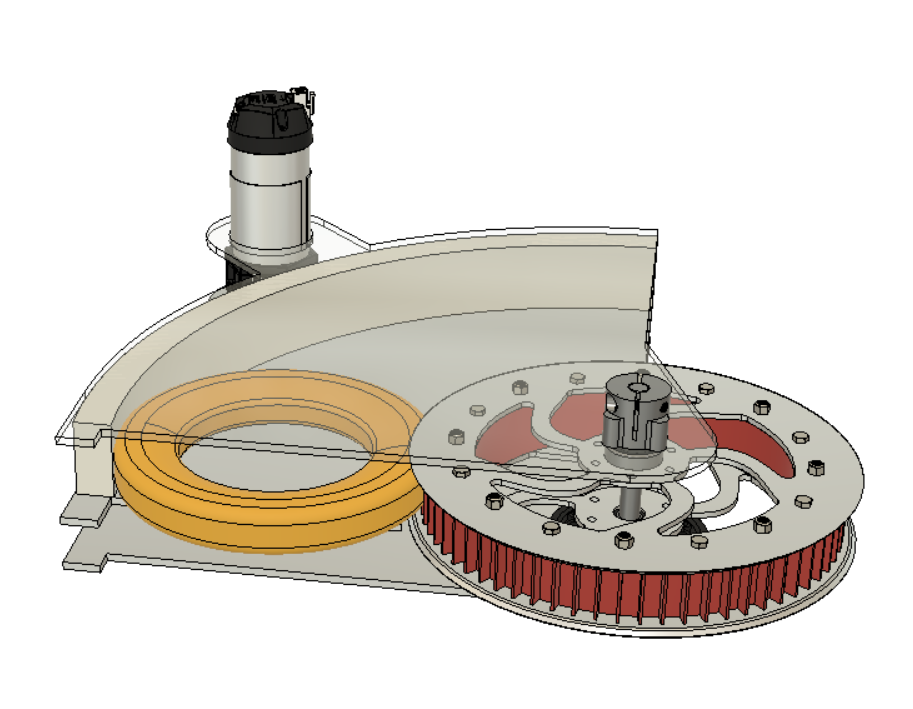
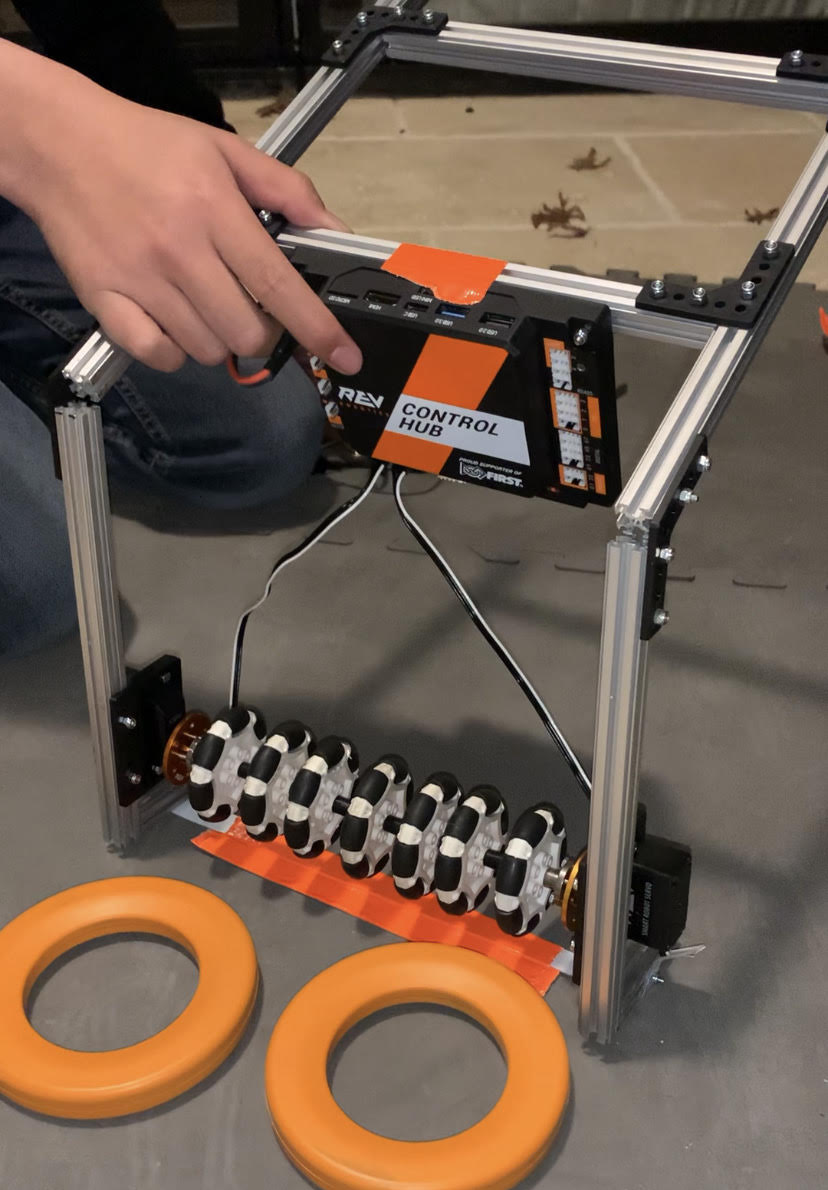
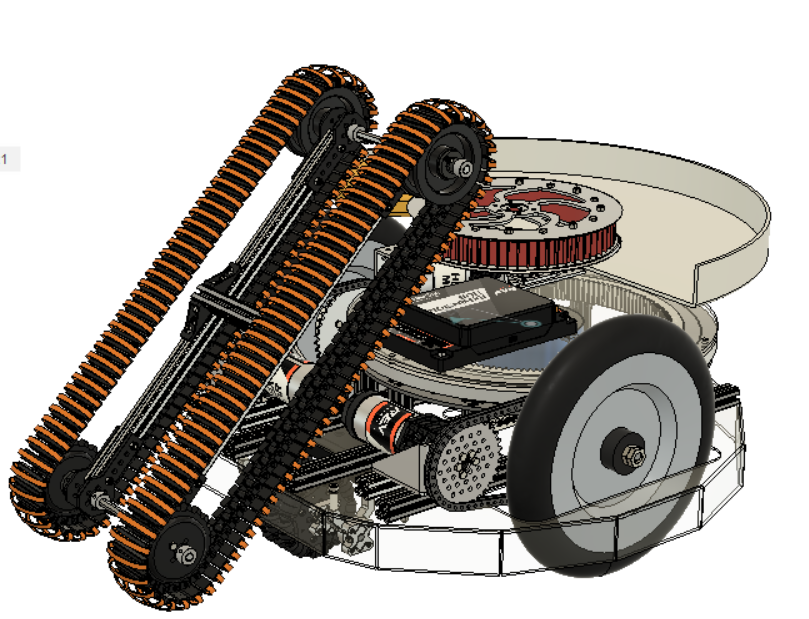
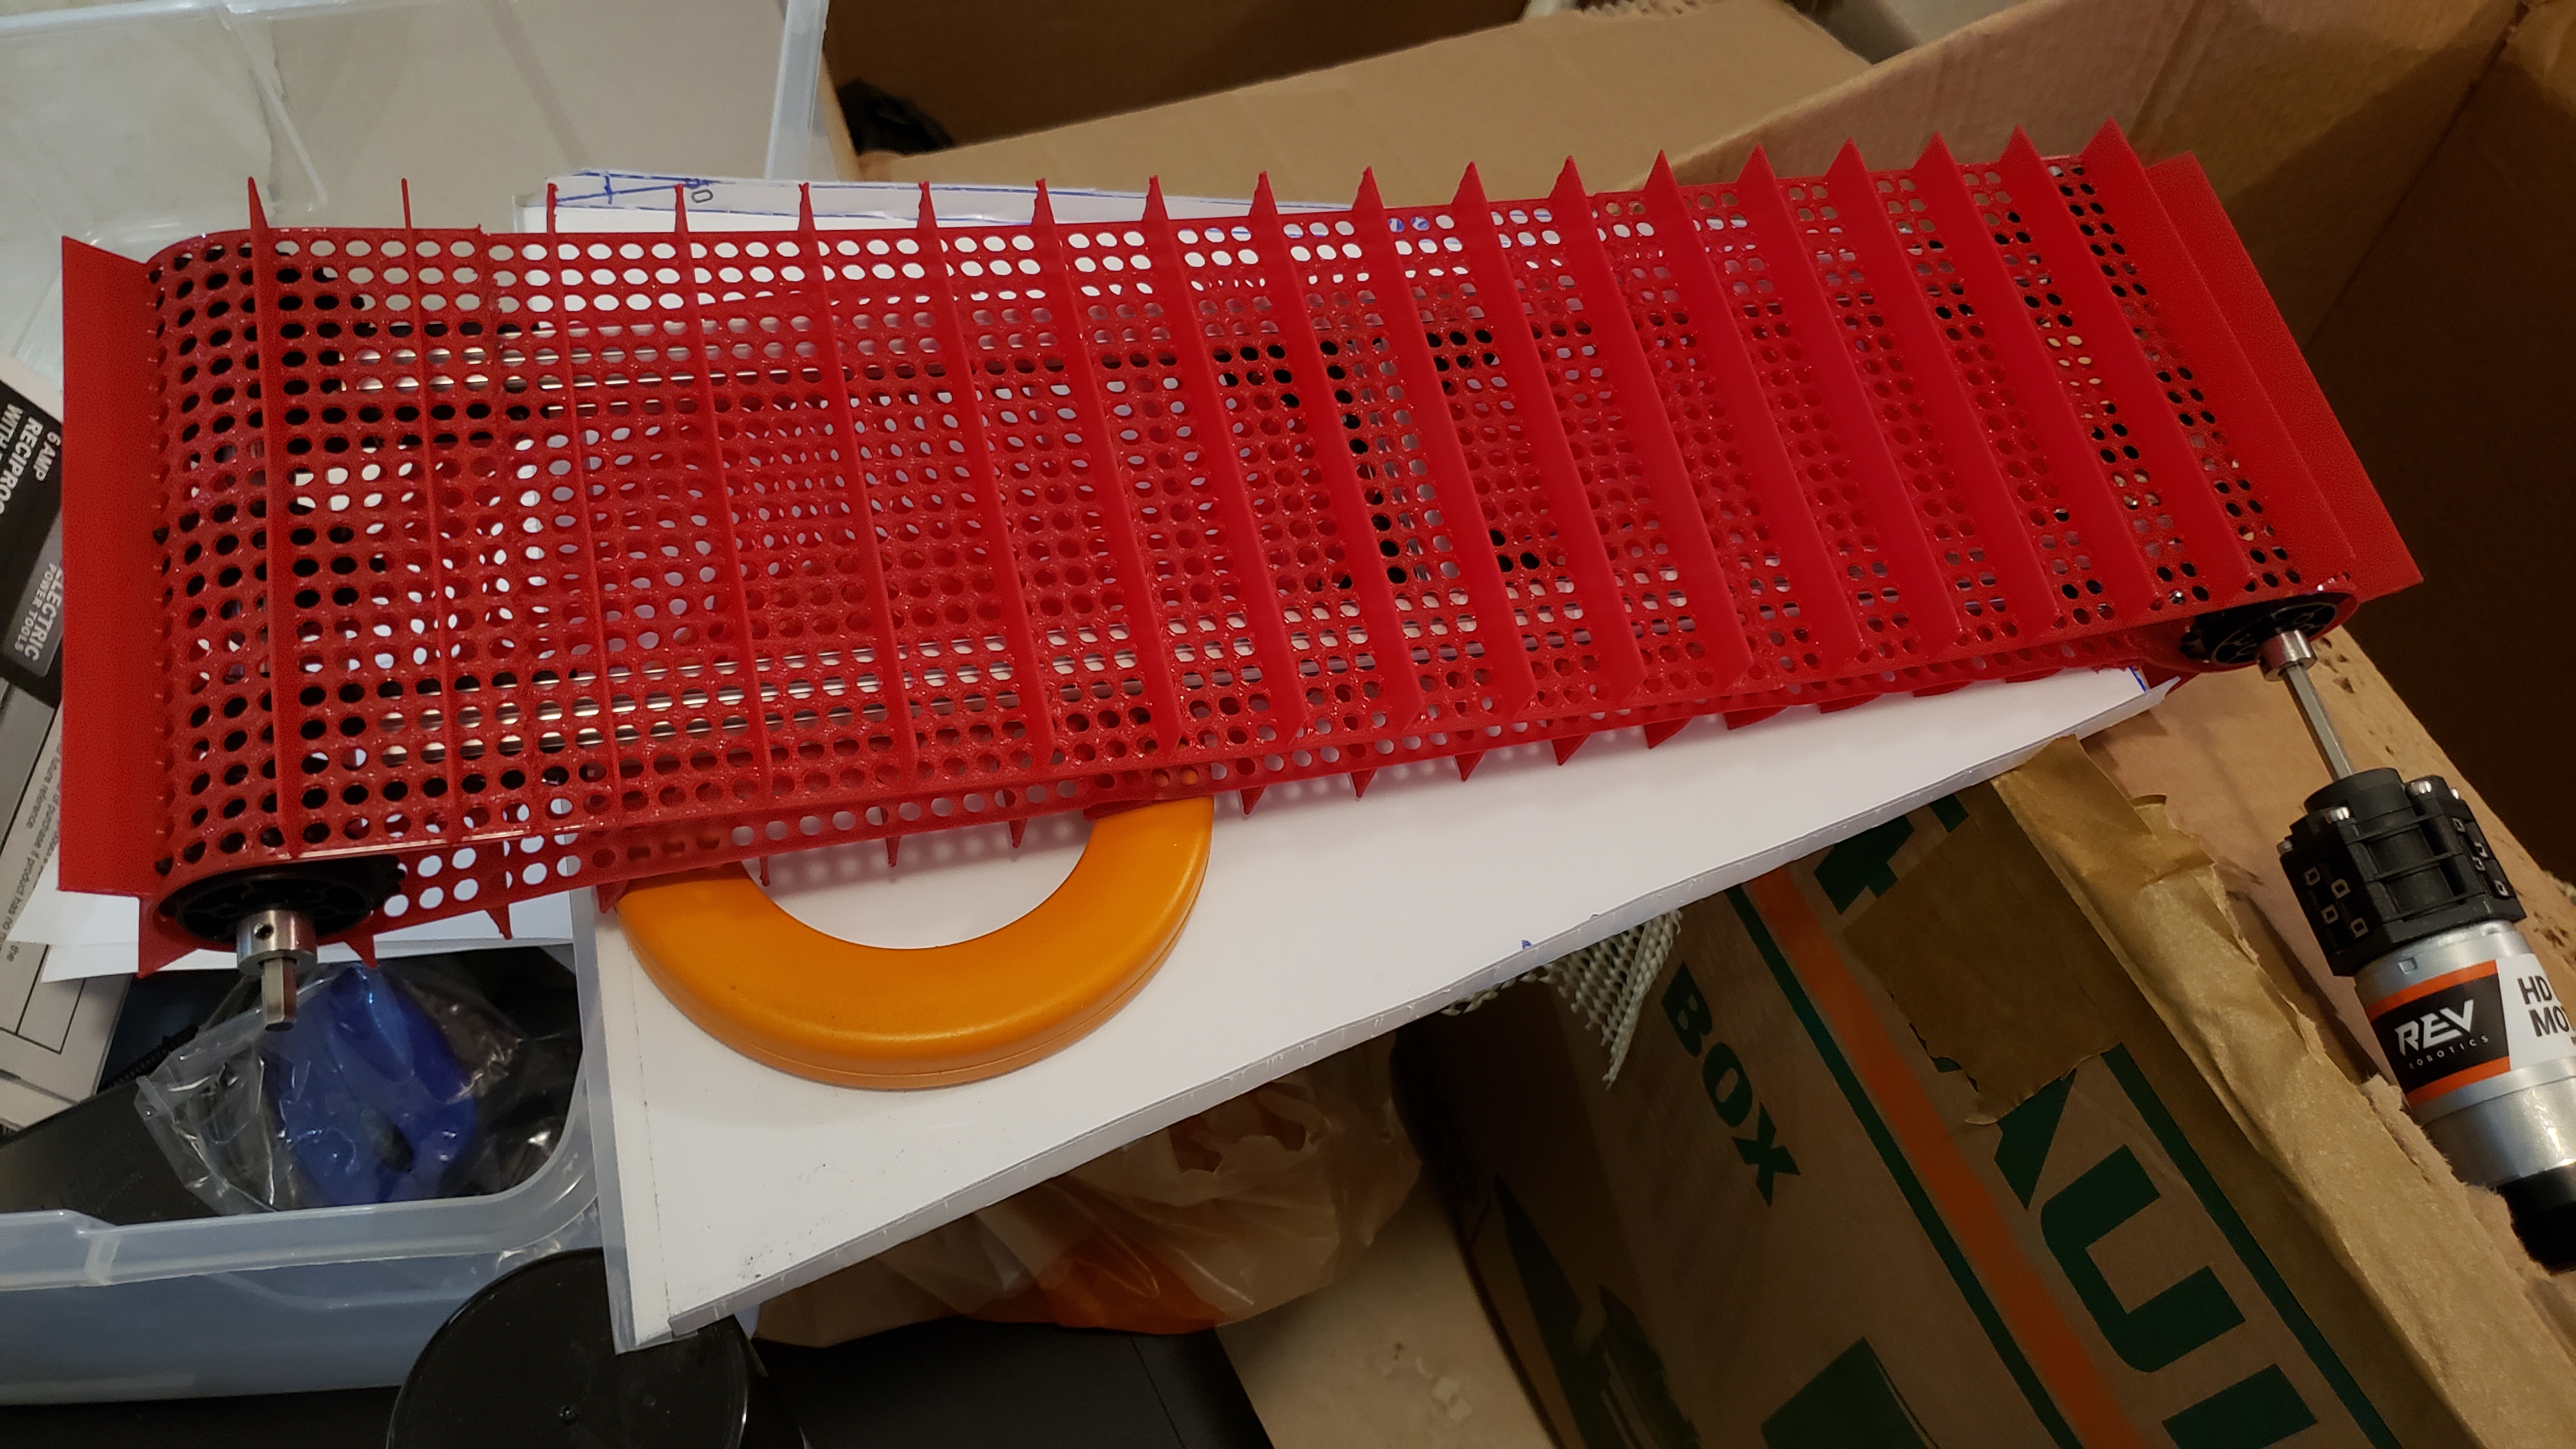
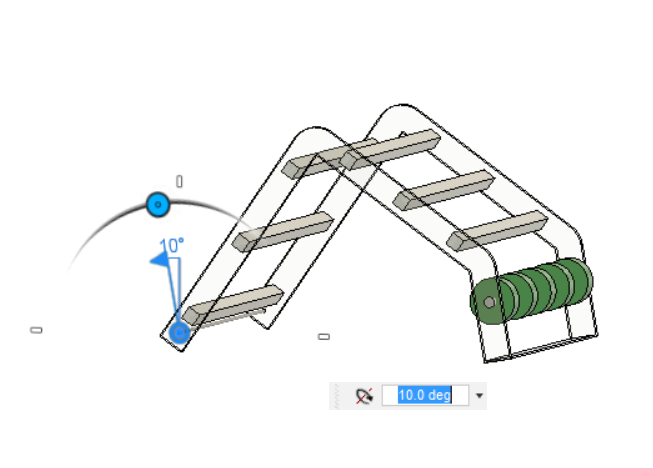
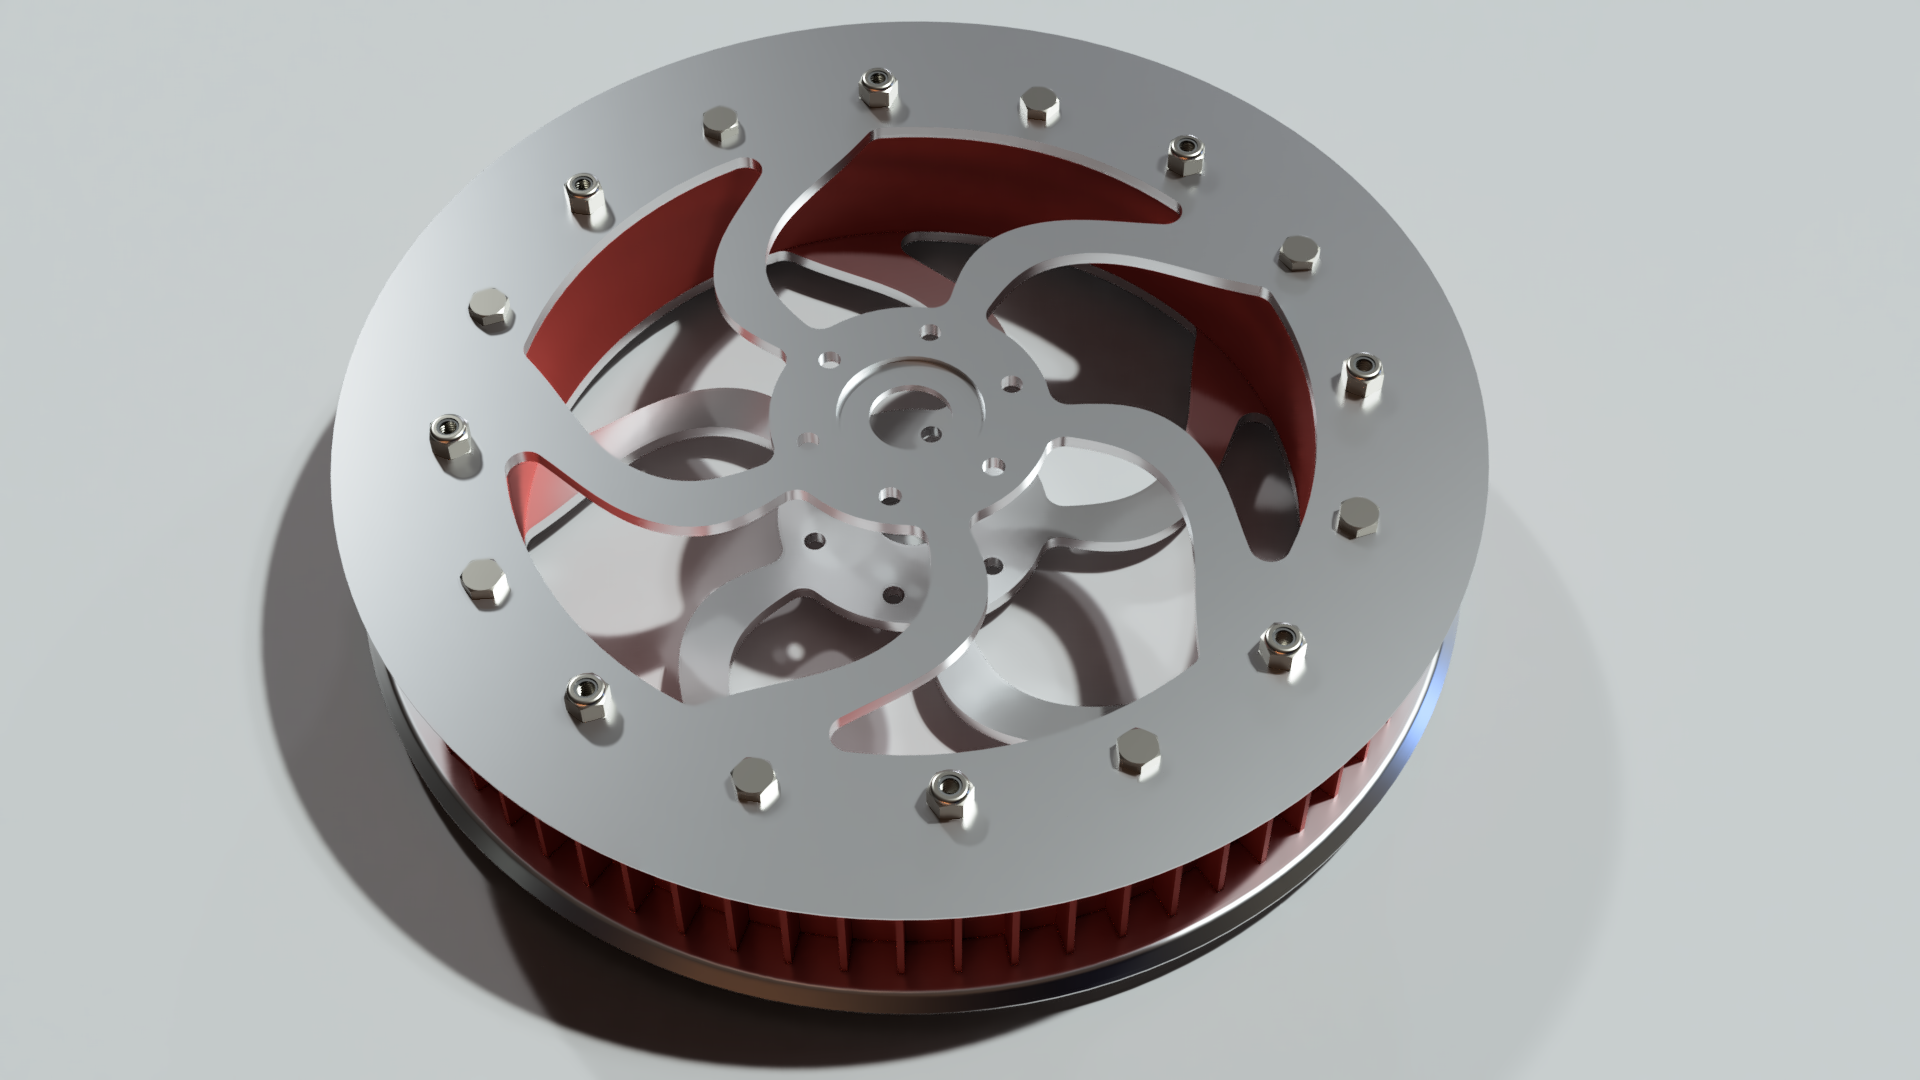
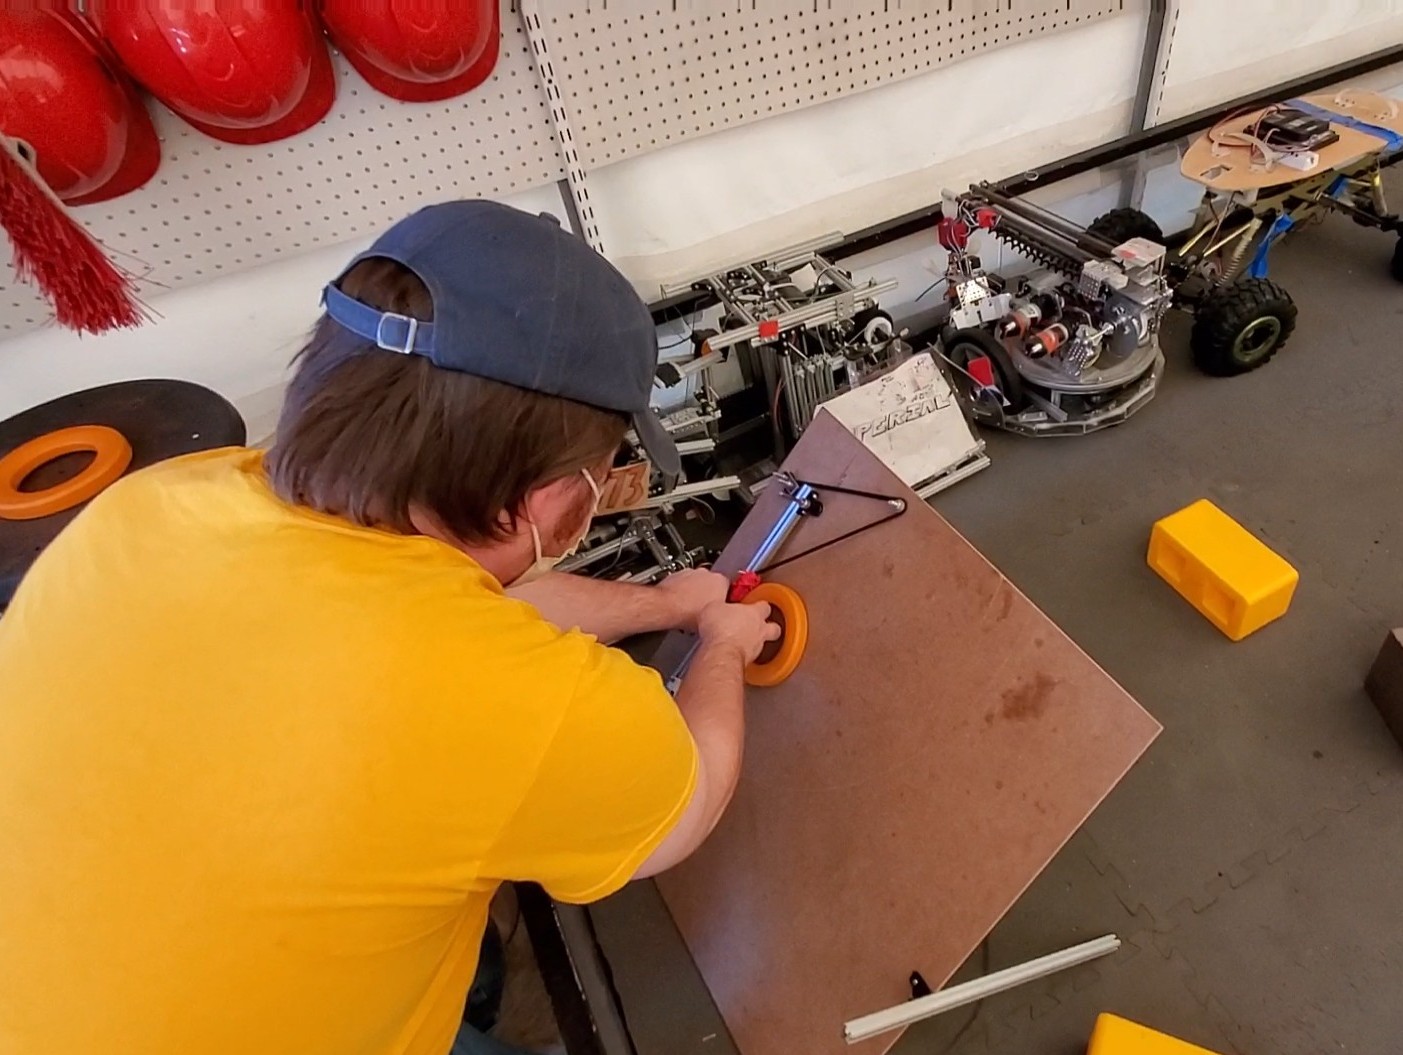
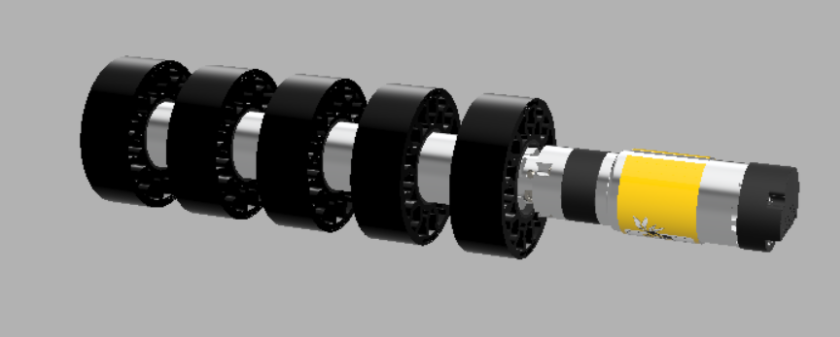

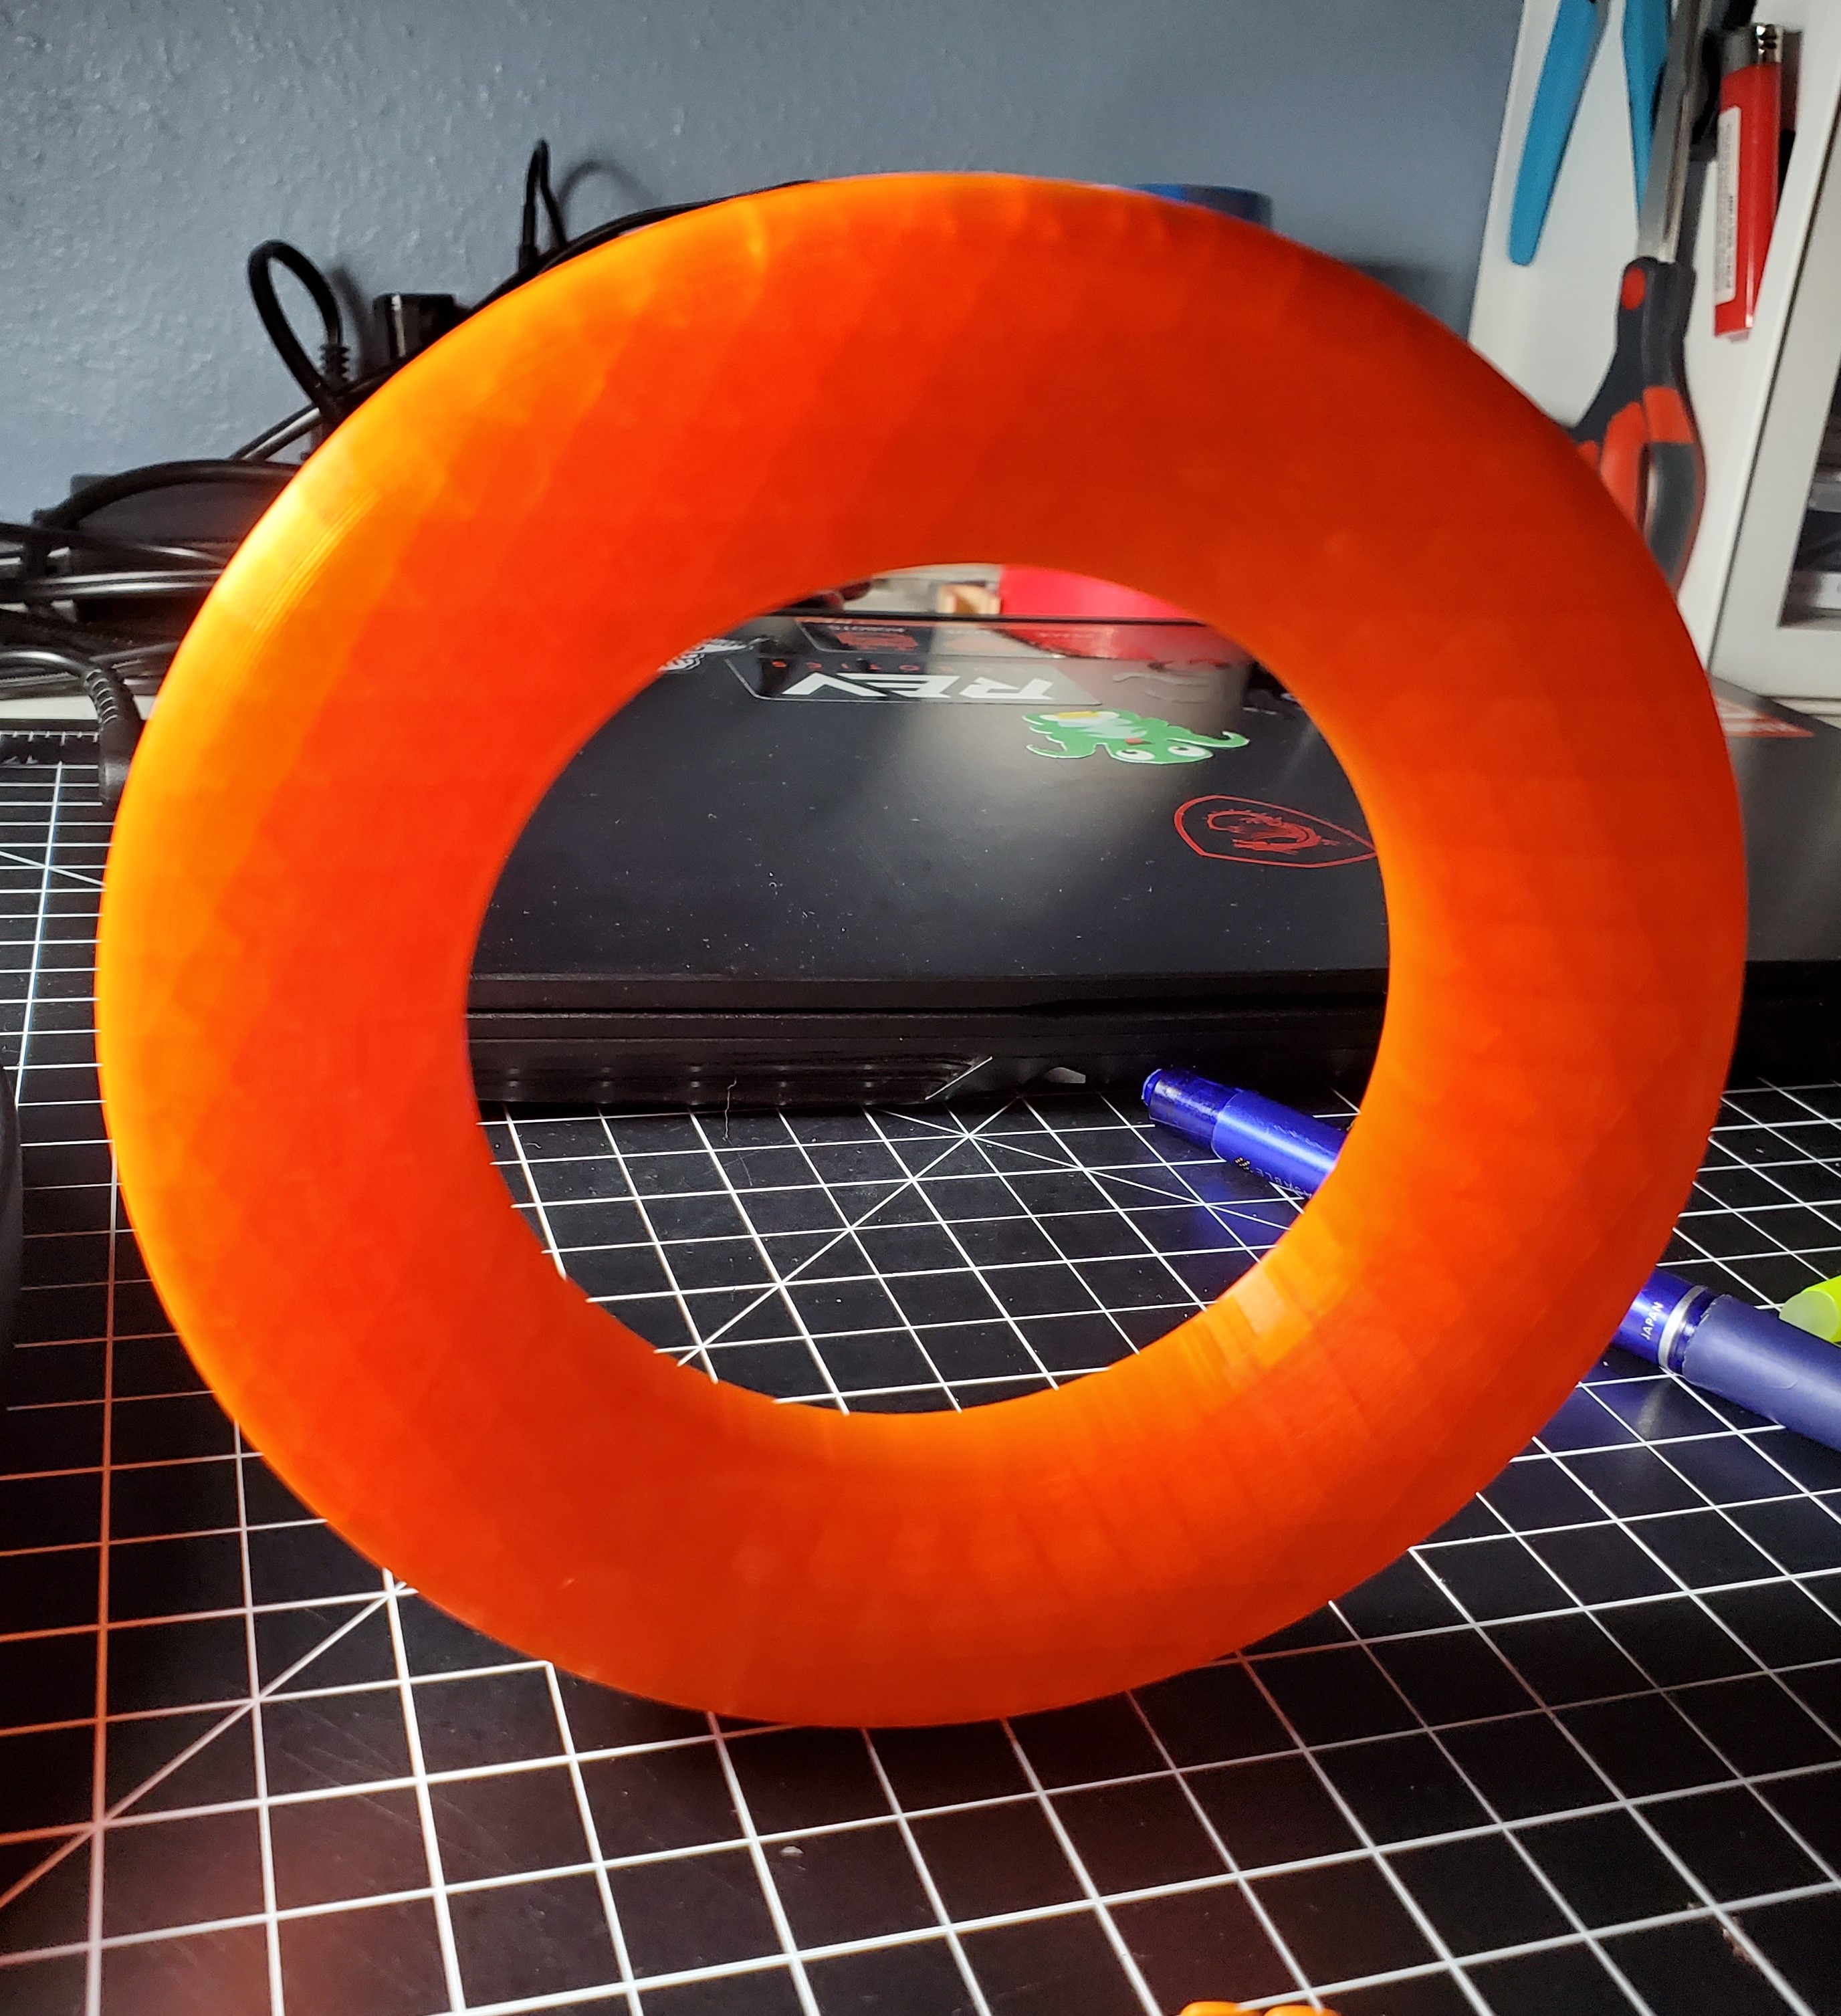

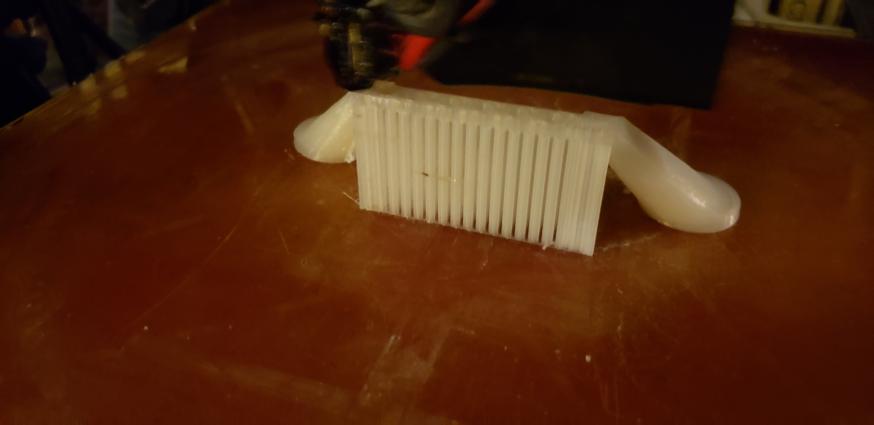
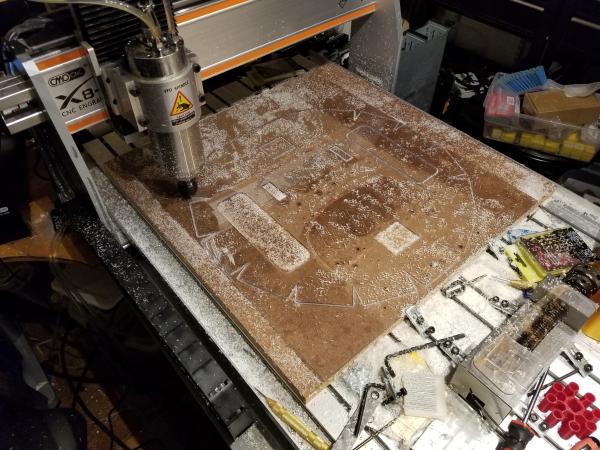
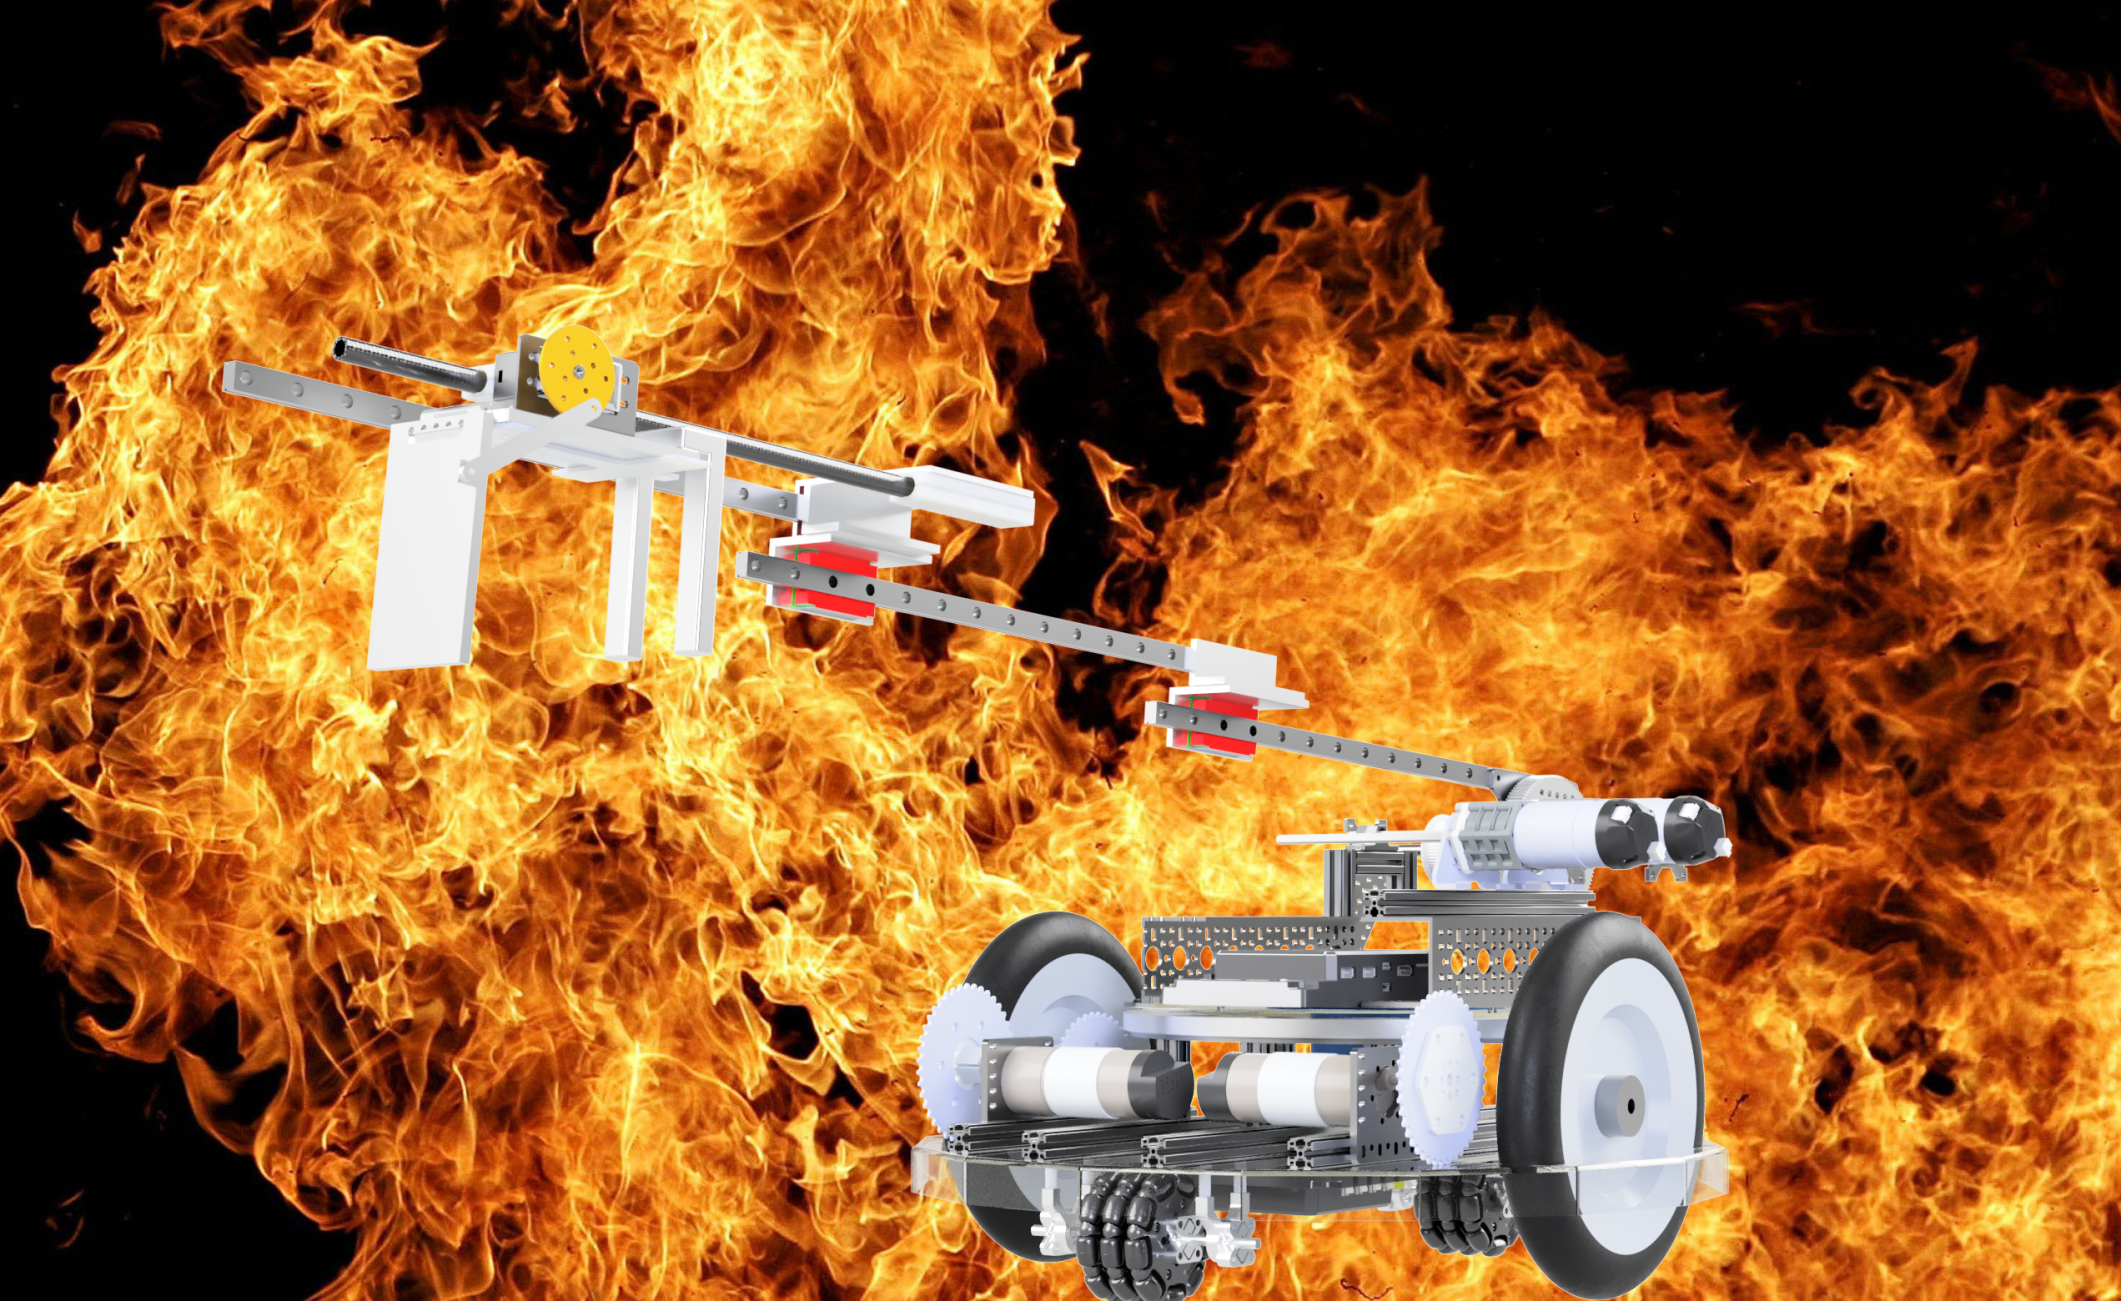
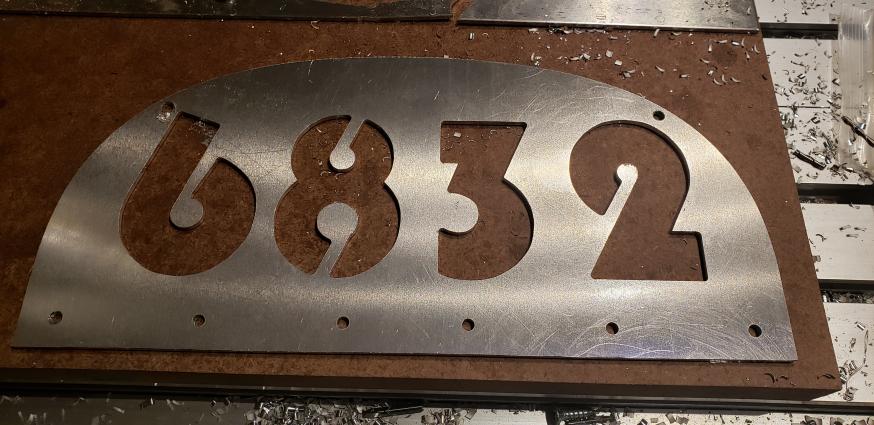
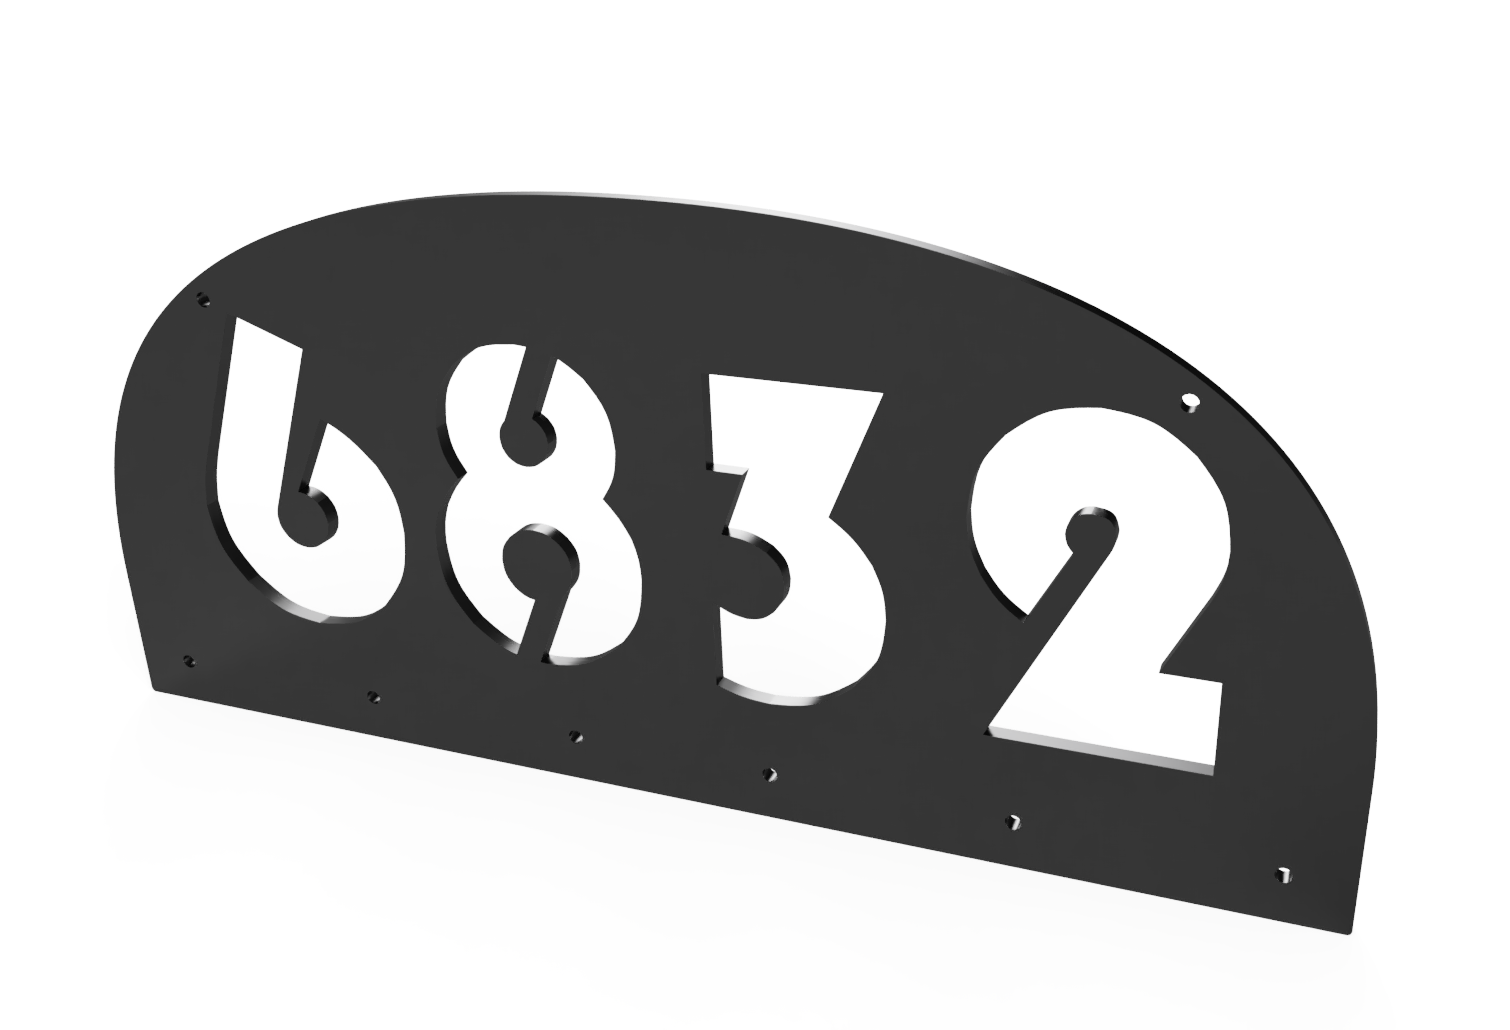
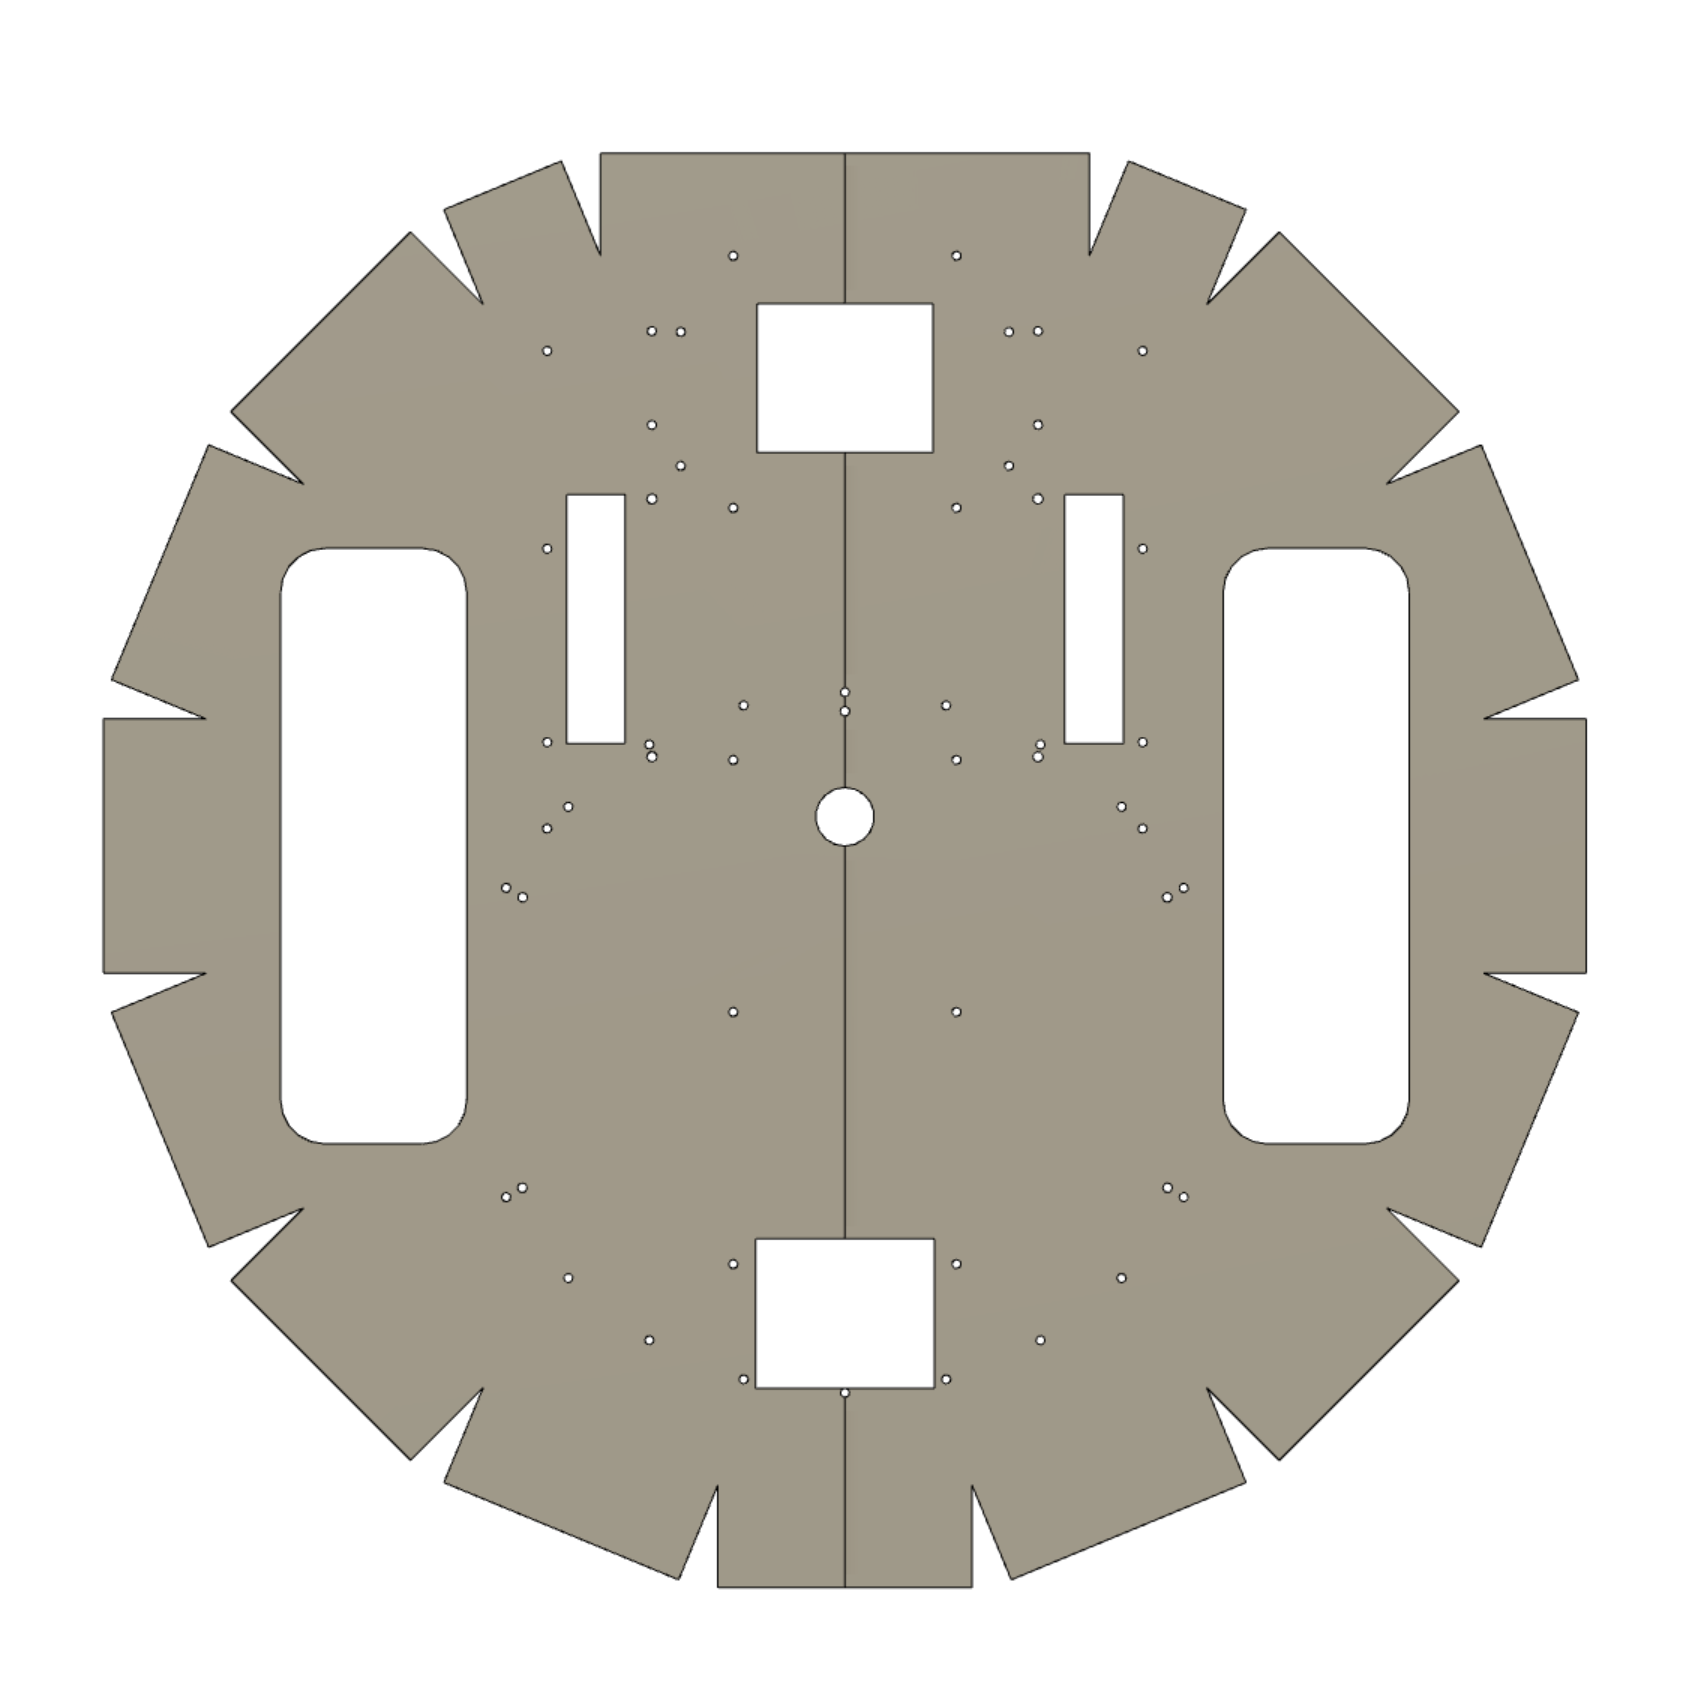
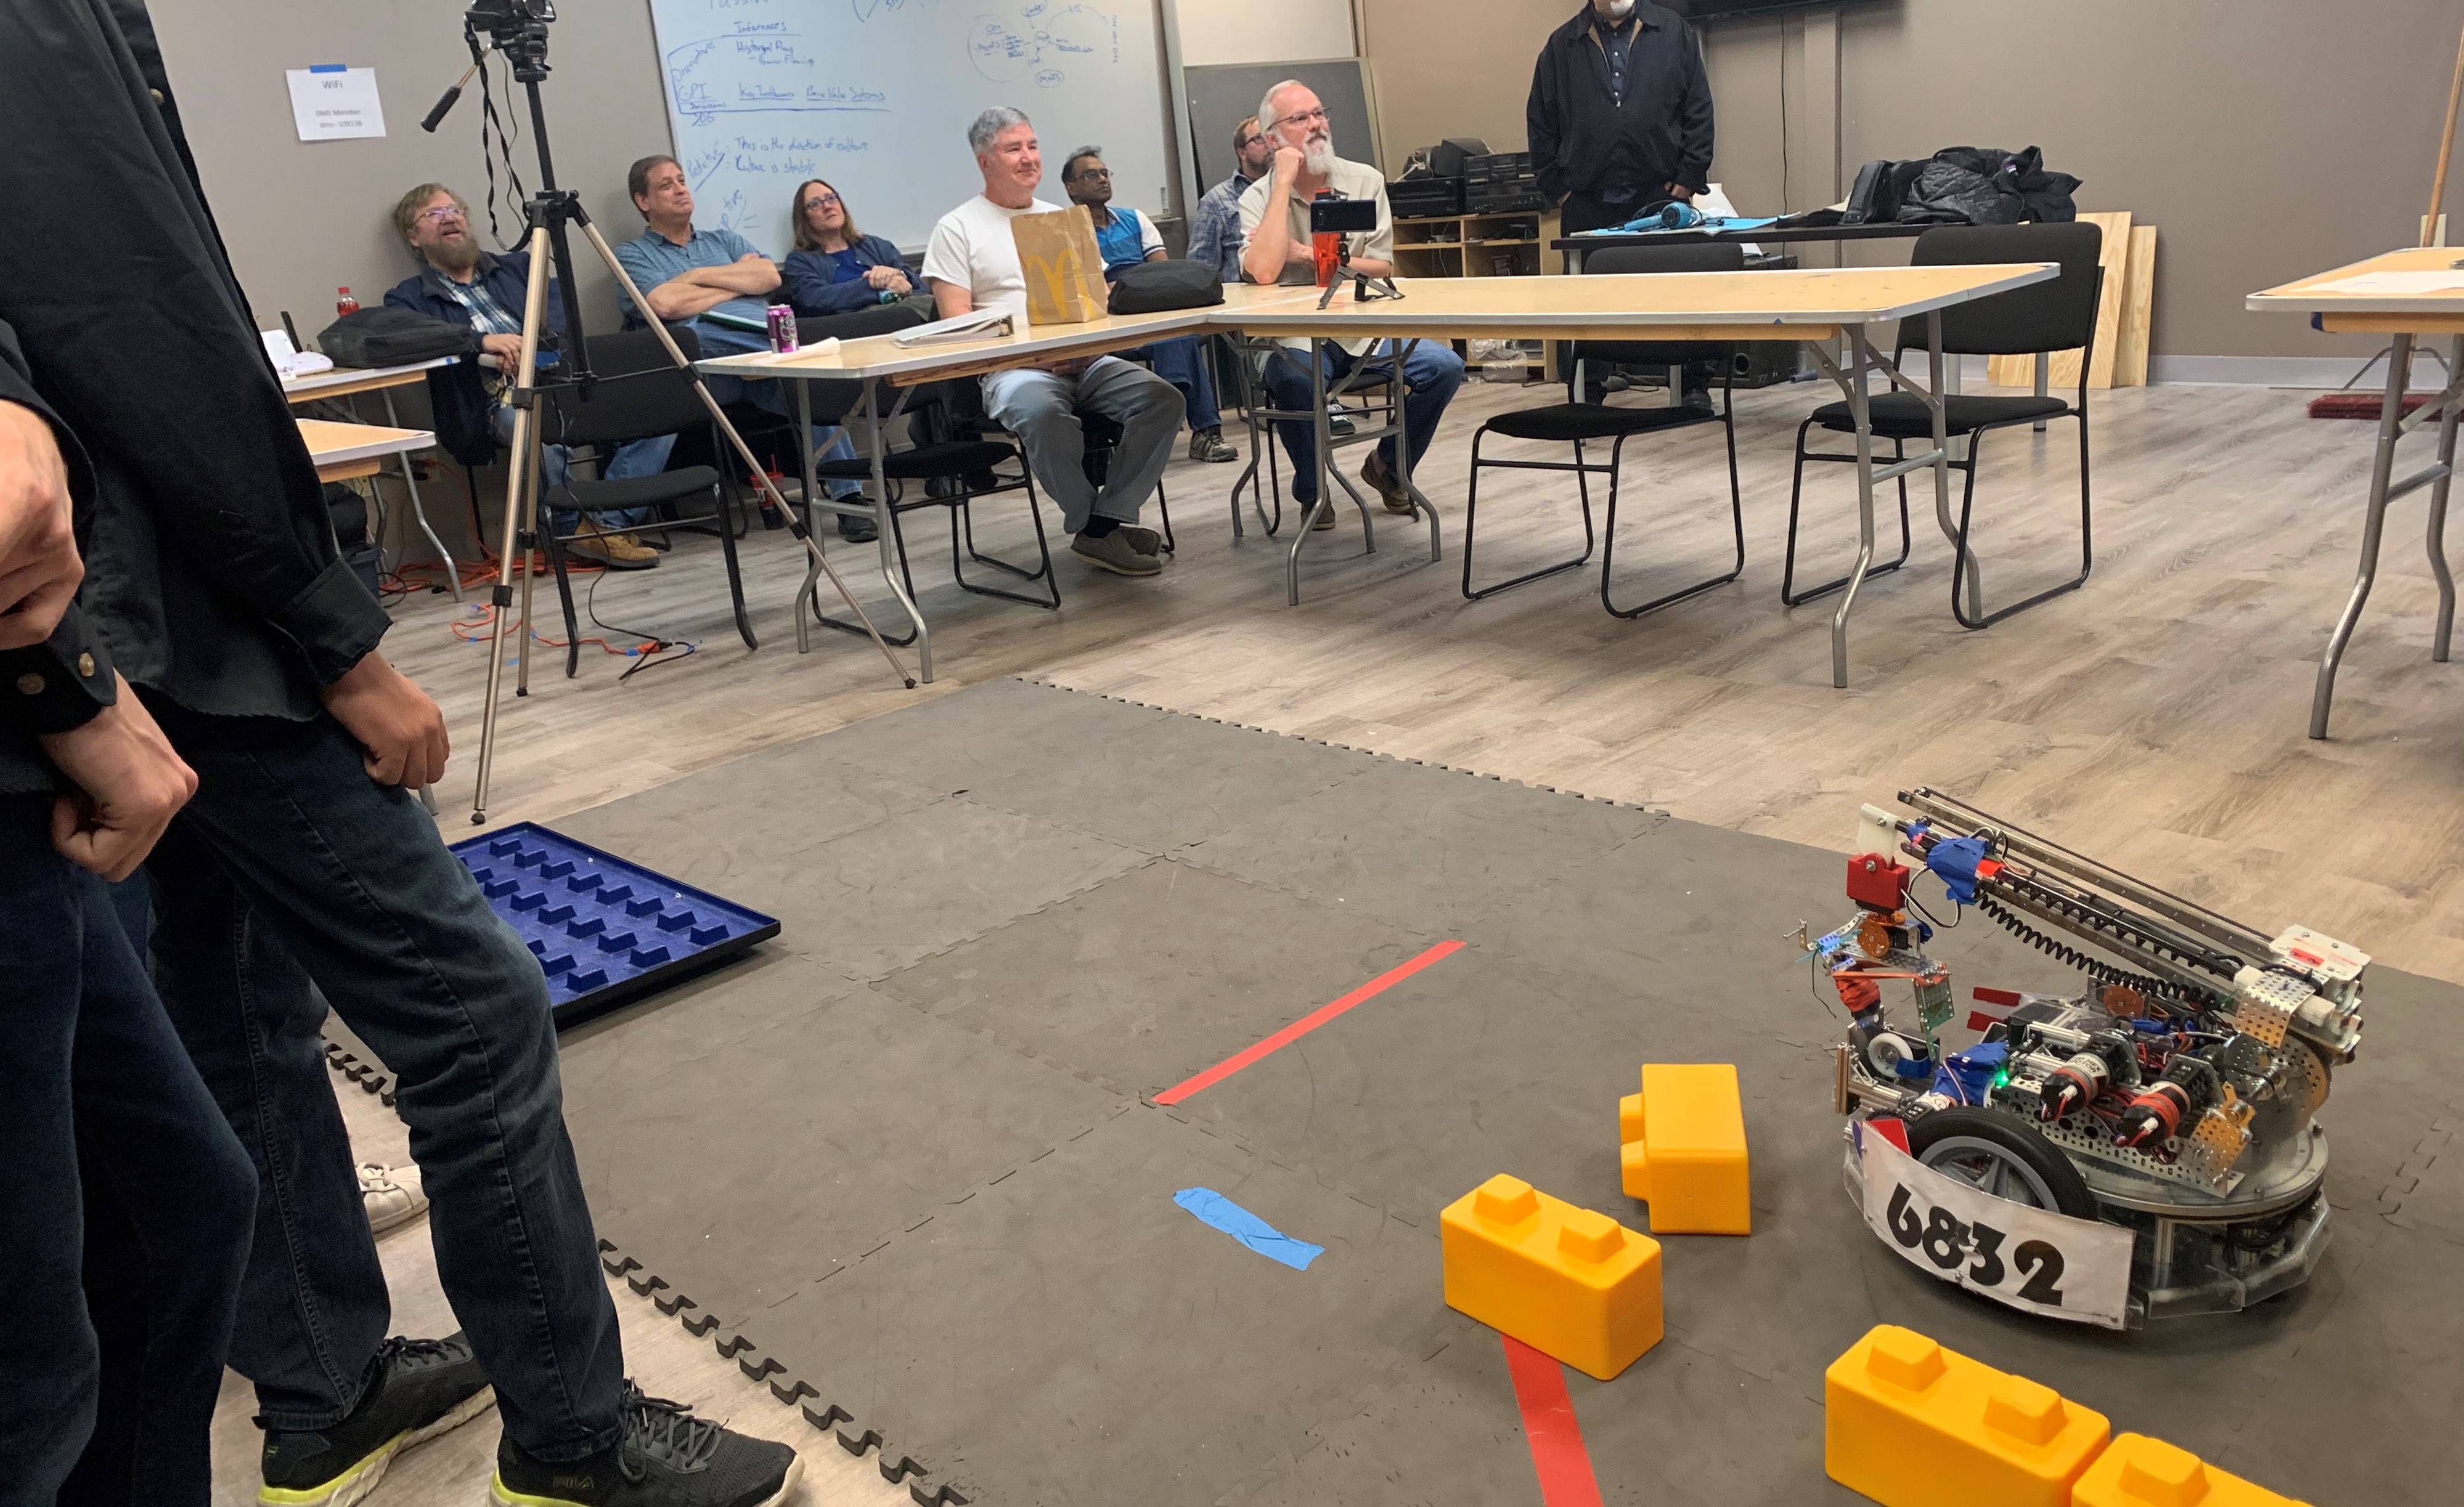
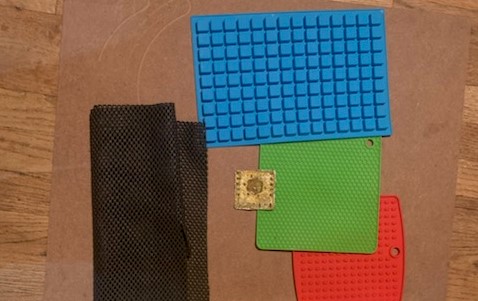
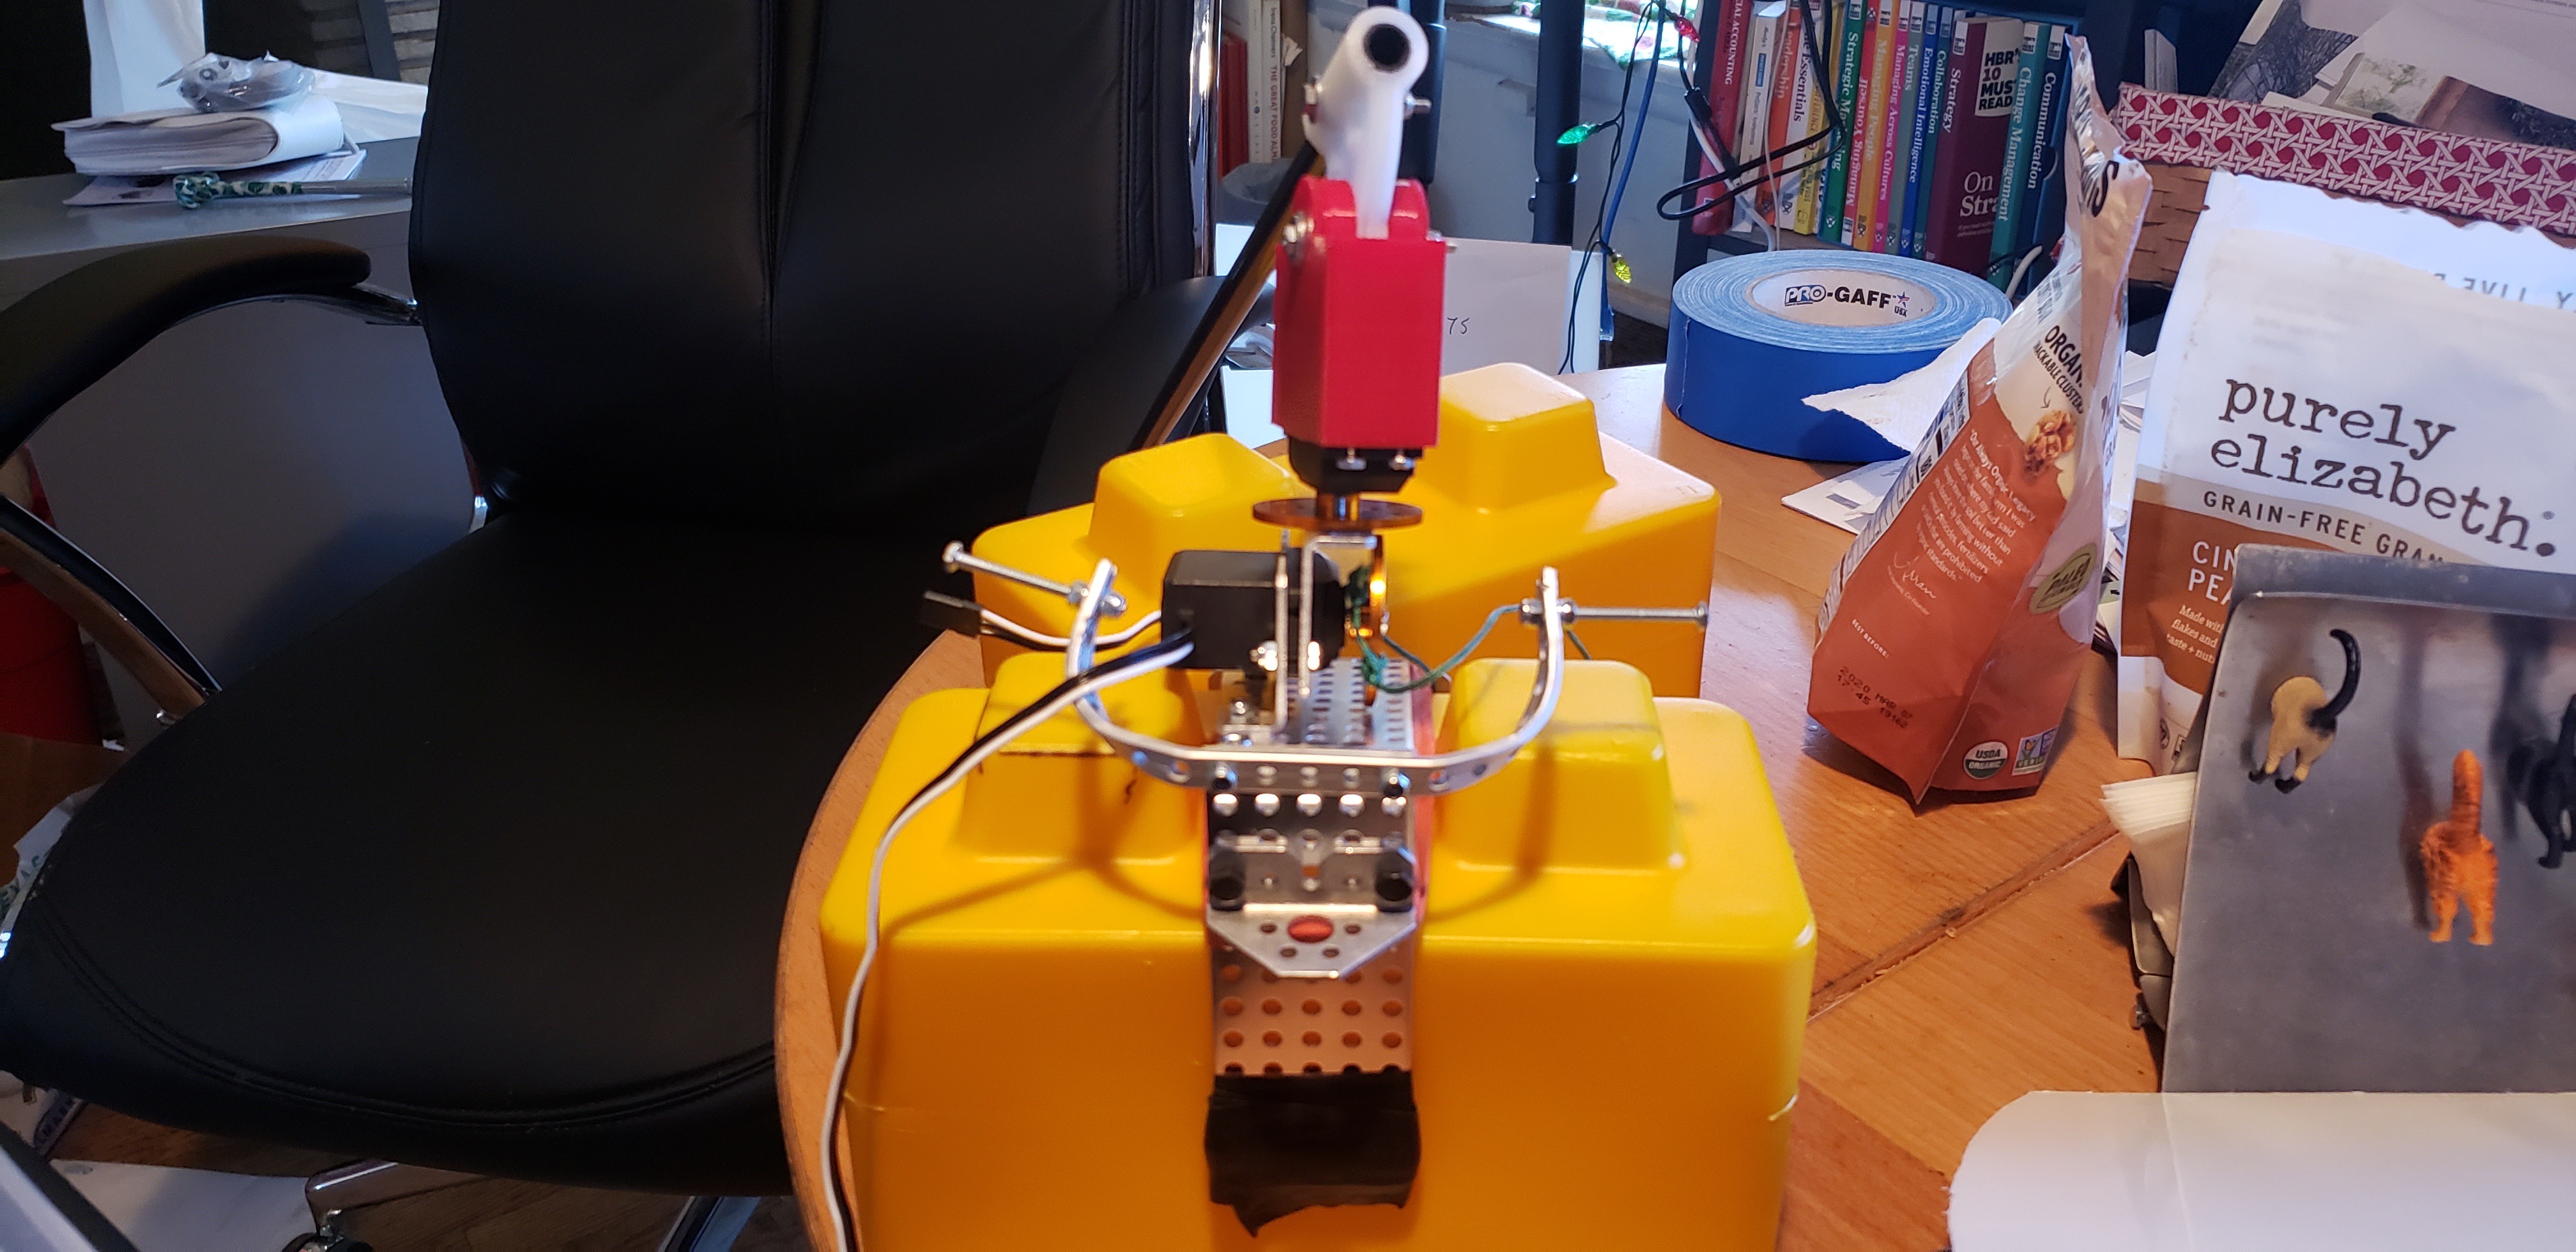
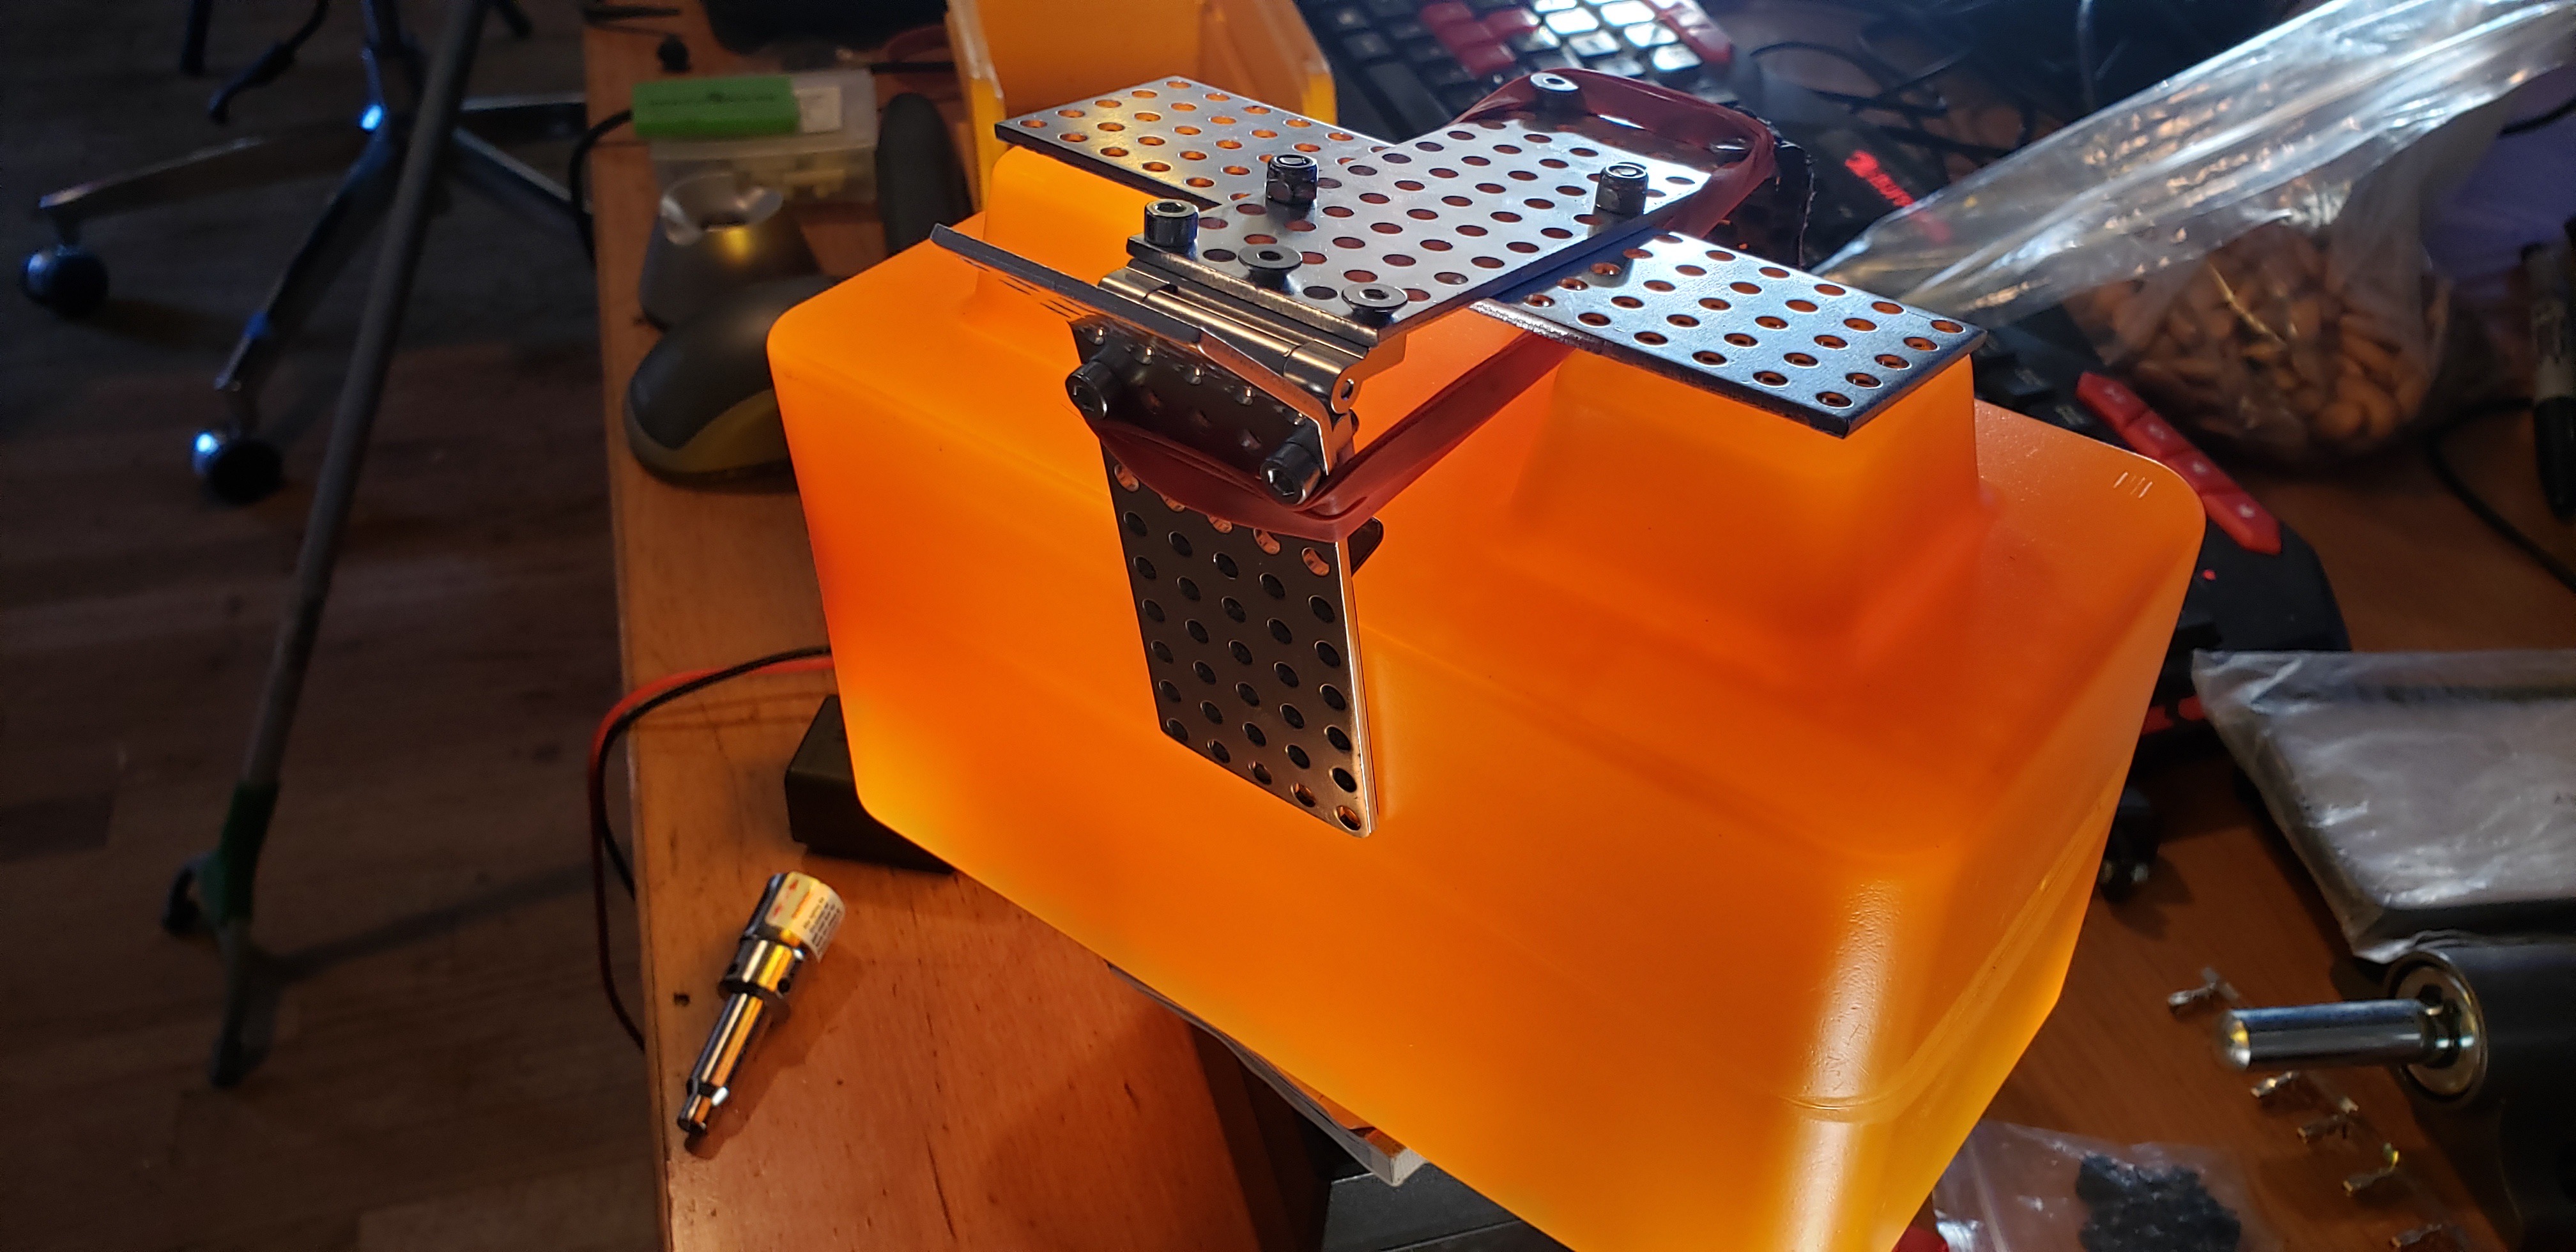
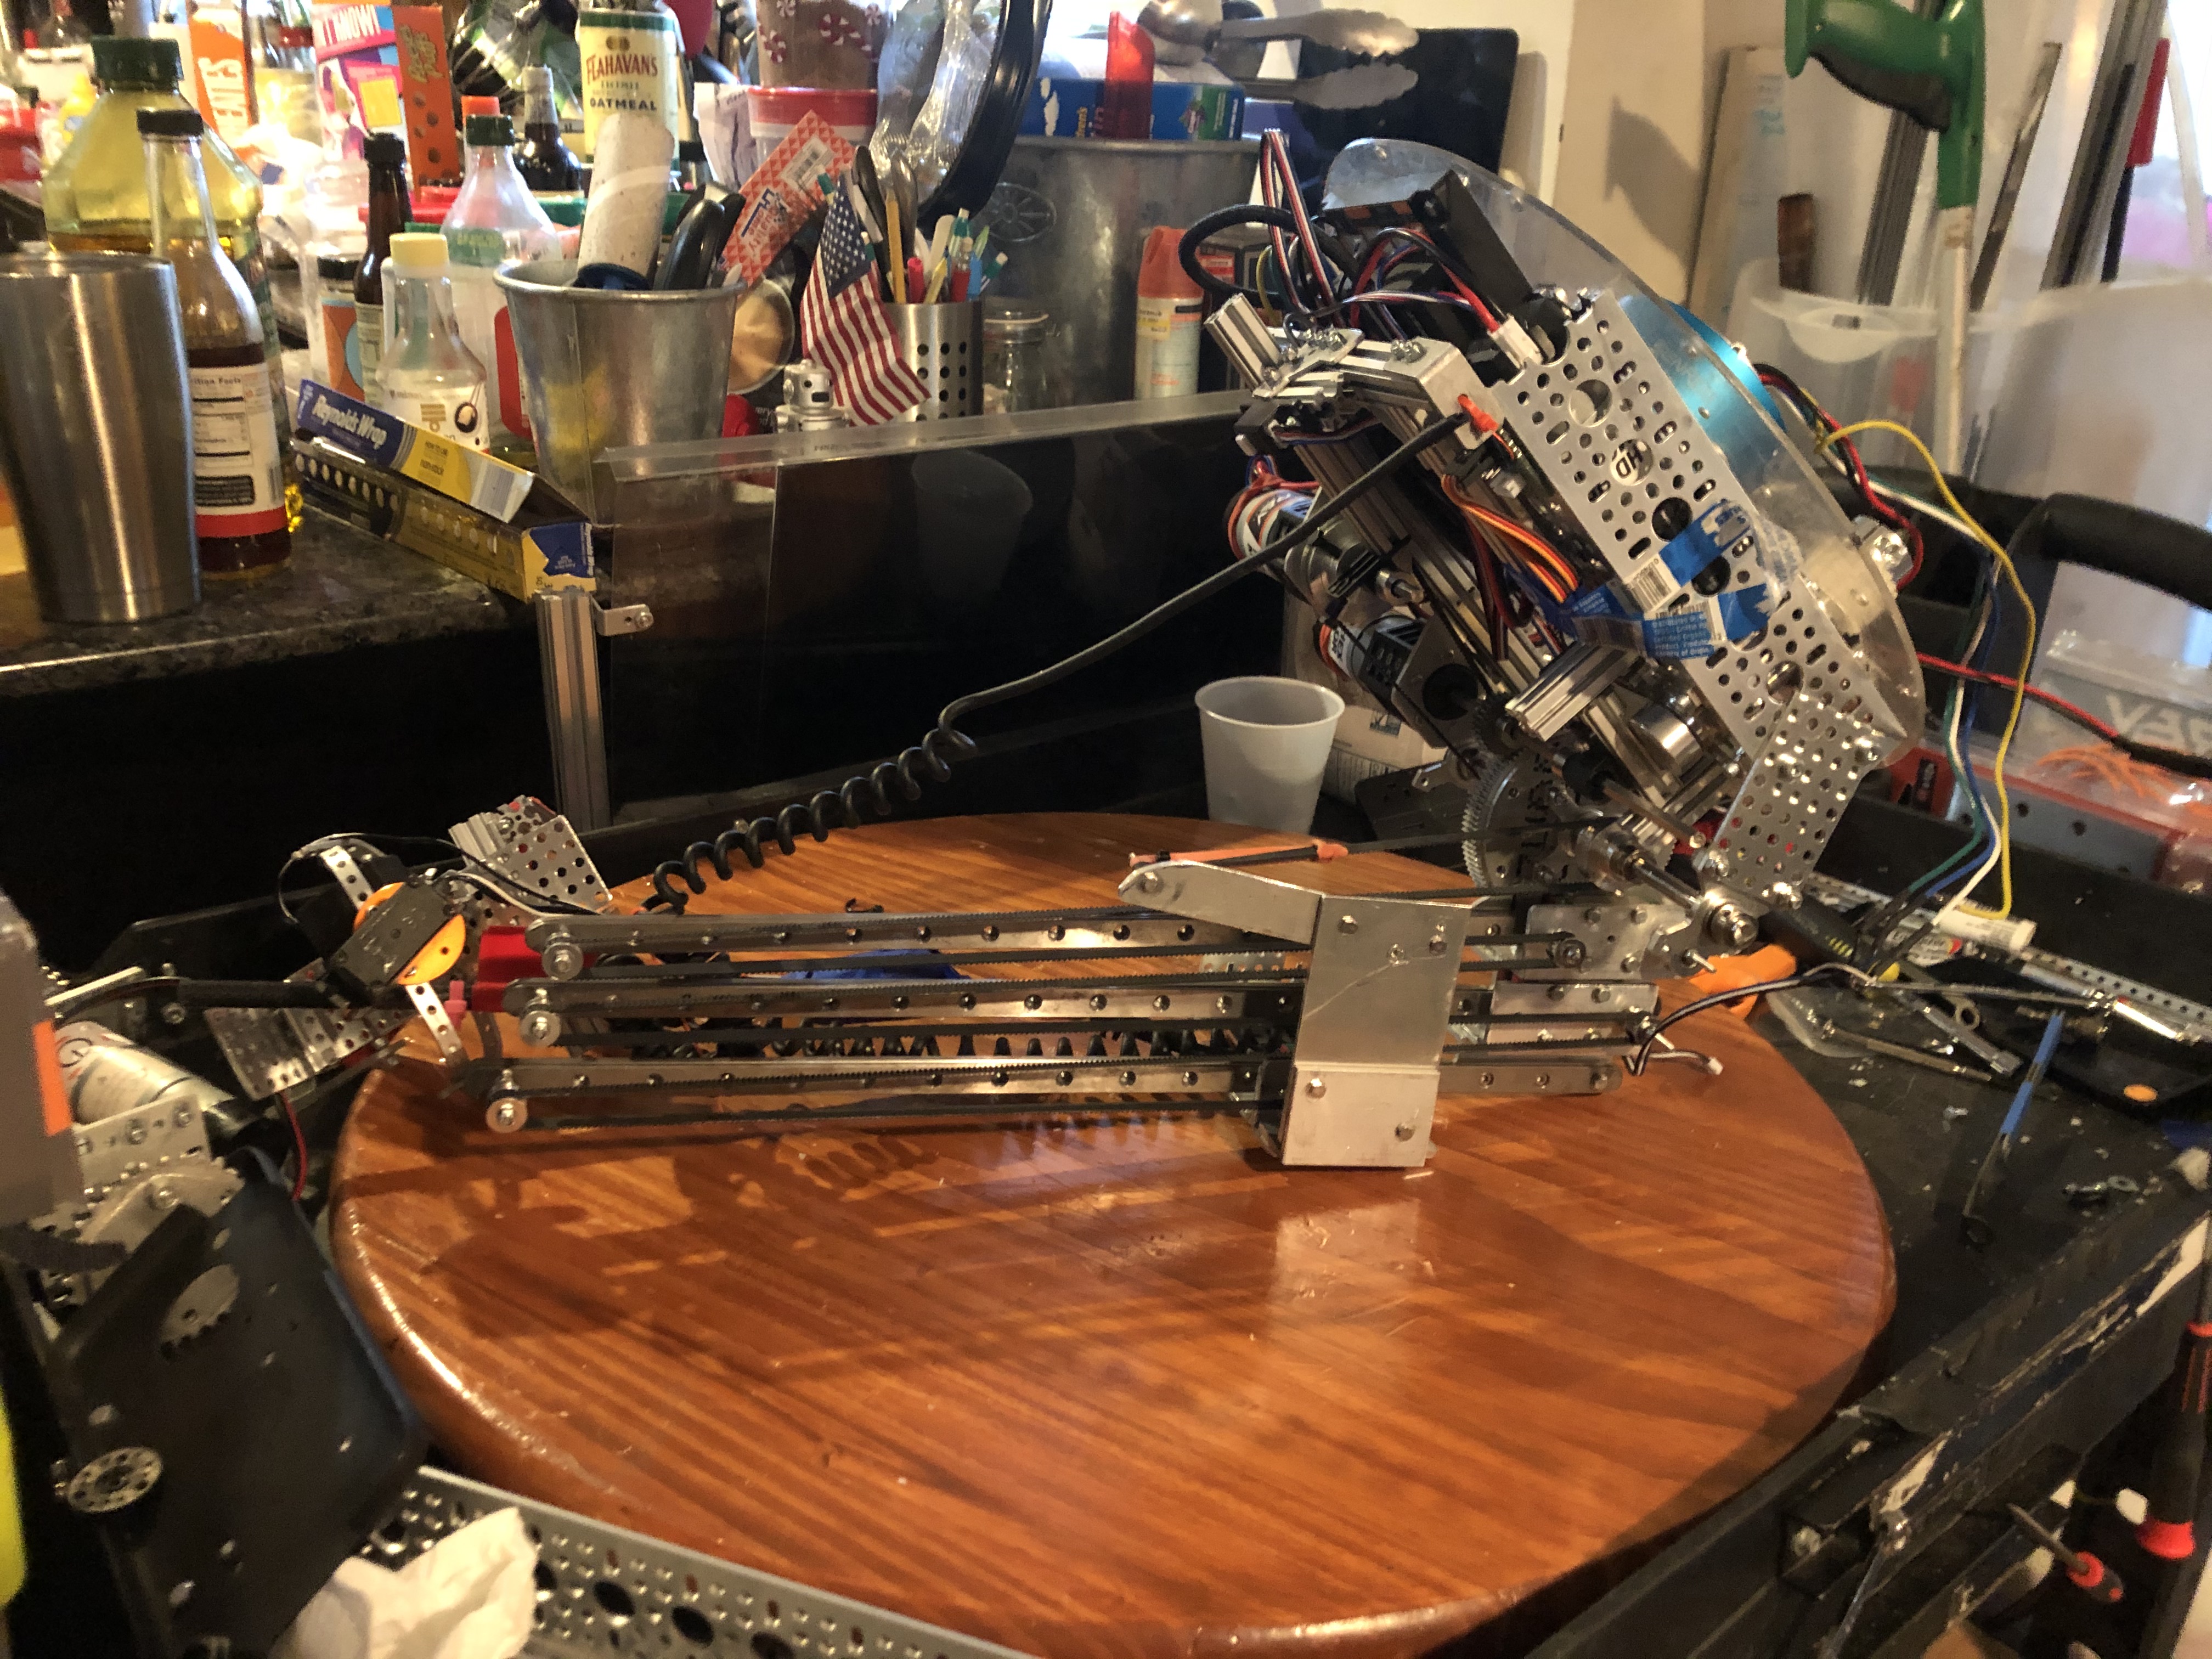
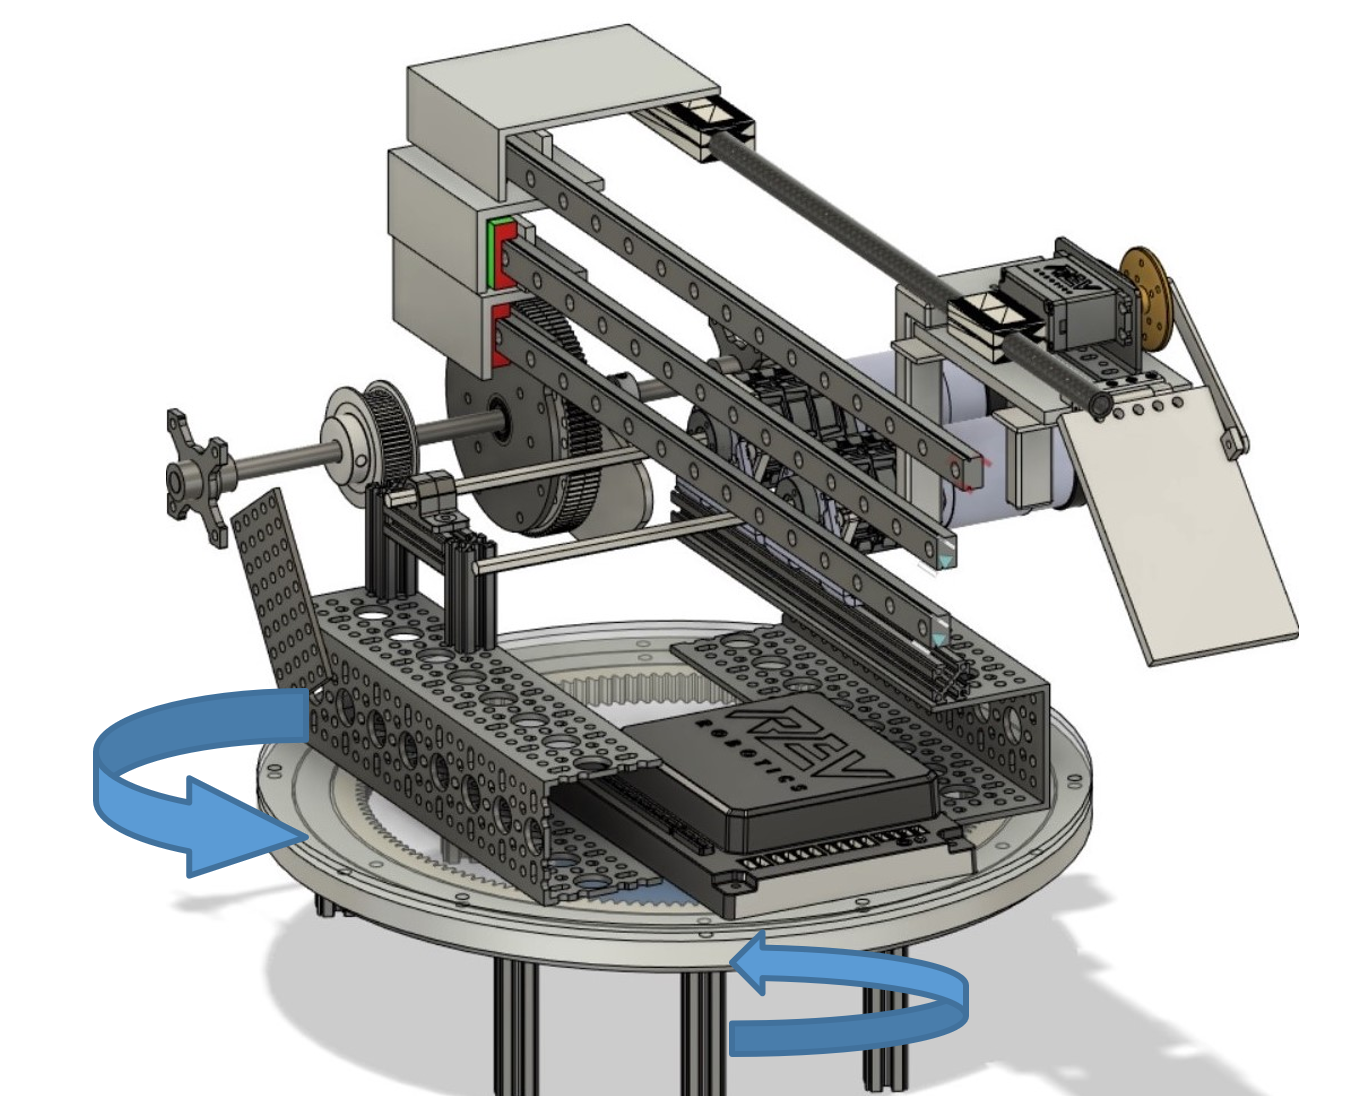
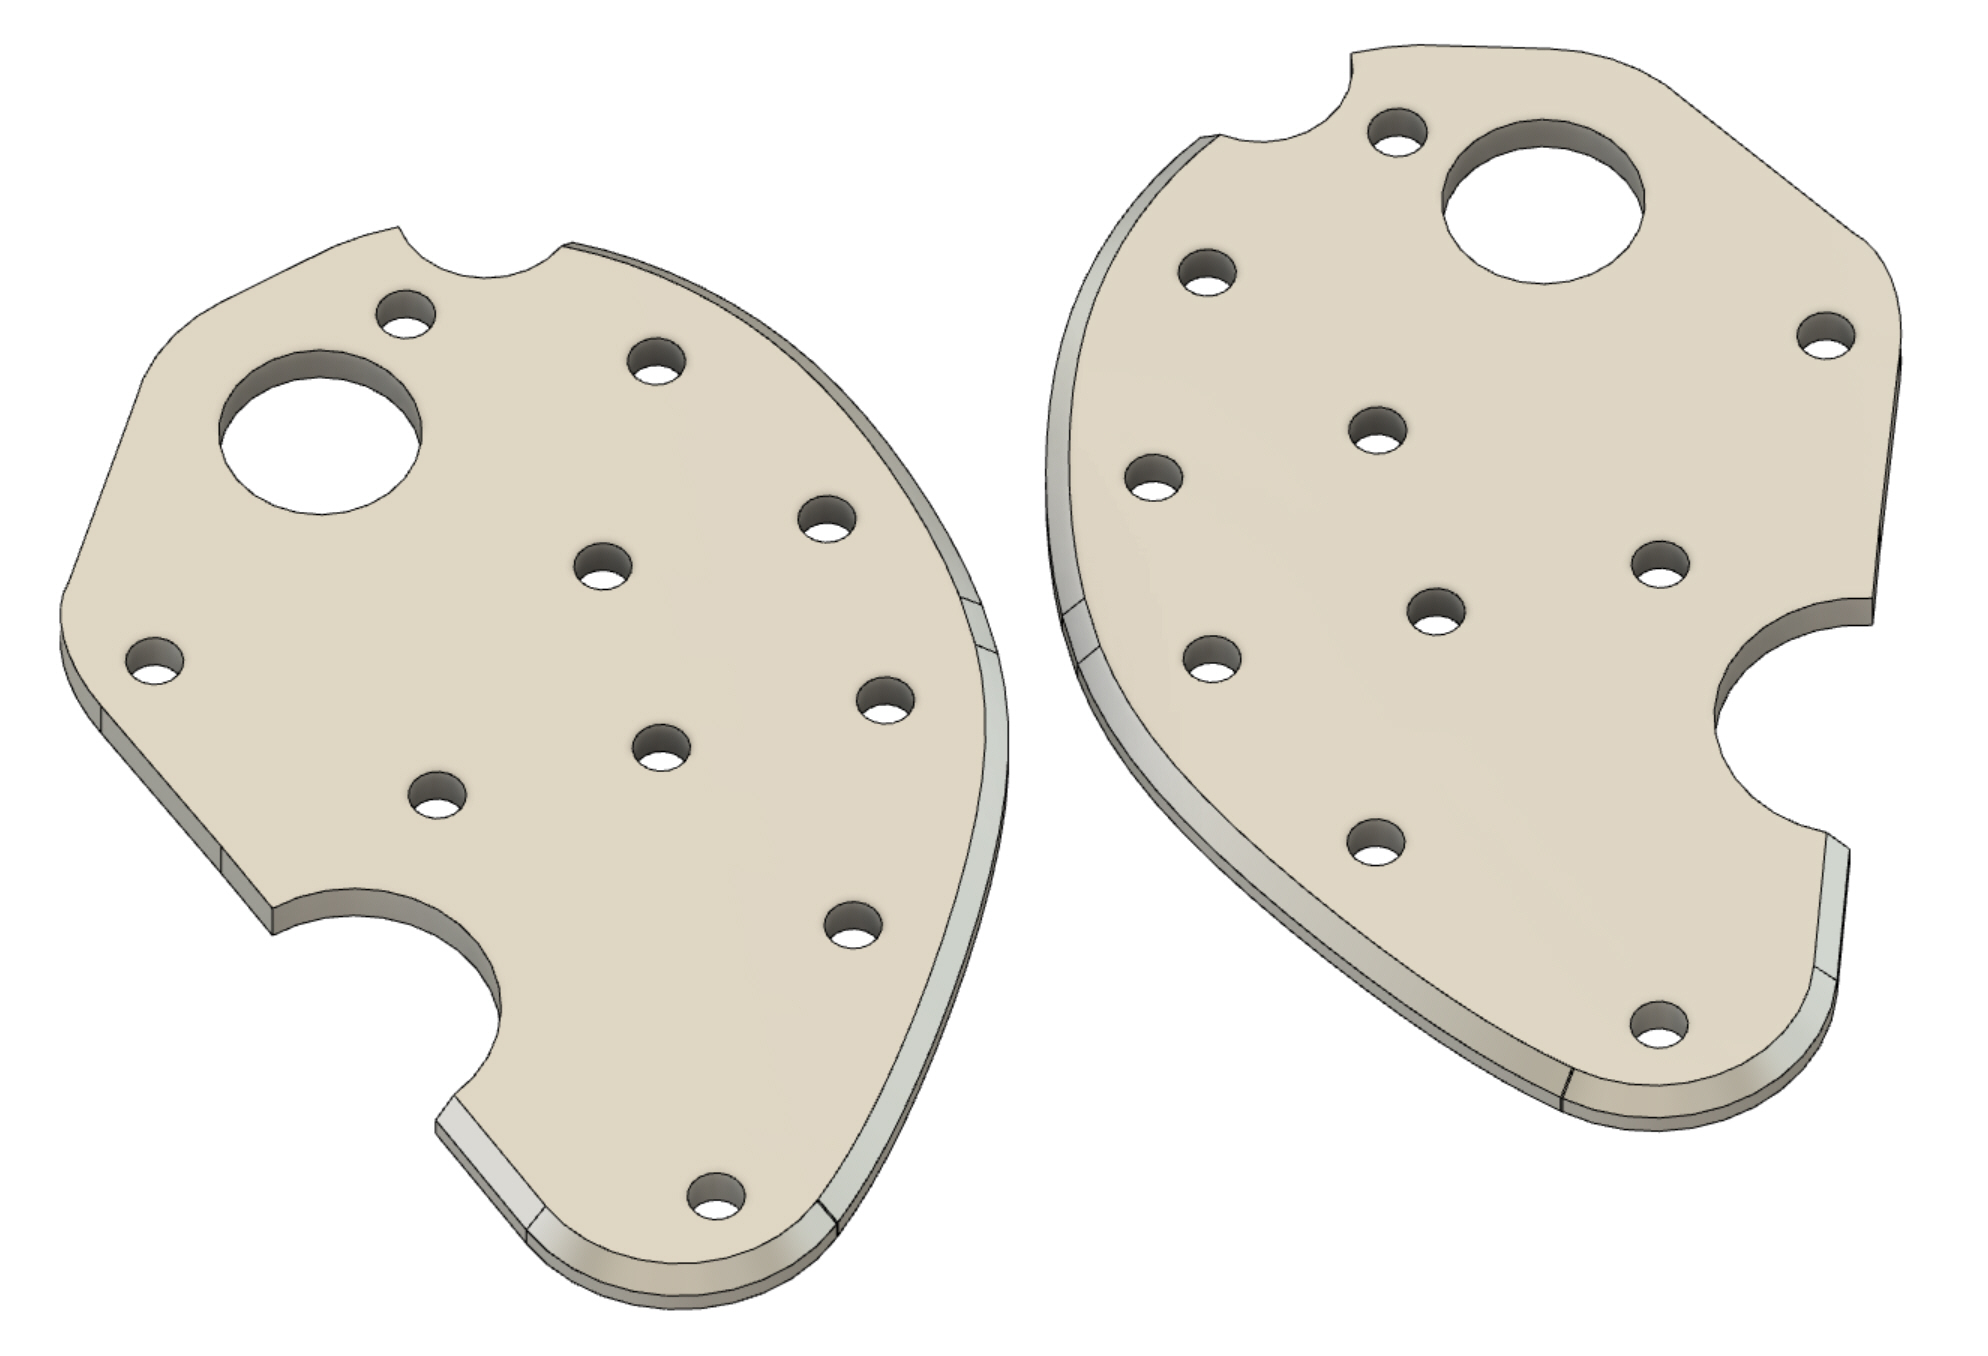
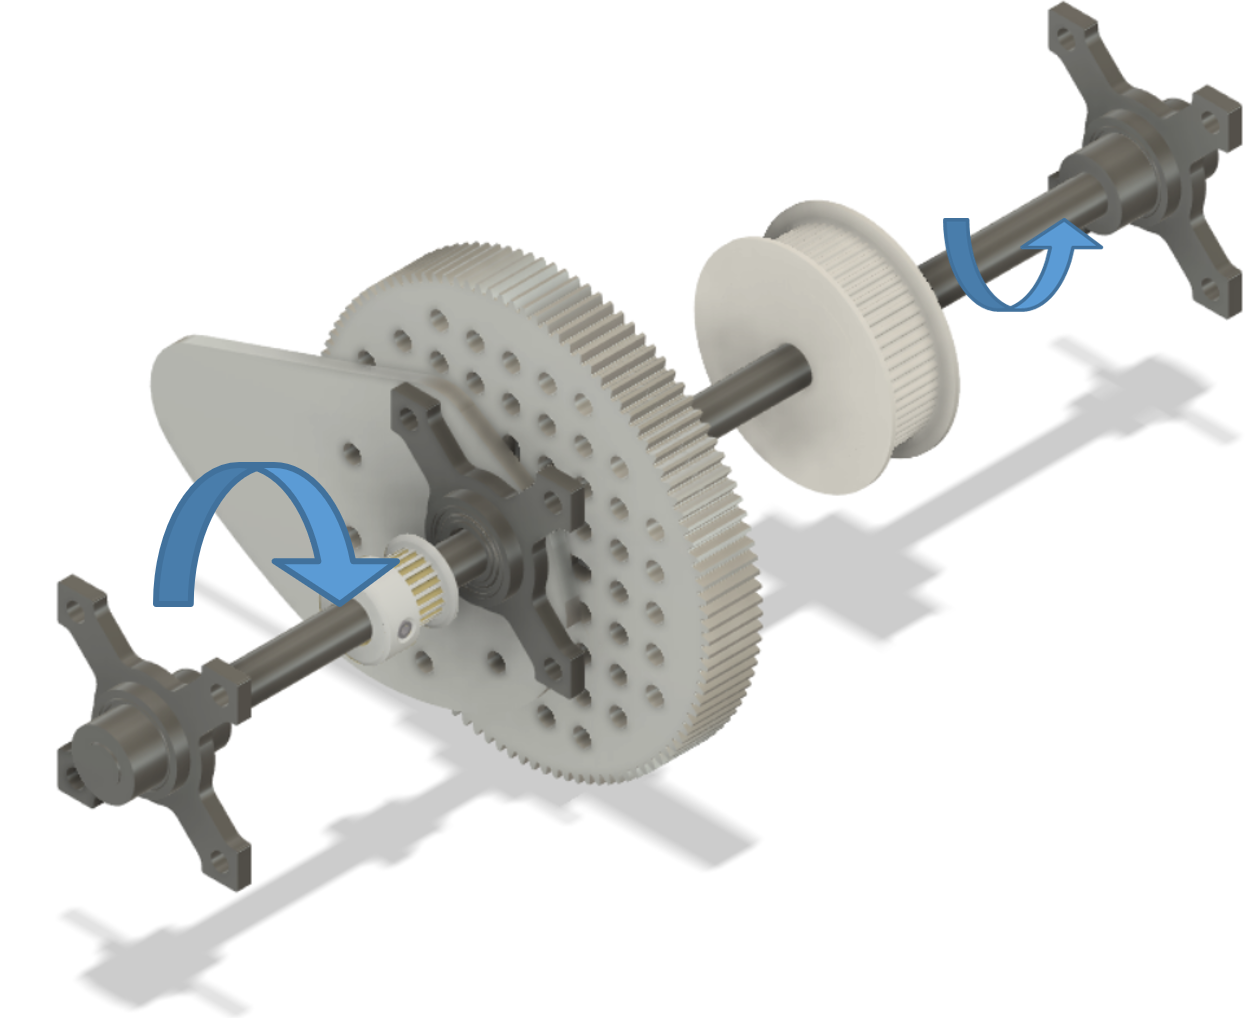
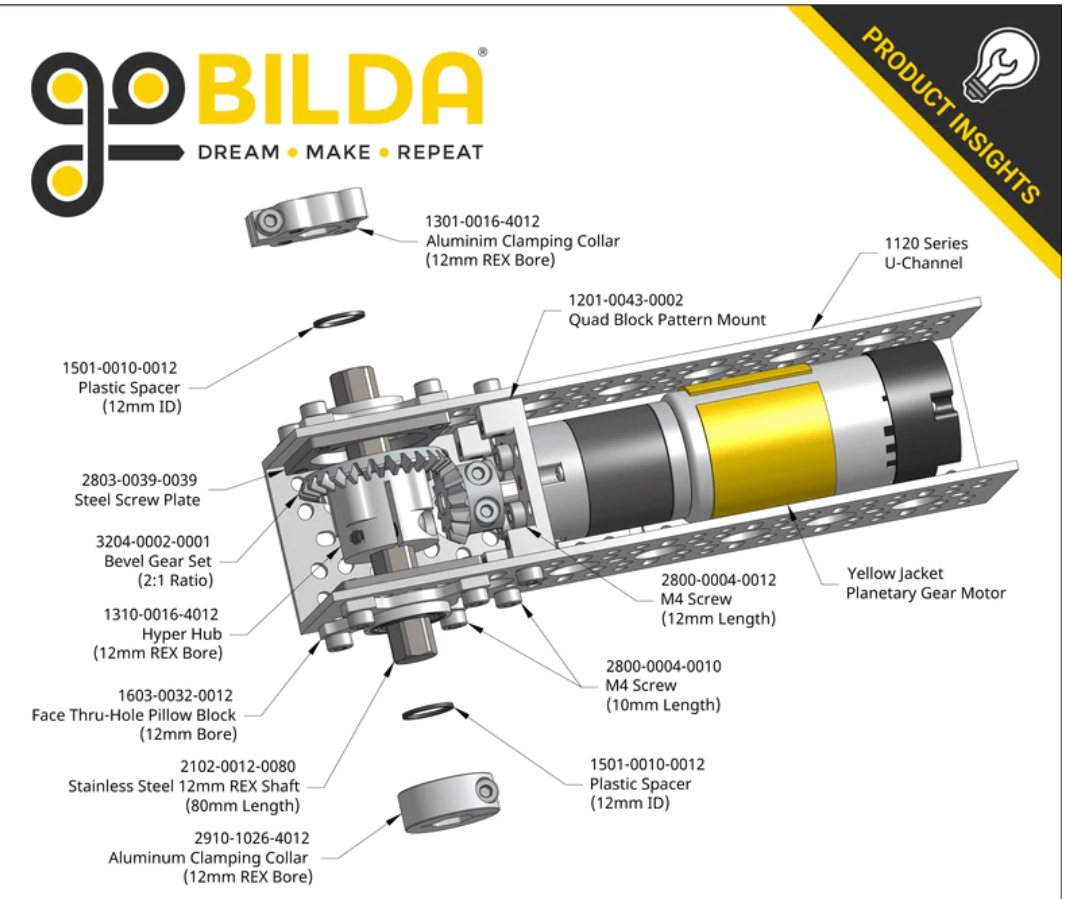
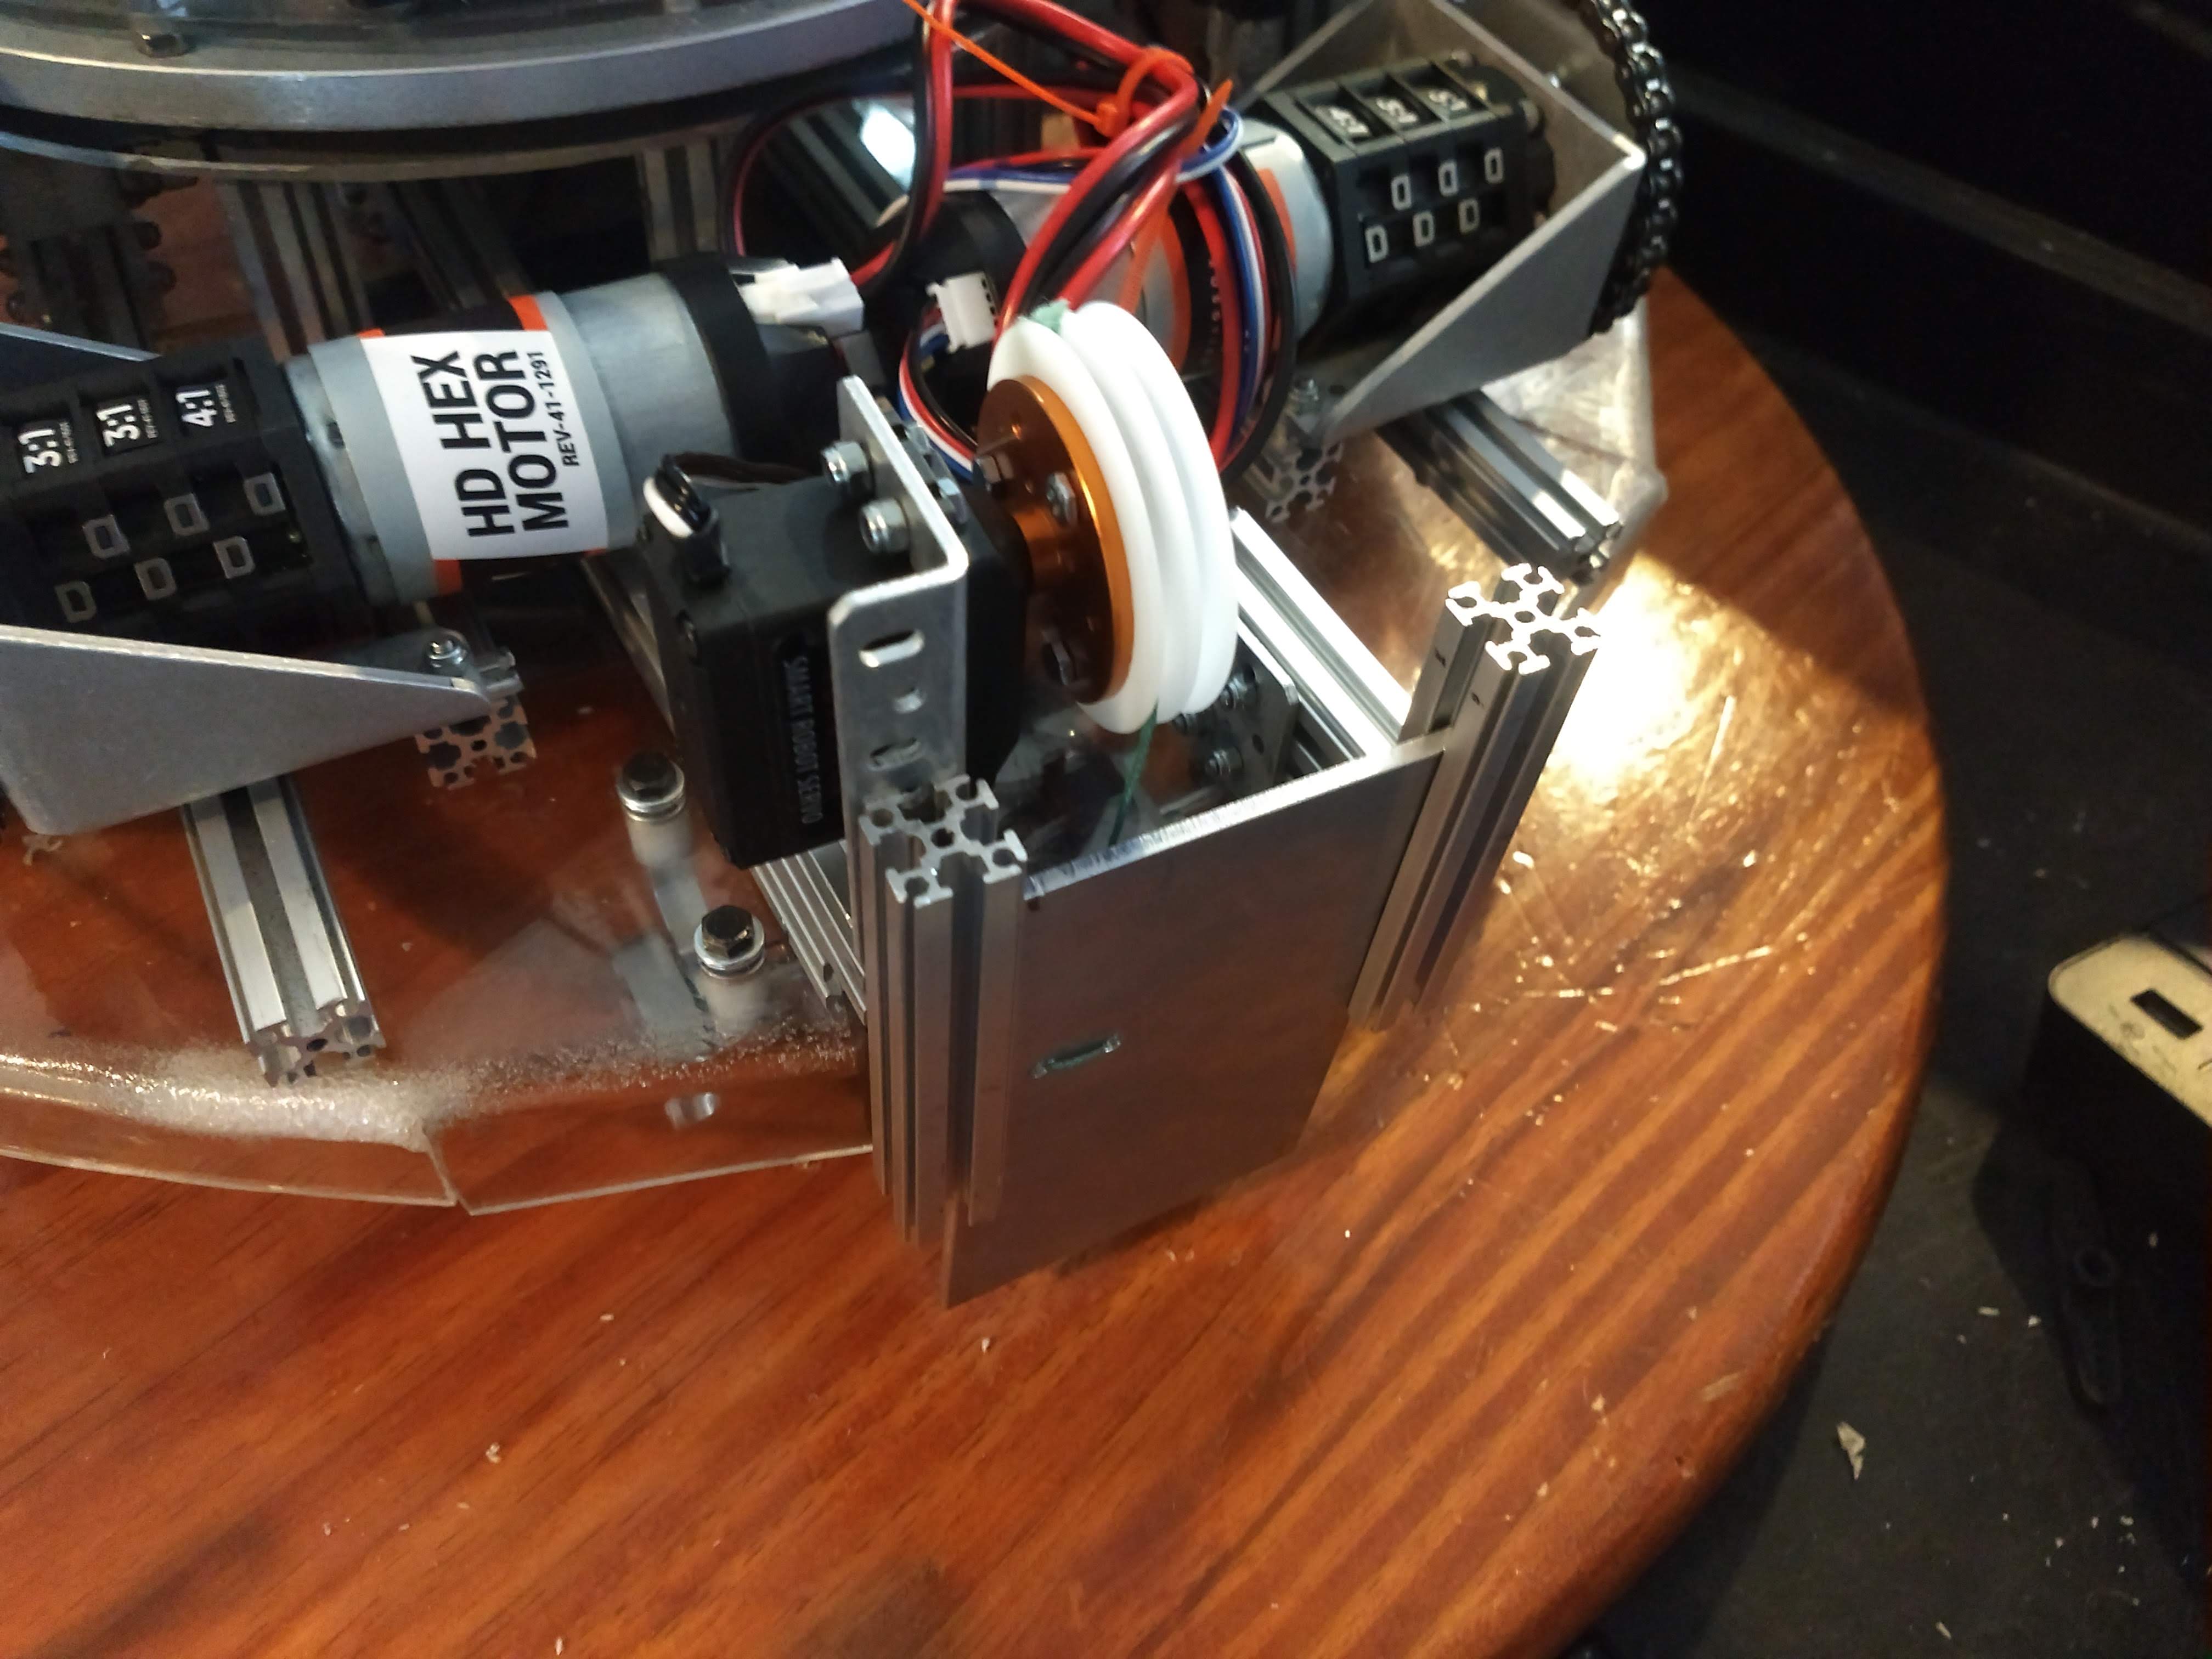
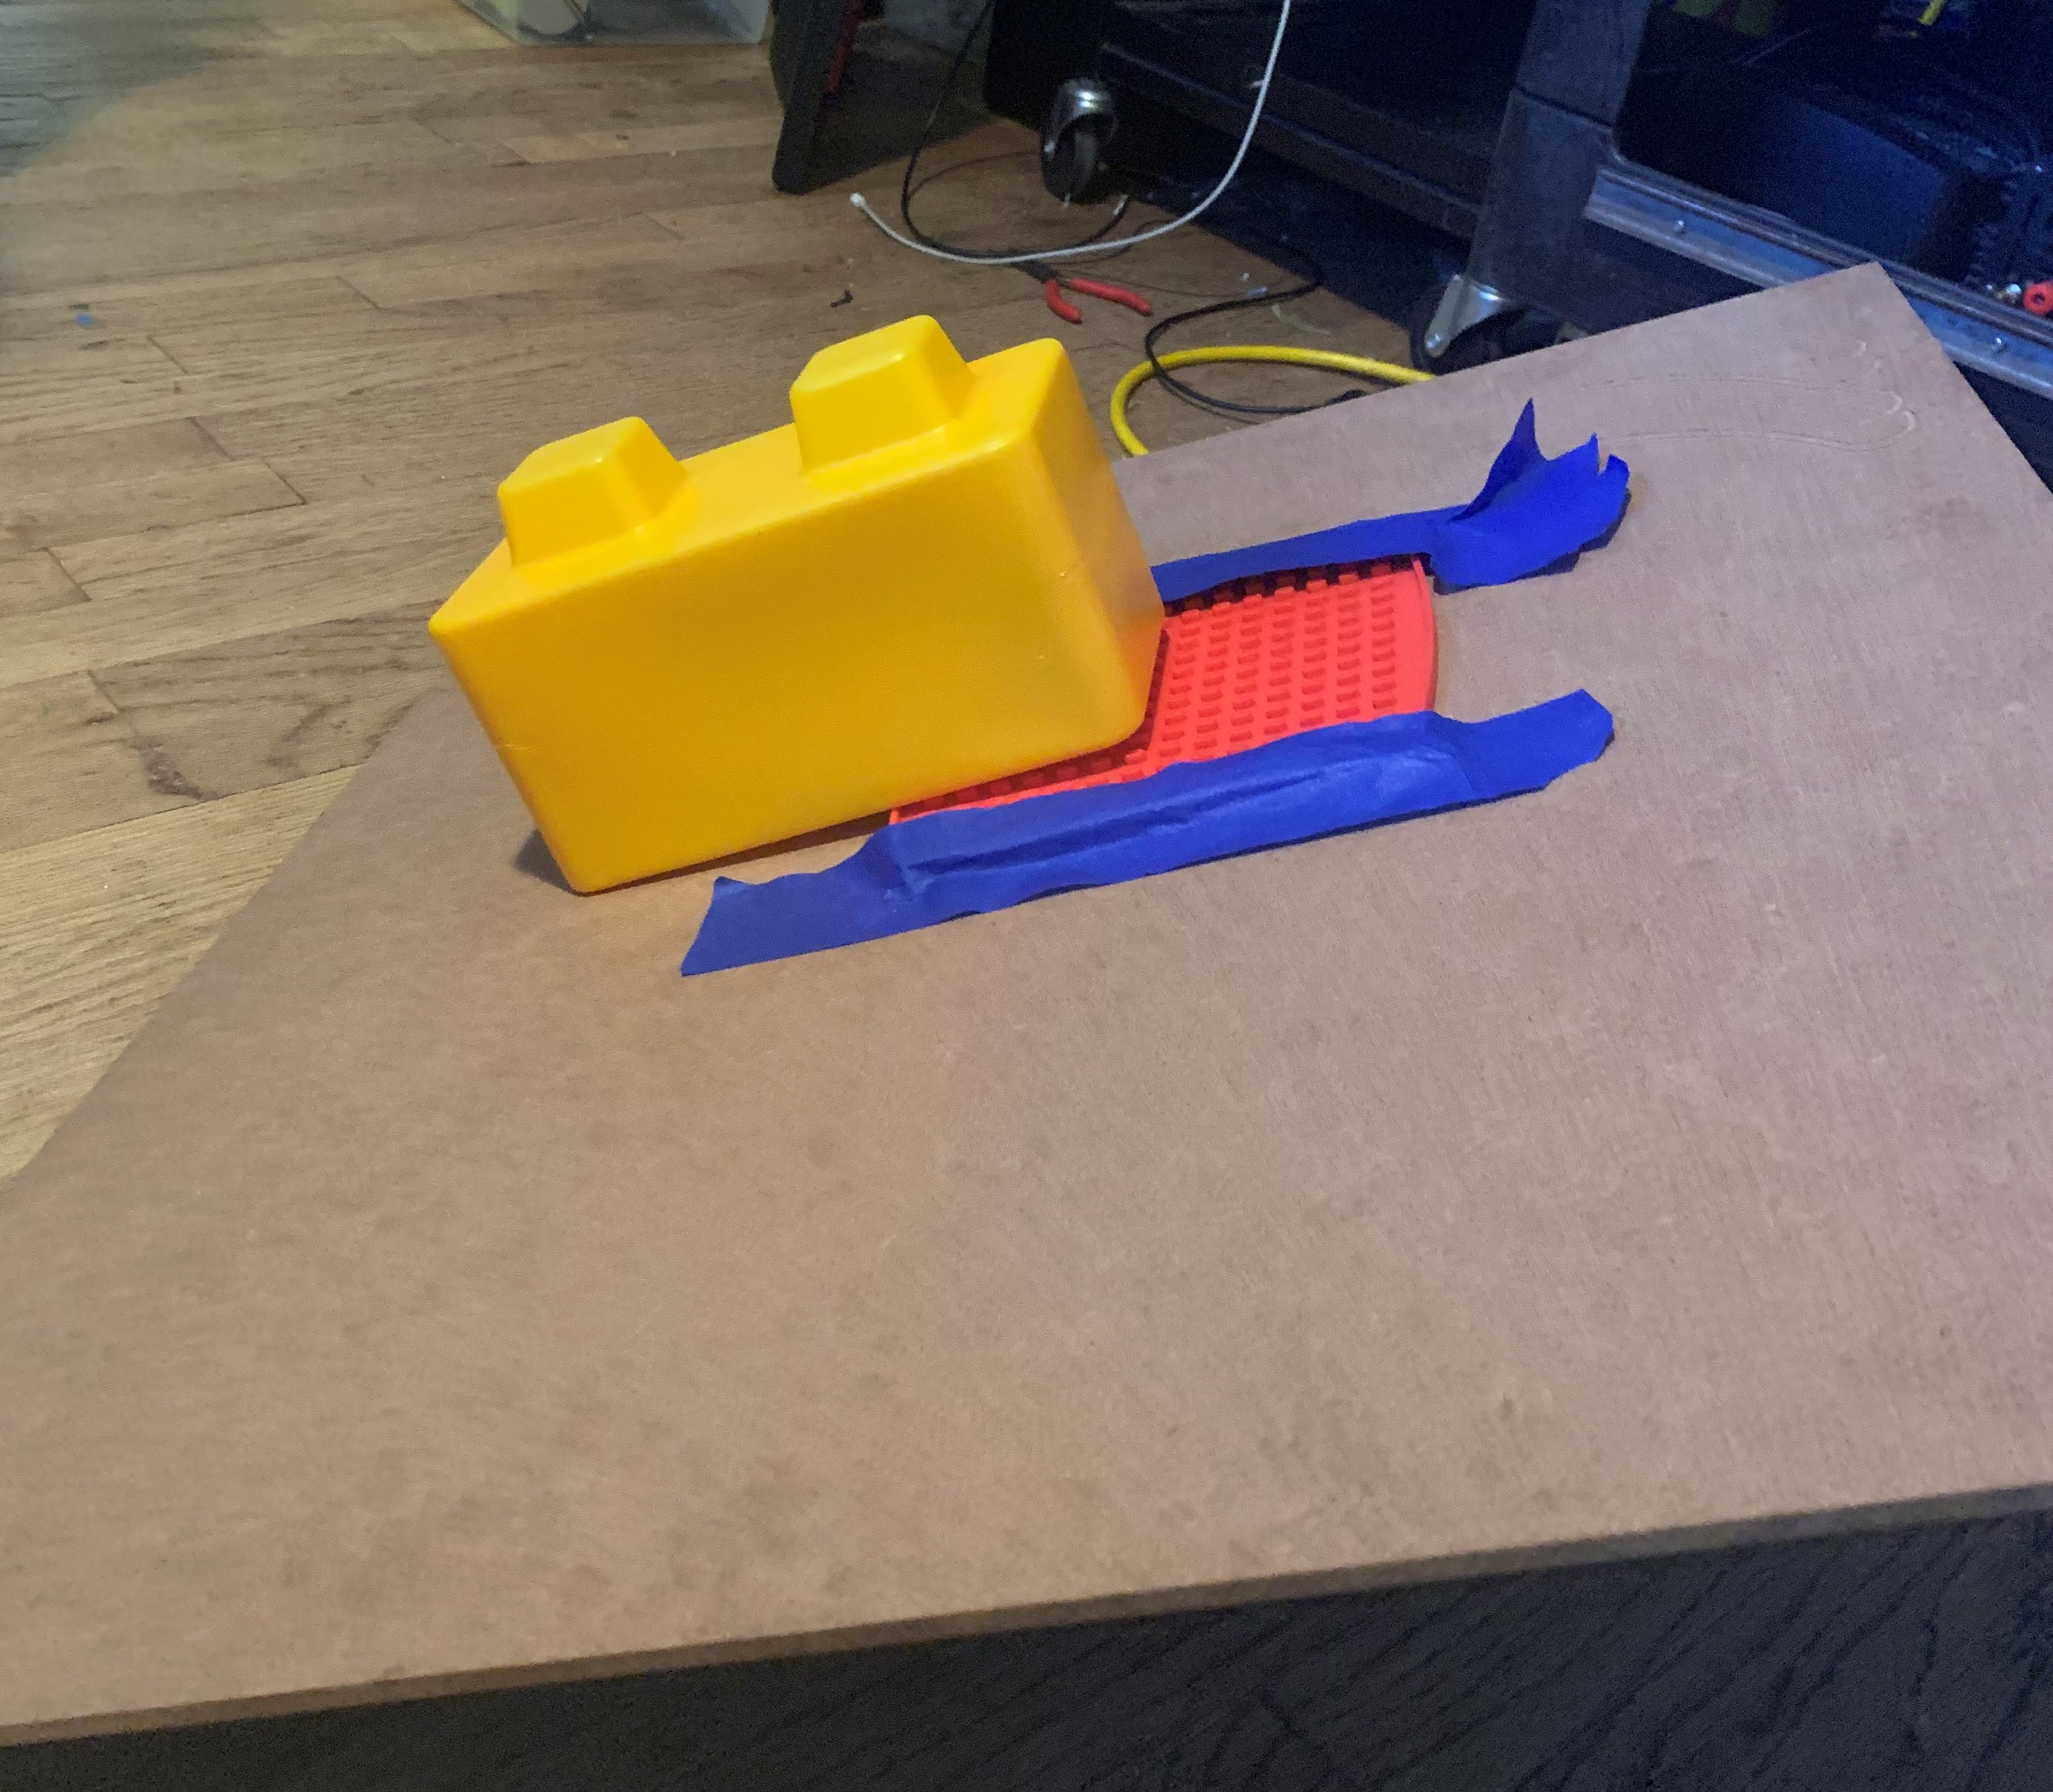
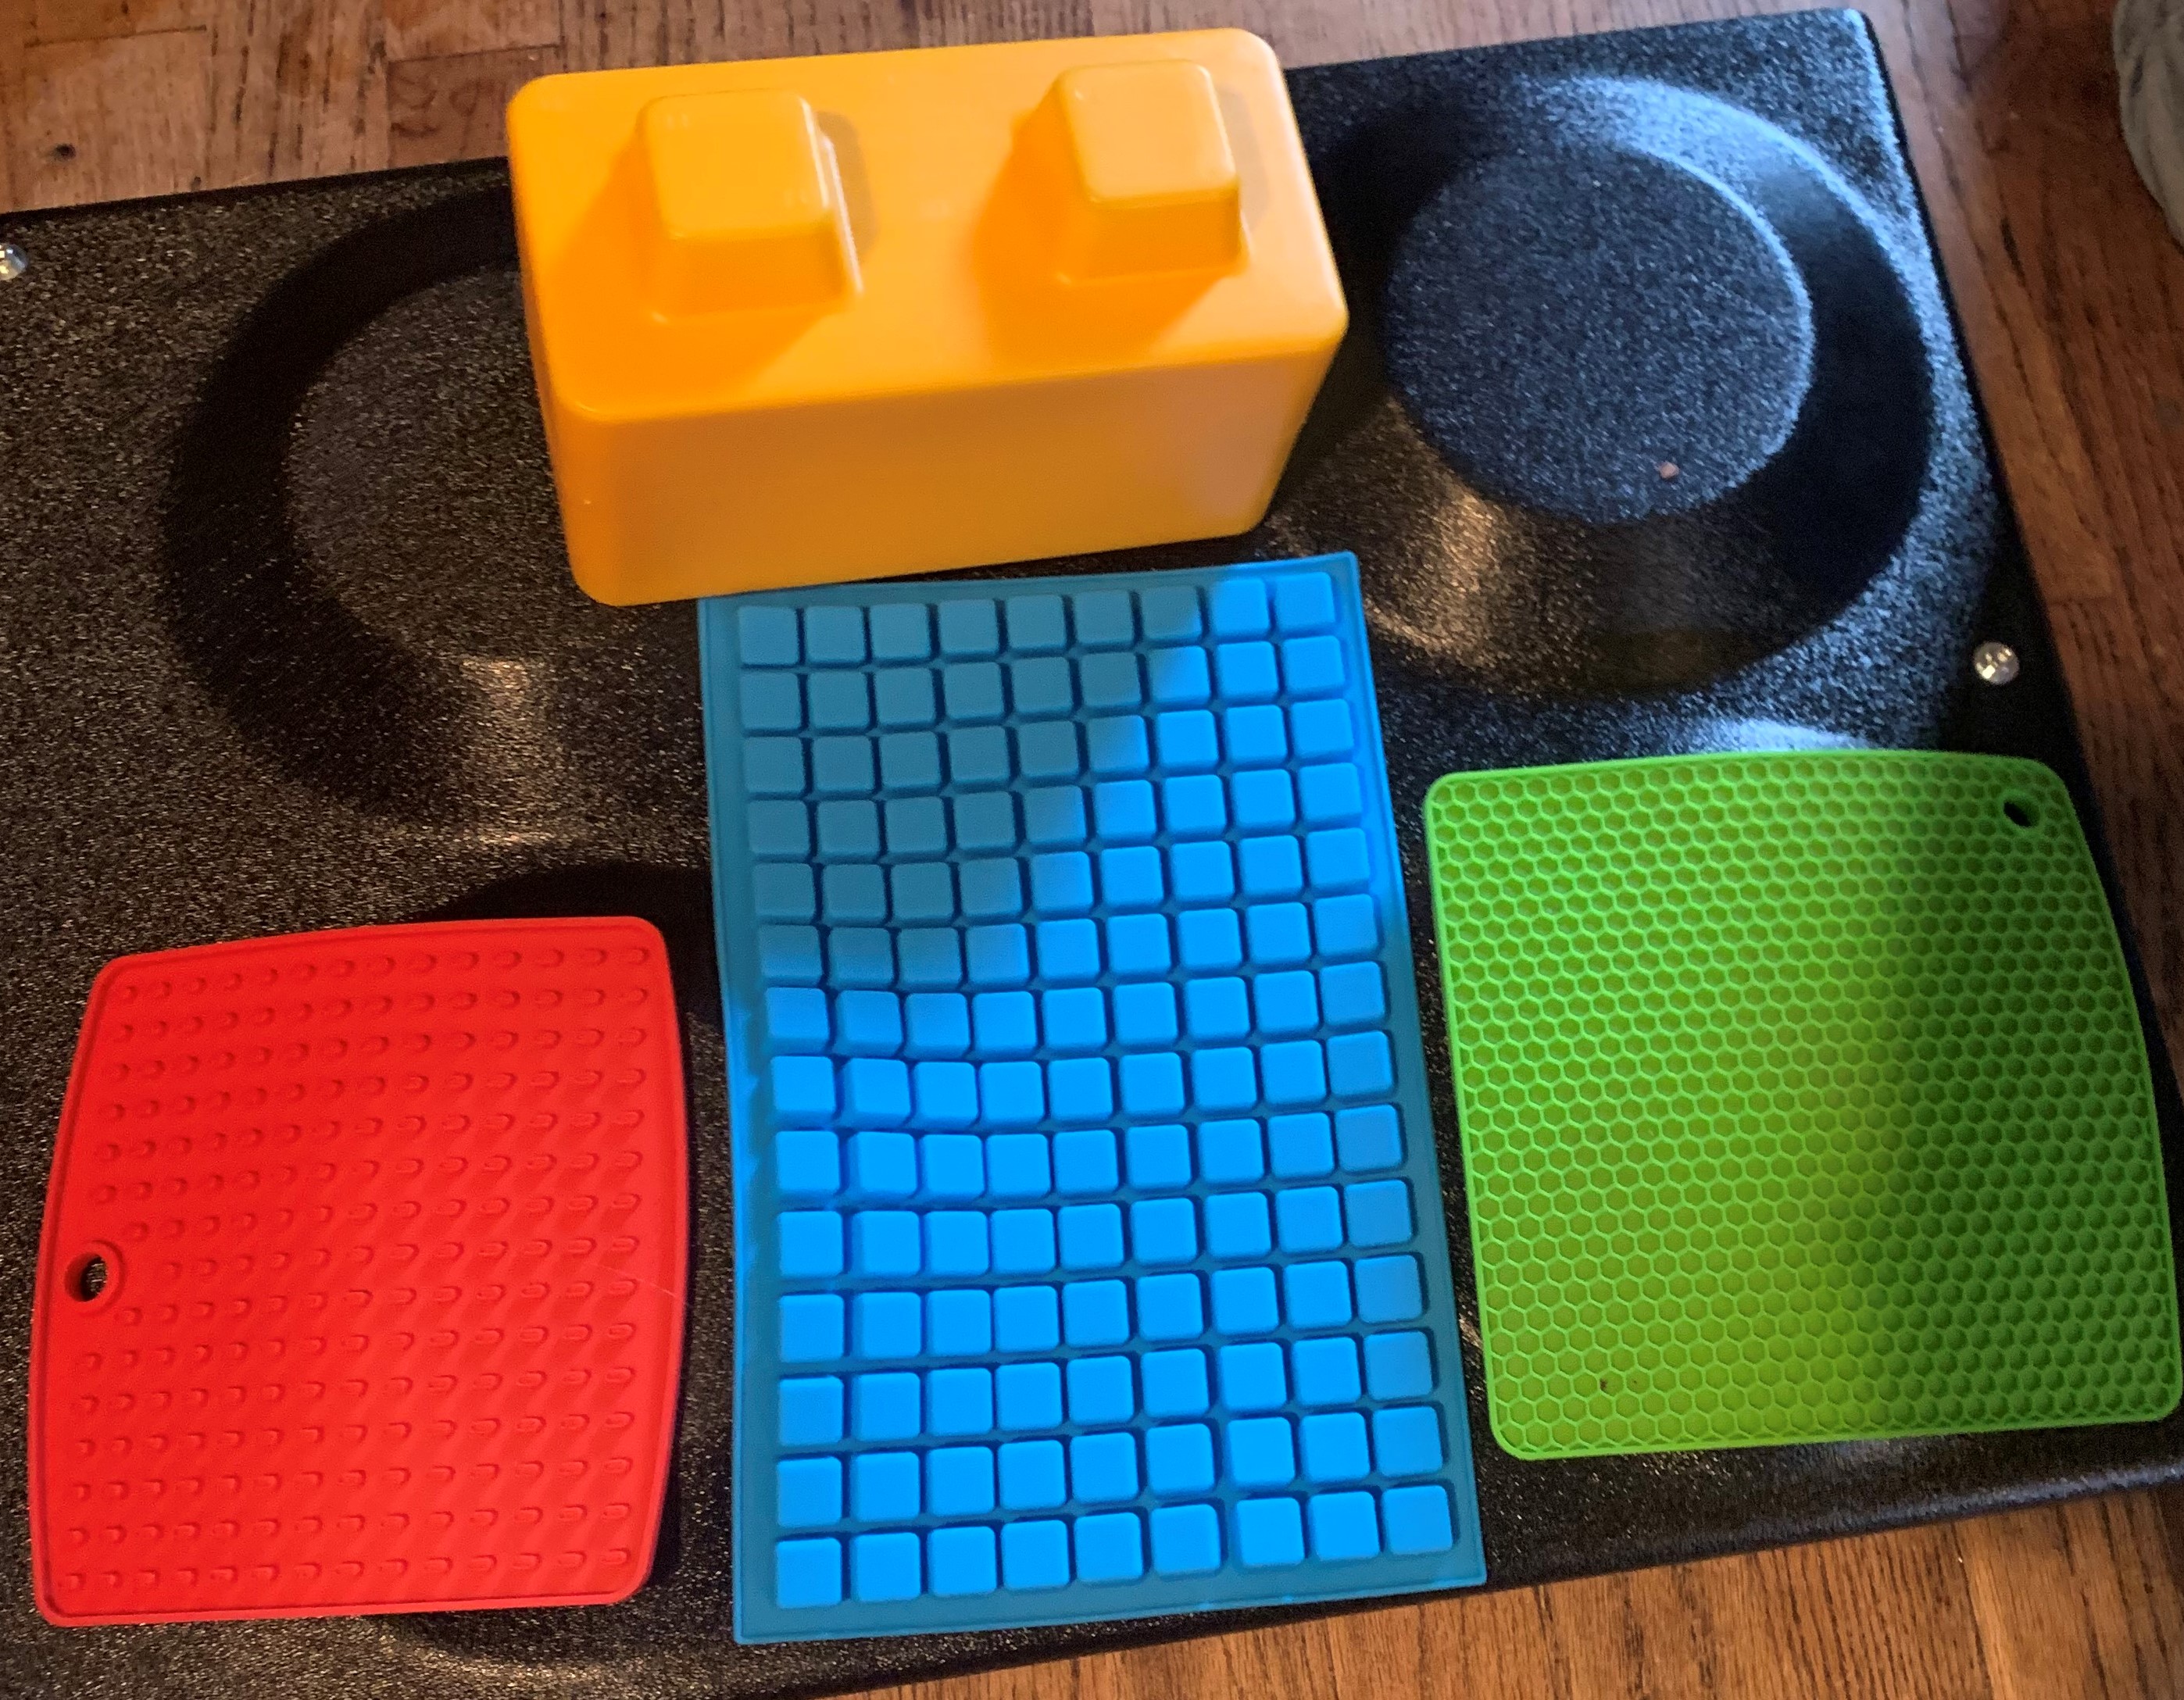
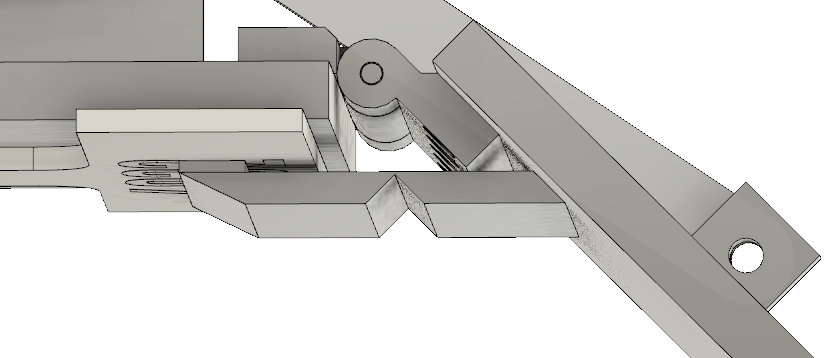
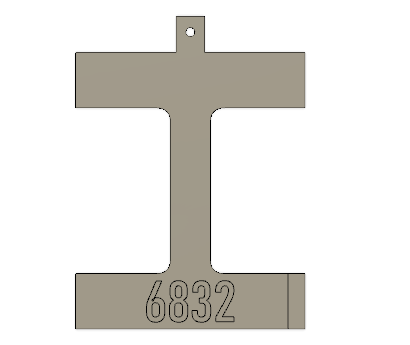
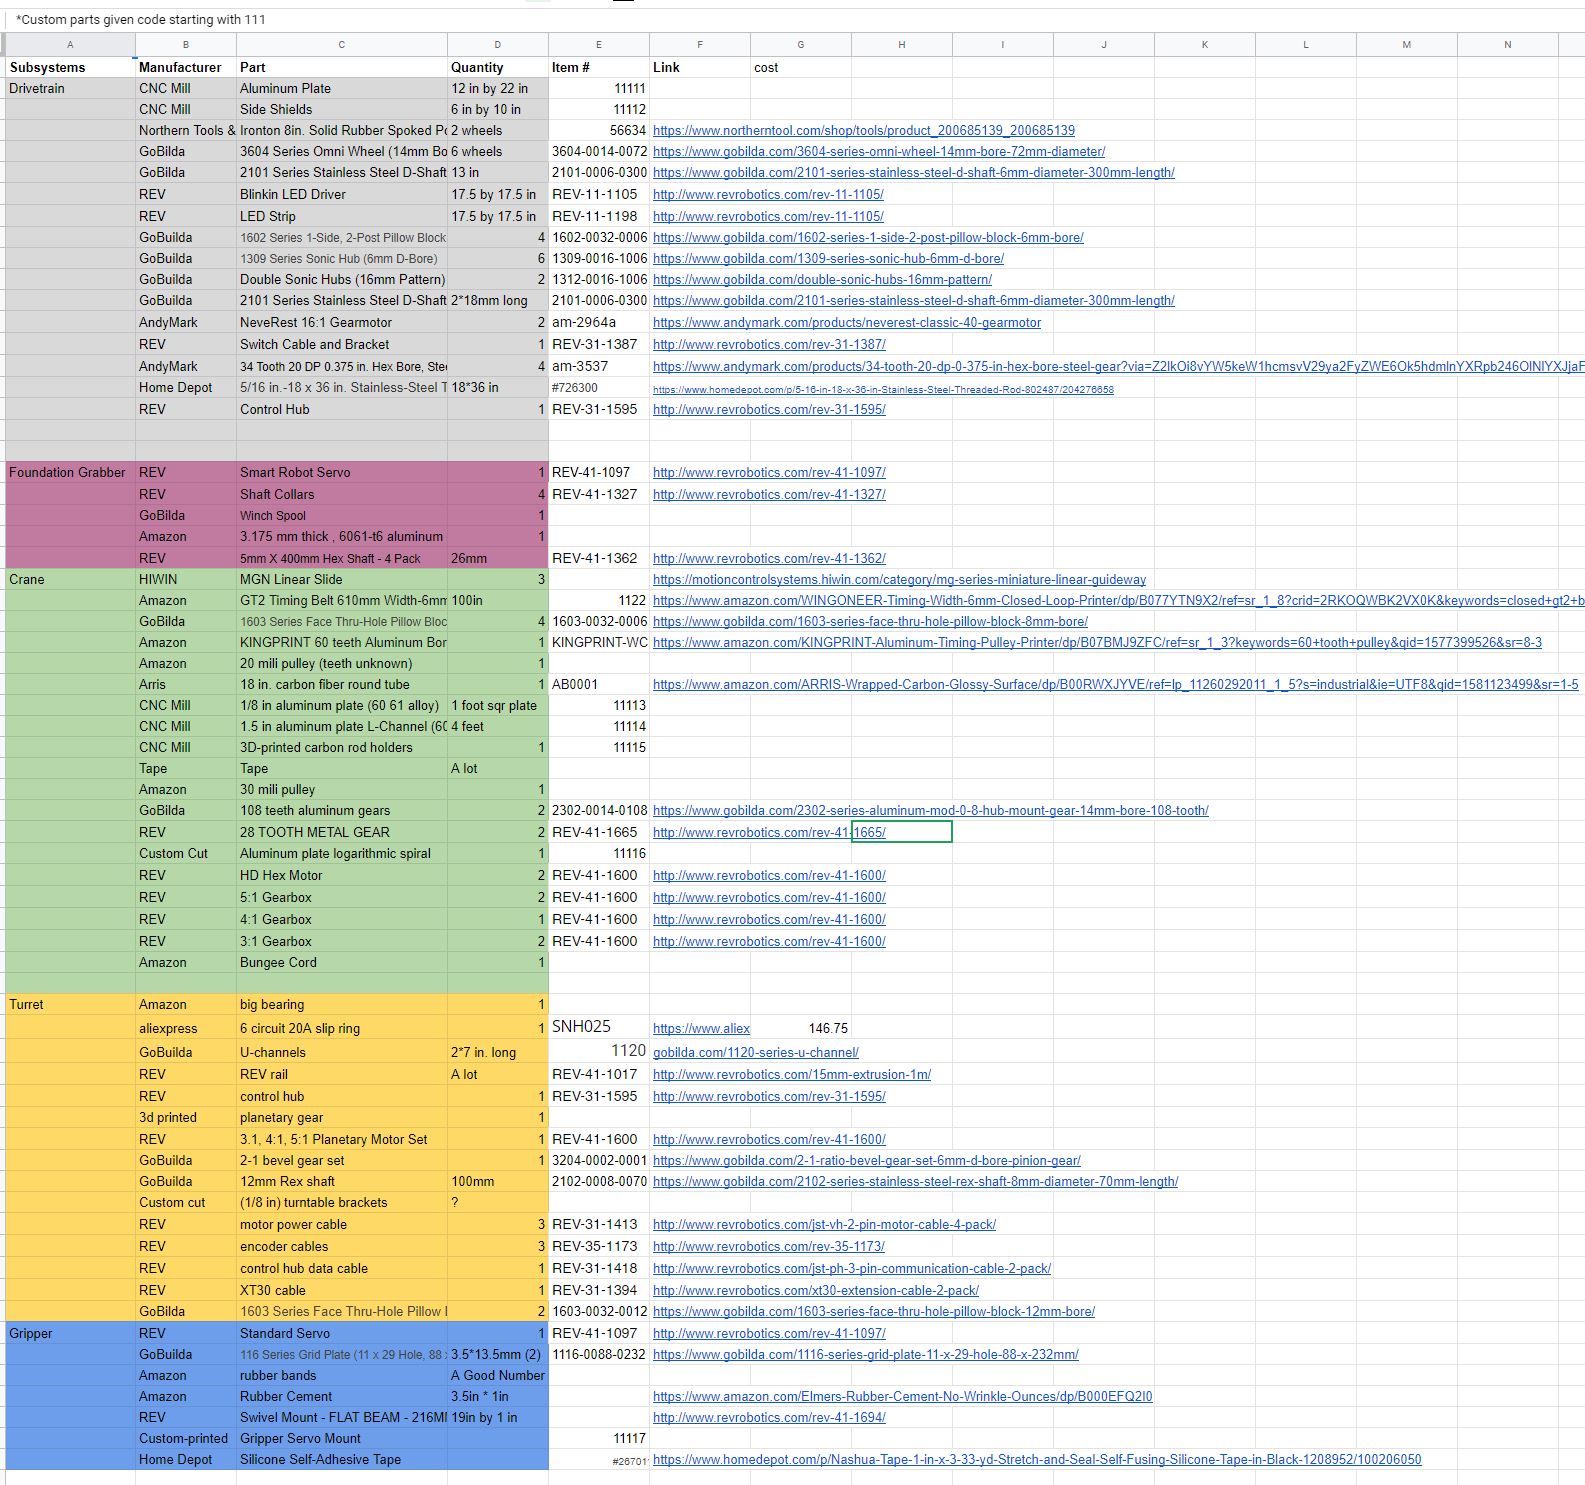
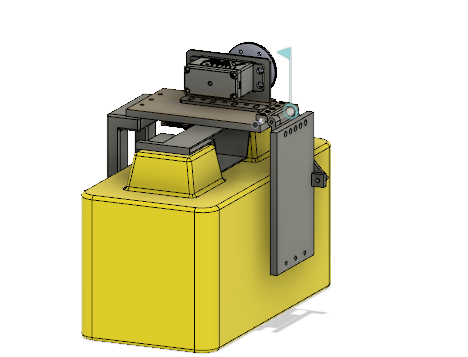
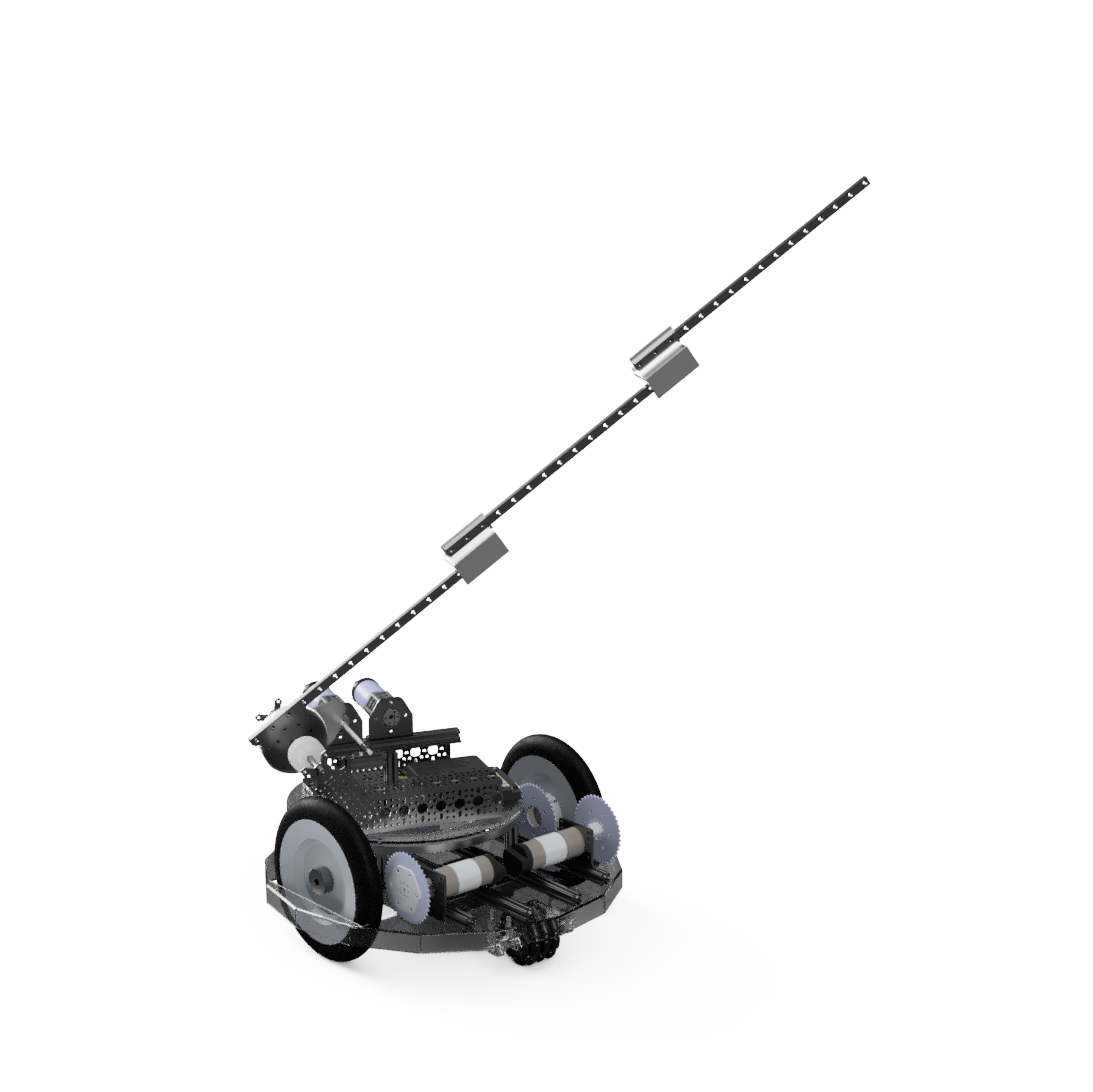
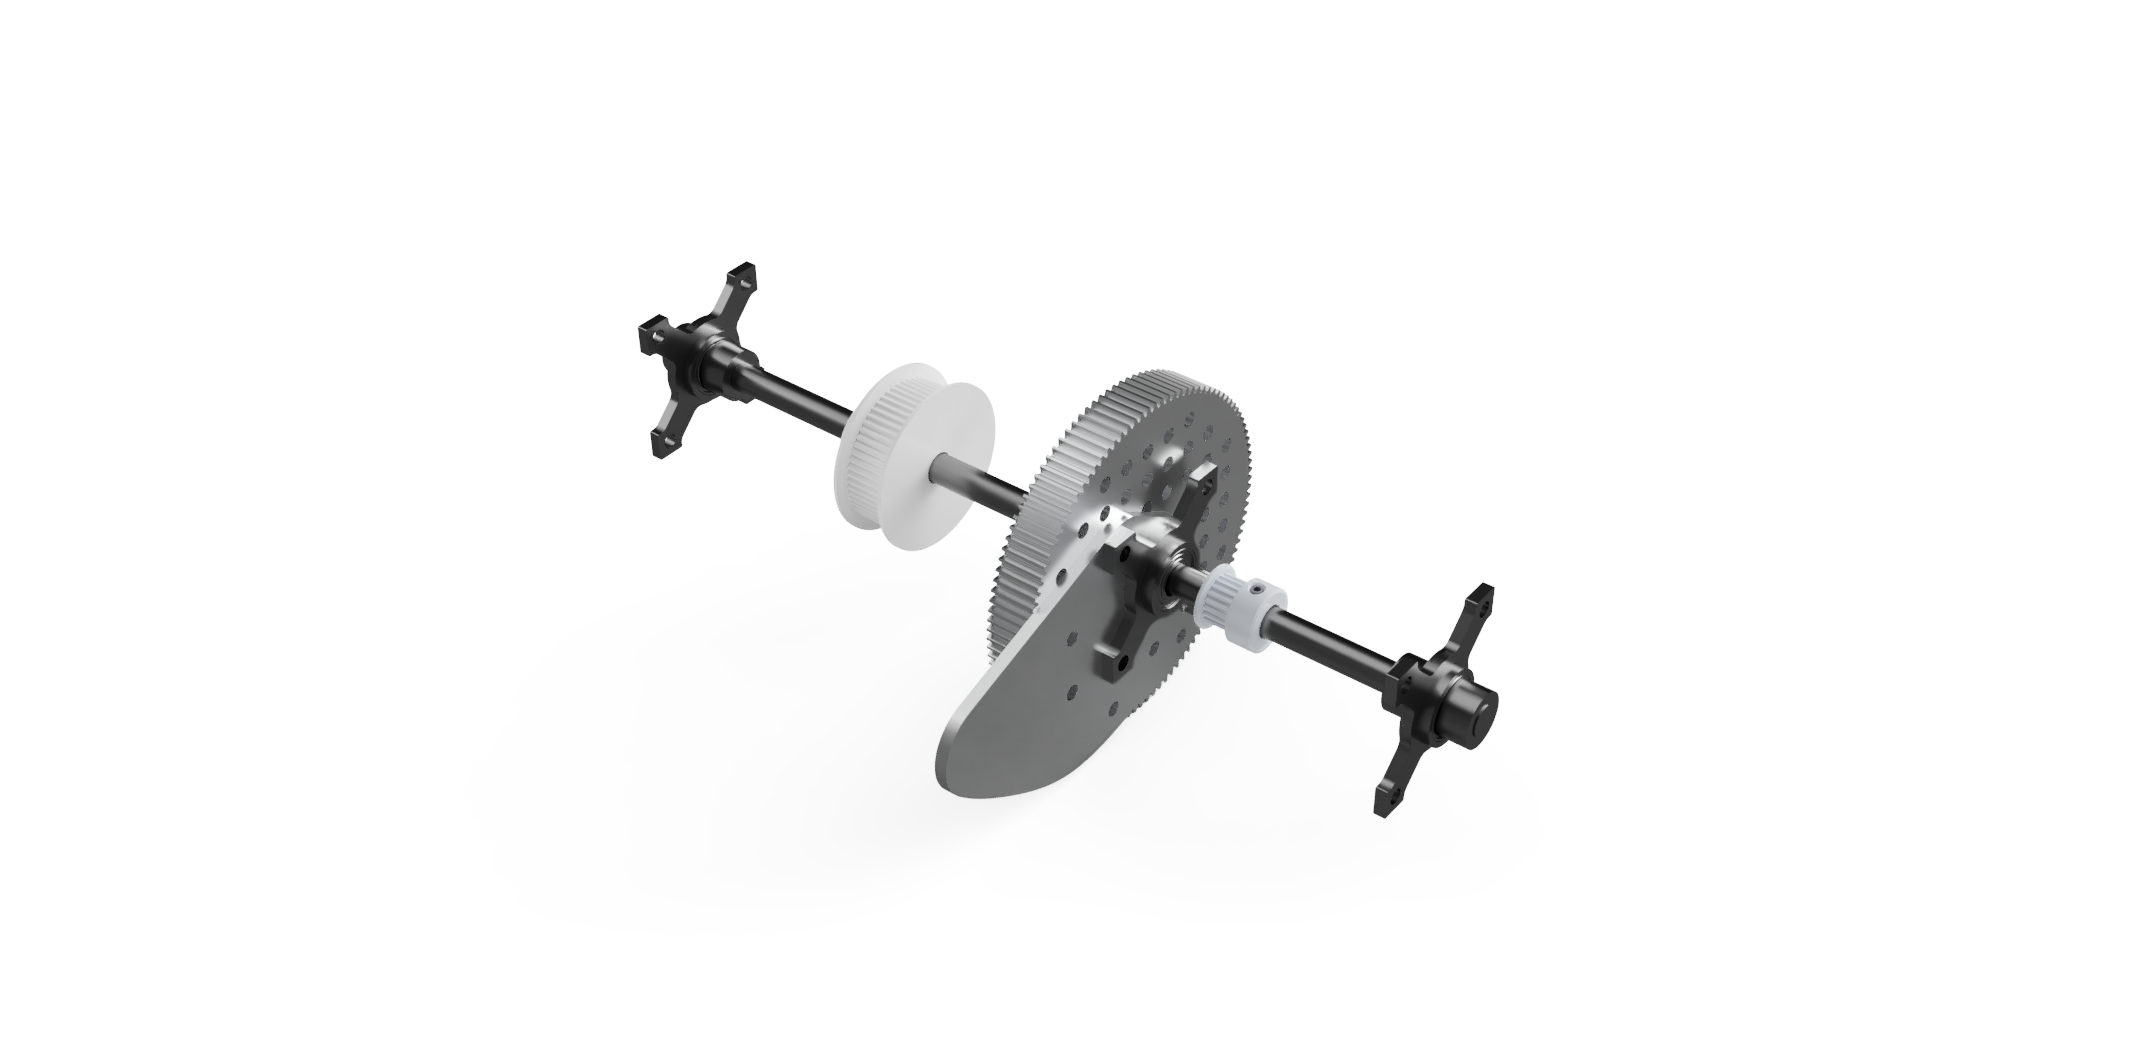 ...
...
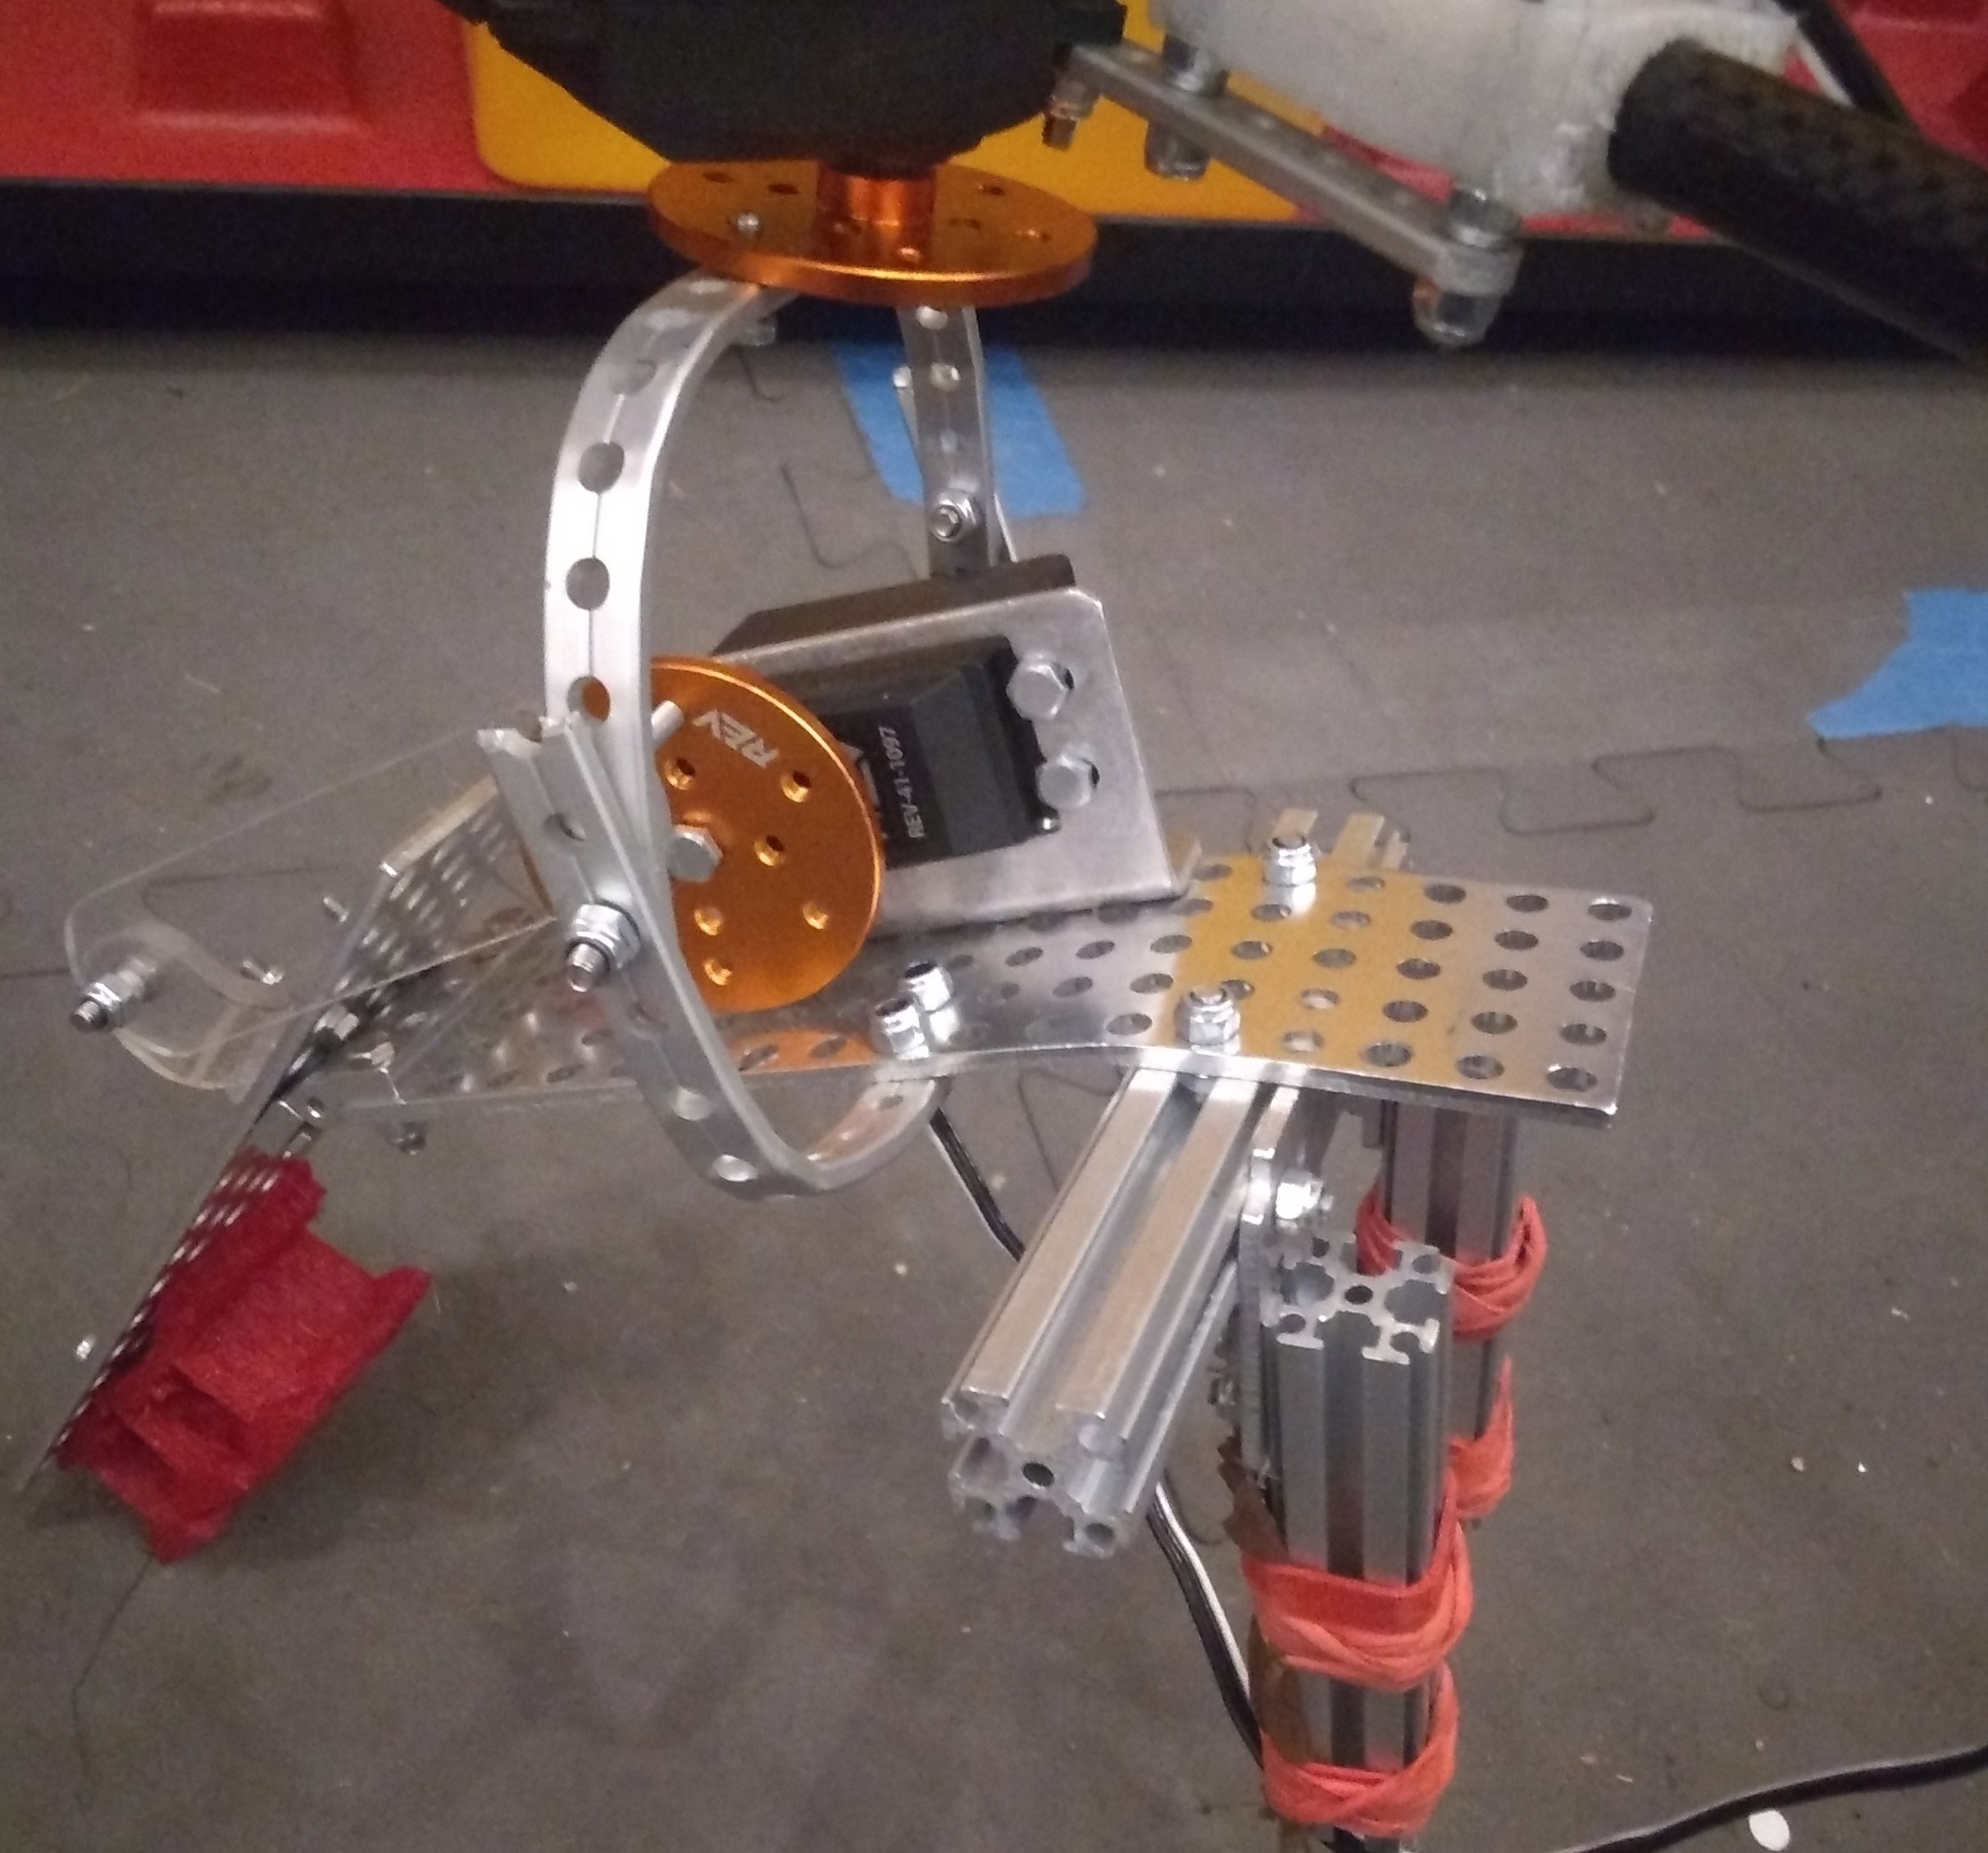
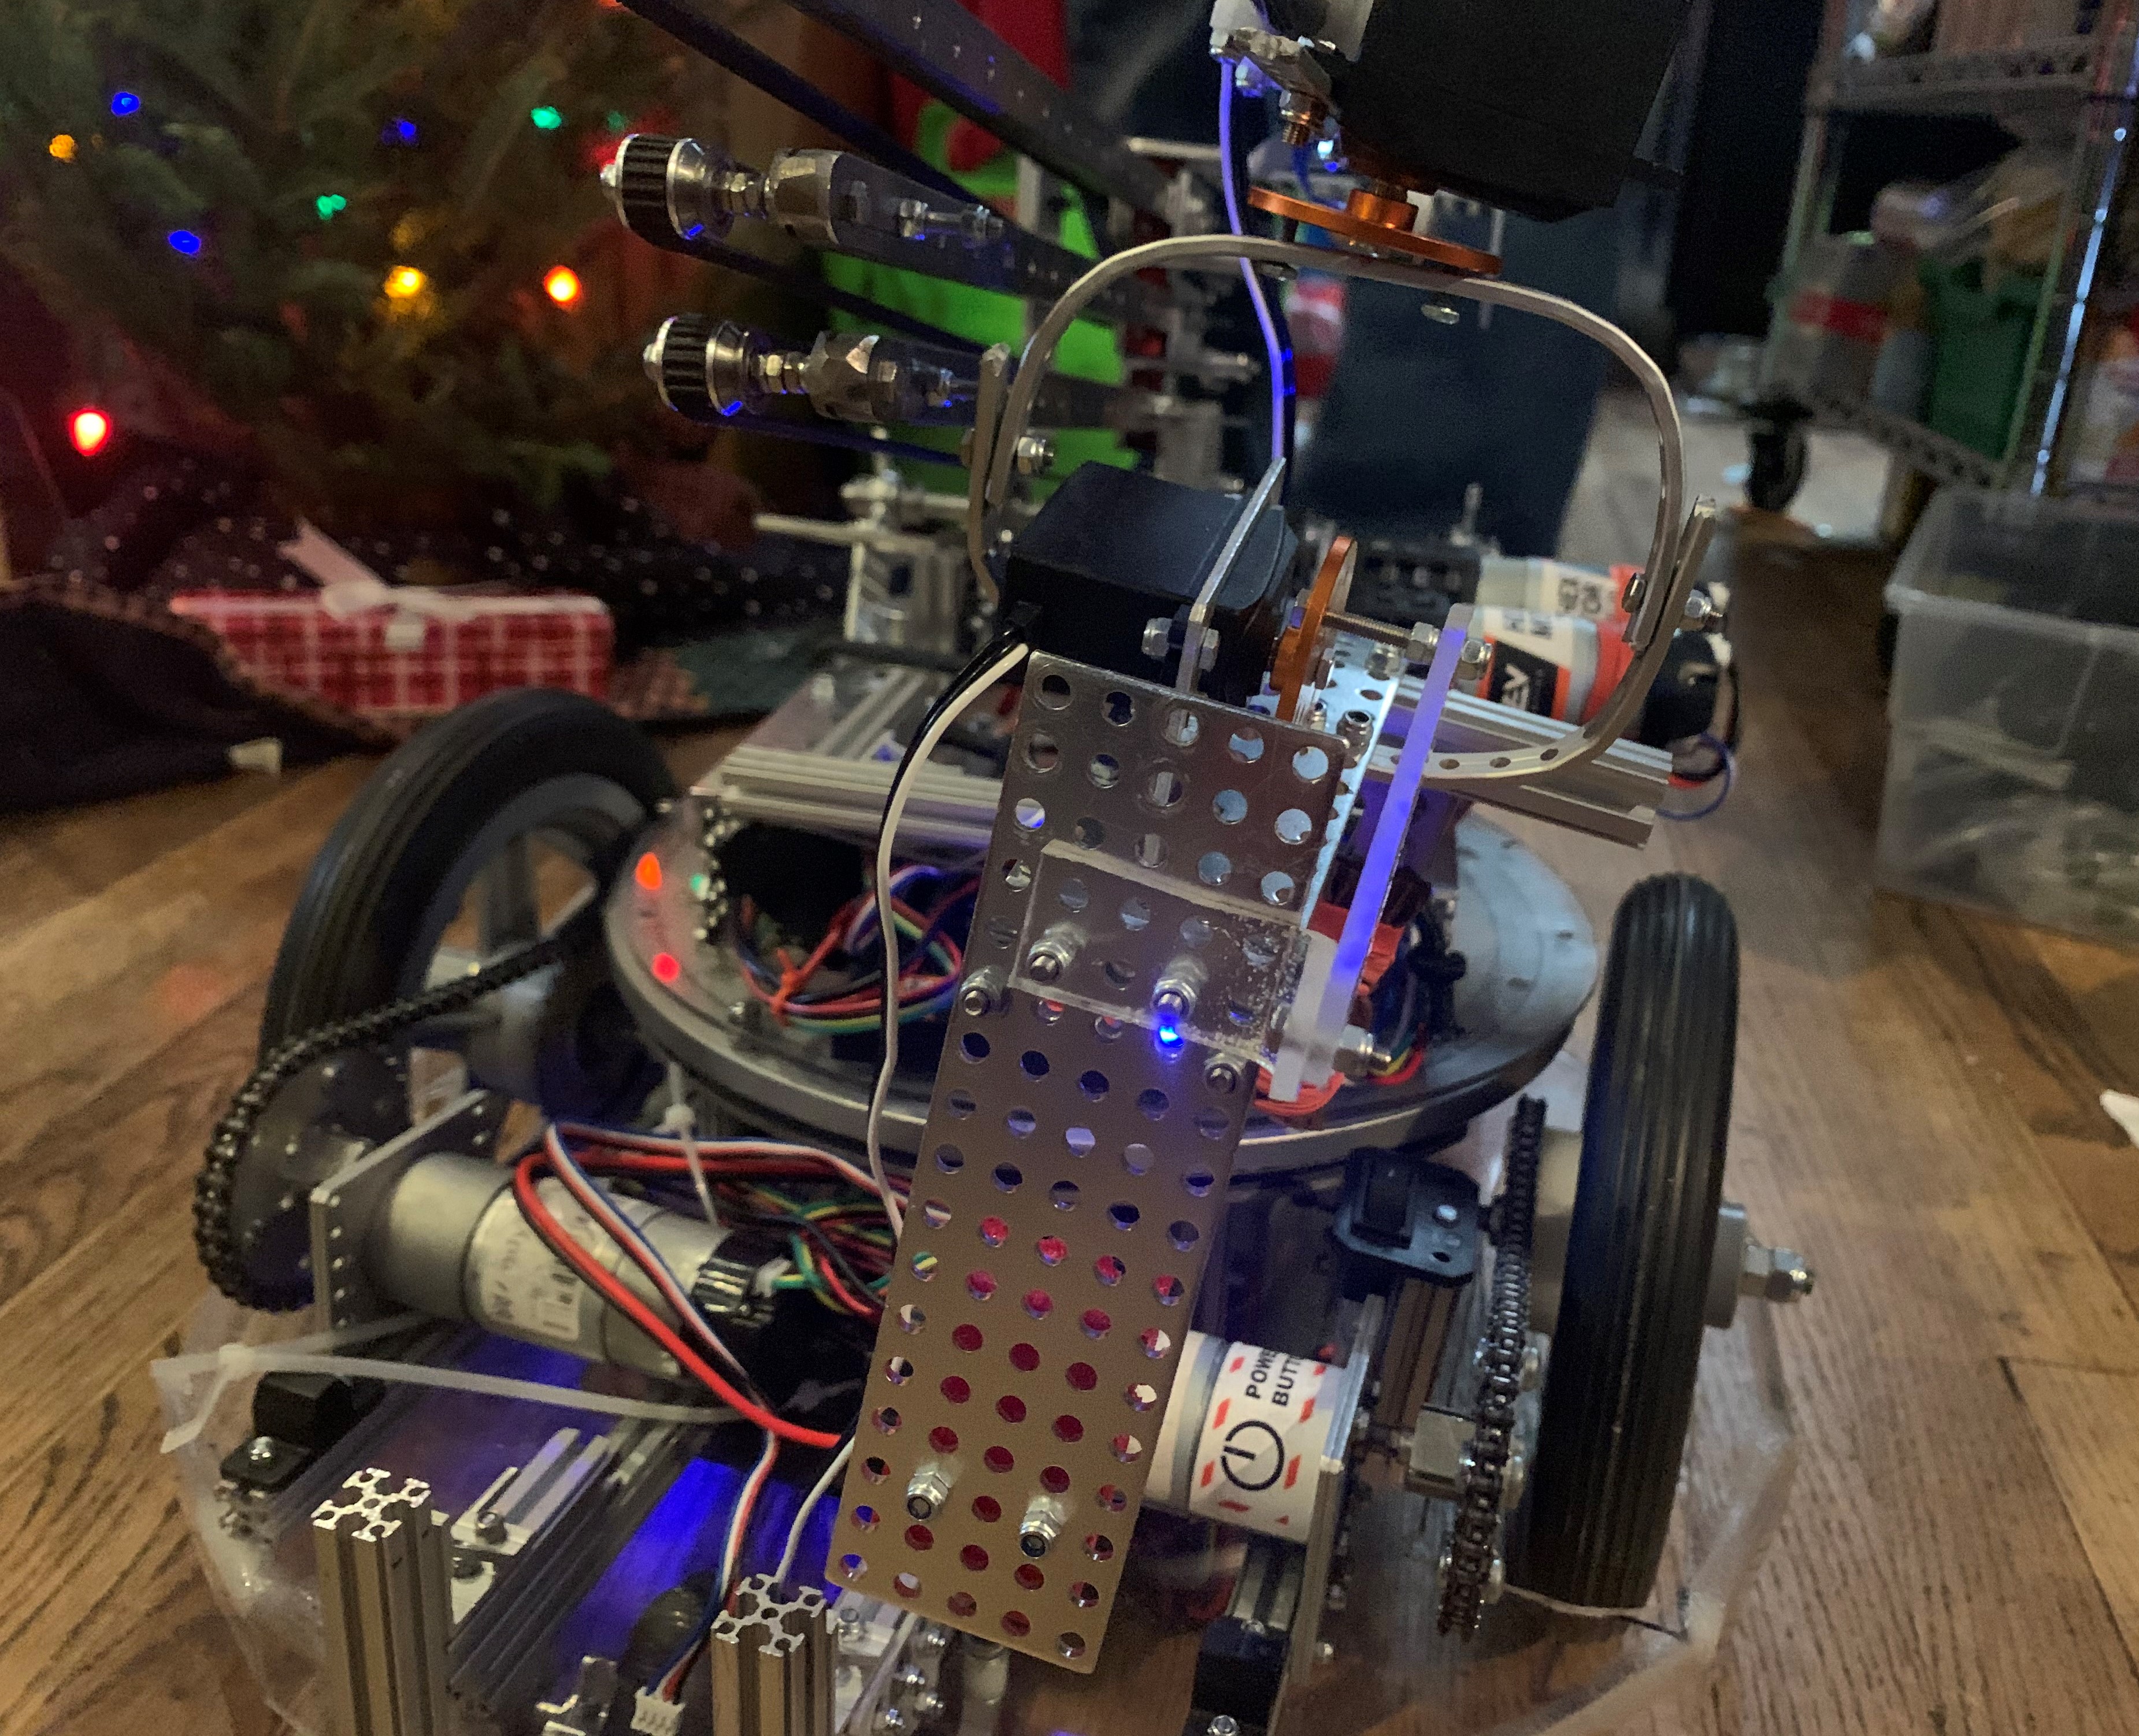
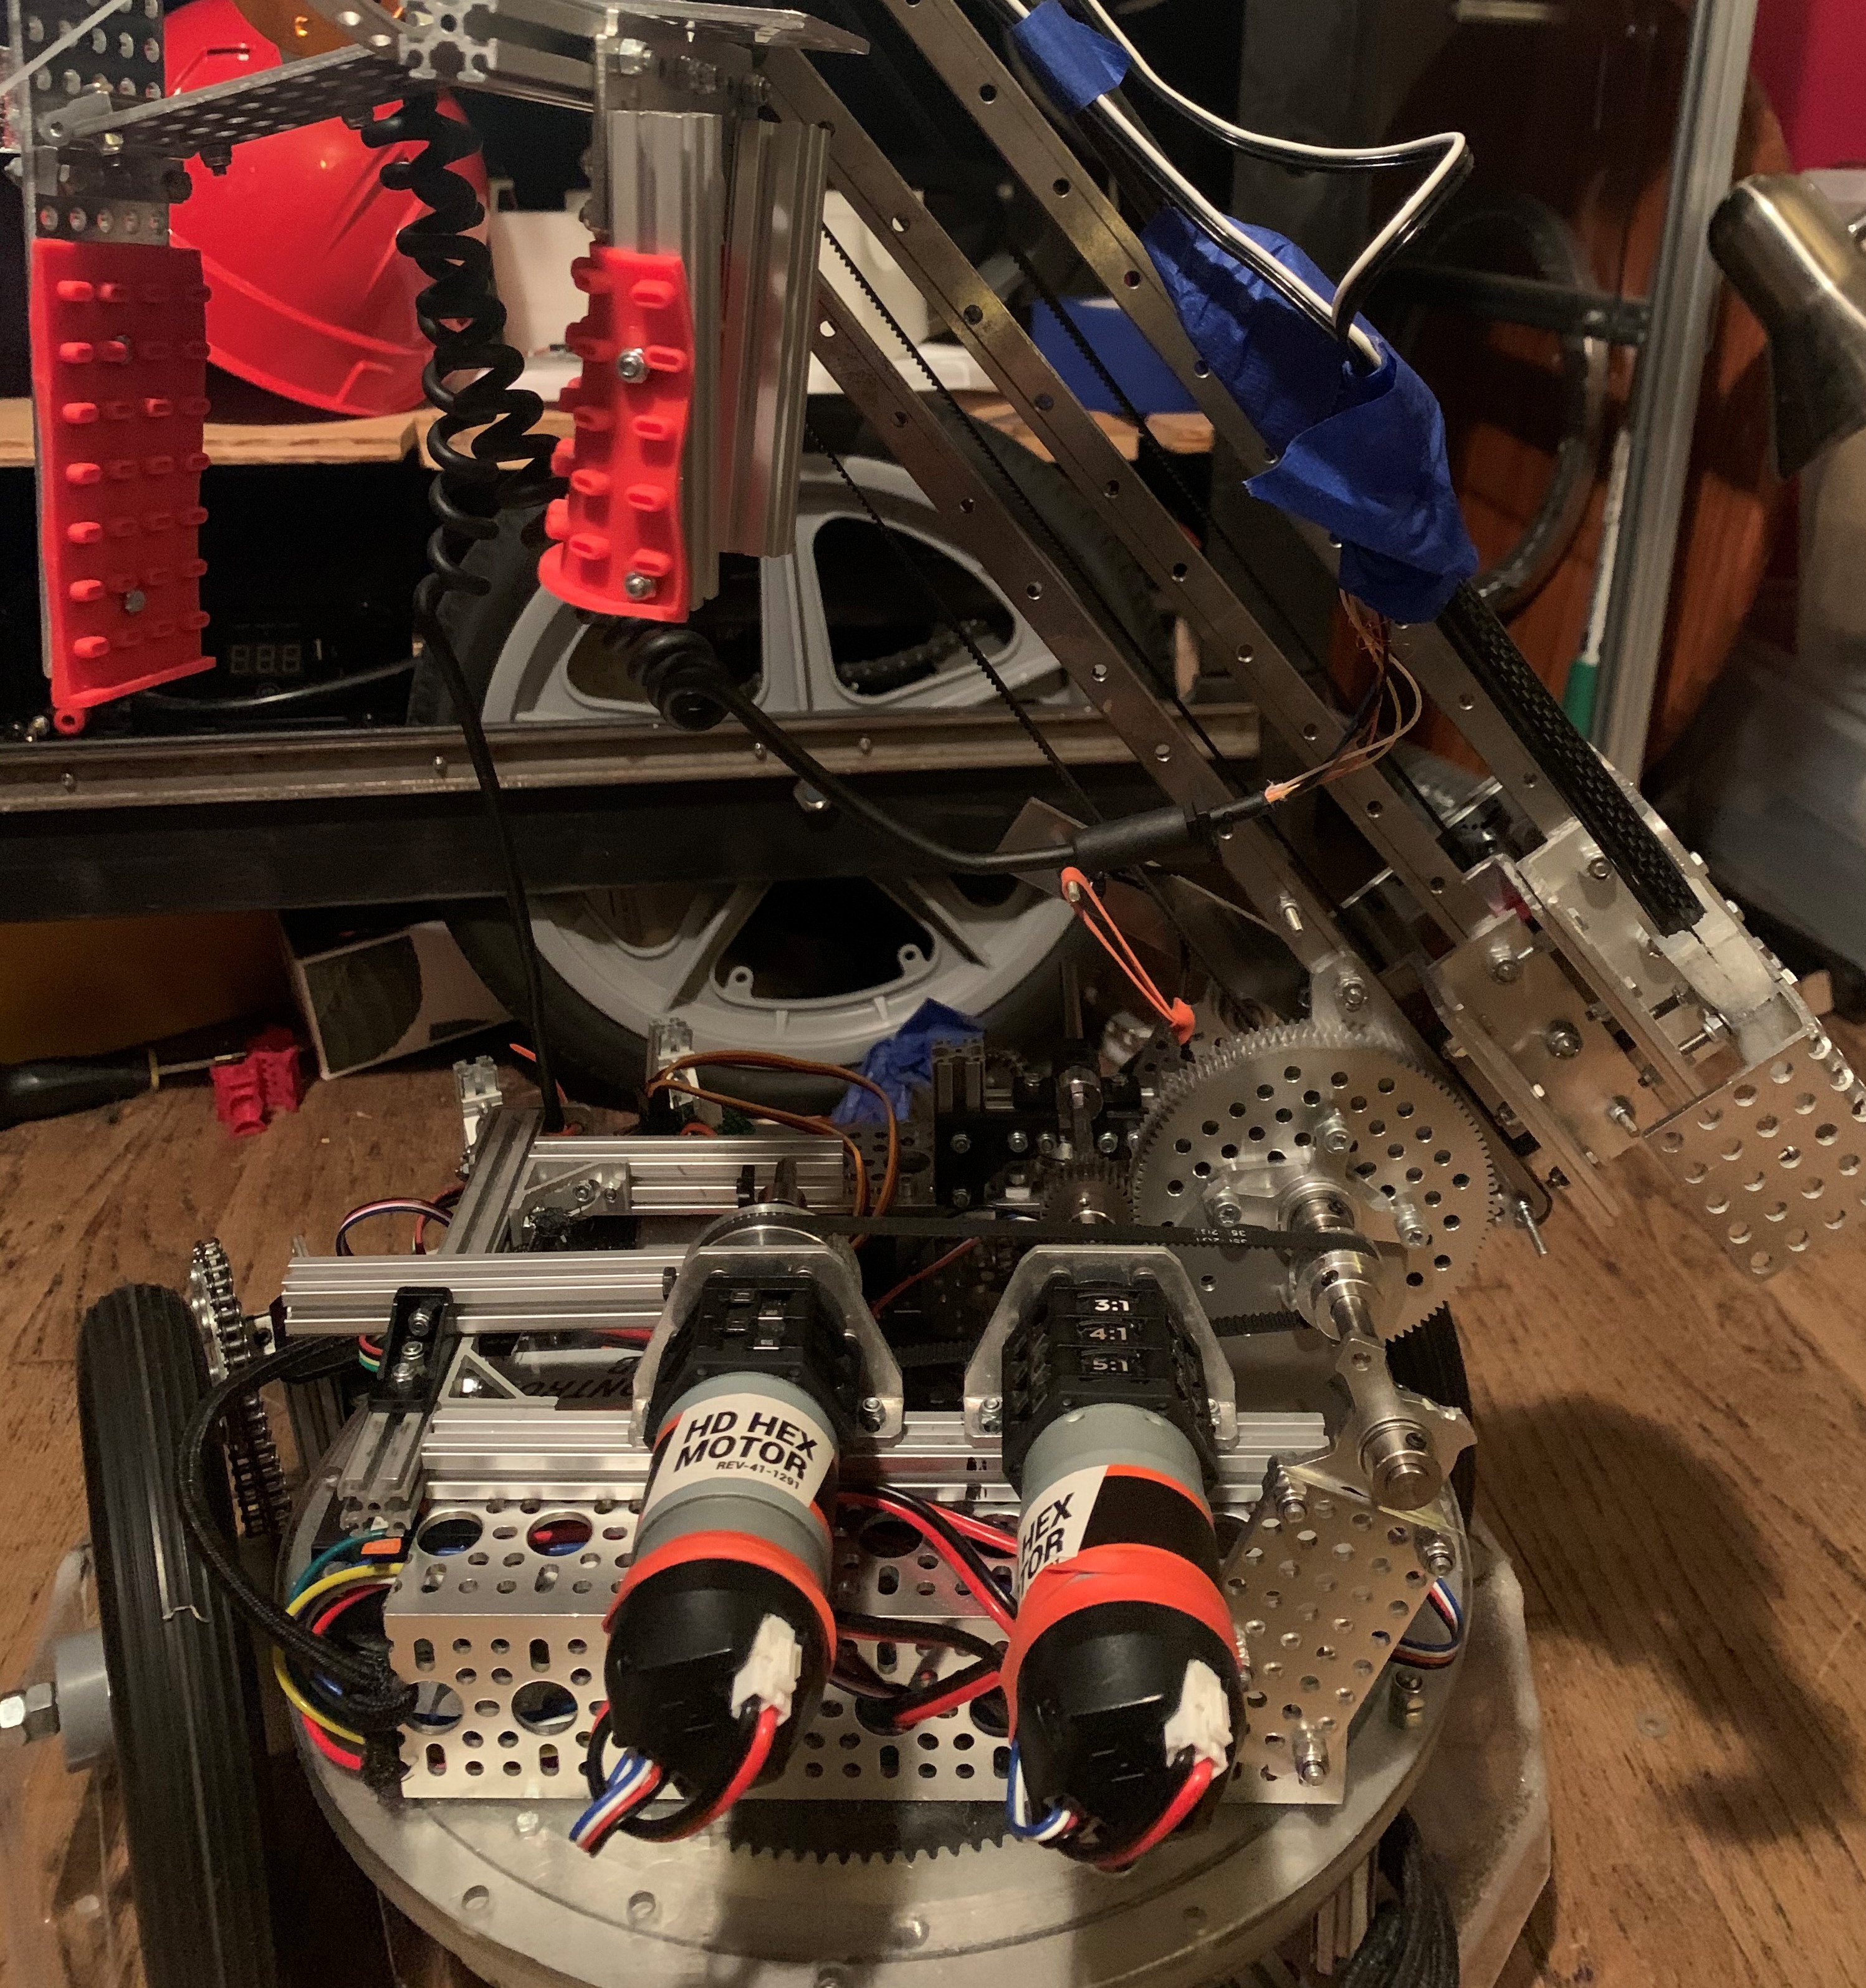
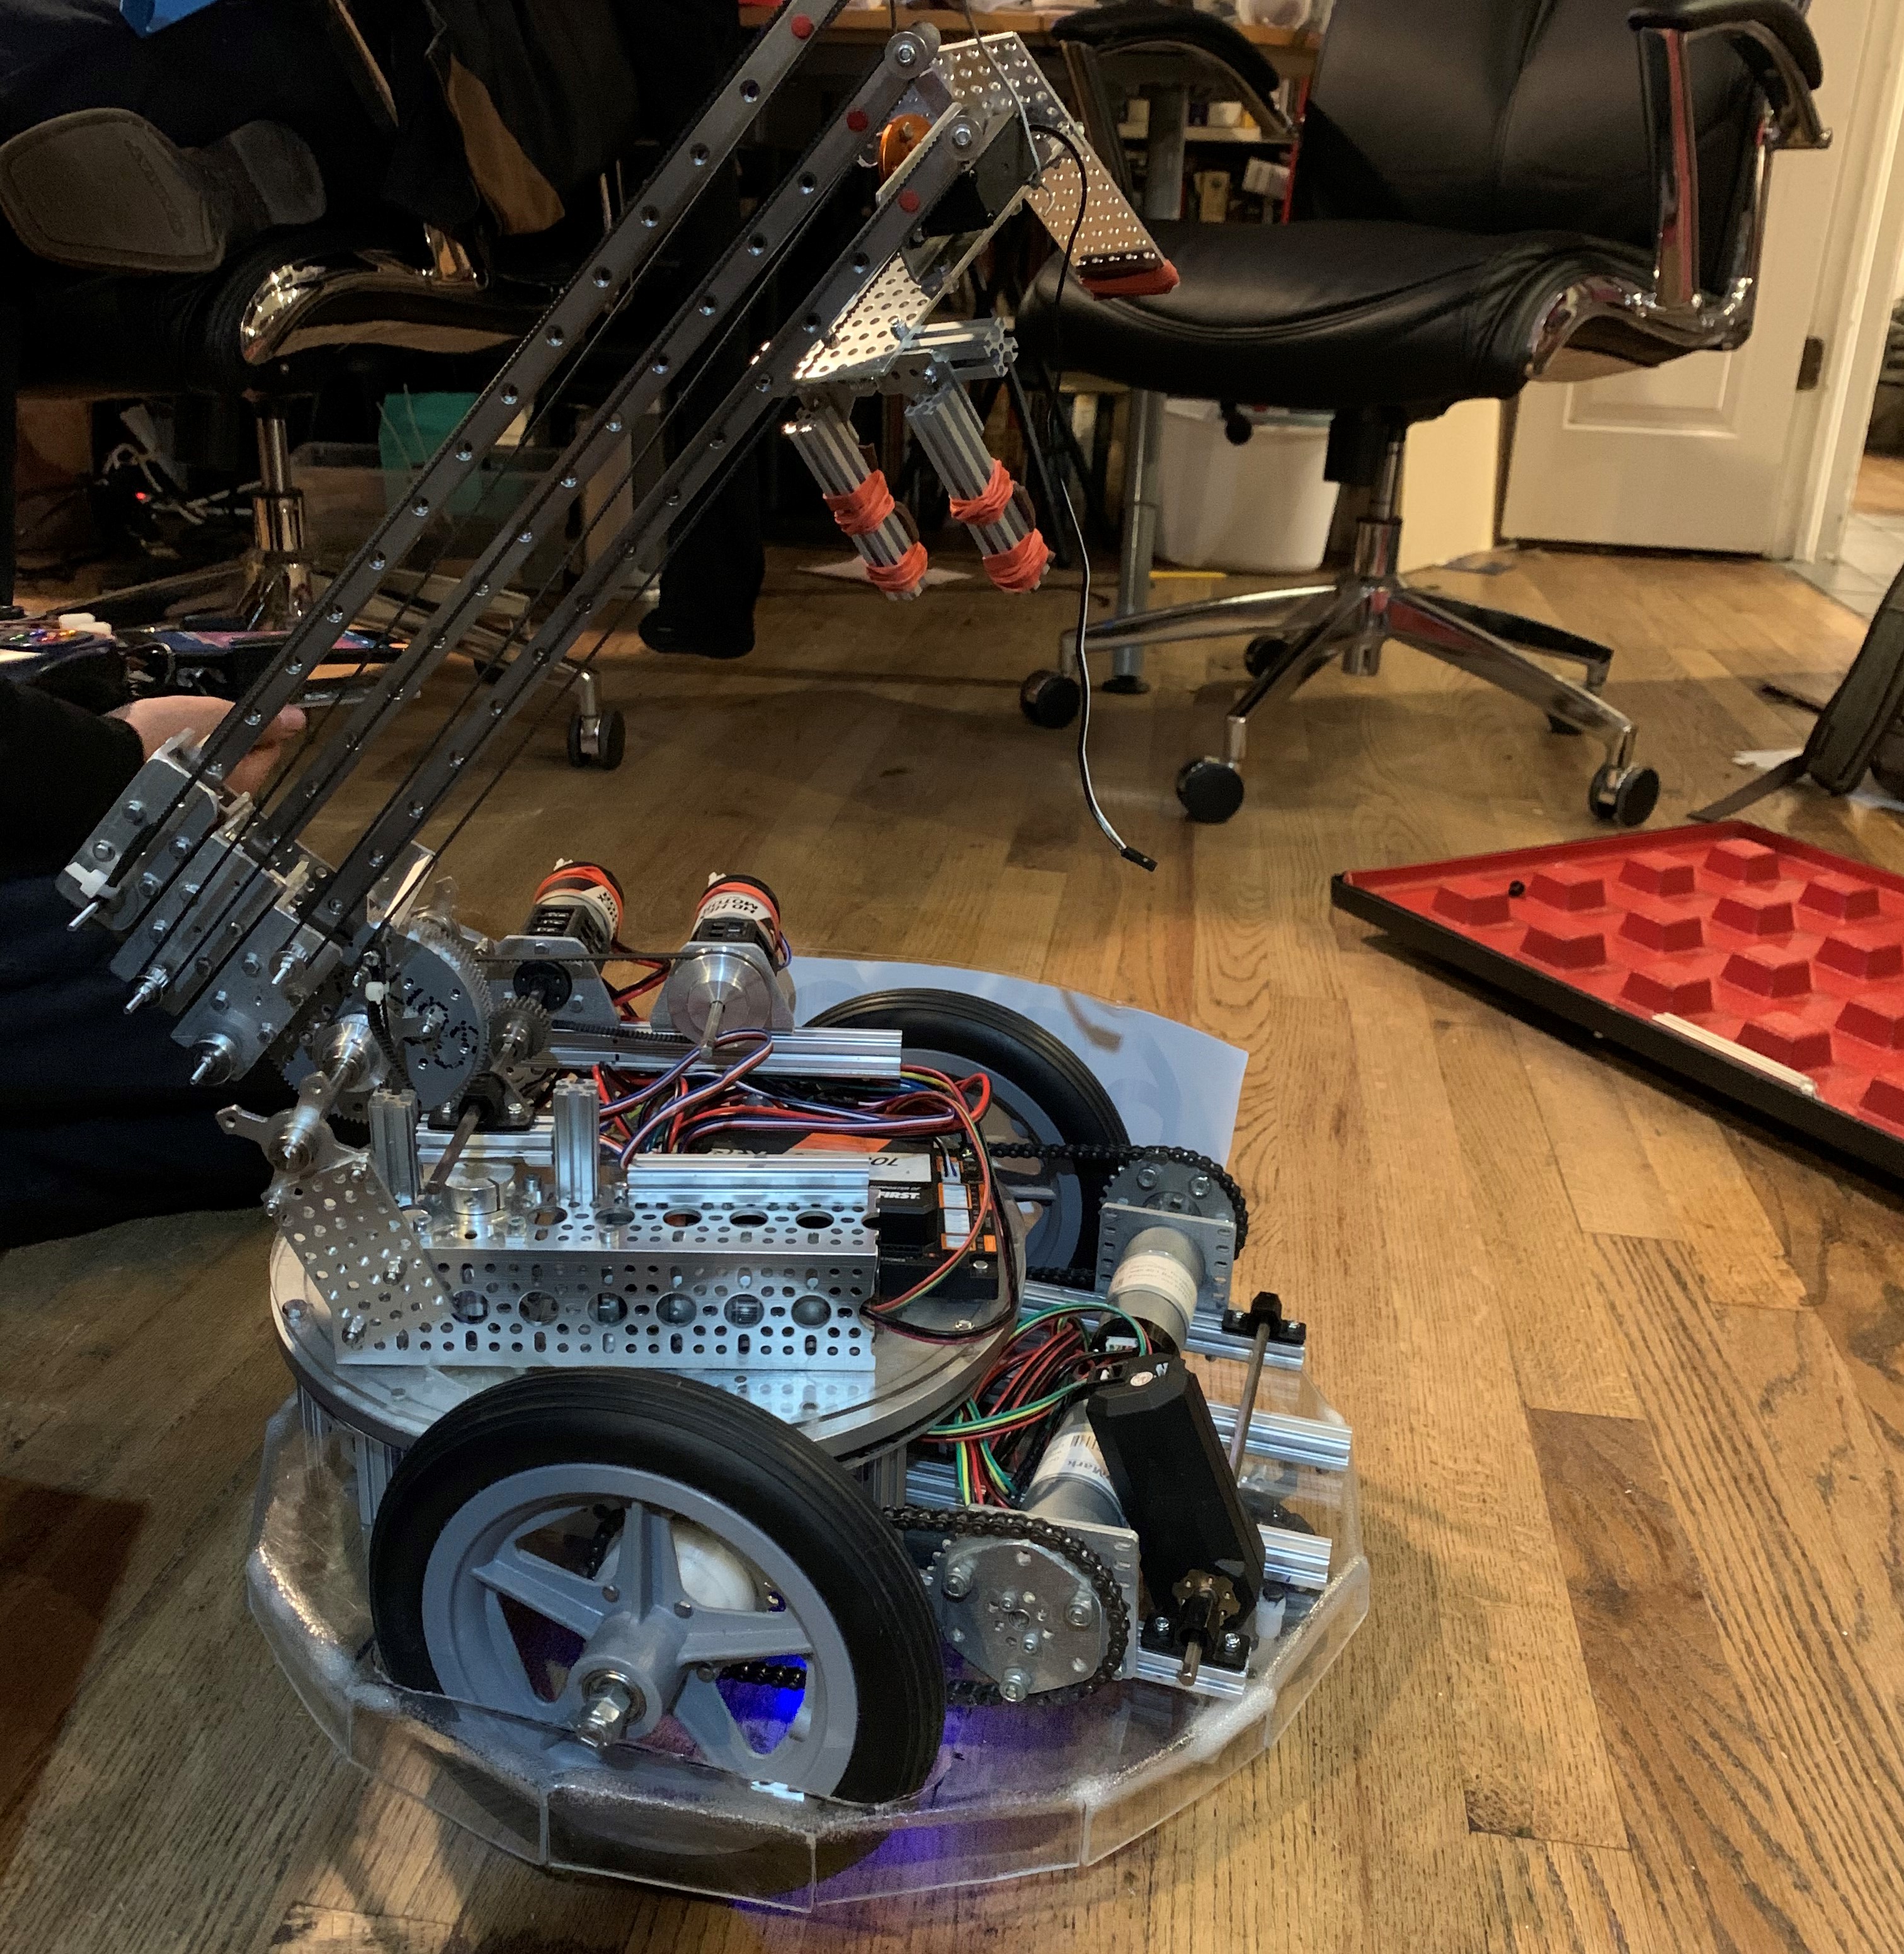
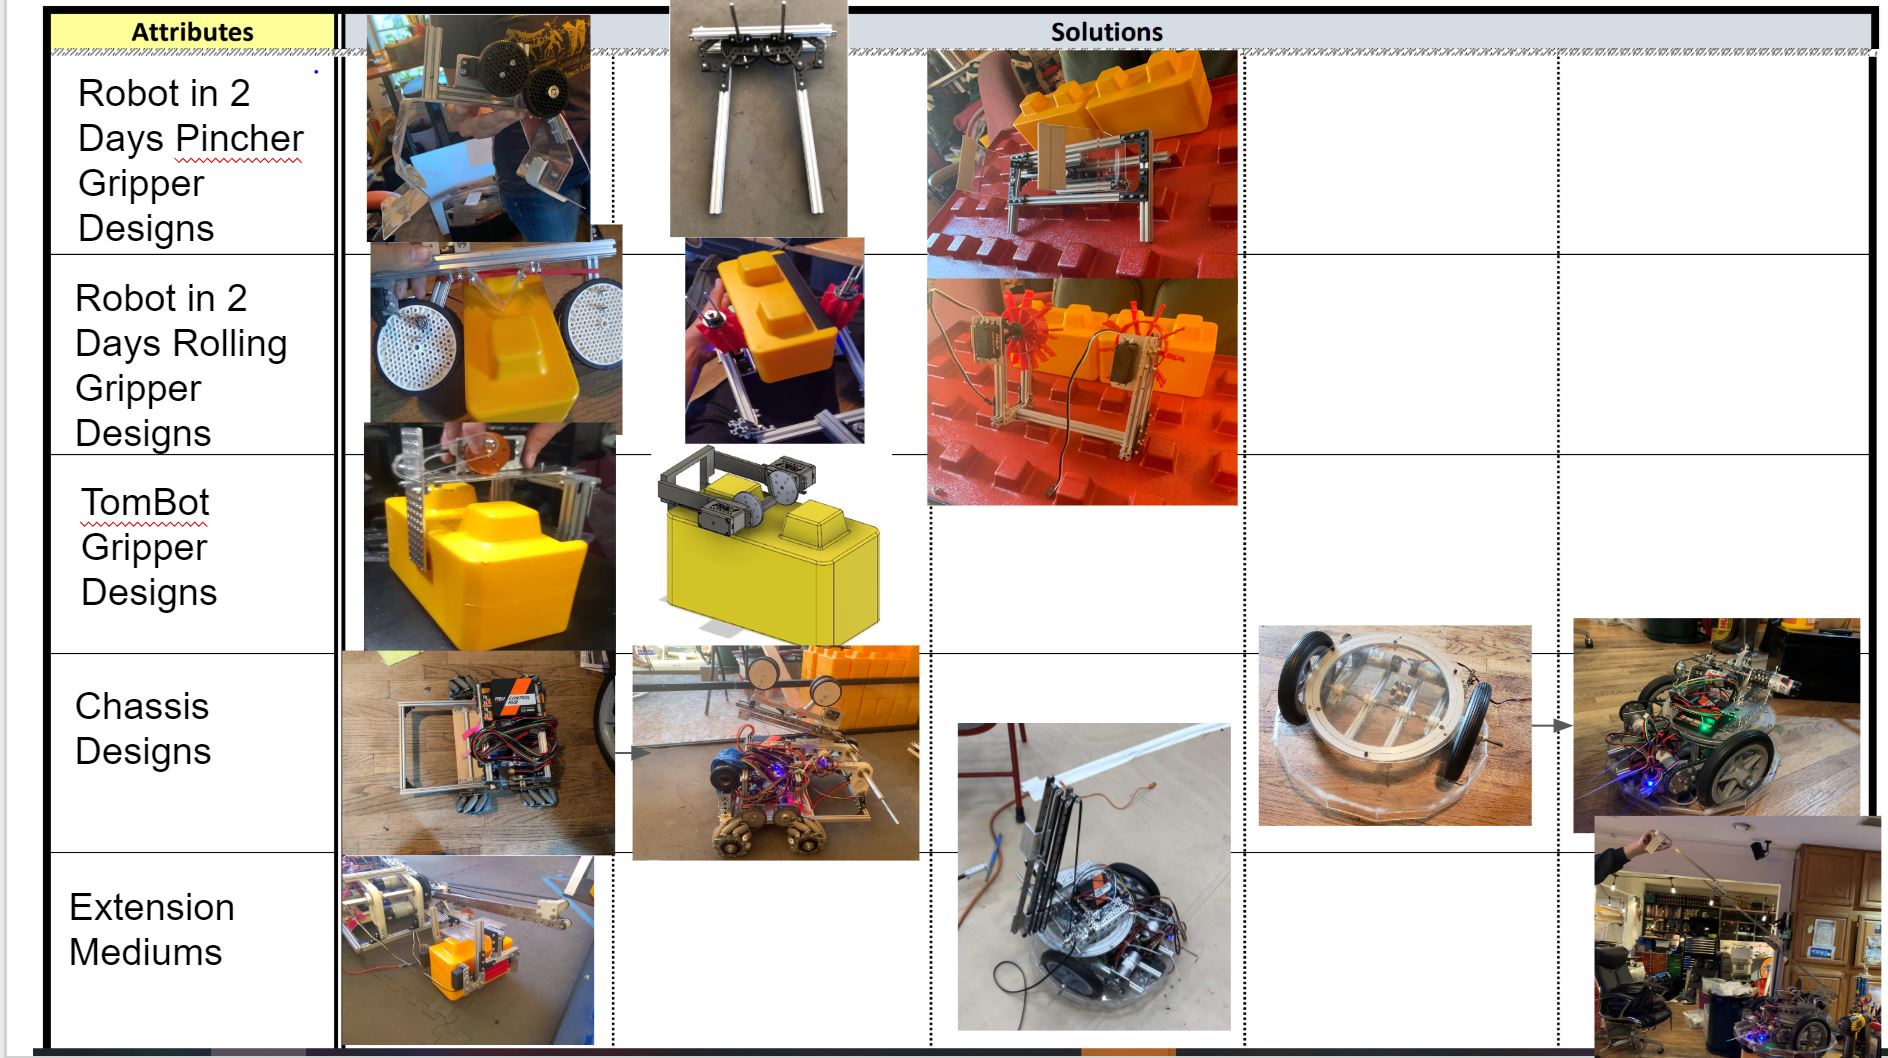
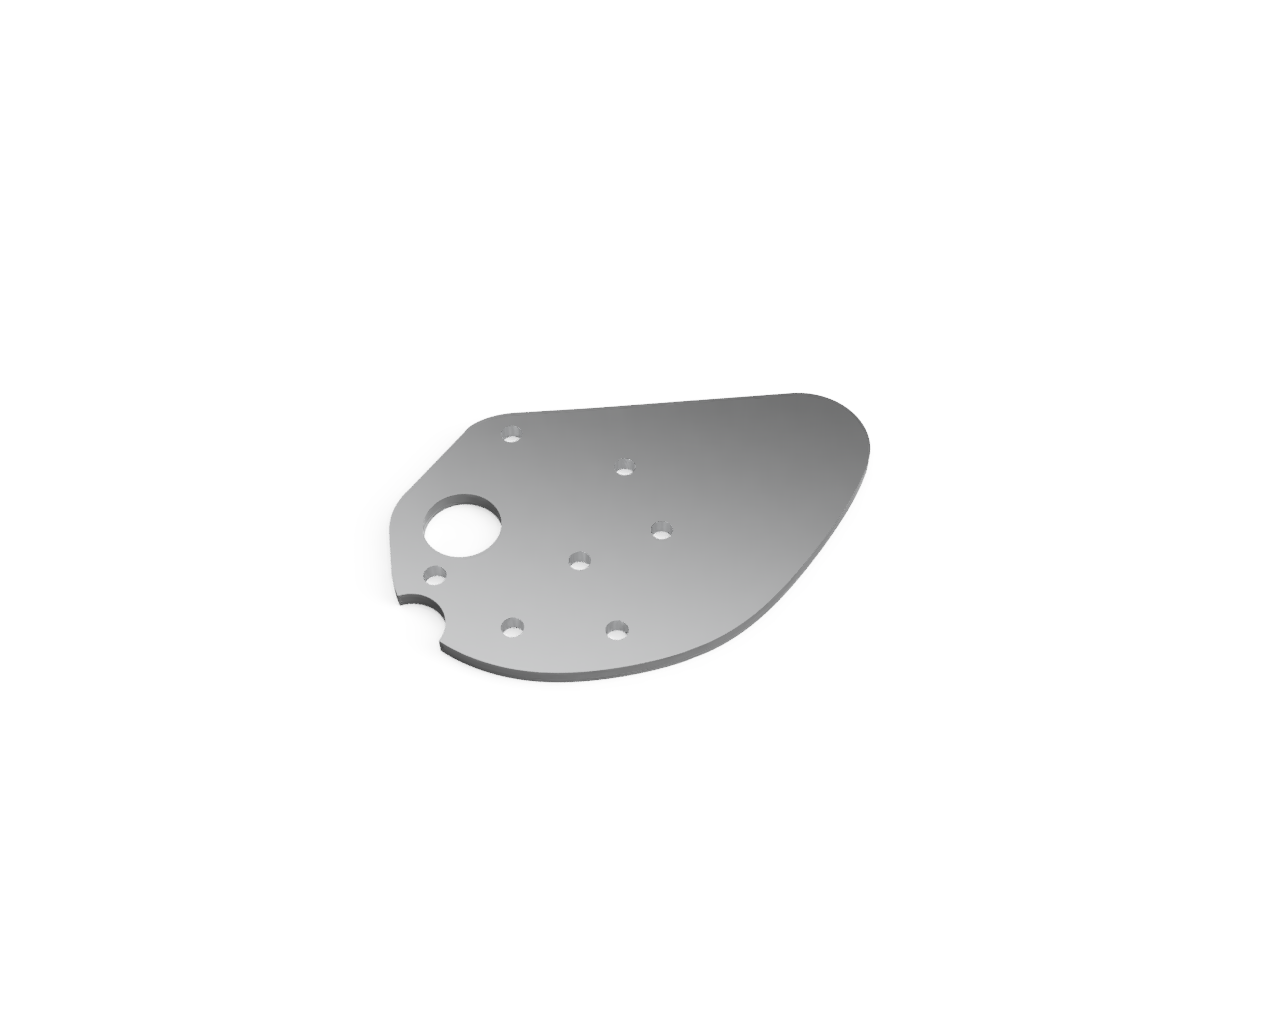
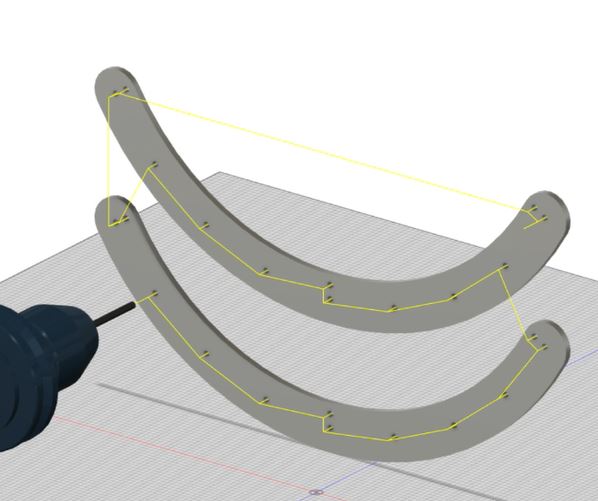
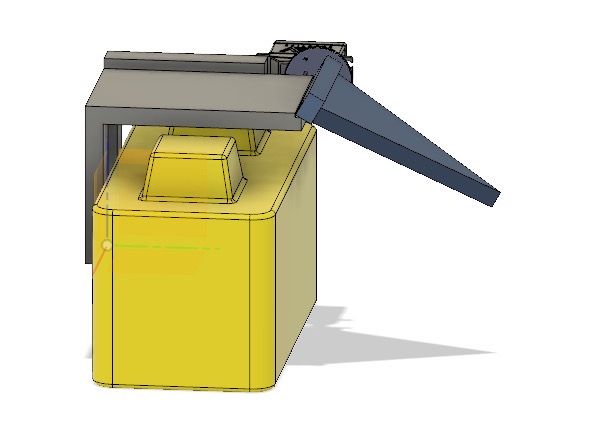
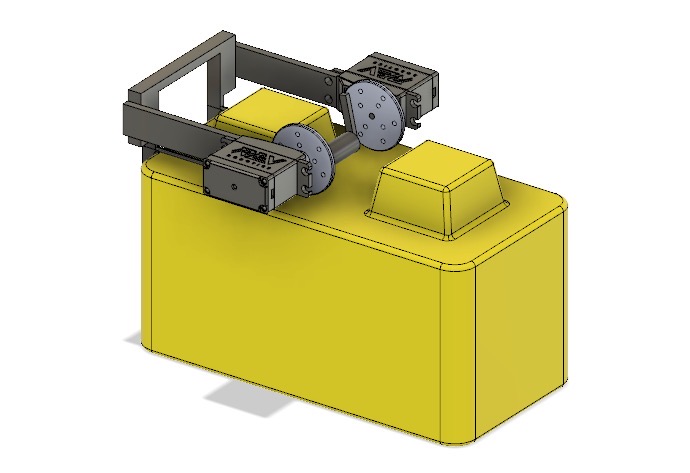
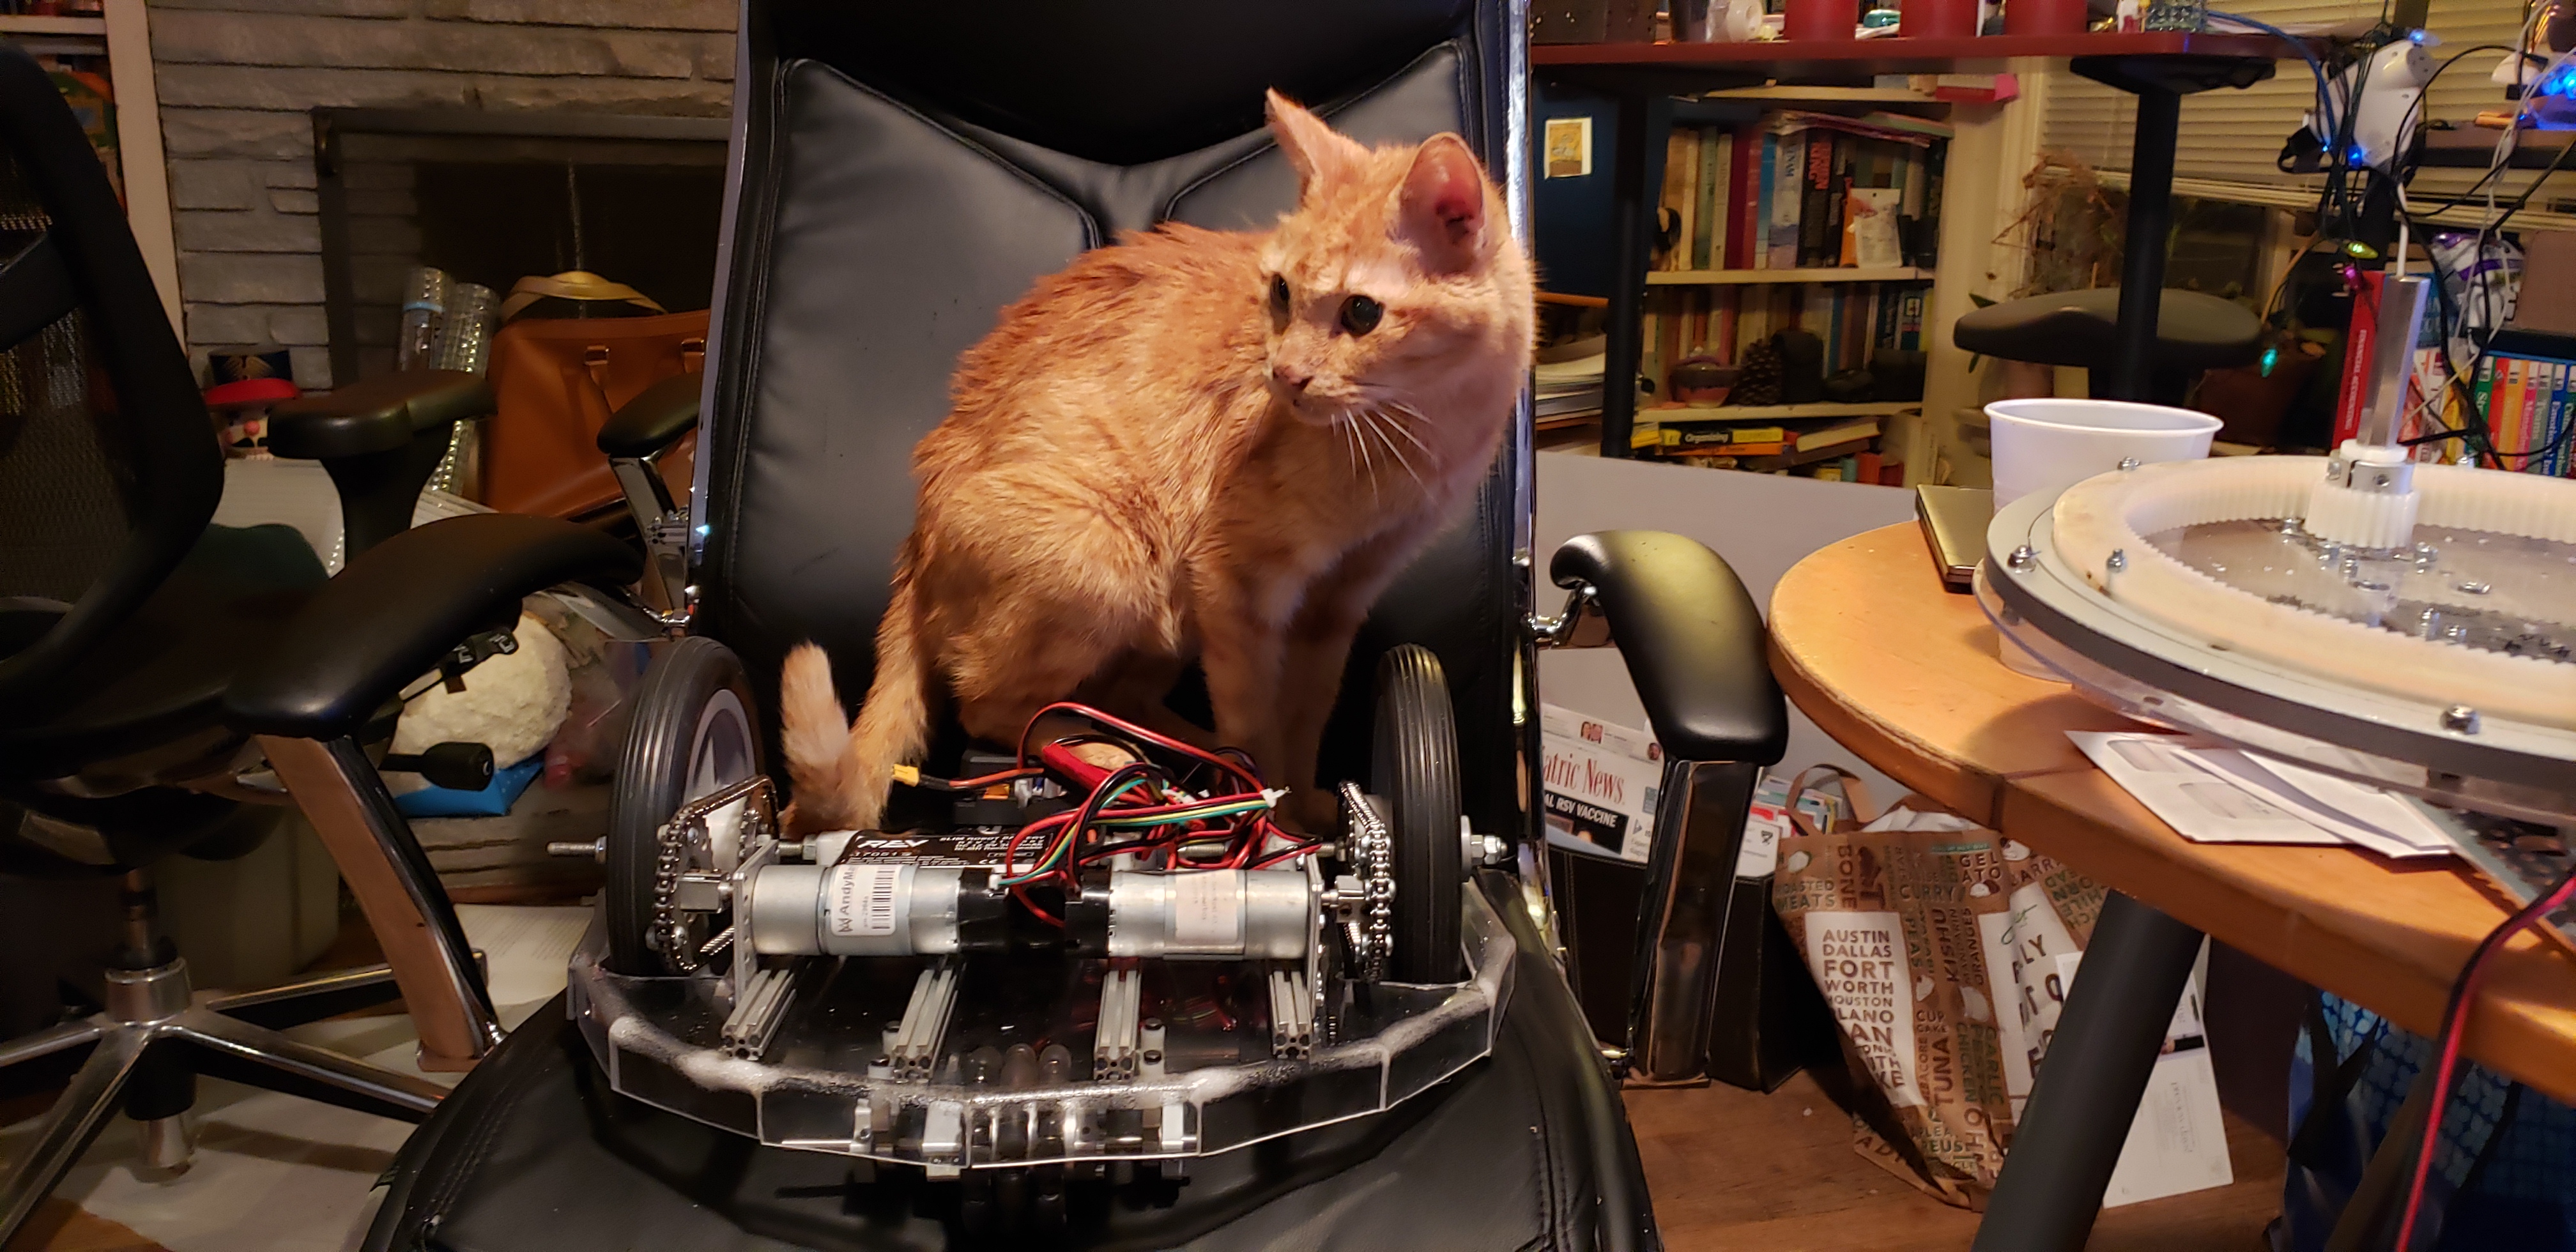
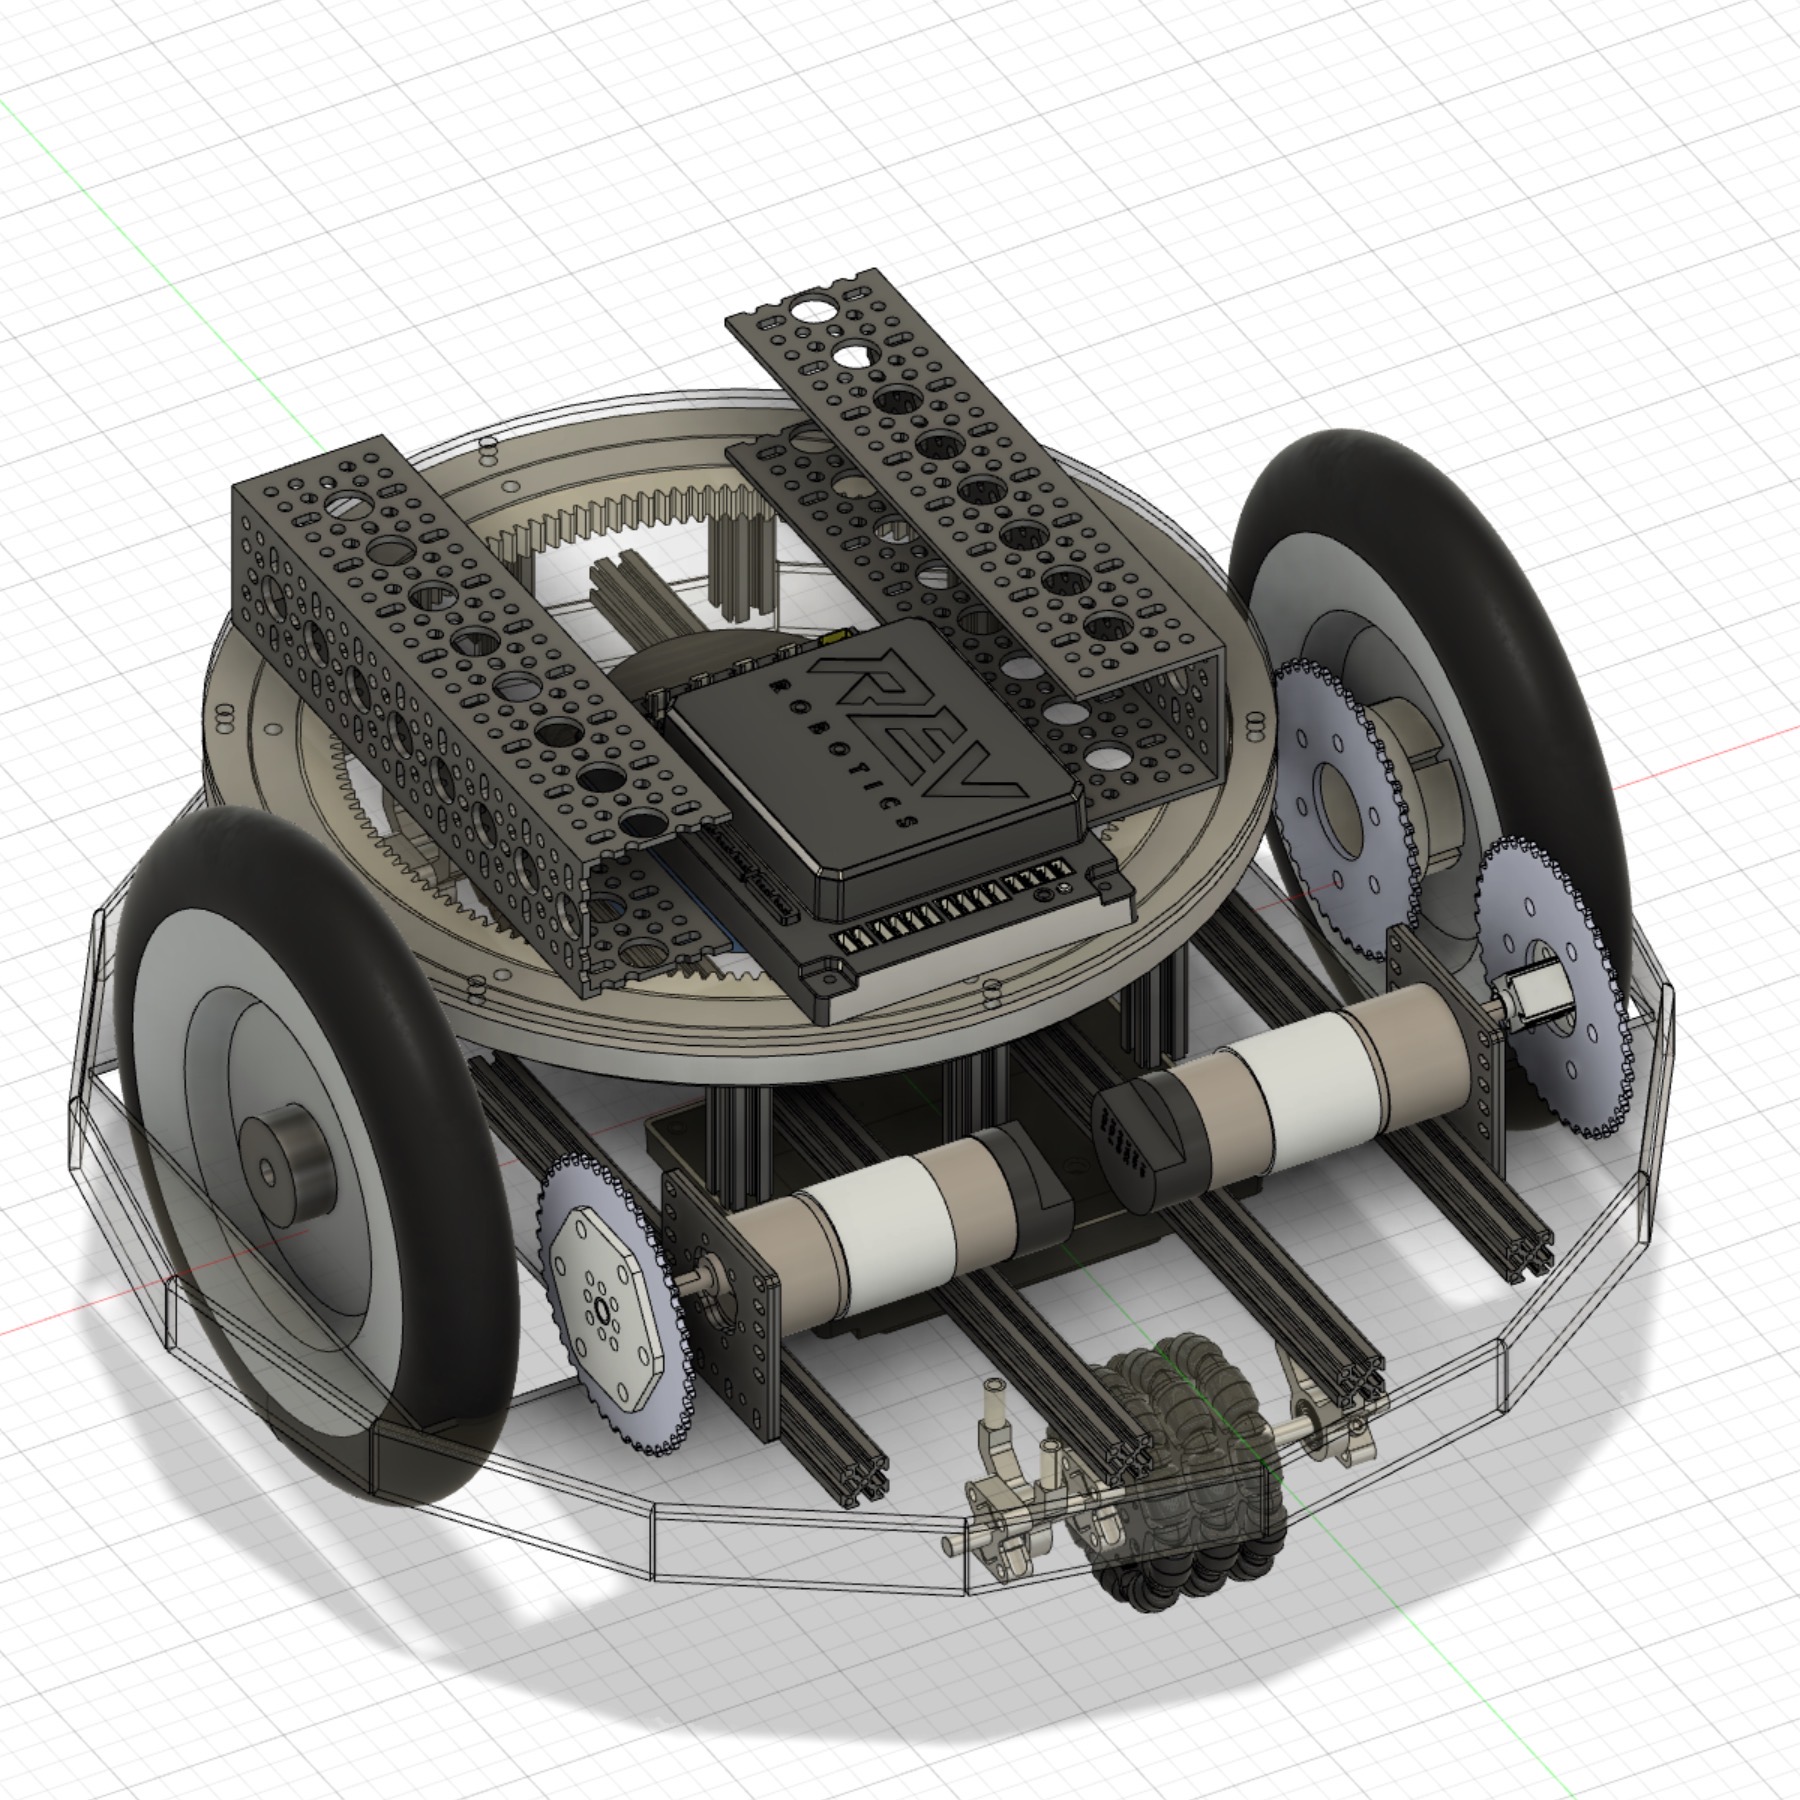
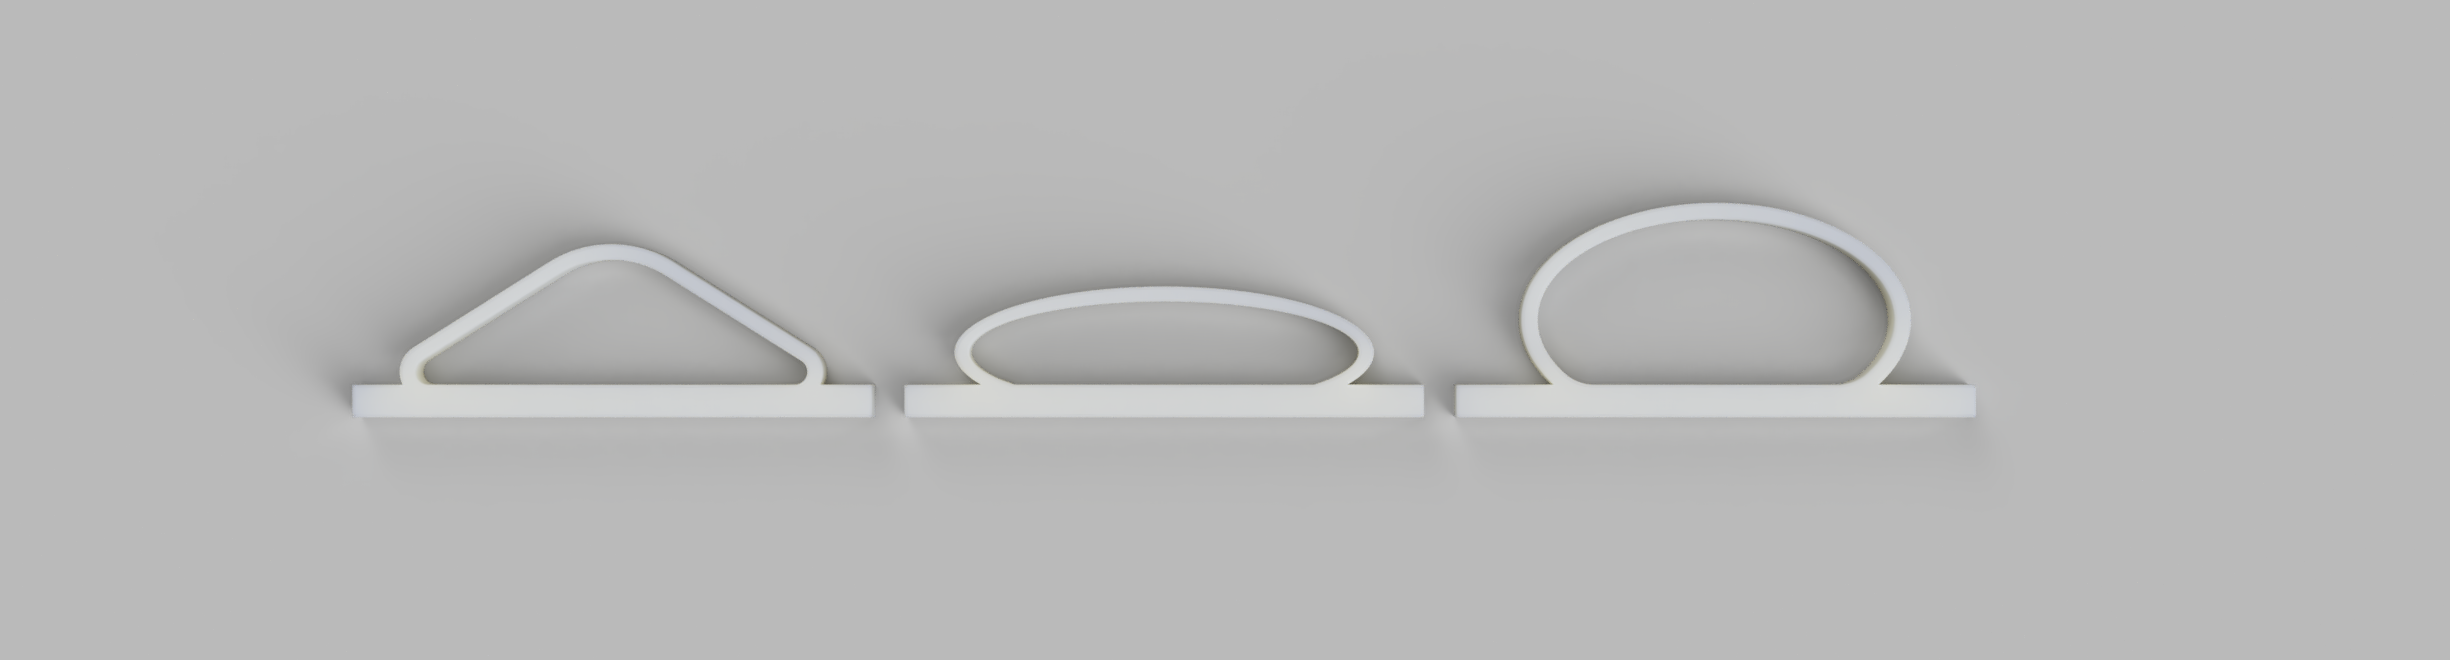
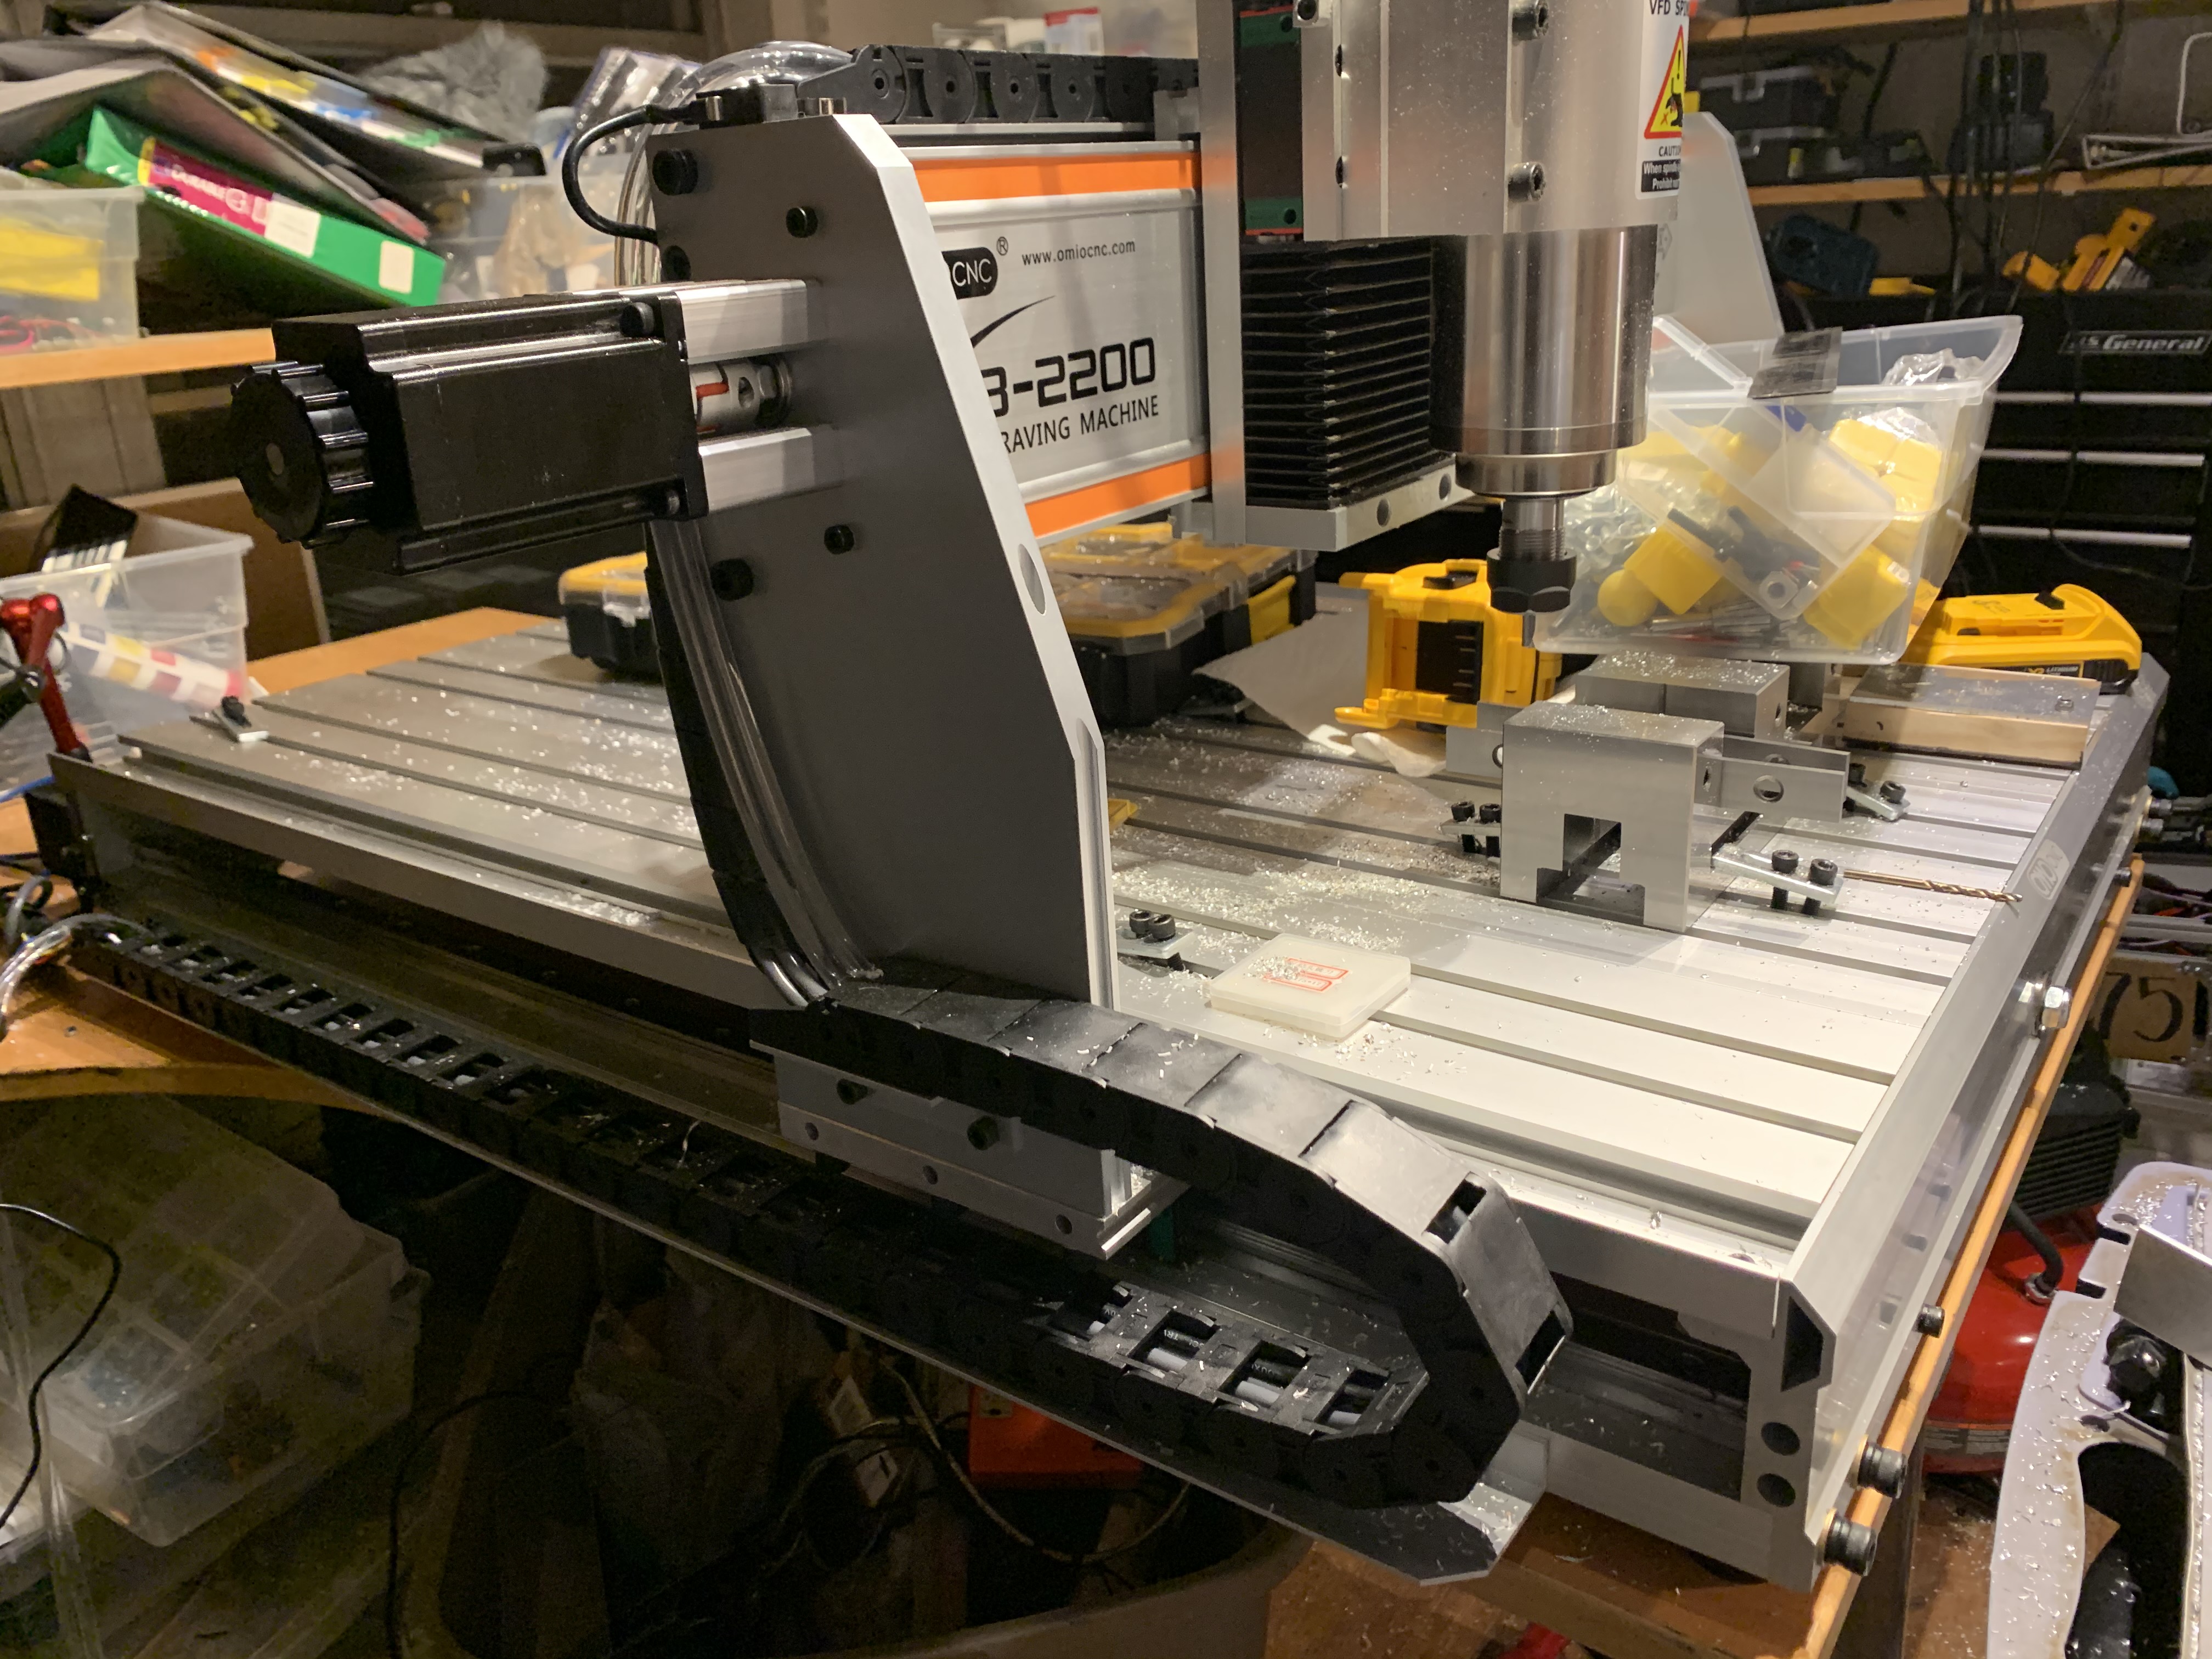
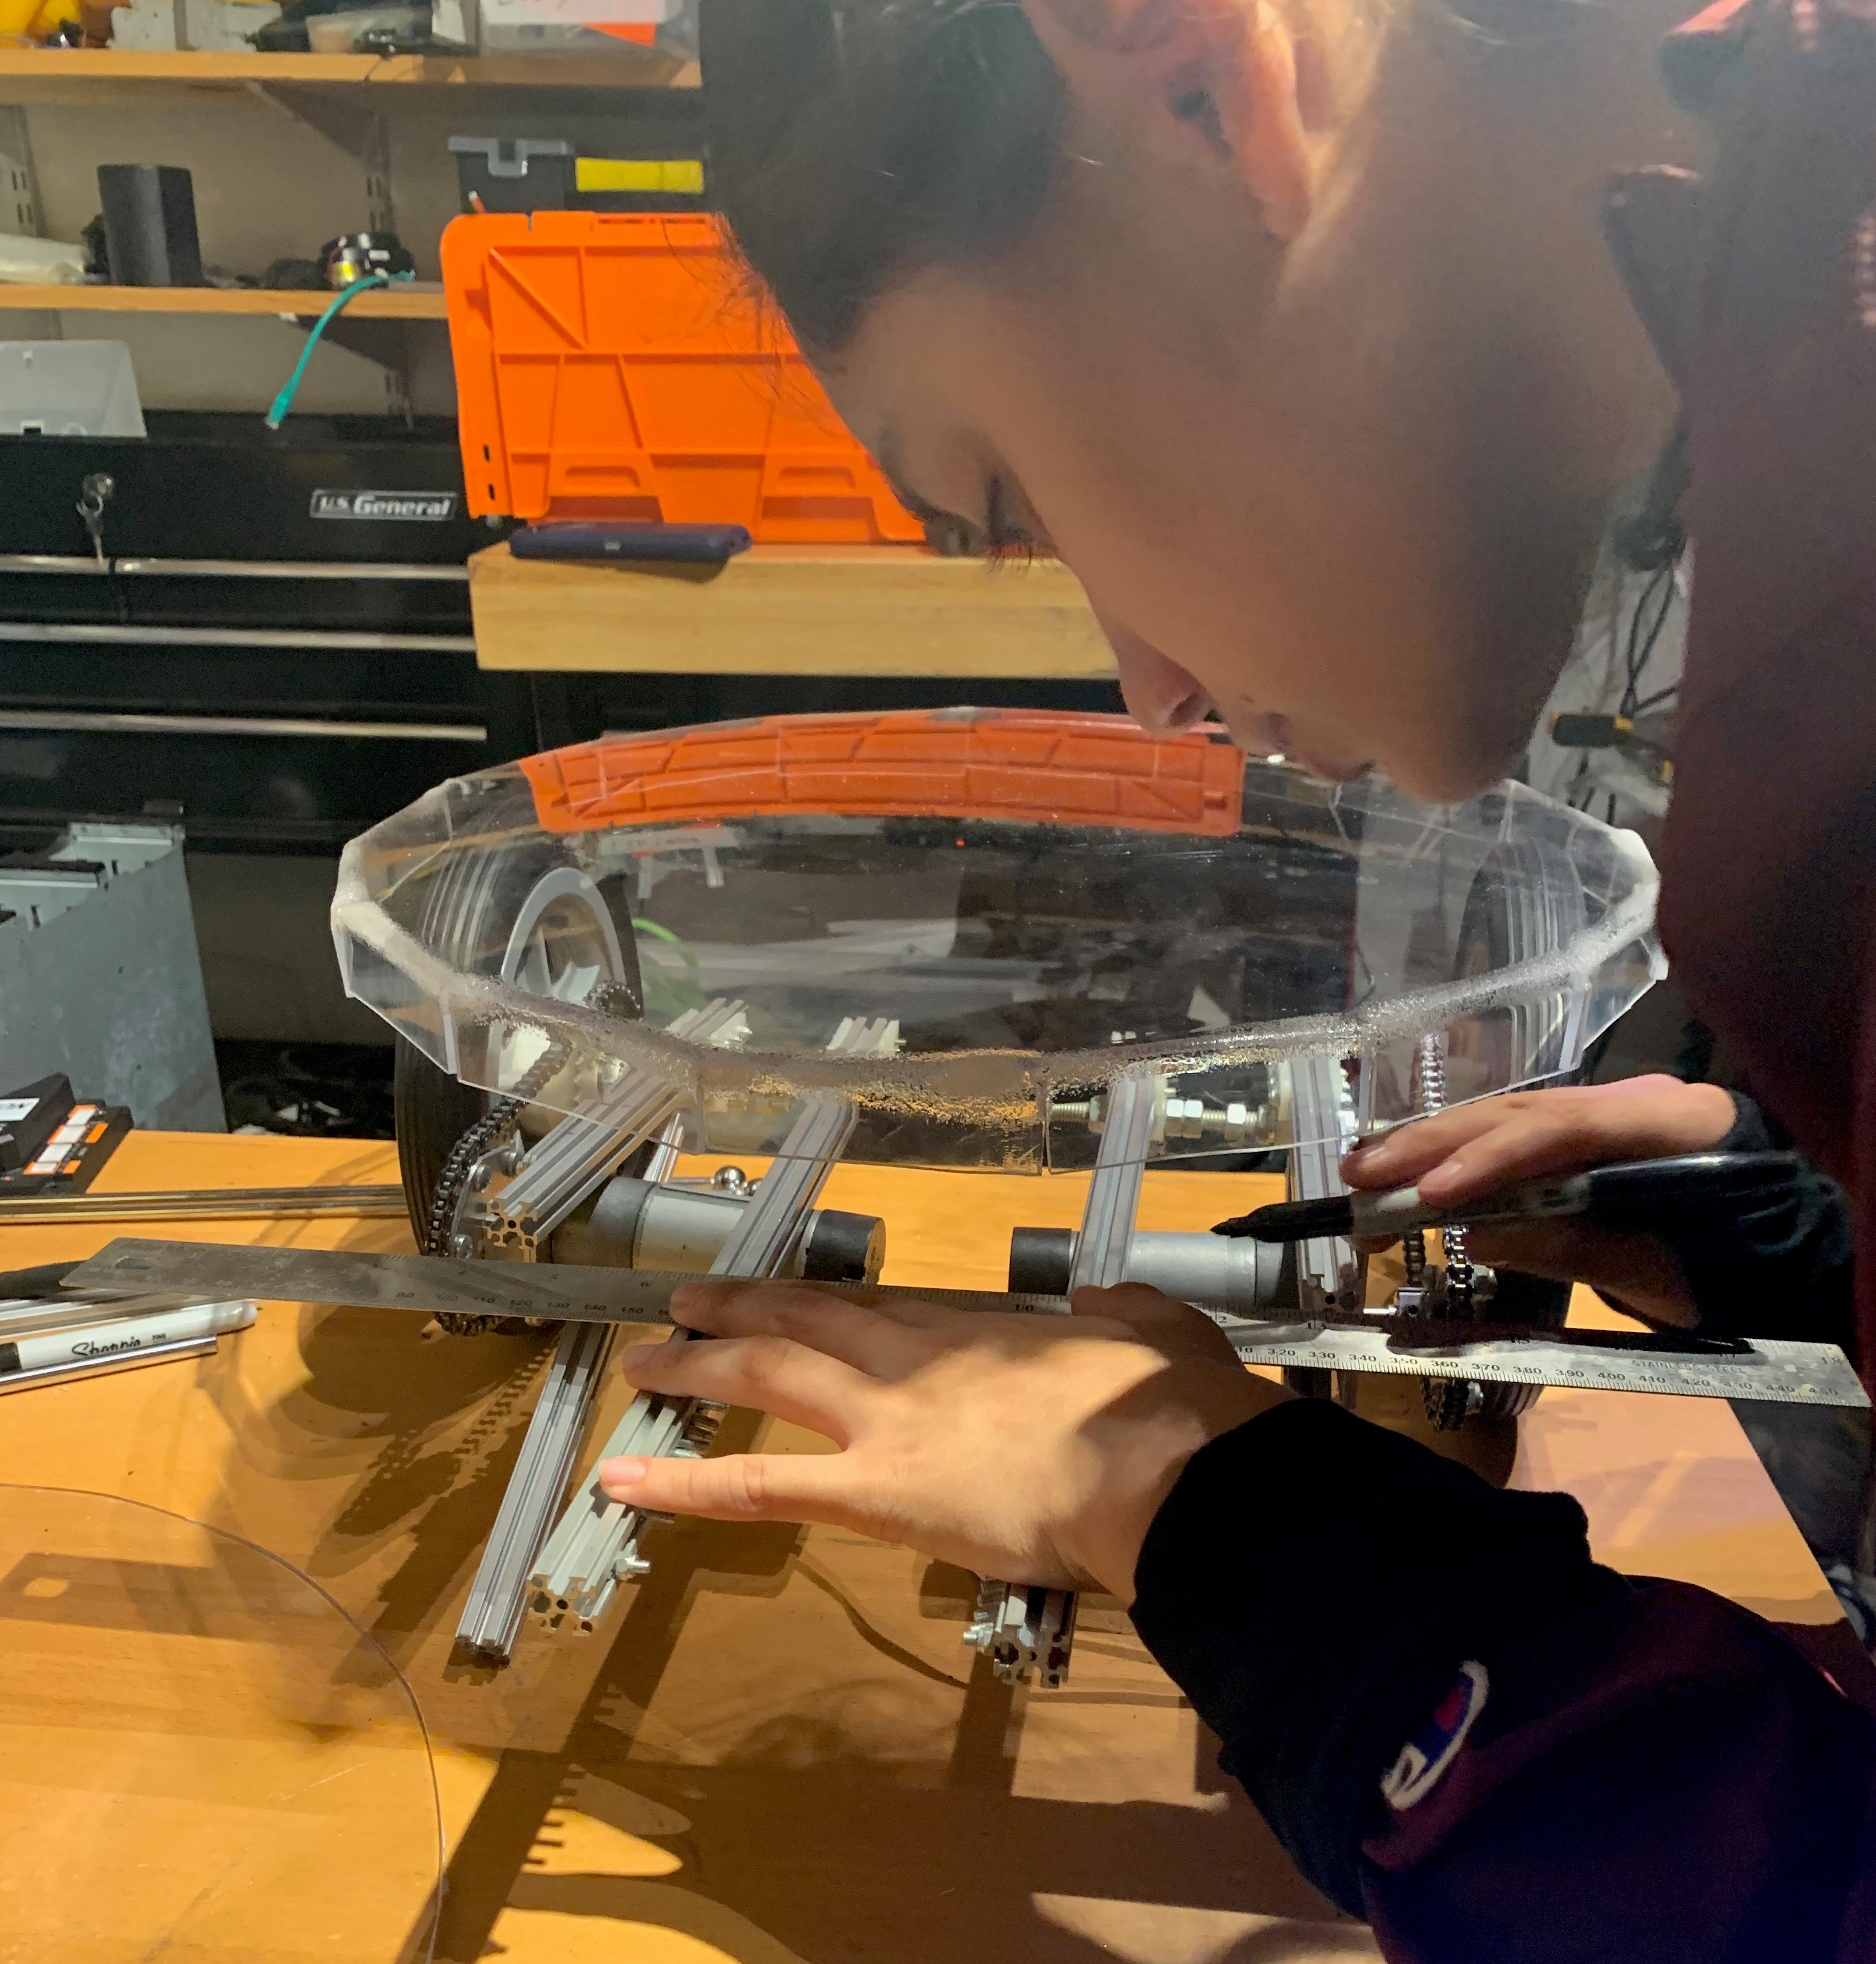
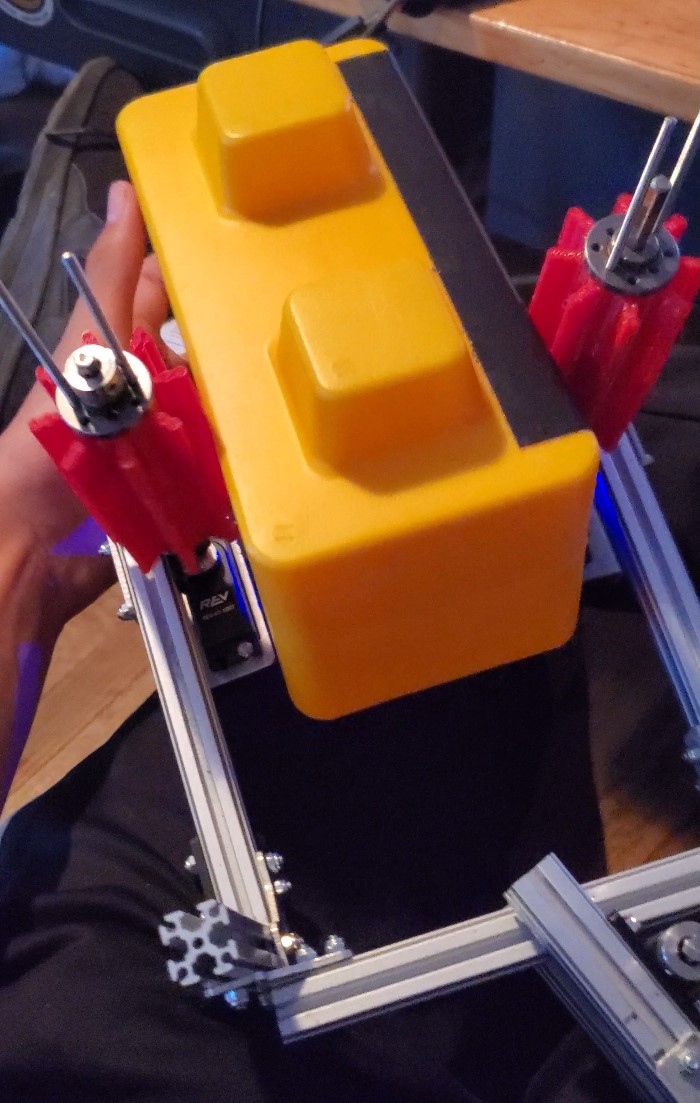
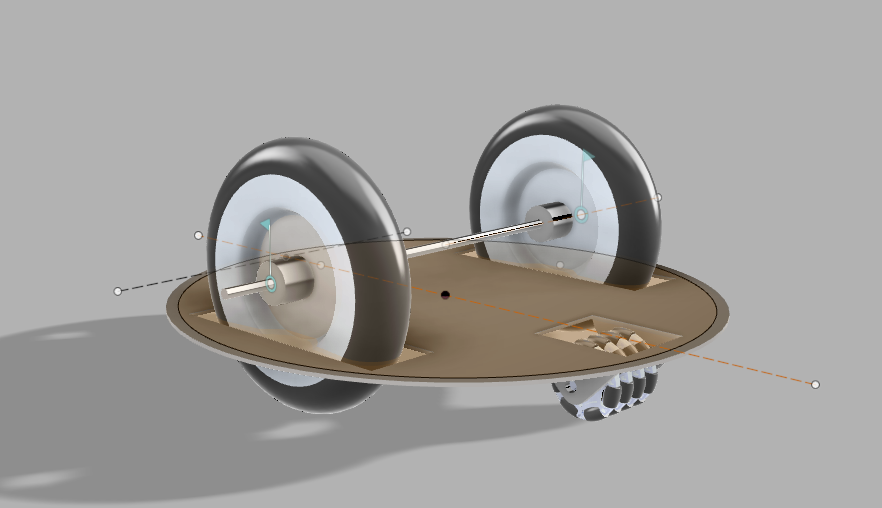
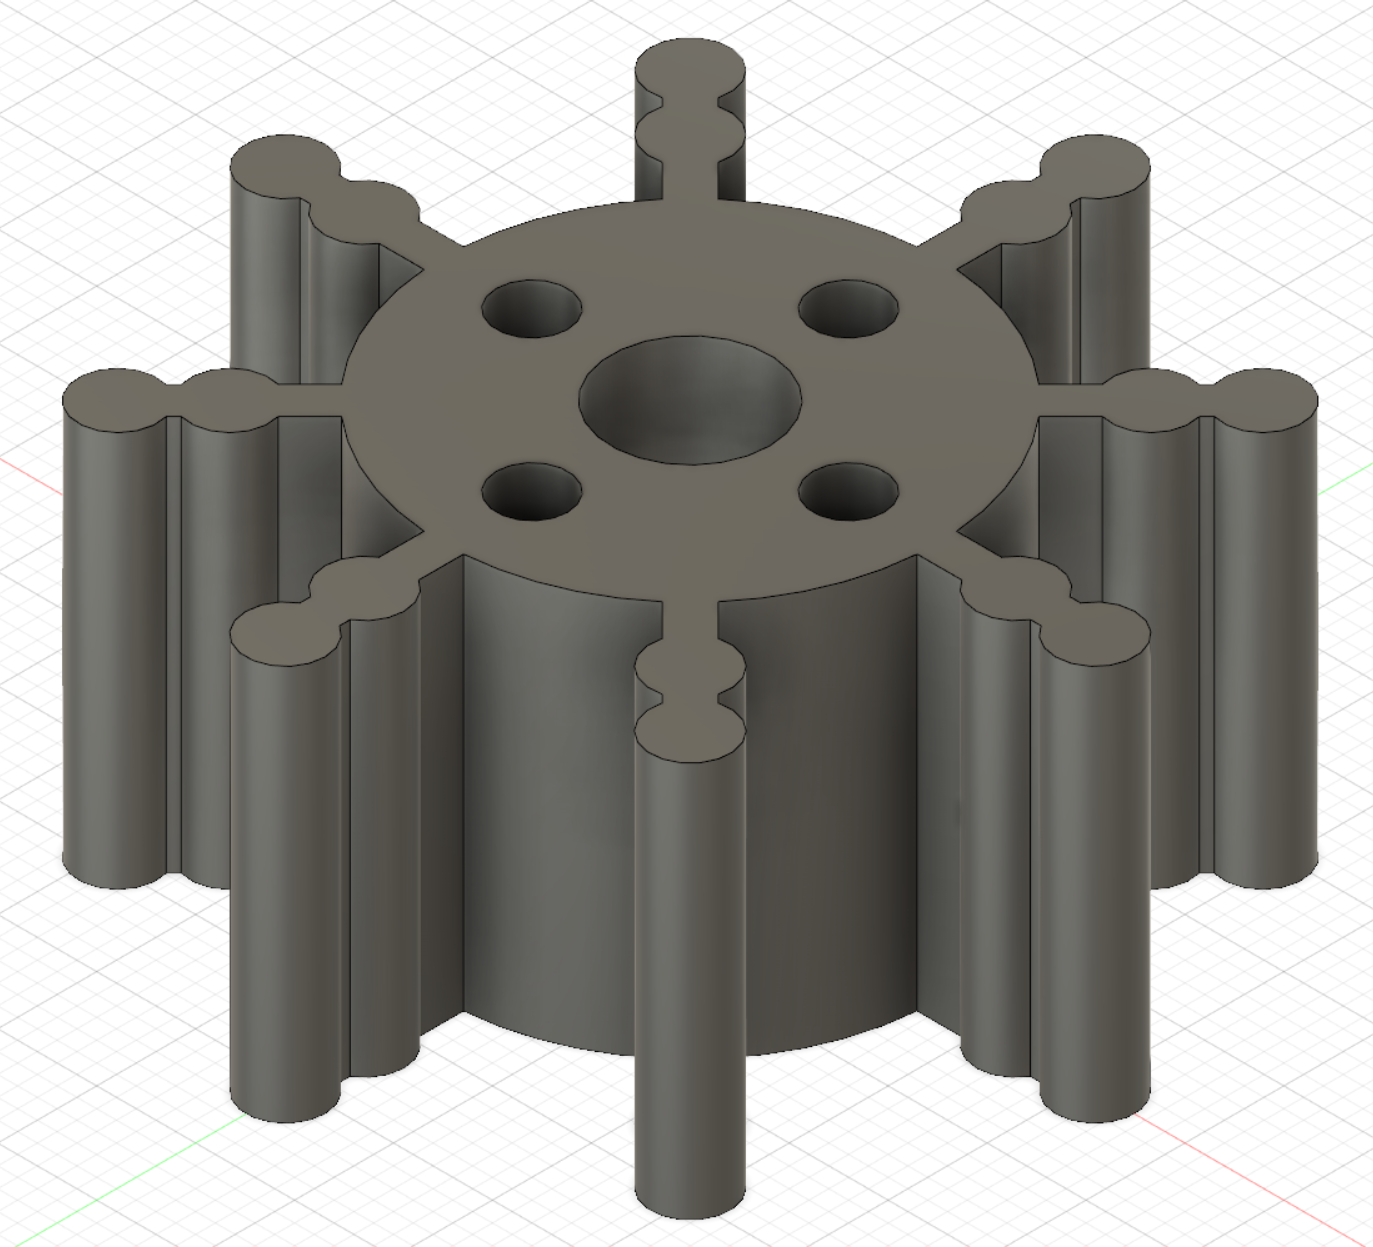
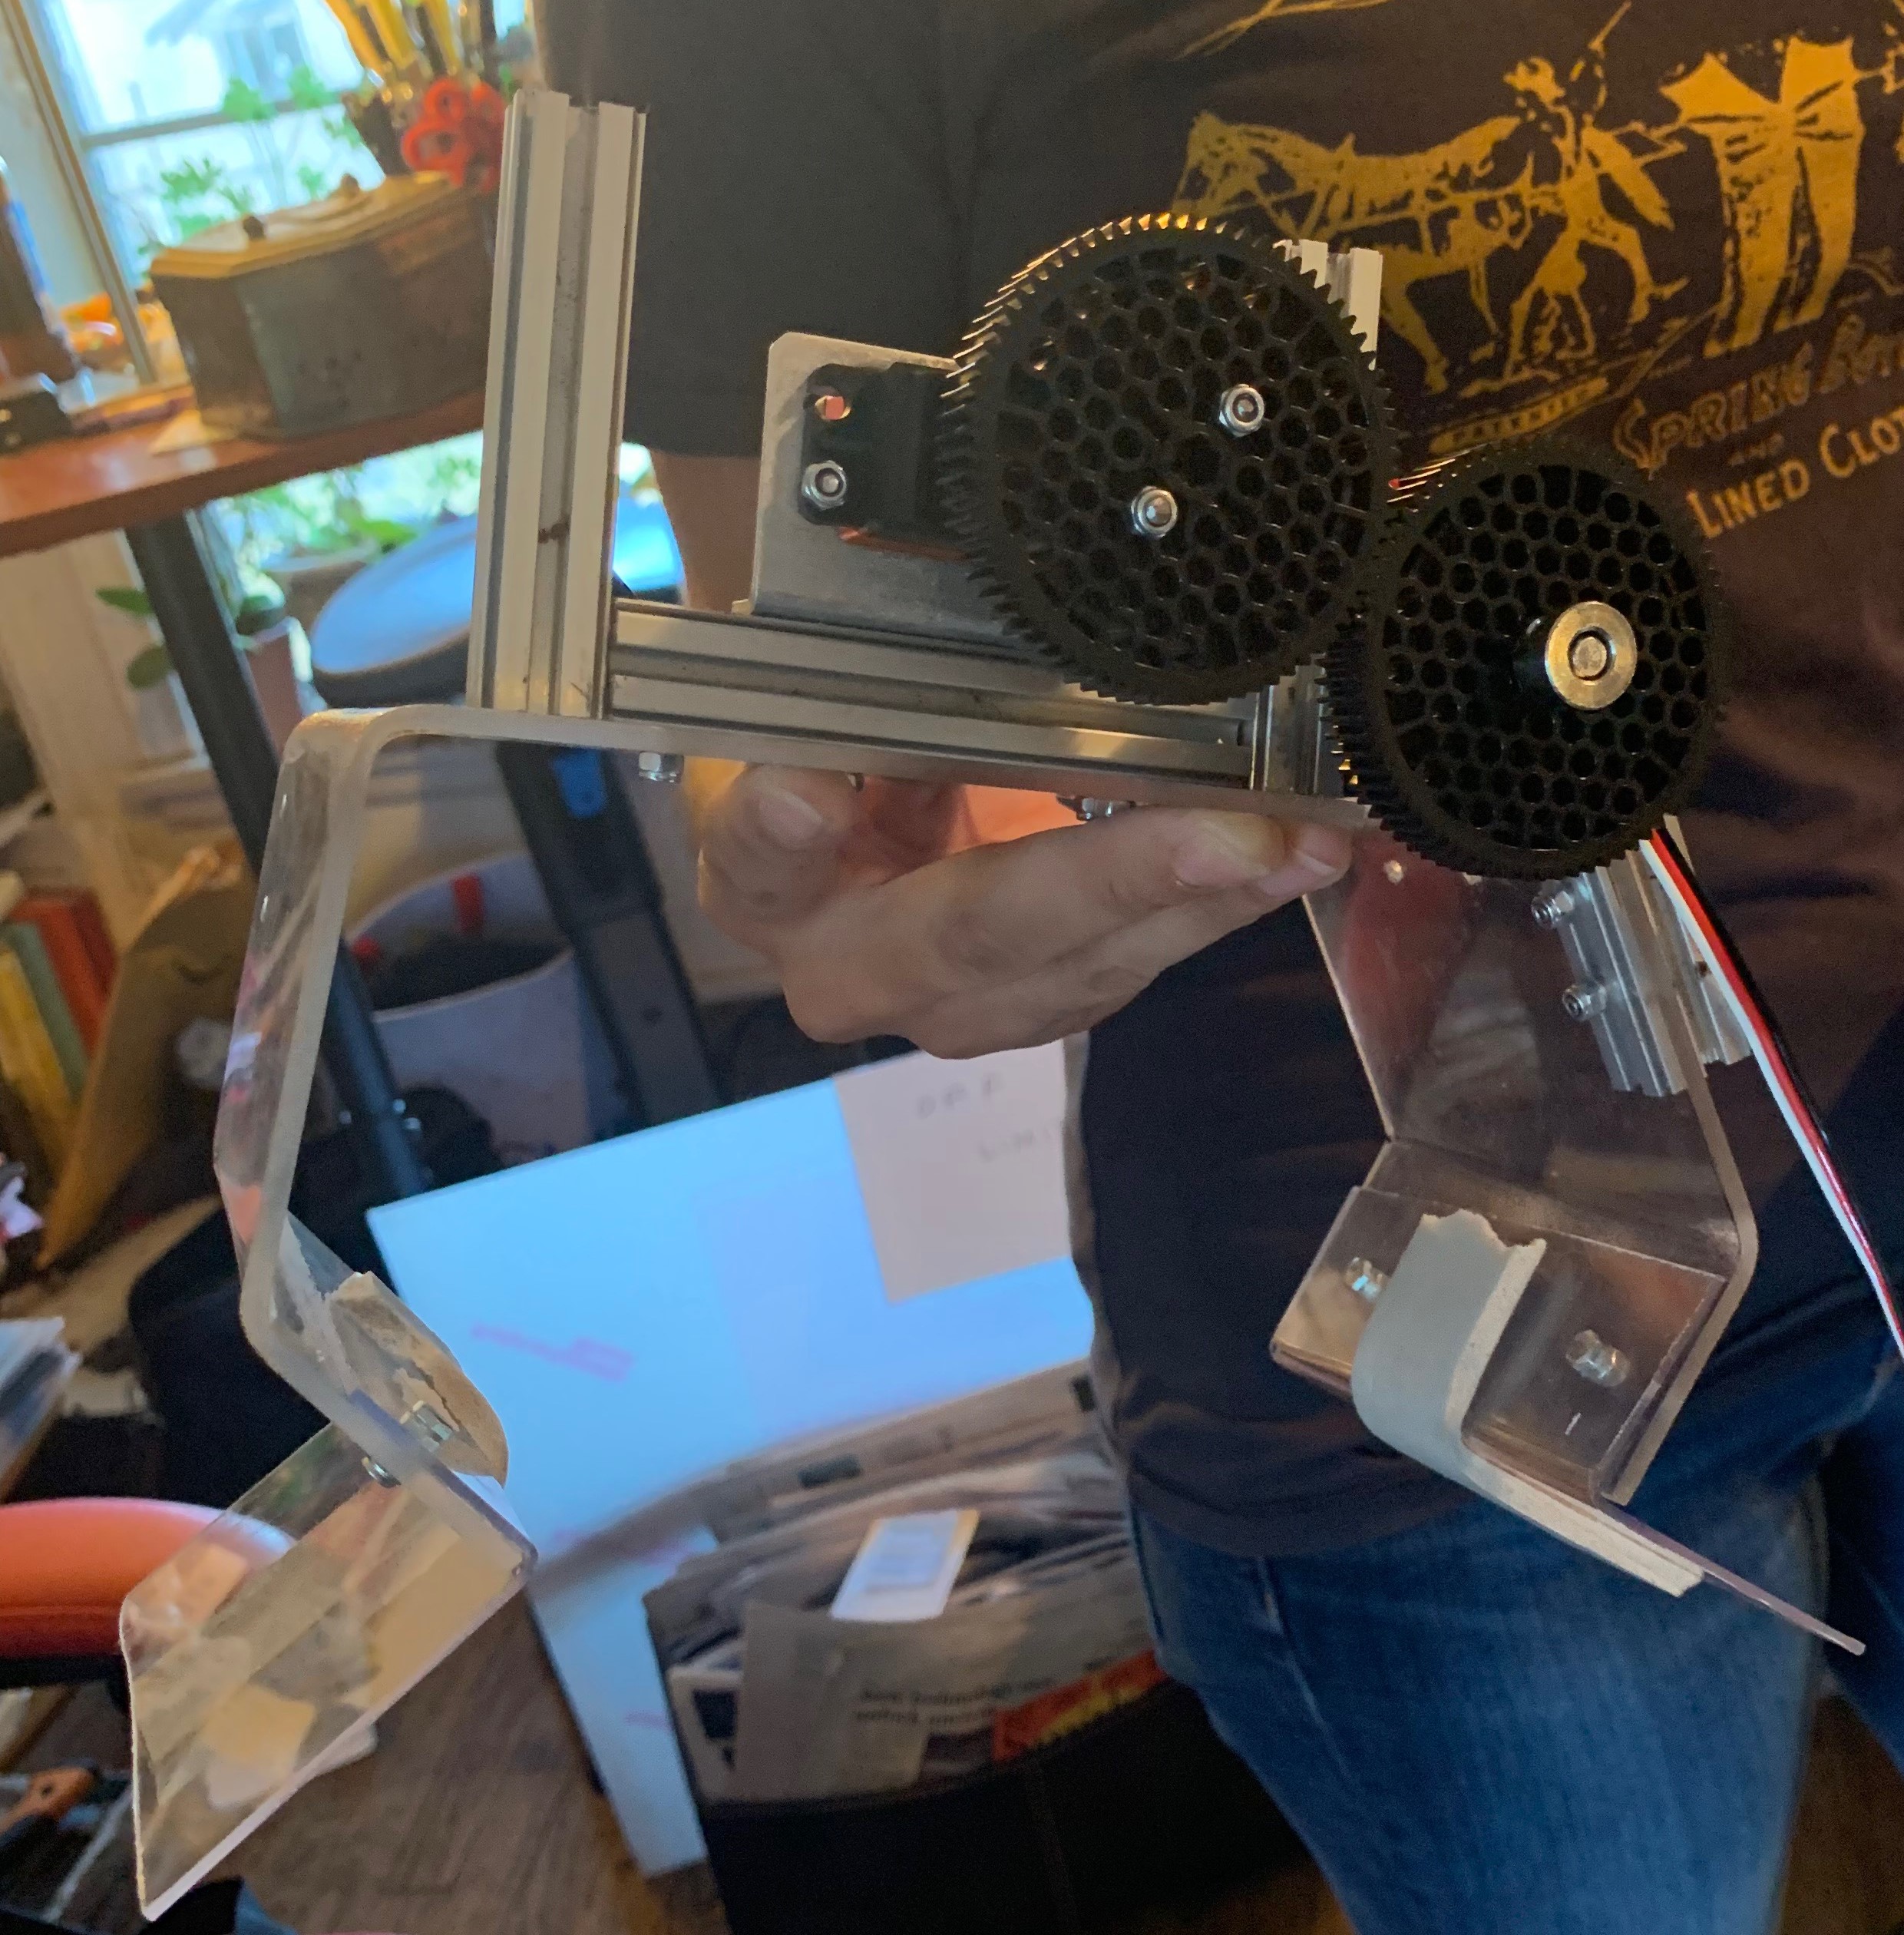
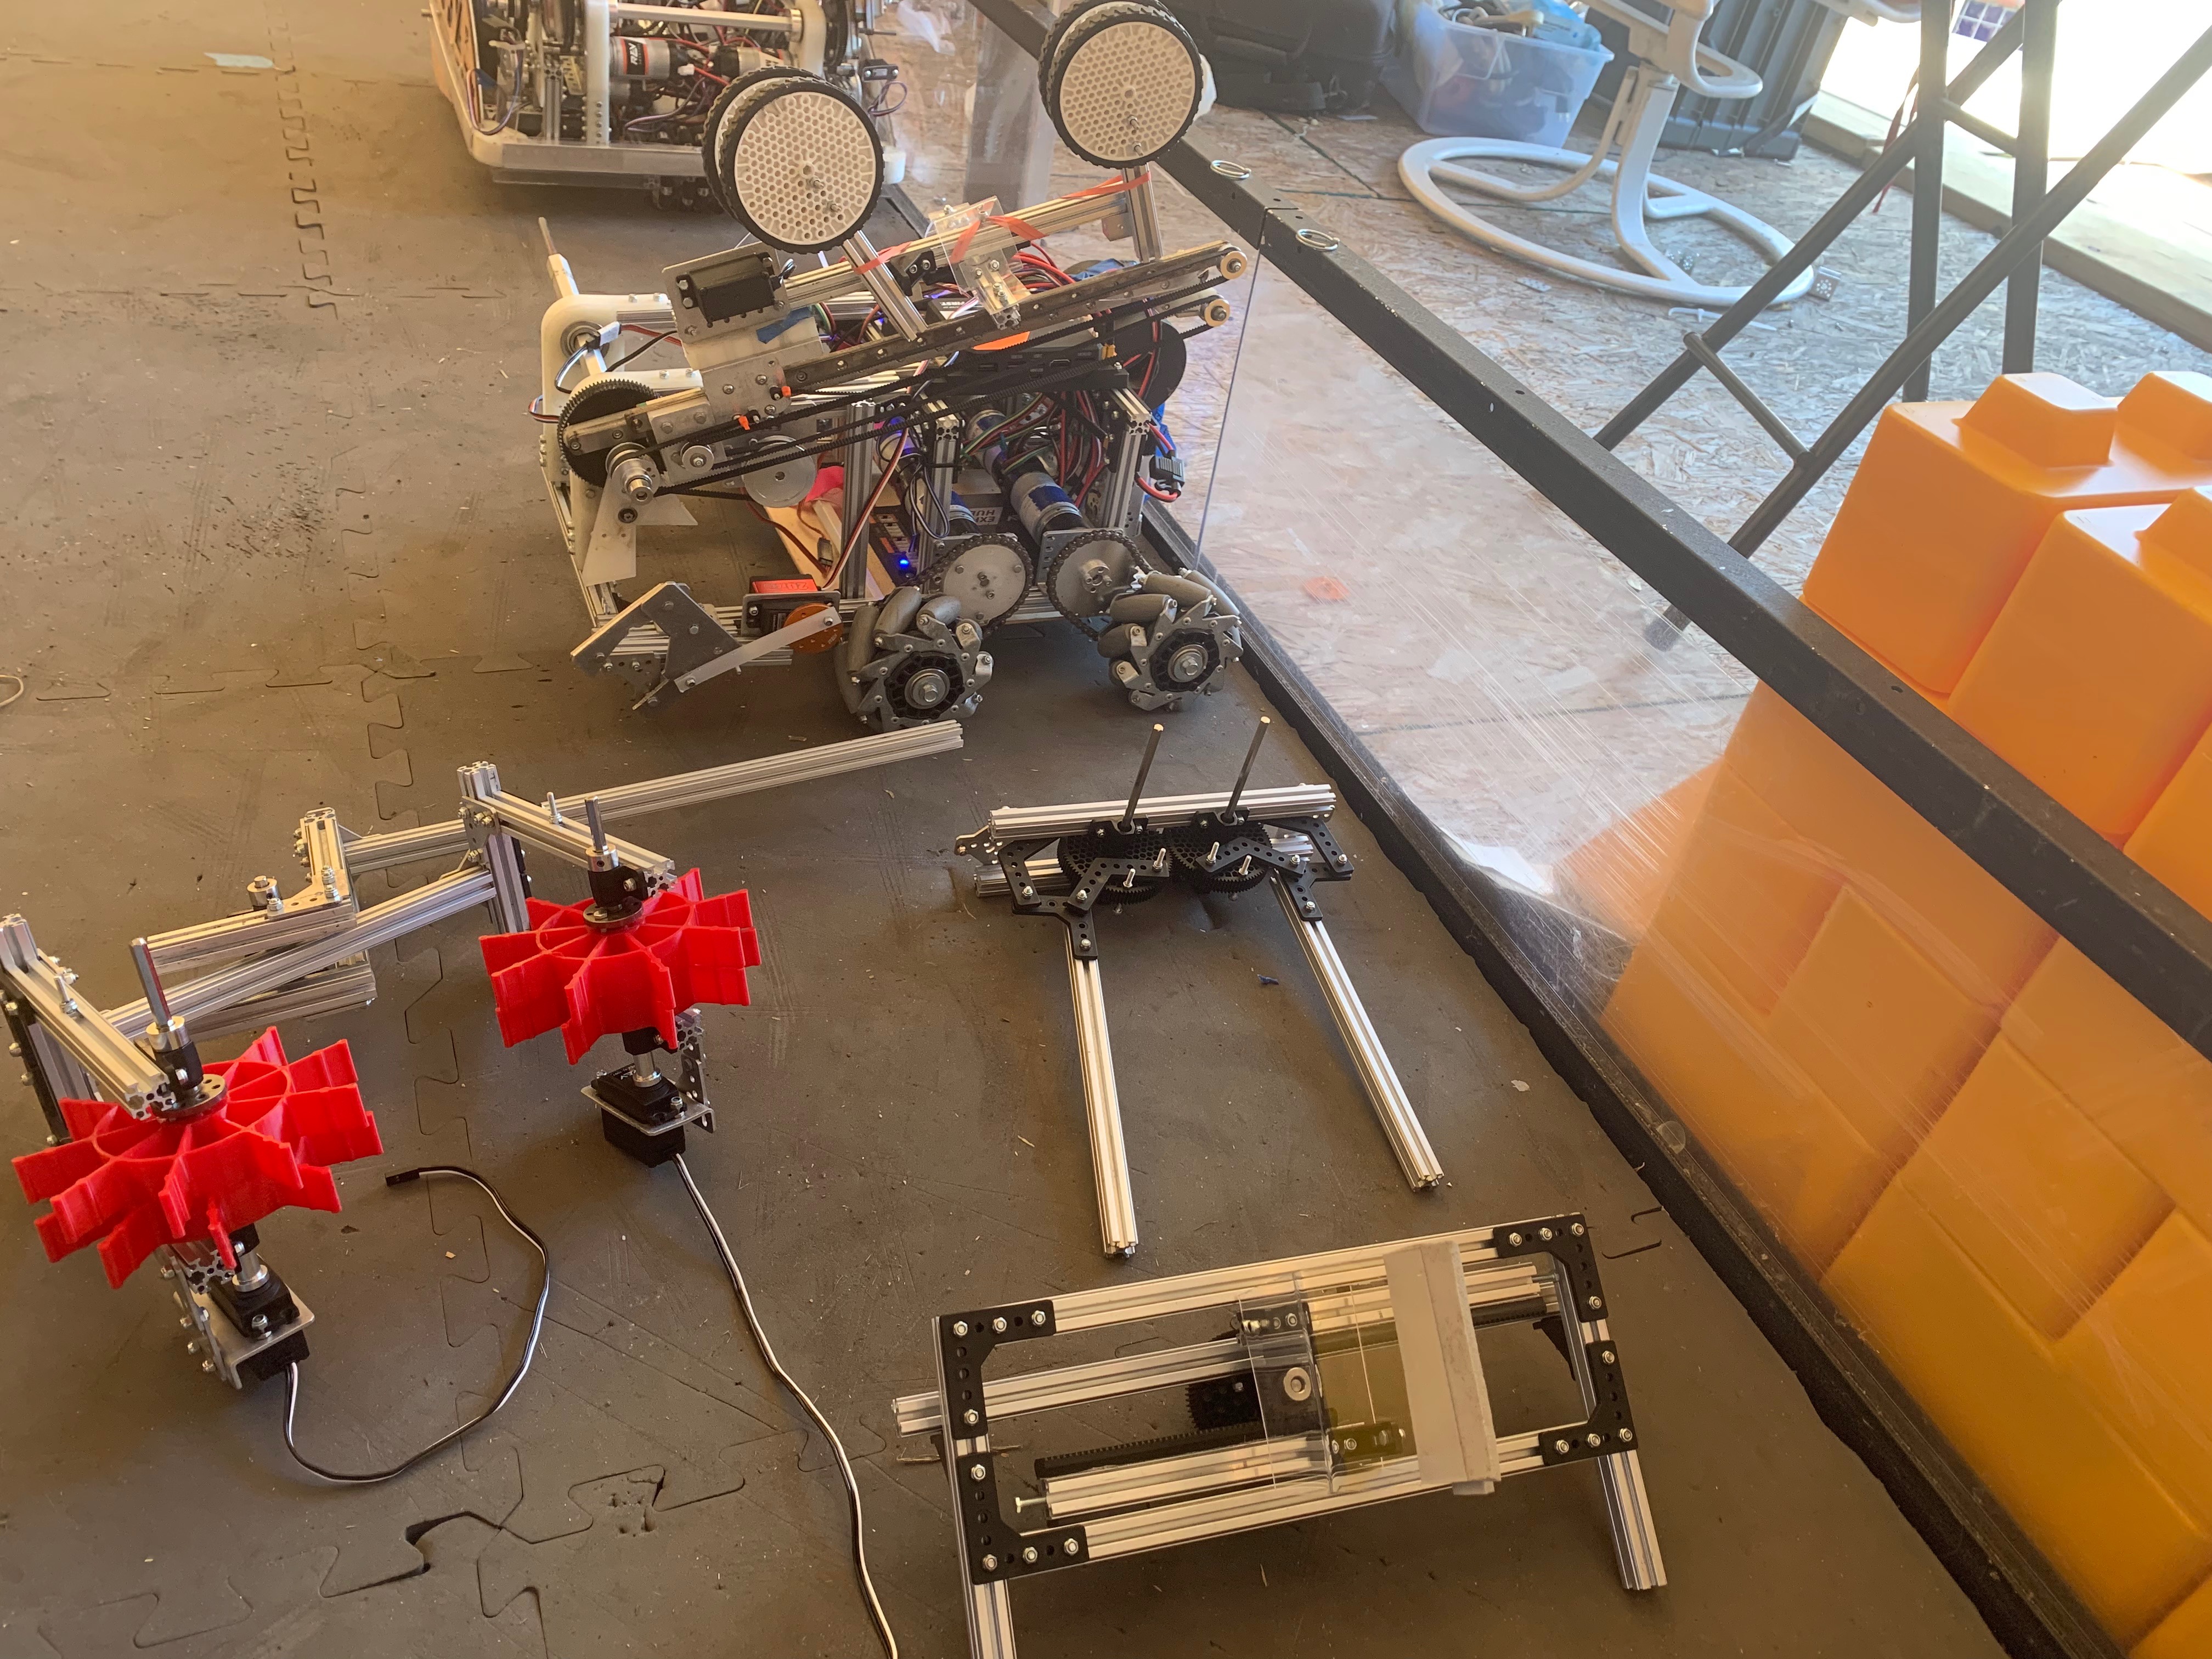
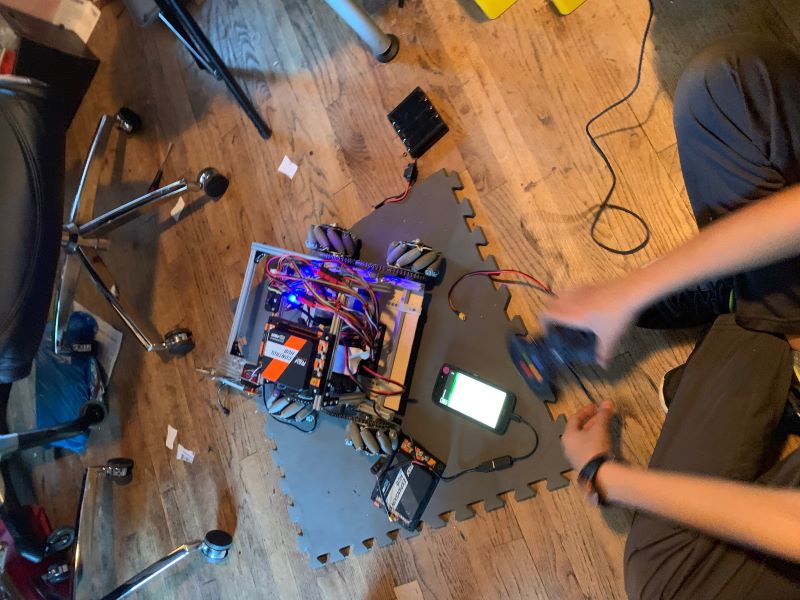
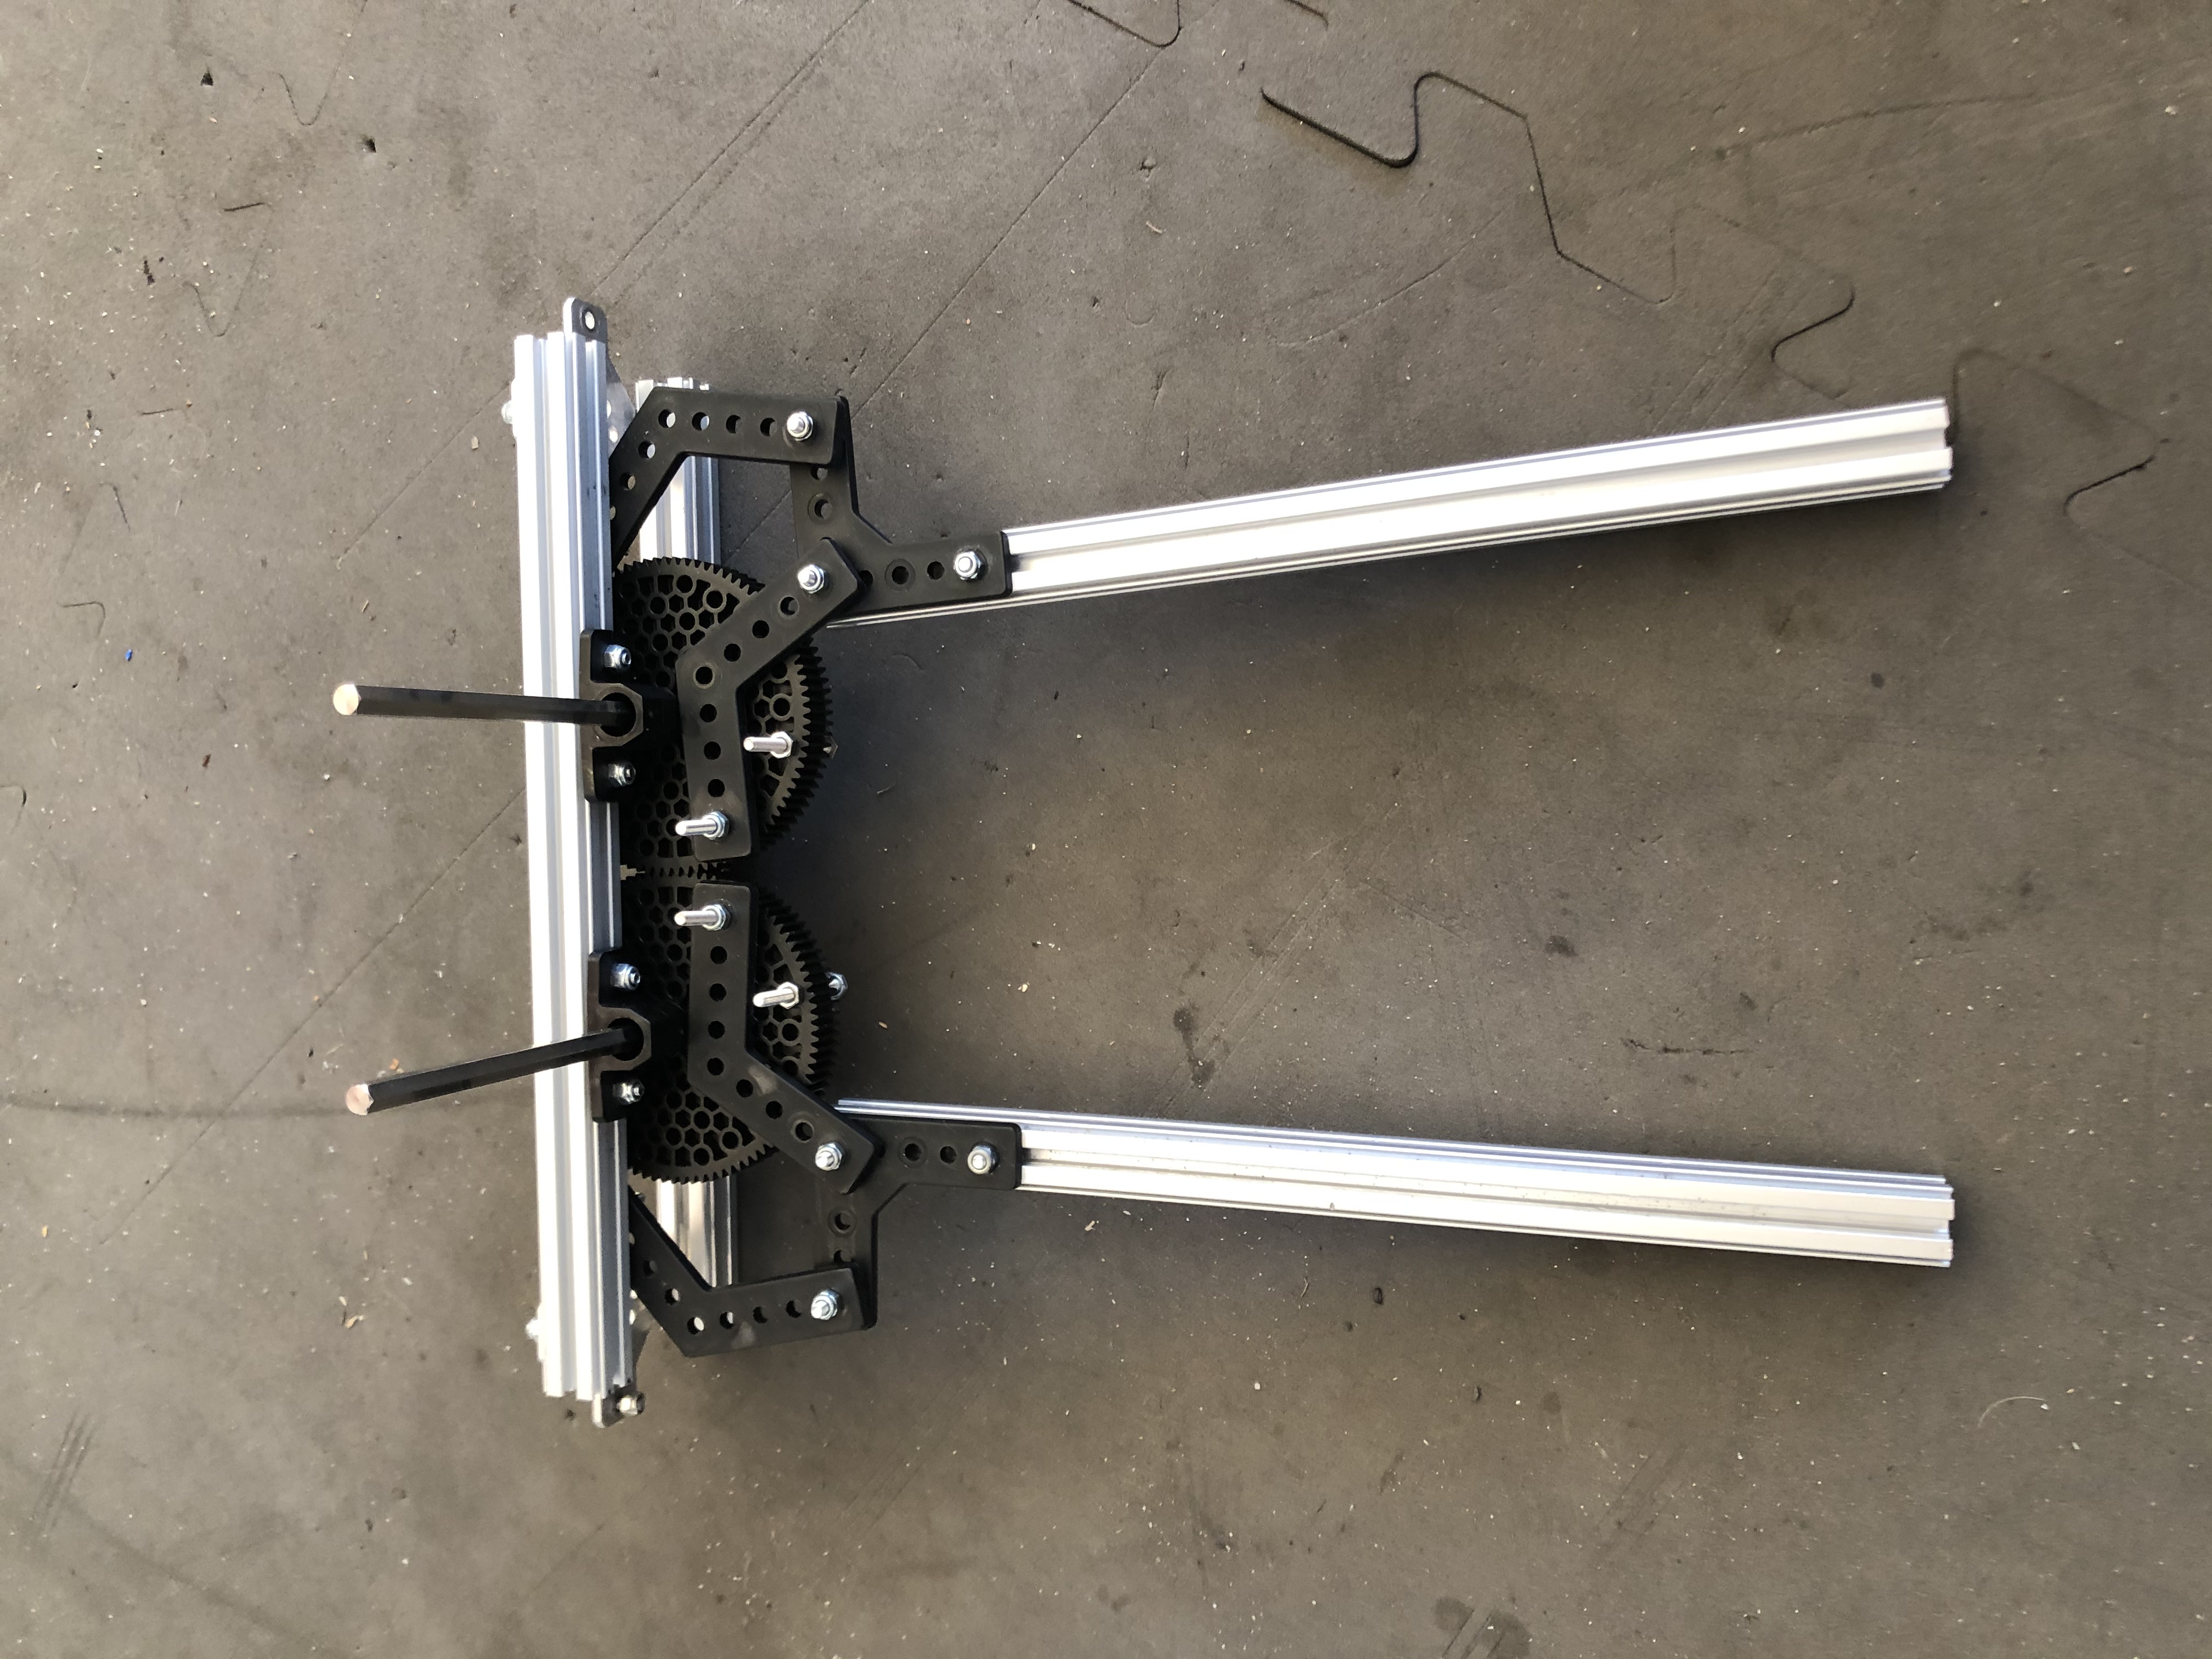
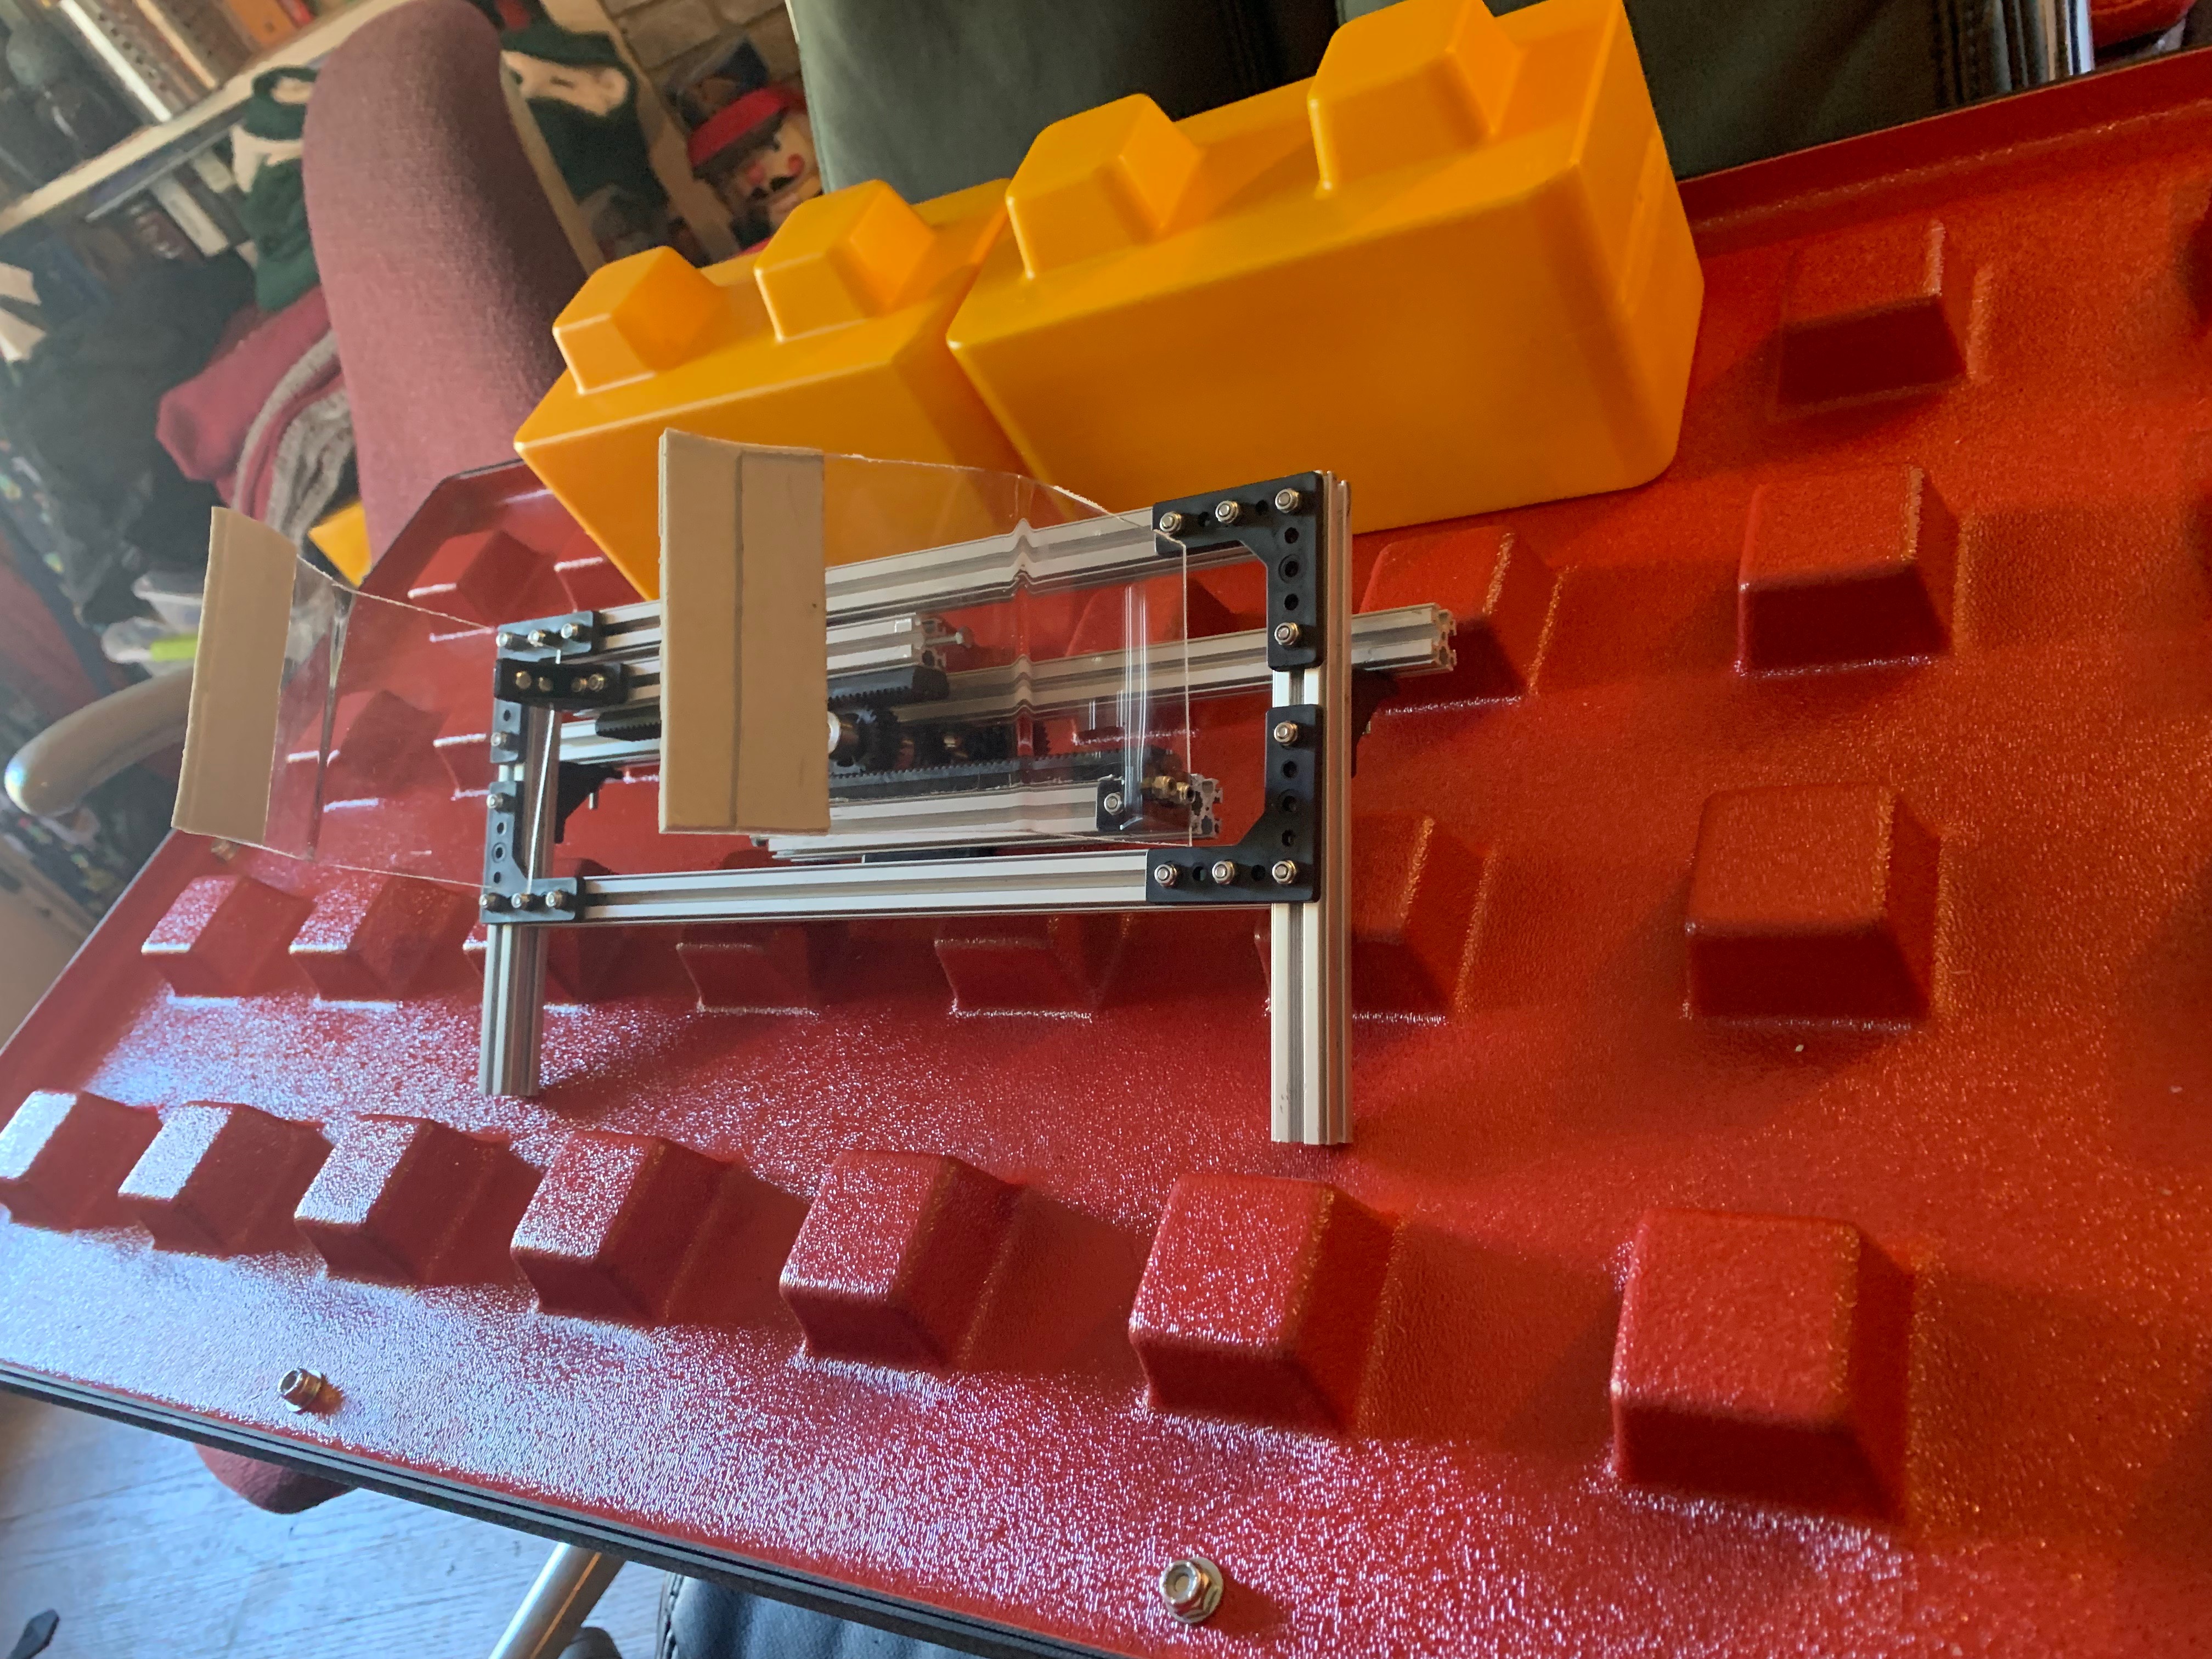
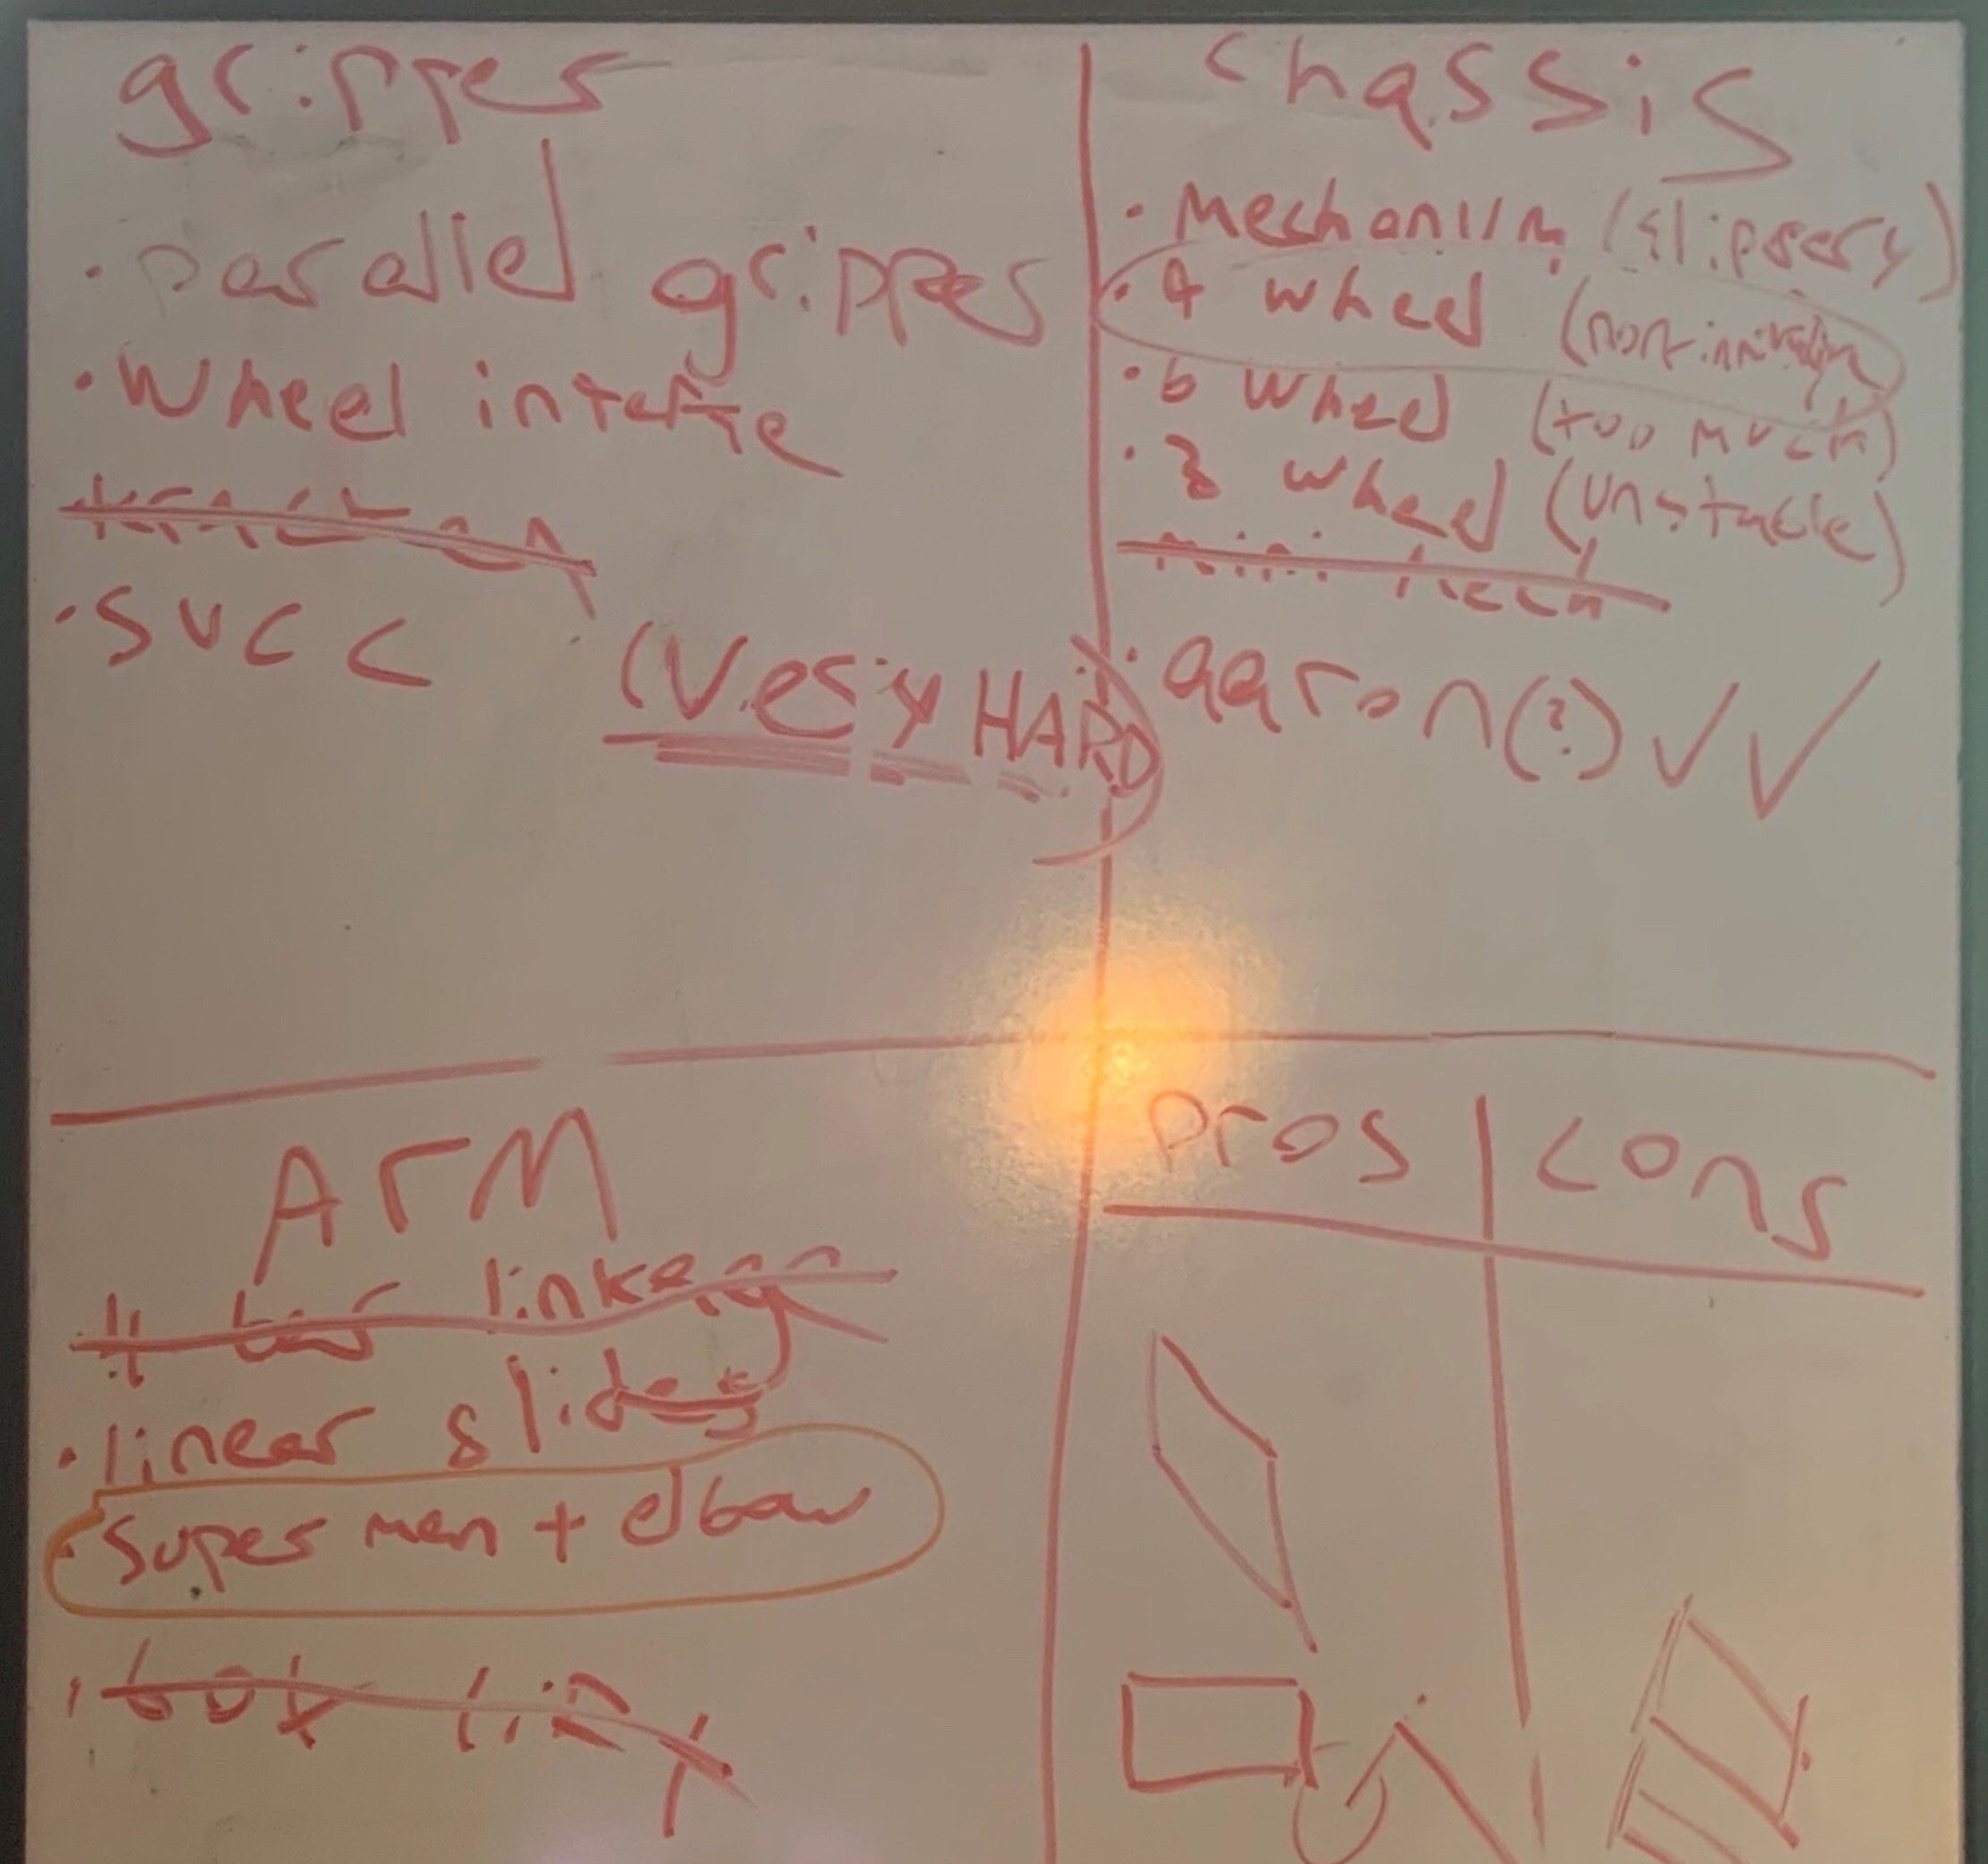
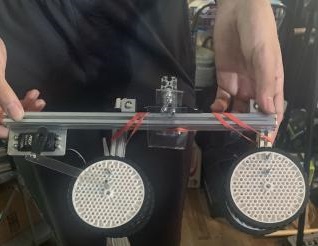
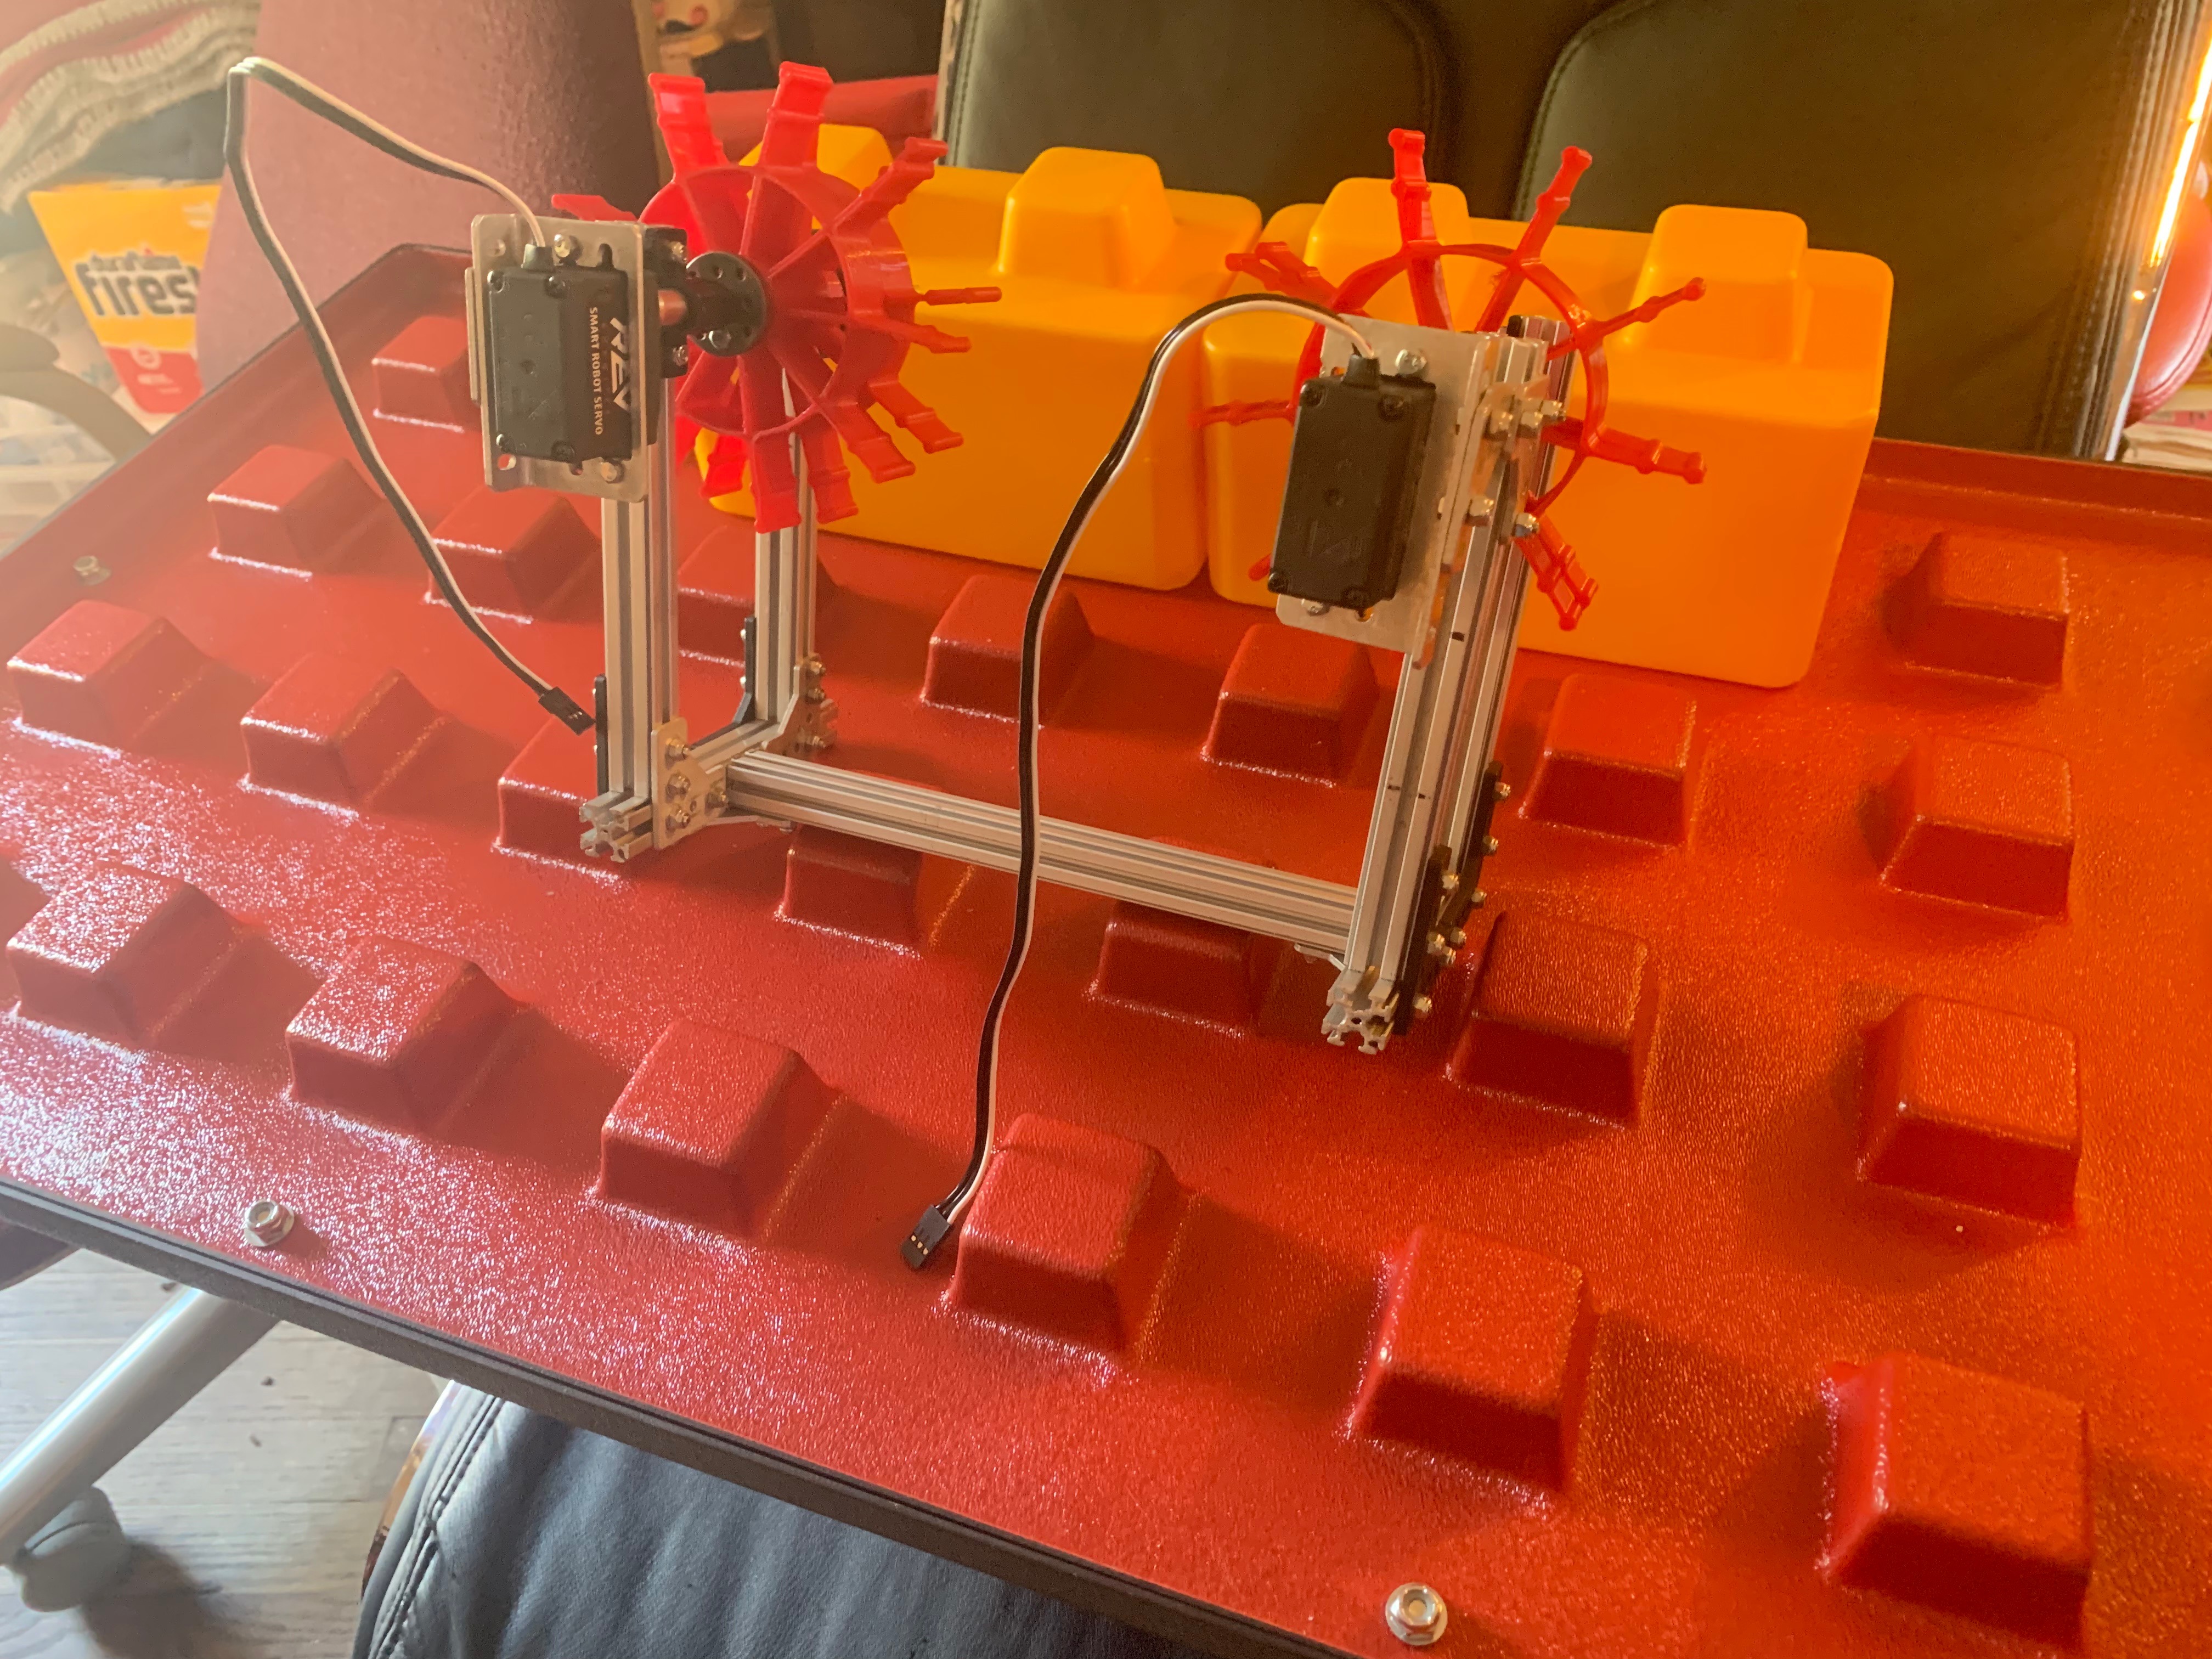
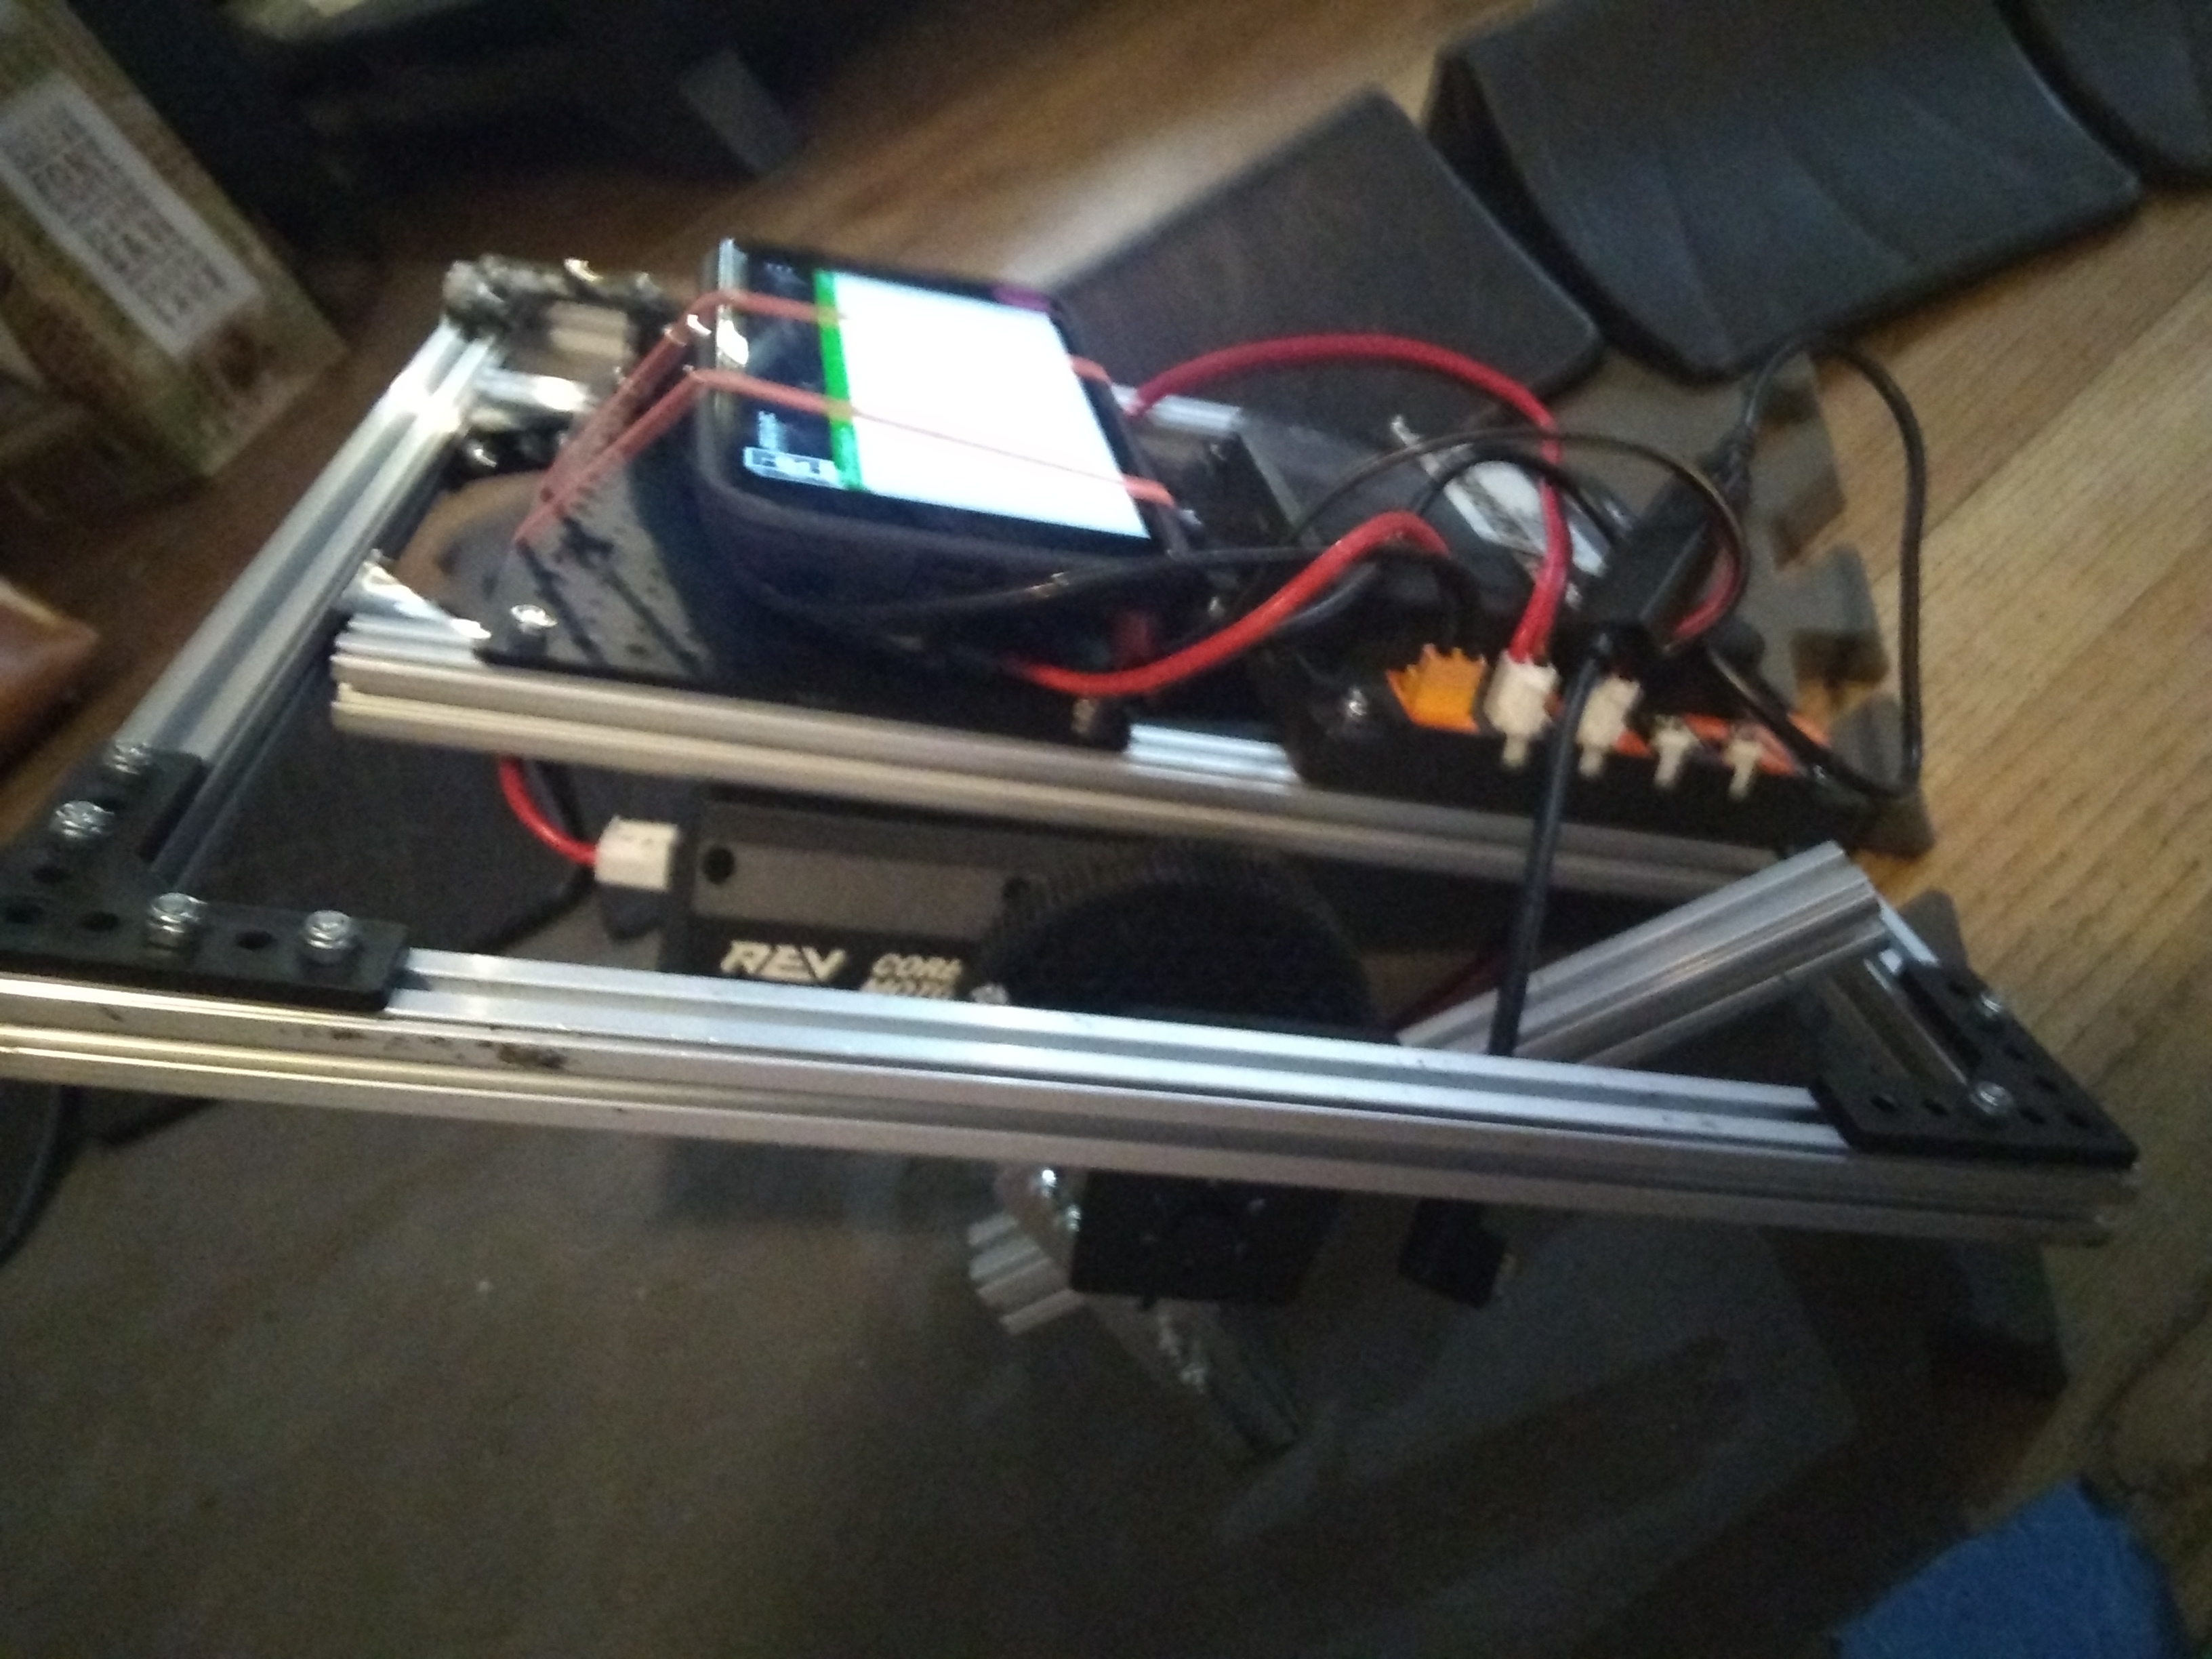
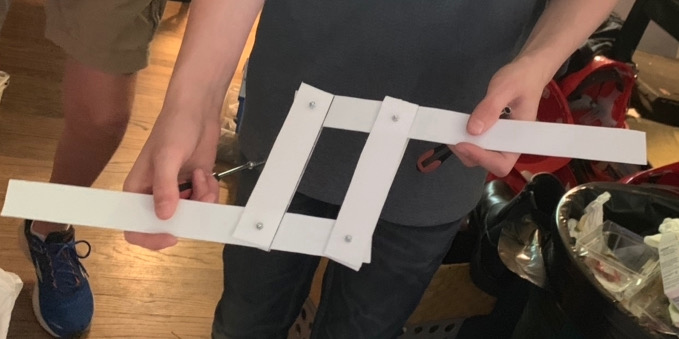
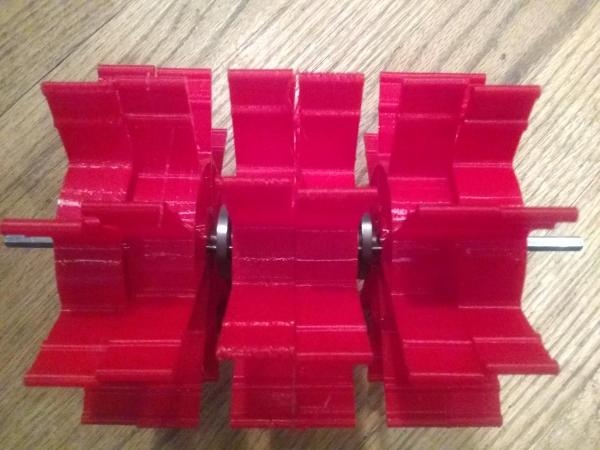
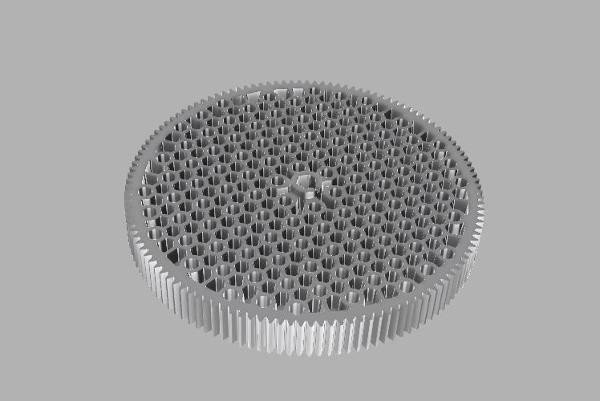
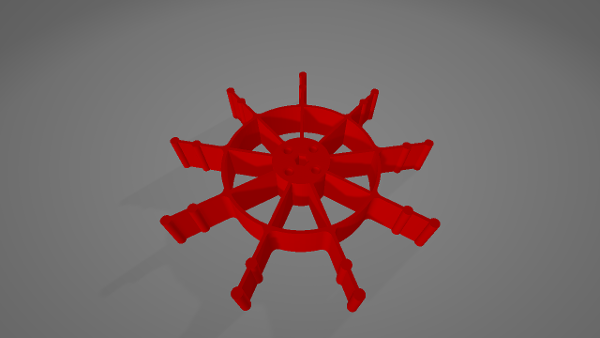
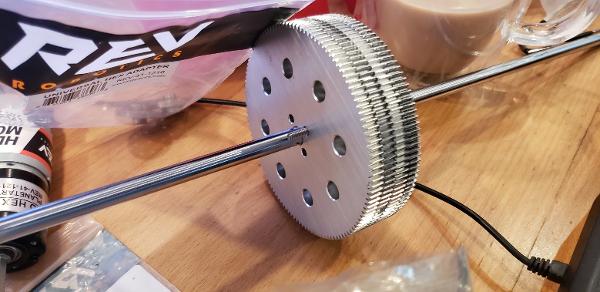
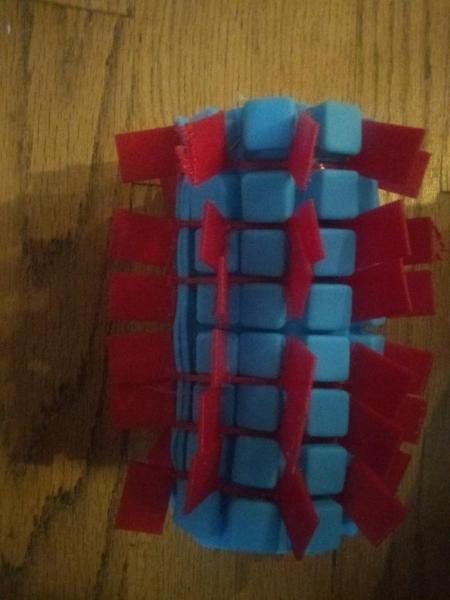
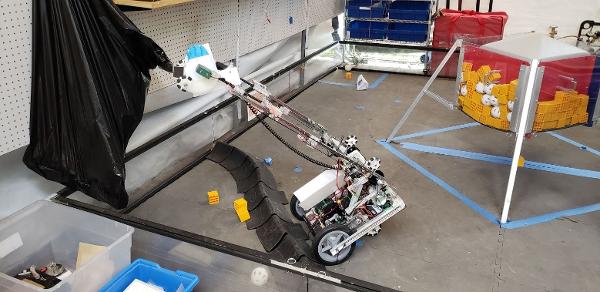
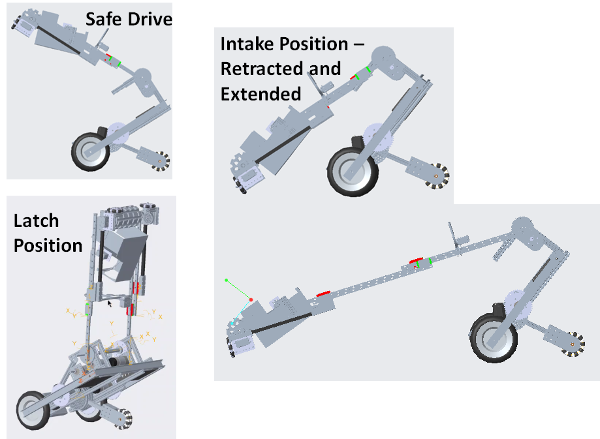

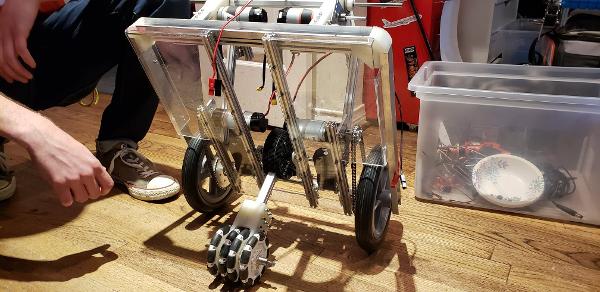
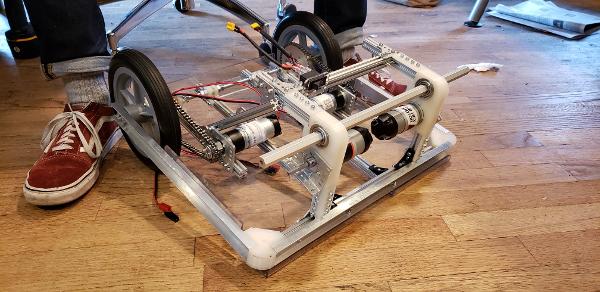
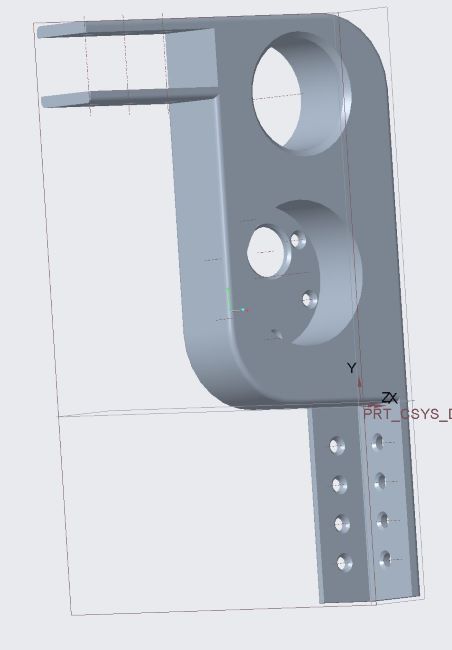
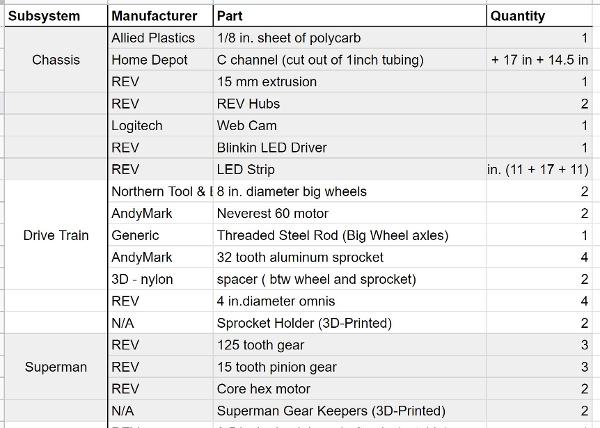

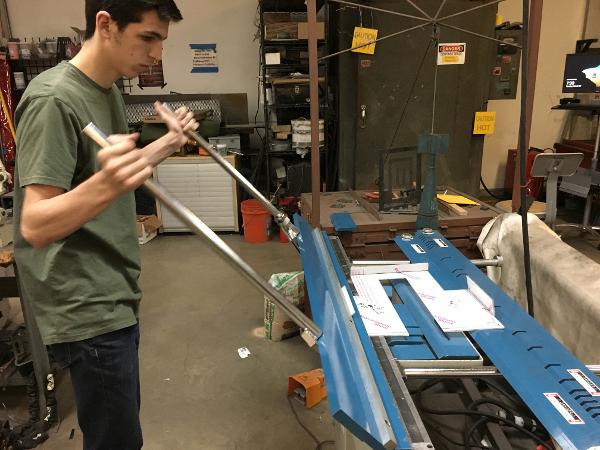
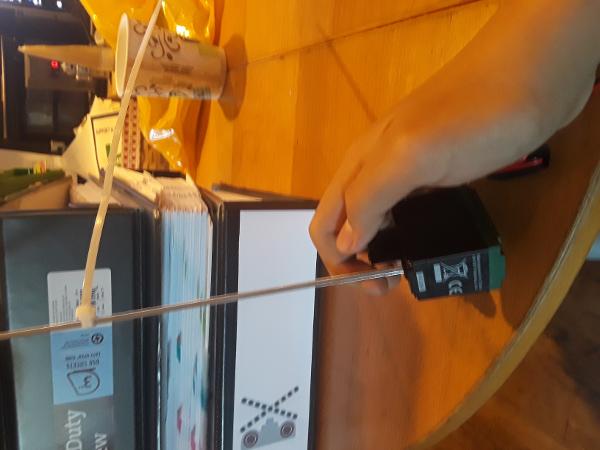
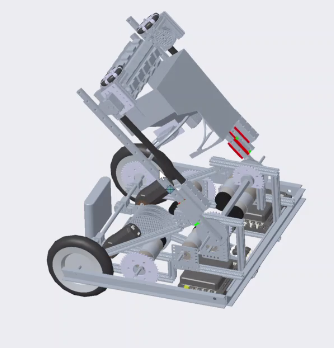
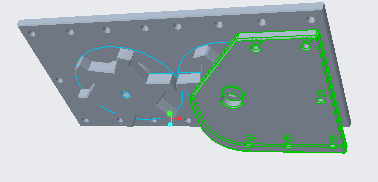
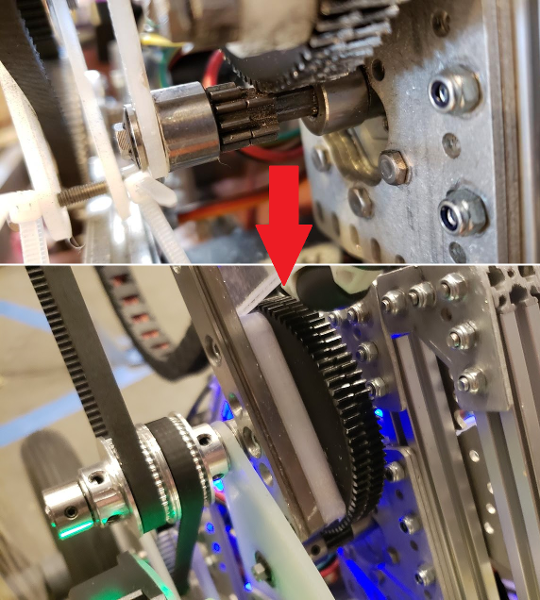
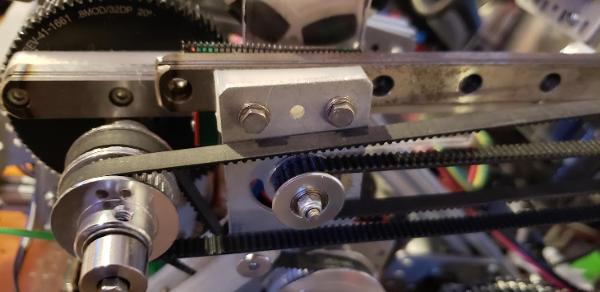
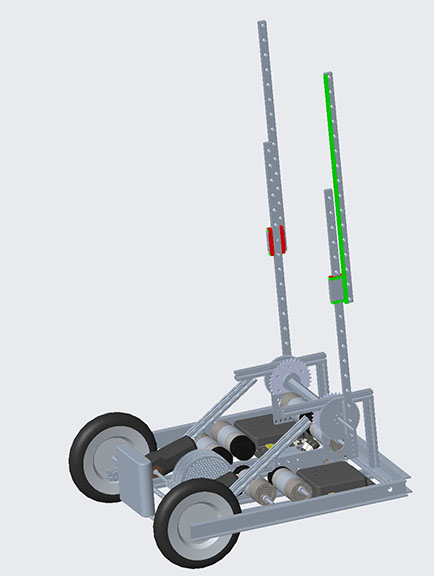
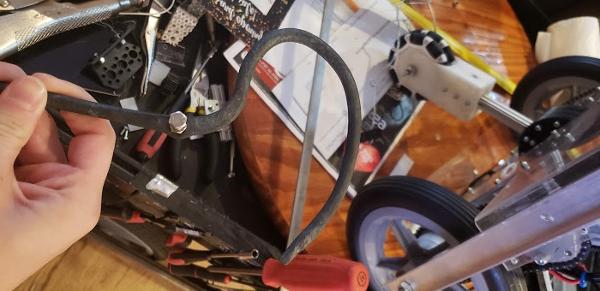
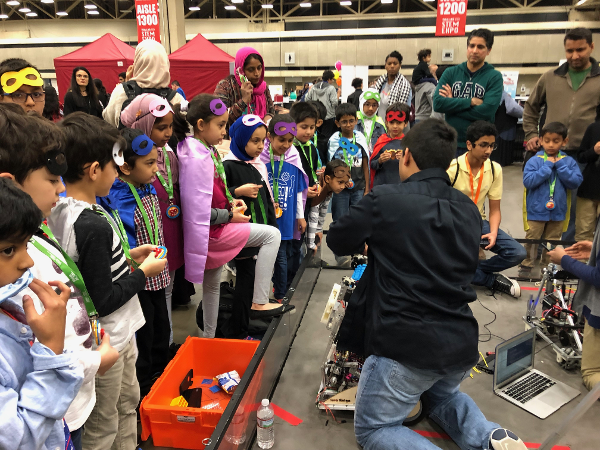

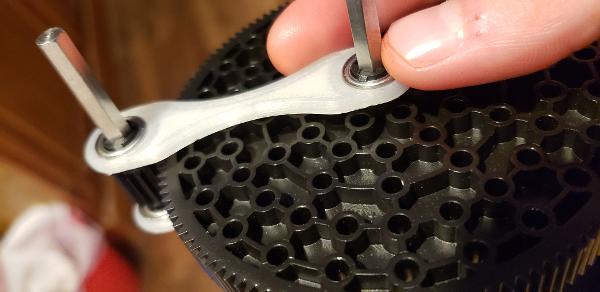

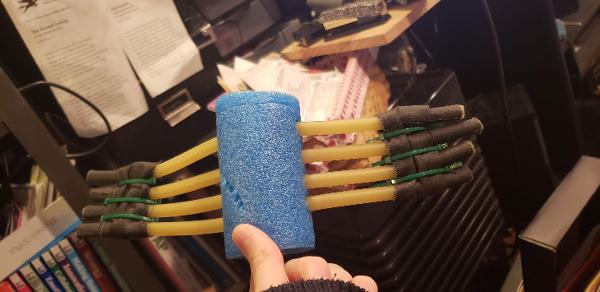
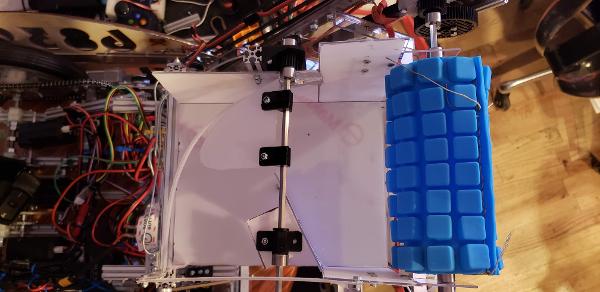
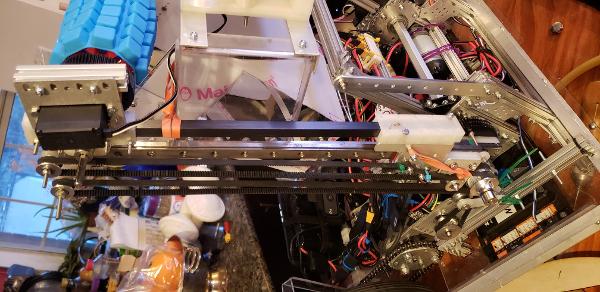
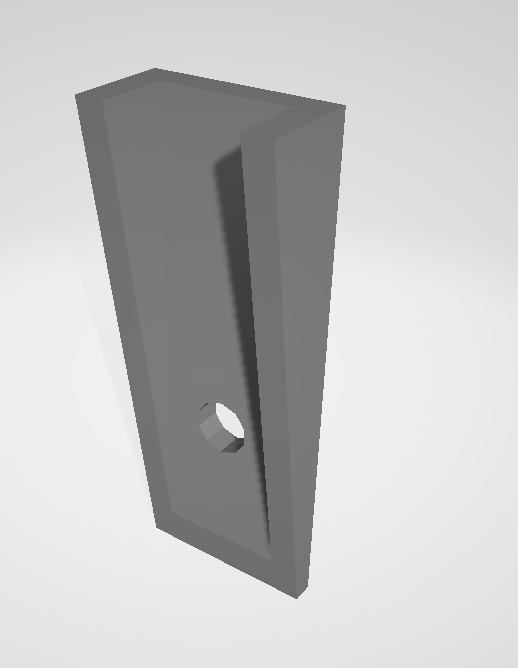
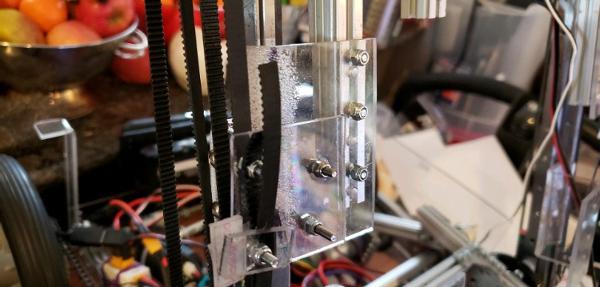
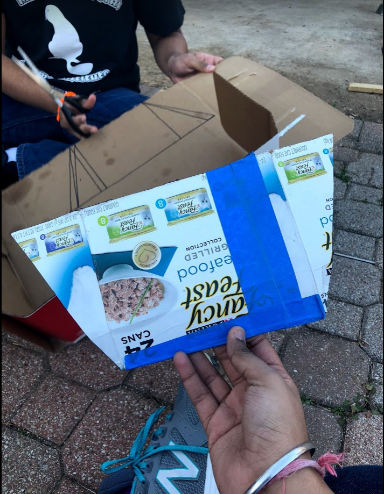
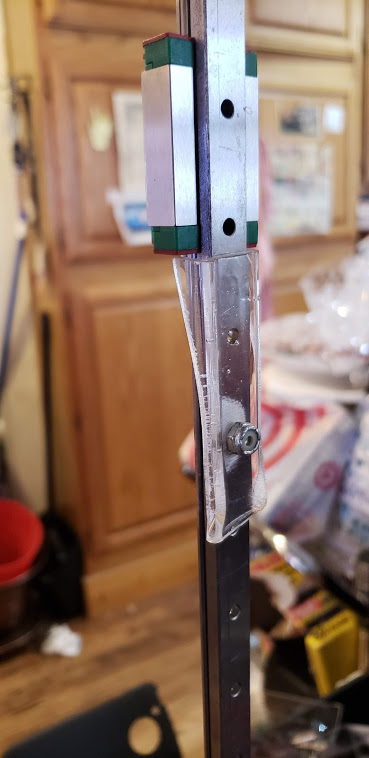
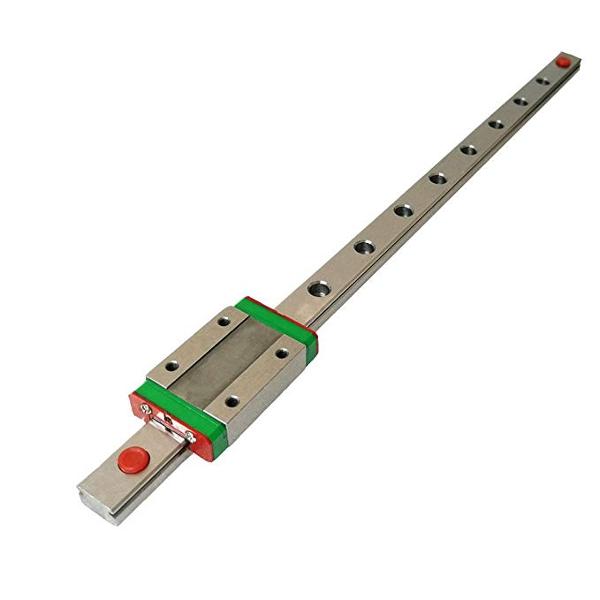
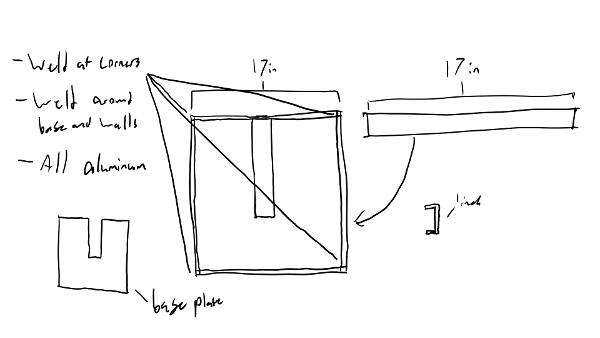
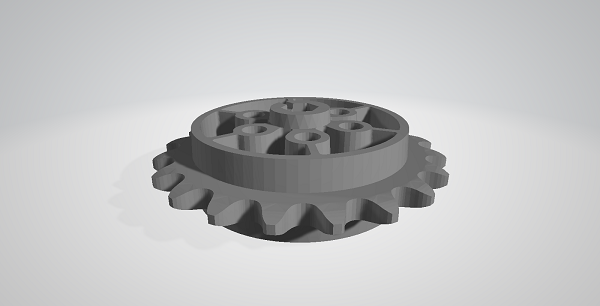
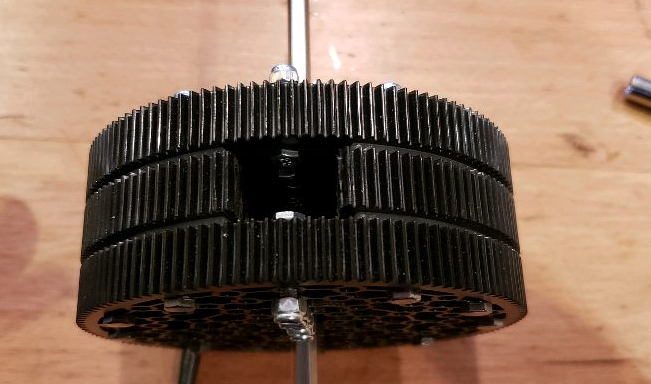
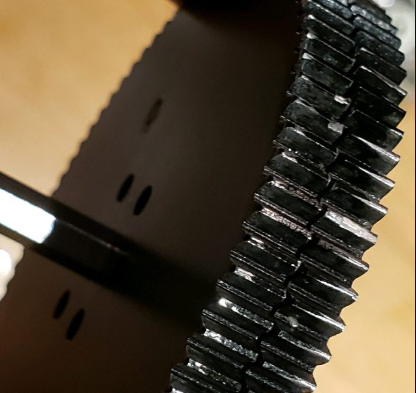
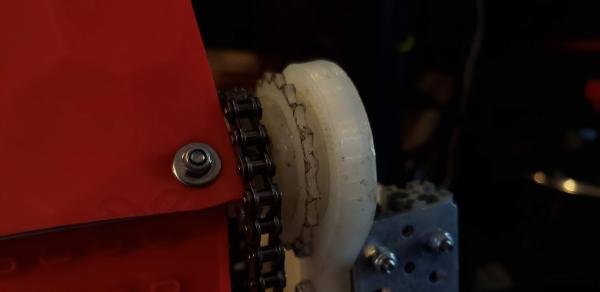
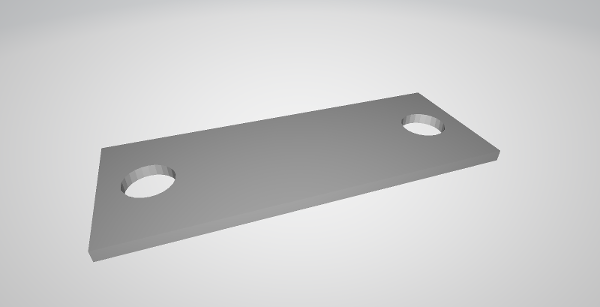
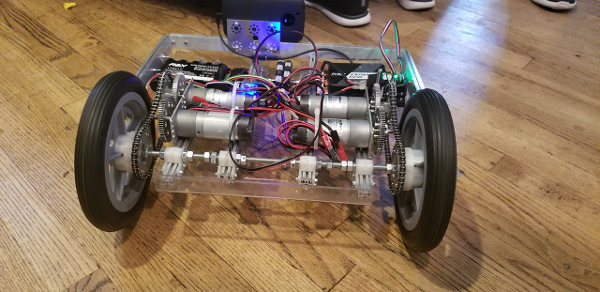
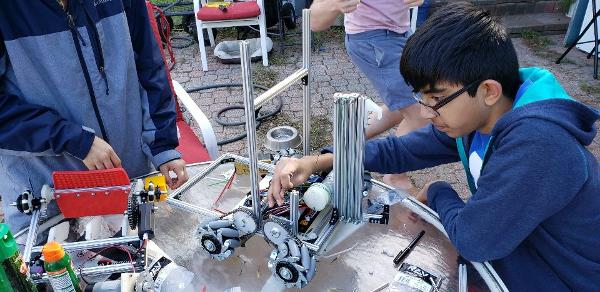
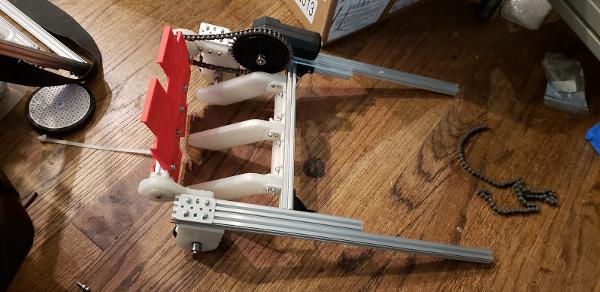

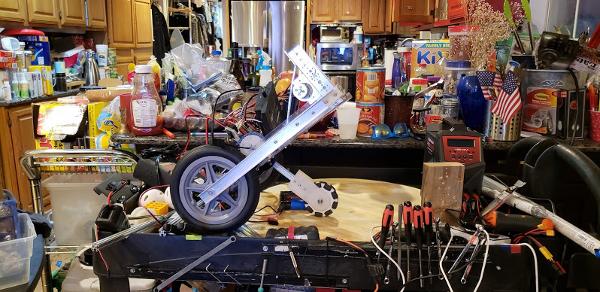
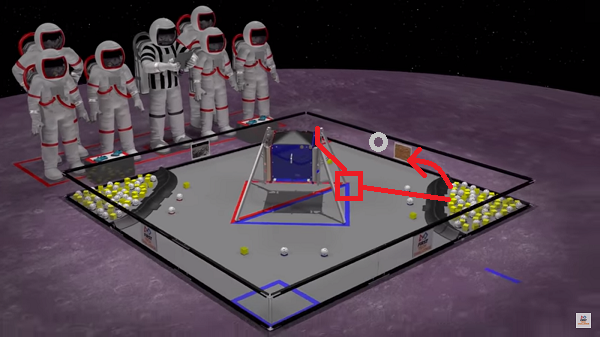
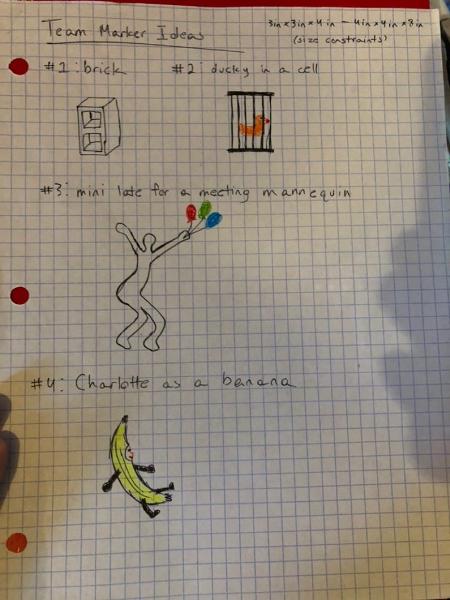
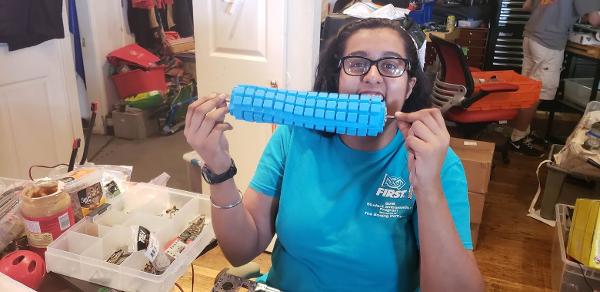
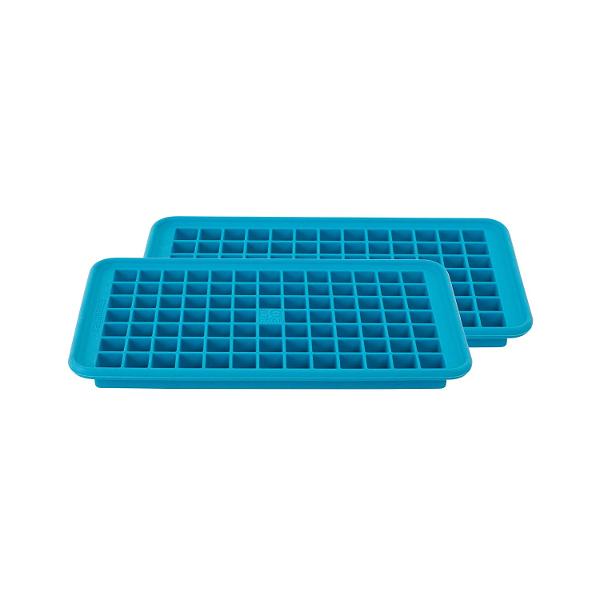
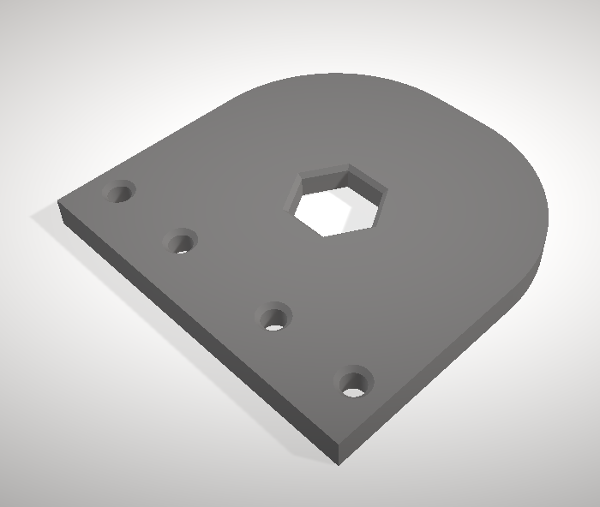
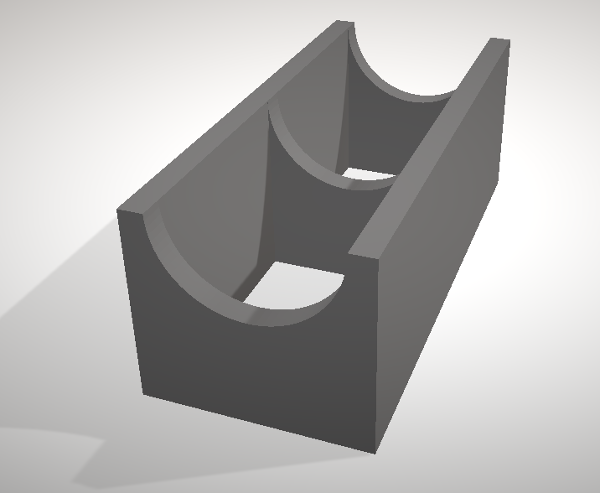
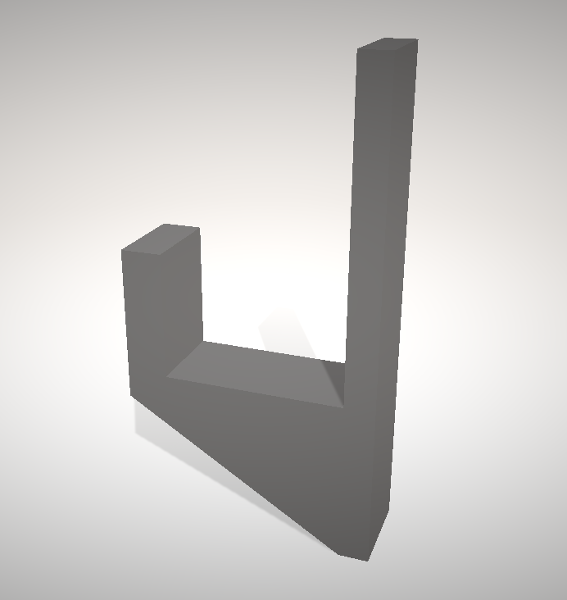
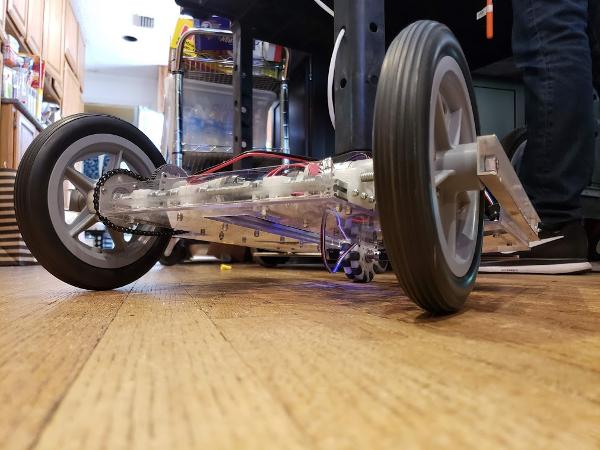
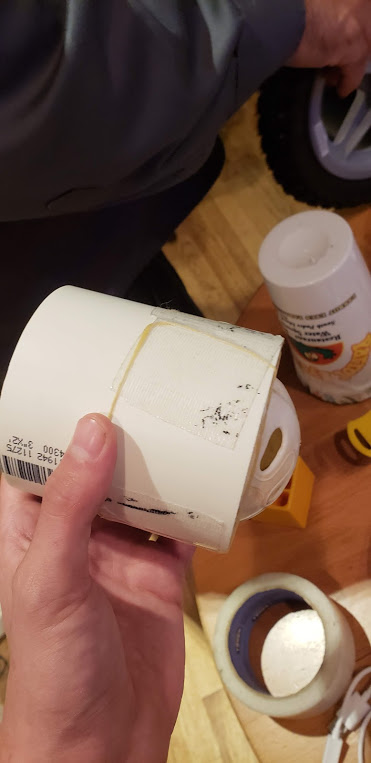
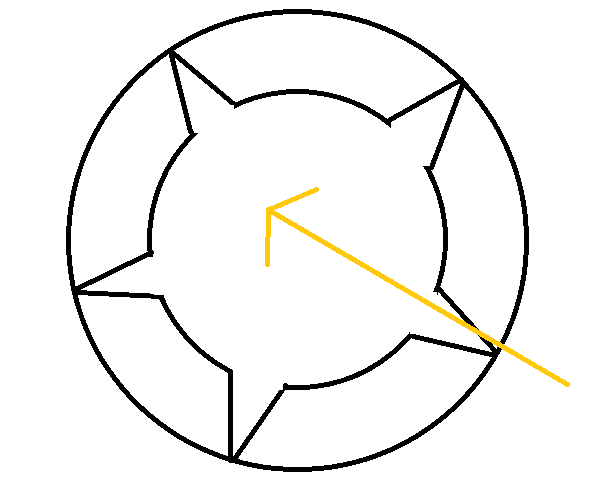 This suggestion uses a...
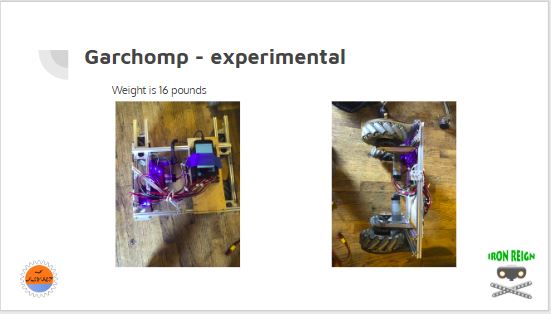
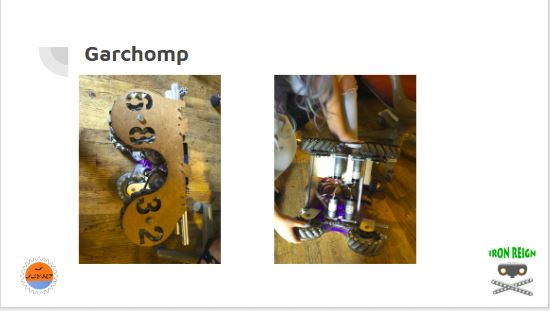
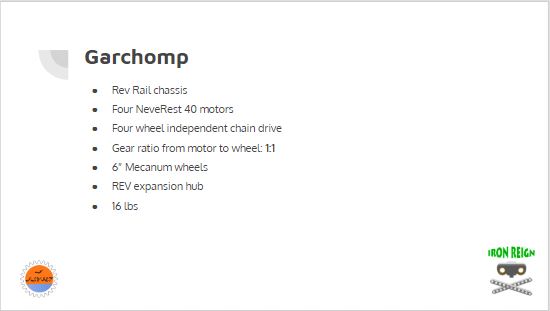
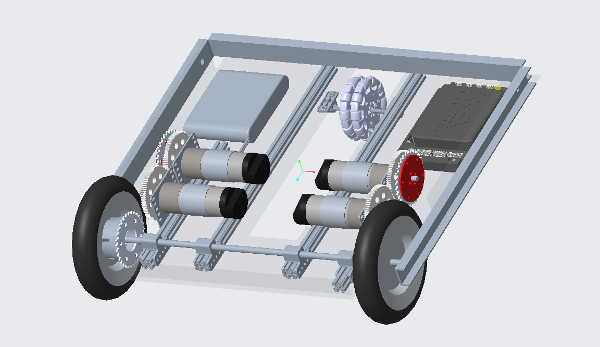
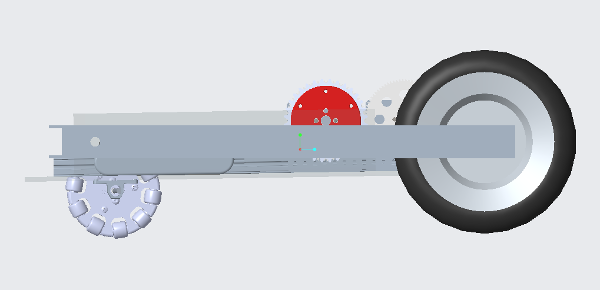
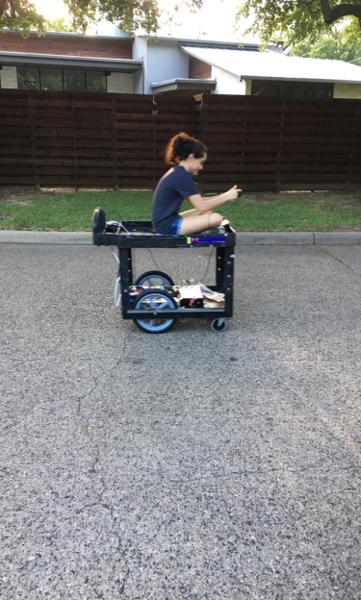
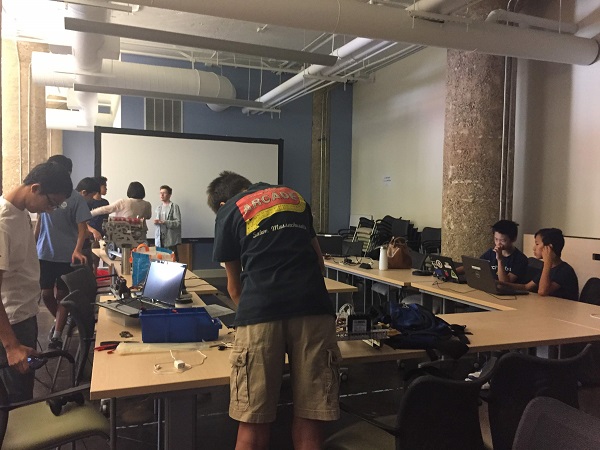
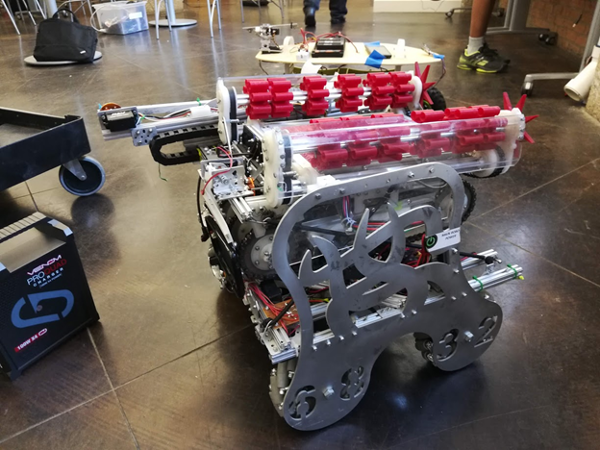
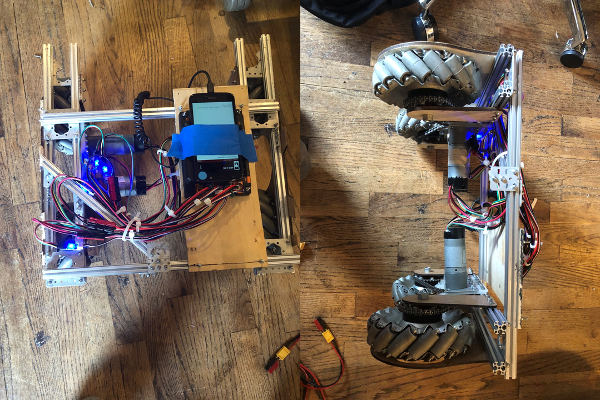
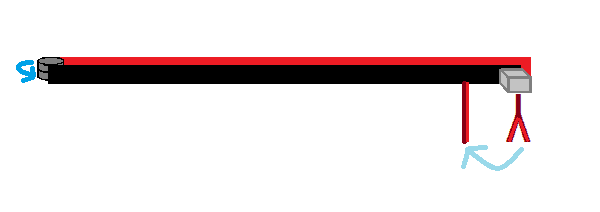
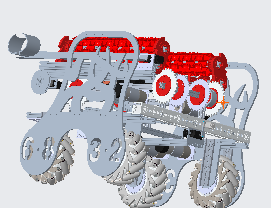
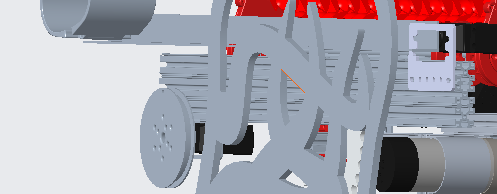
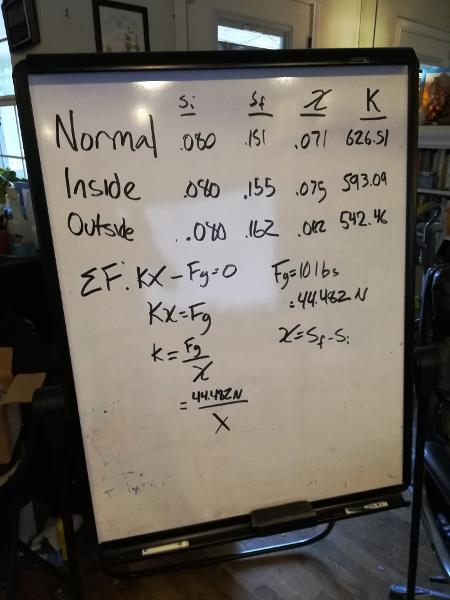
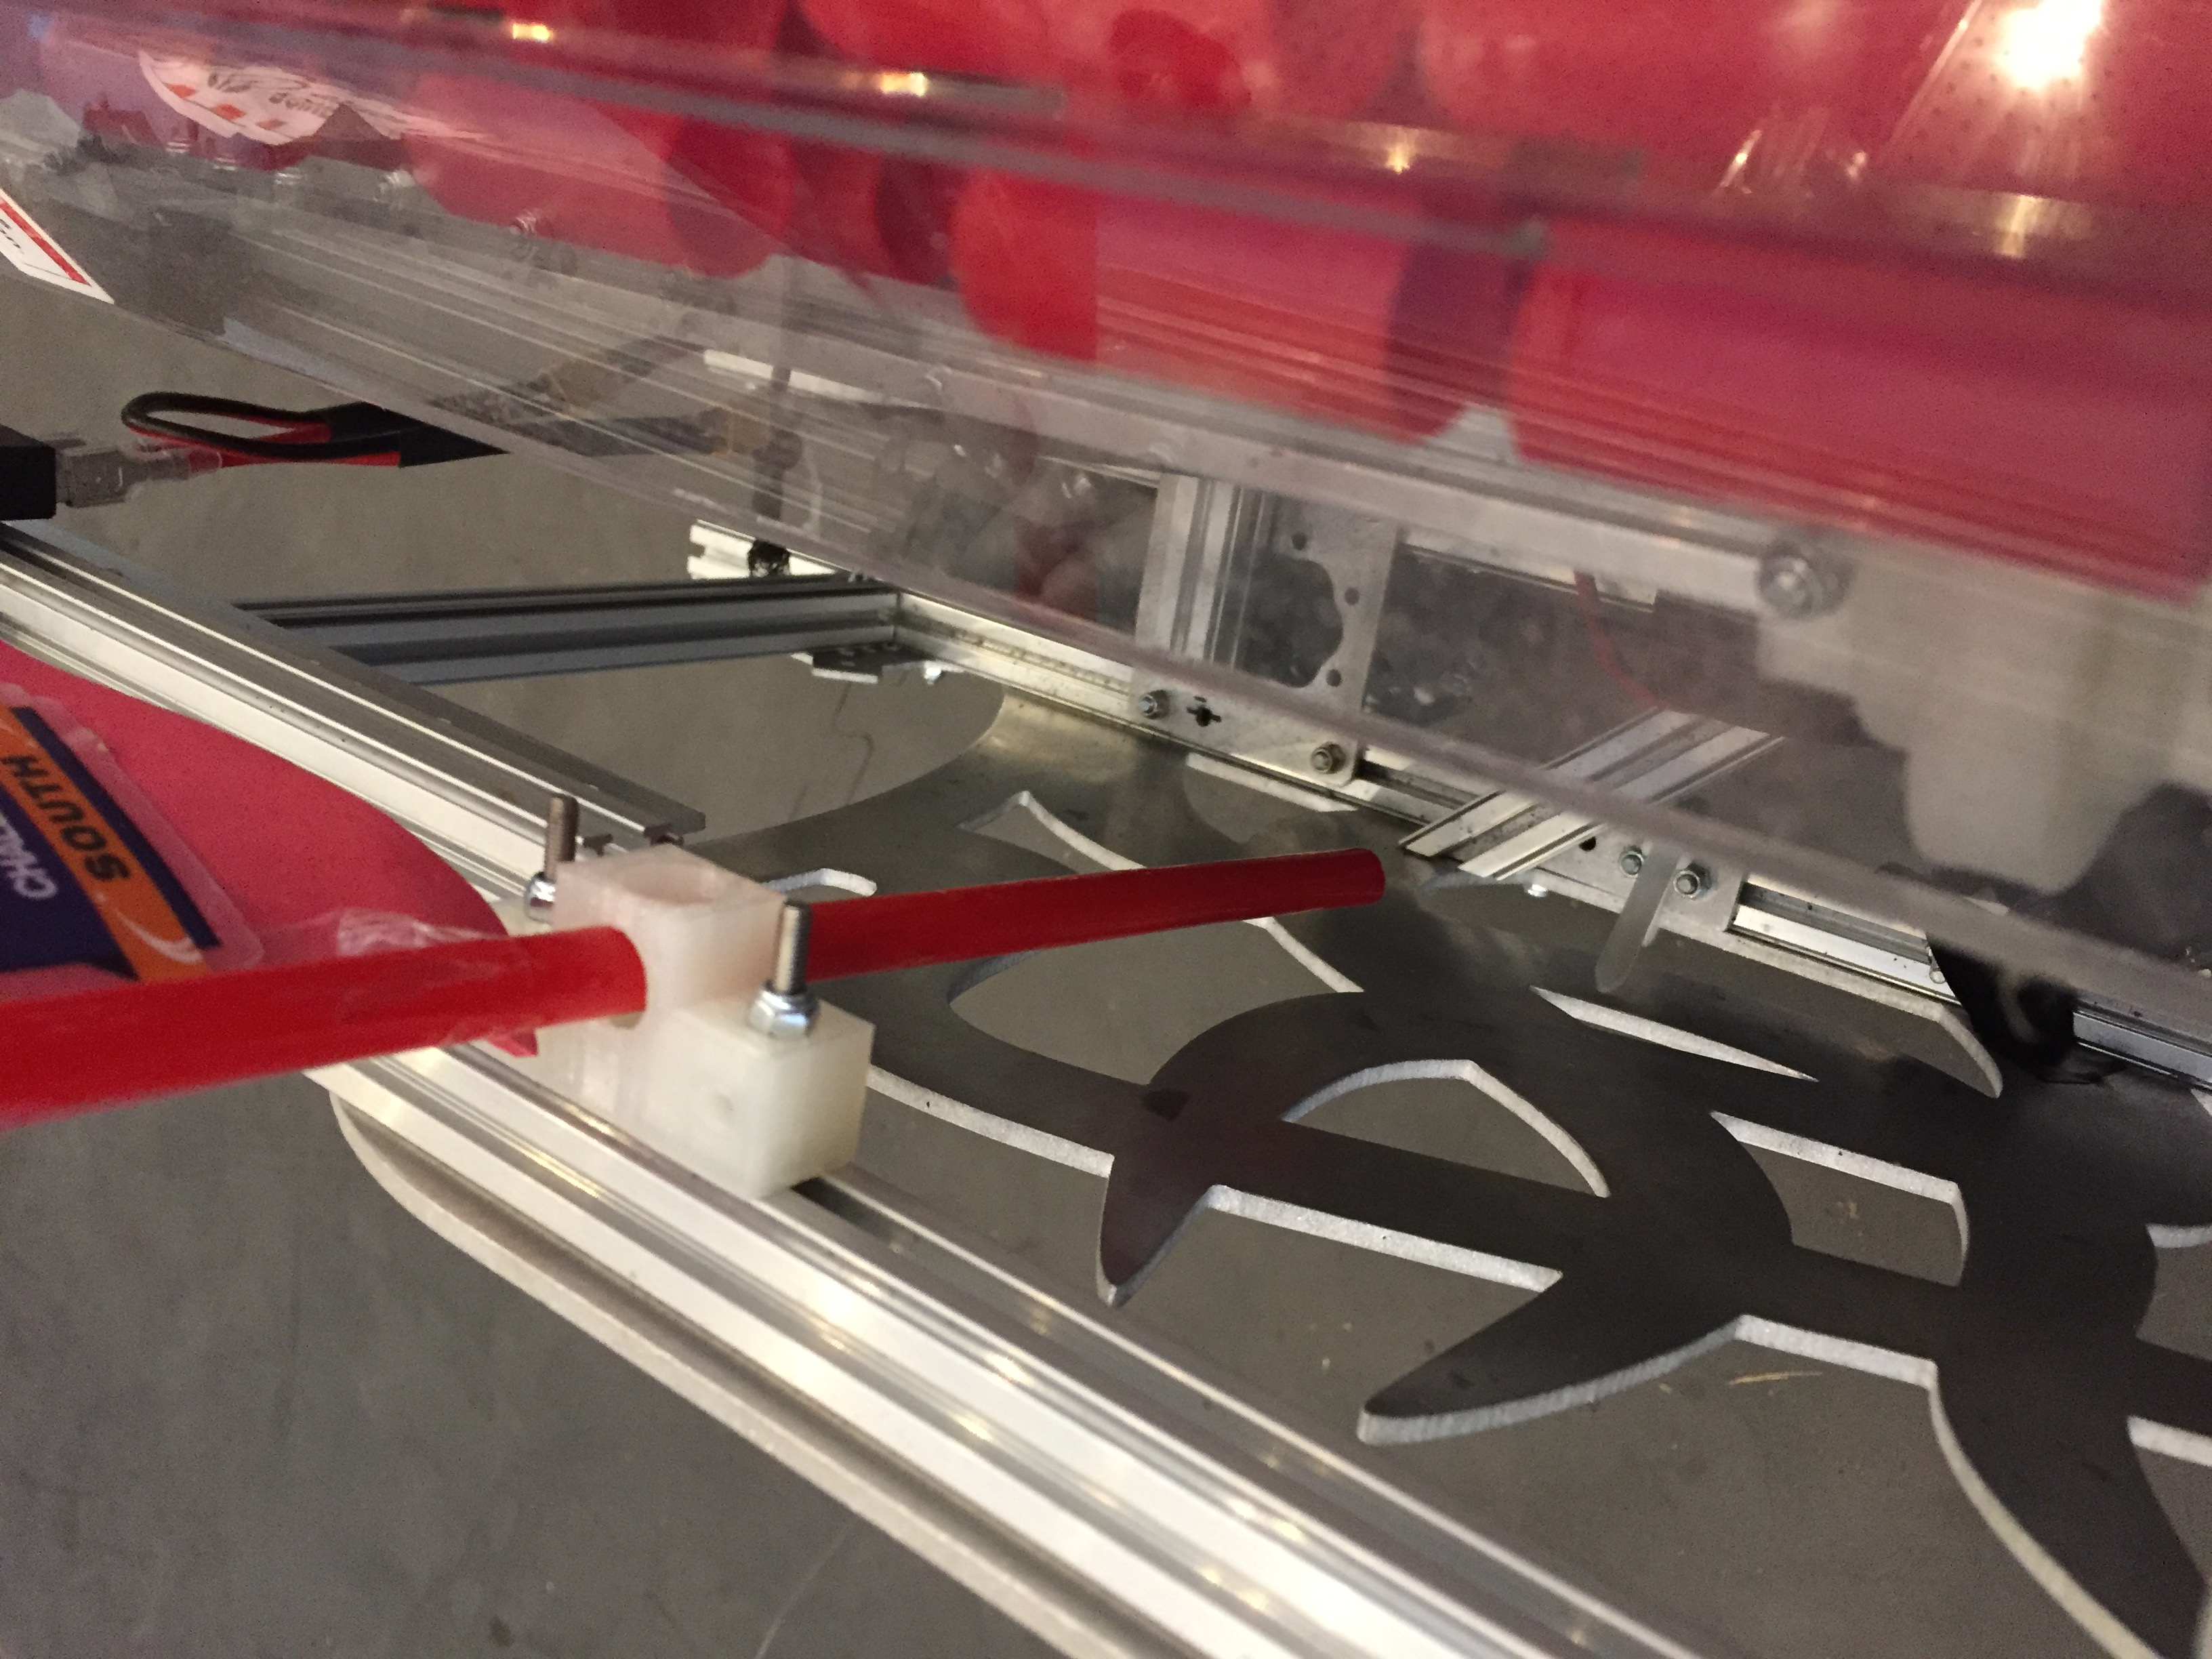
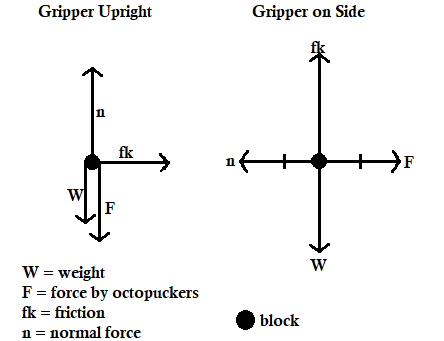
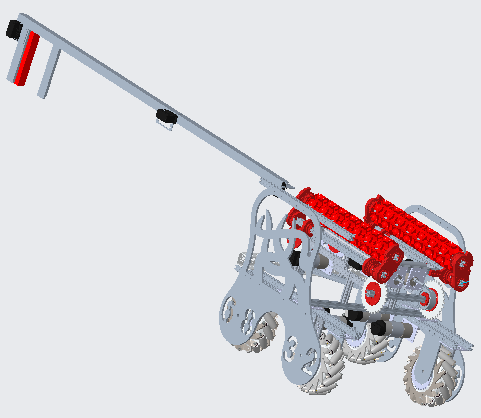

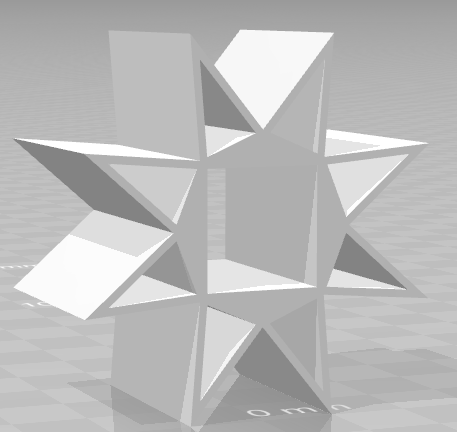 This design was too rigid, we overlooked the fact that triangles tend to be the strongest shape, and therefore this octopucker wasn't as compliant as we wanted, damaging the blocks.
  This design was really good, and we used it for 3-4 tournaments. Our initial design of these wouldn't damage the blocks significantly at the levels...
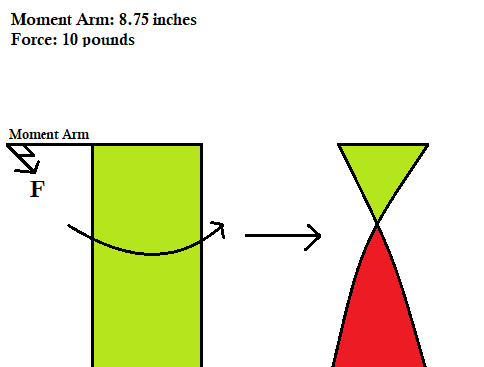
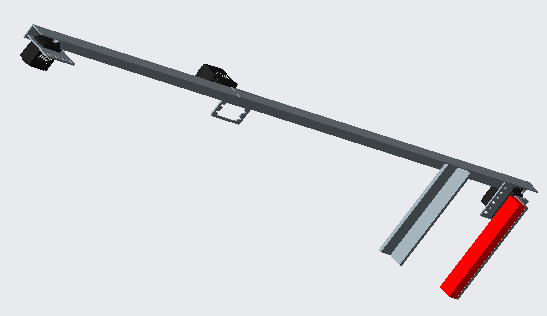
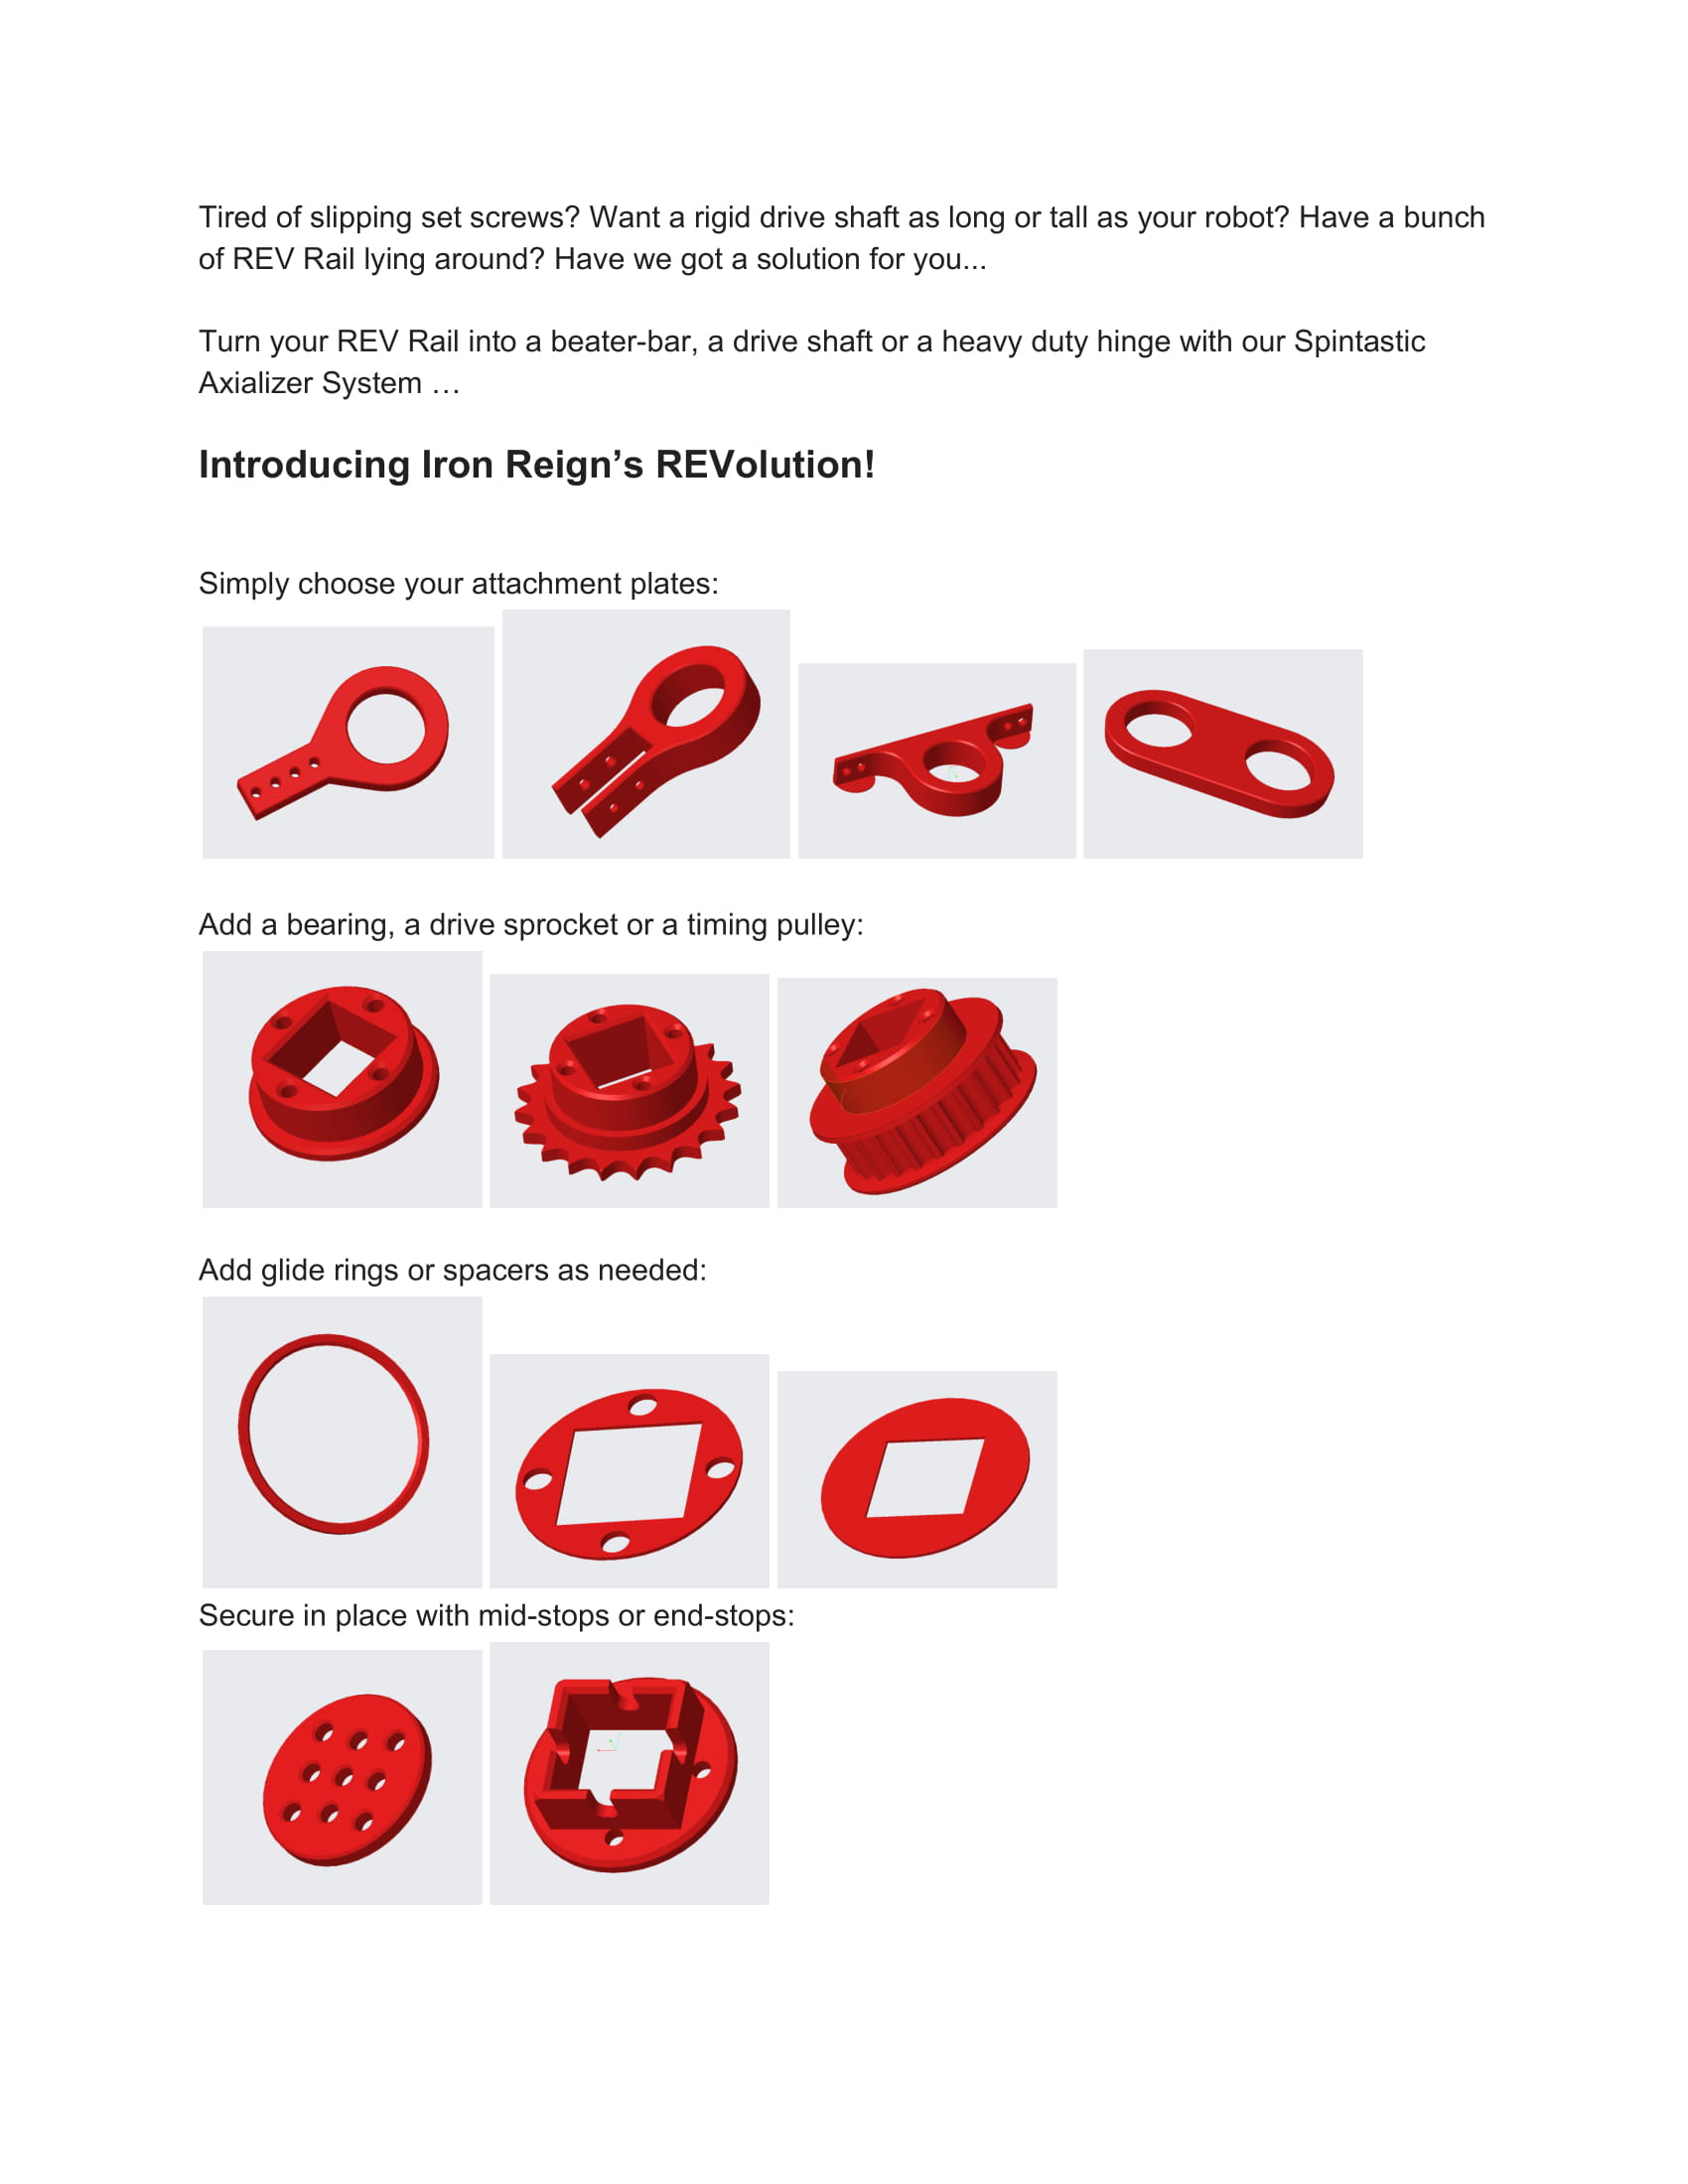

 ...
...
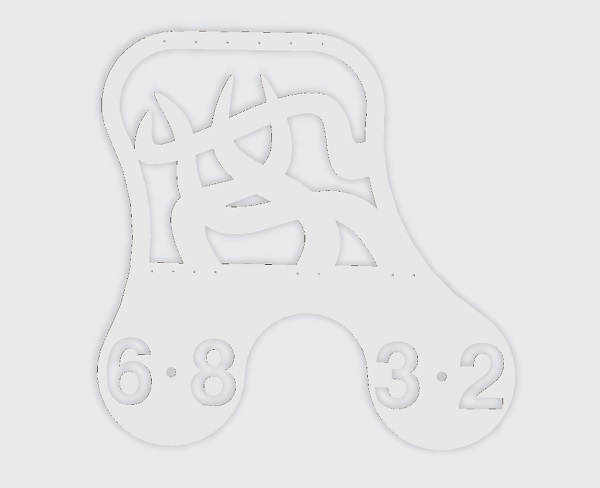
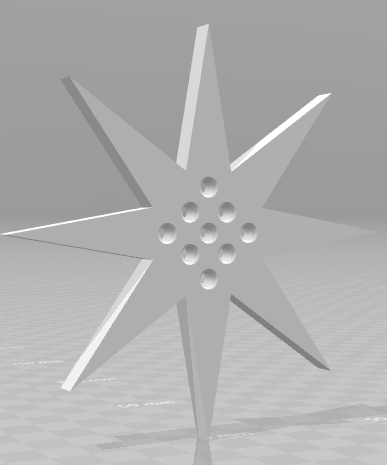
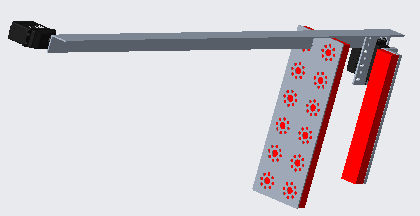
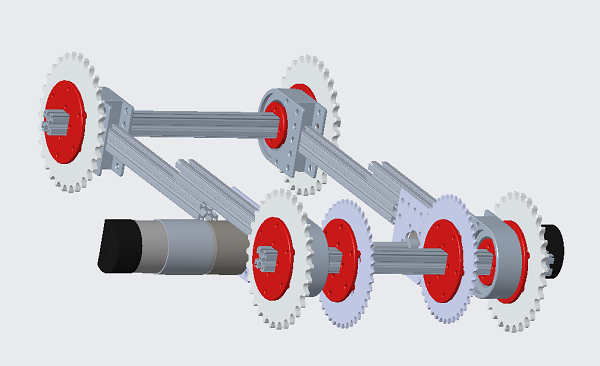
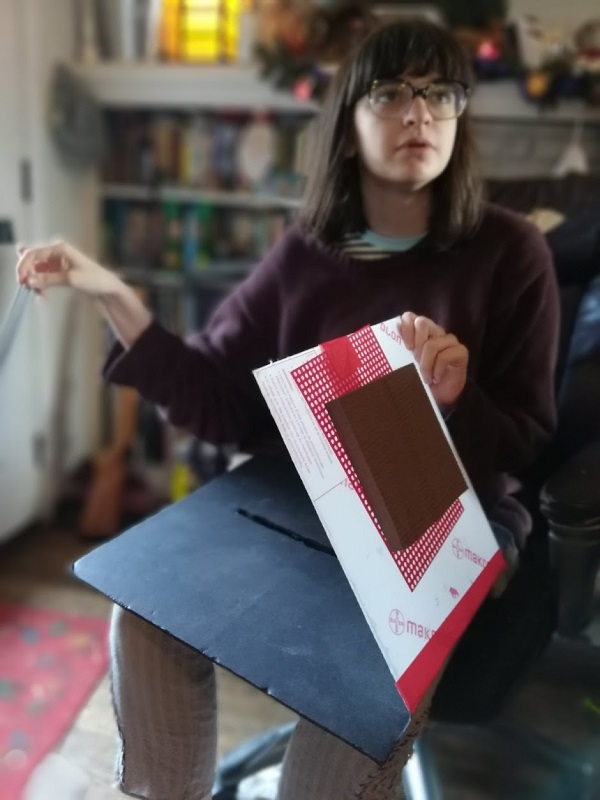
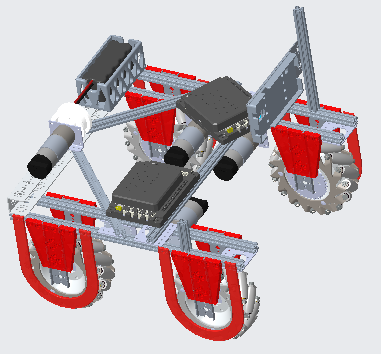
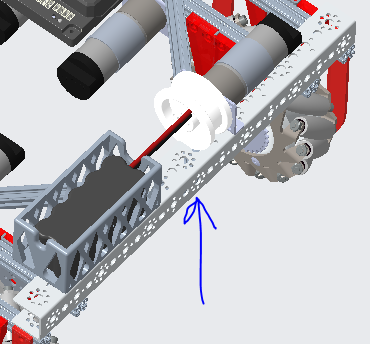
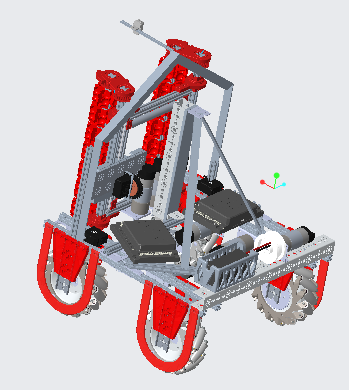
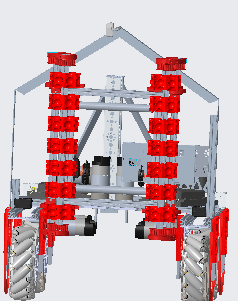
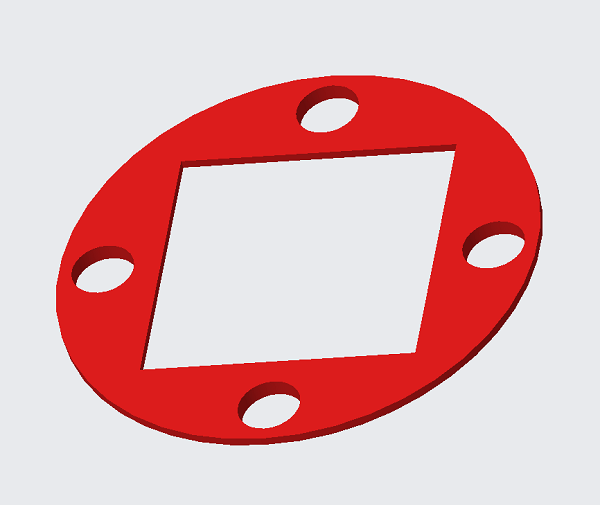

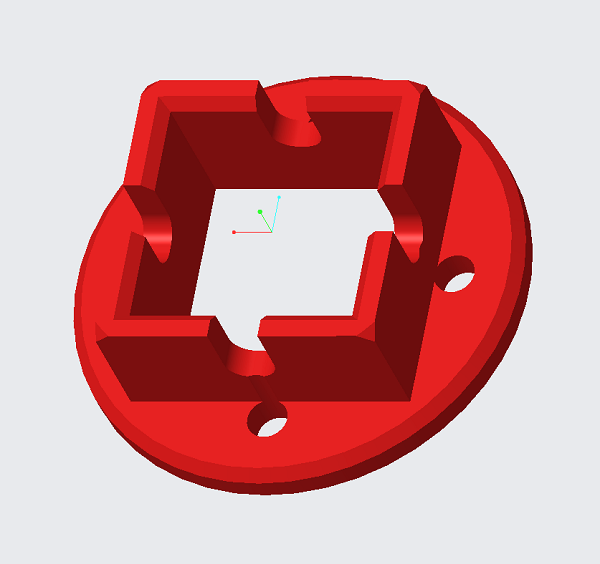

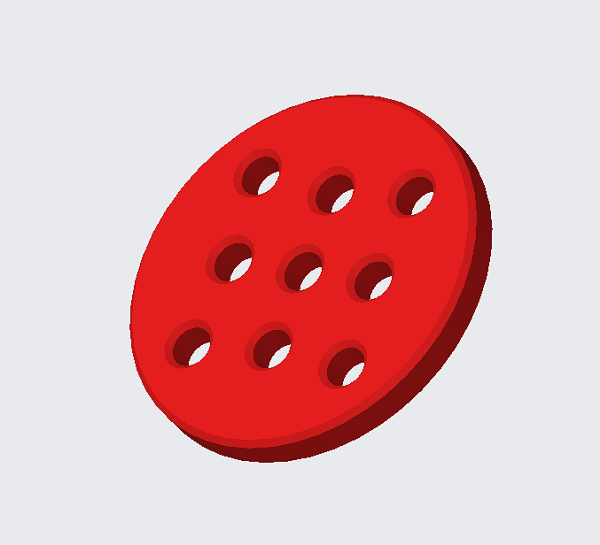
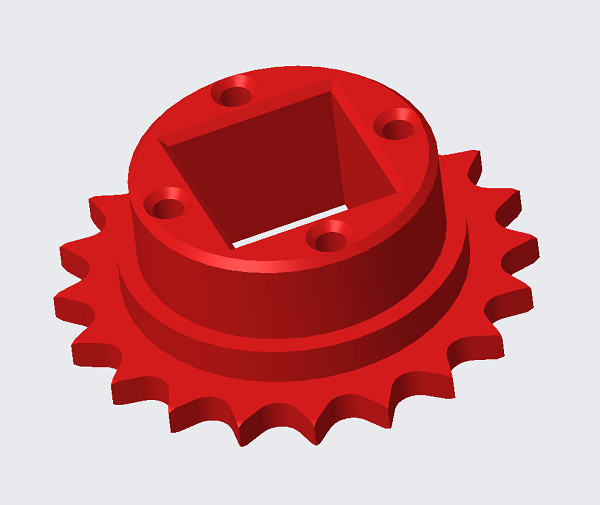


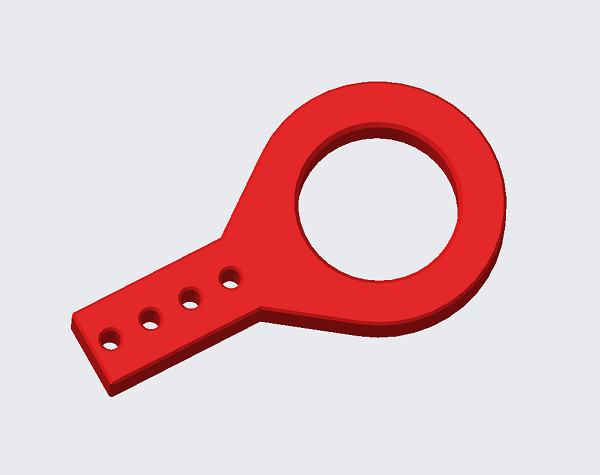
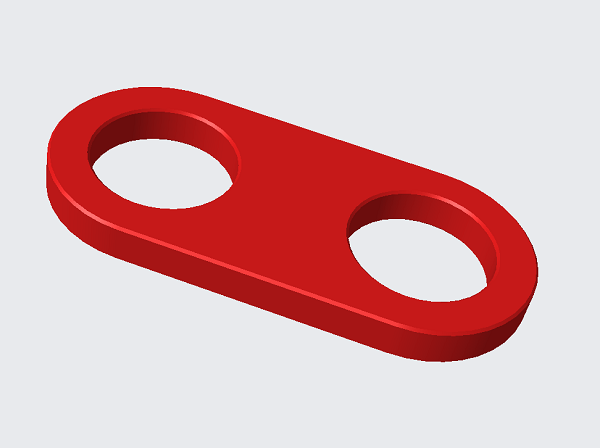
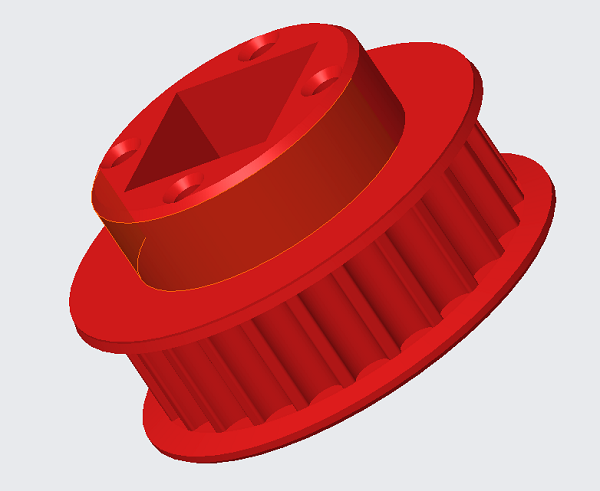
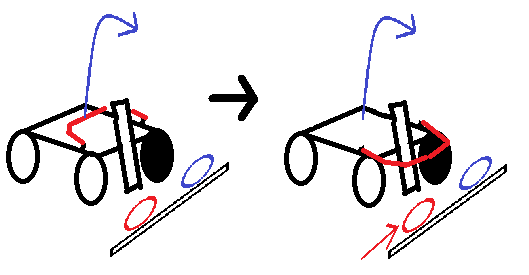
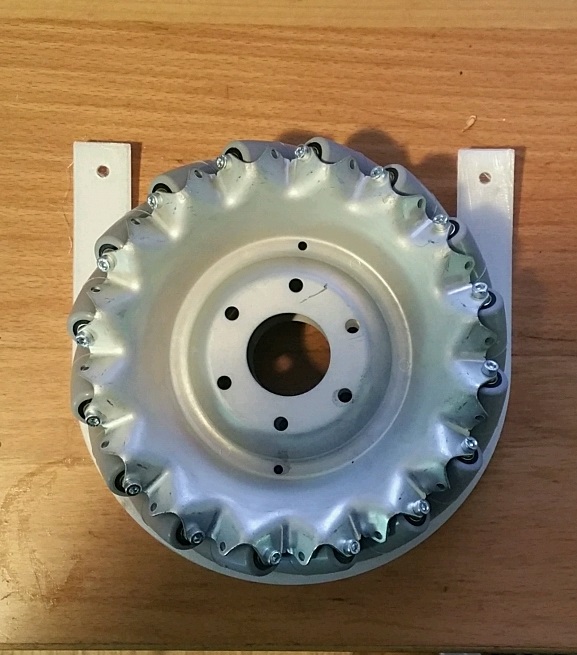
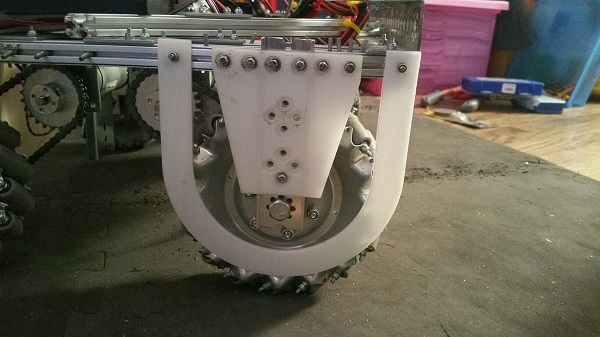
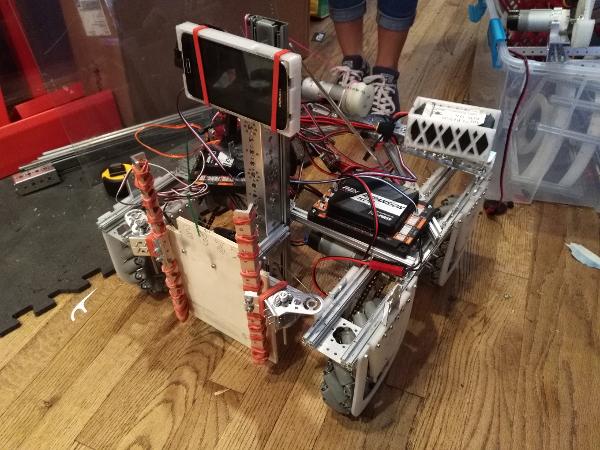
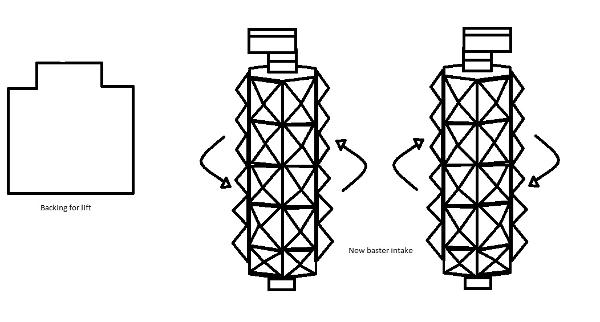
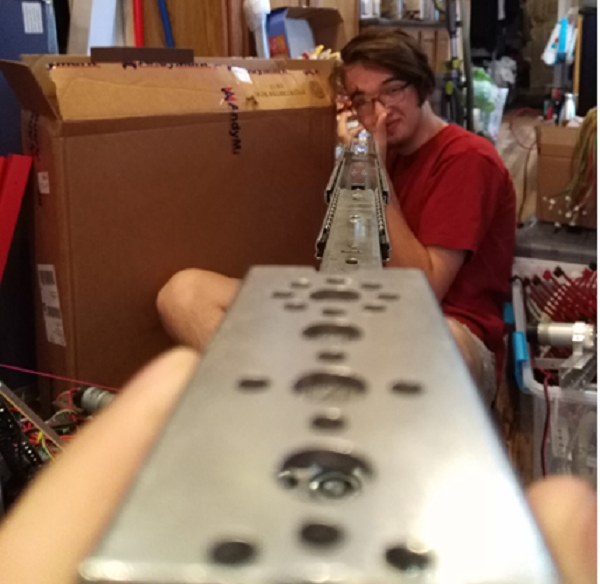

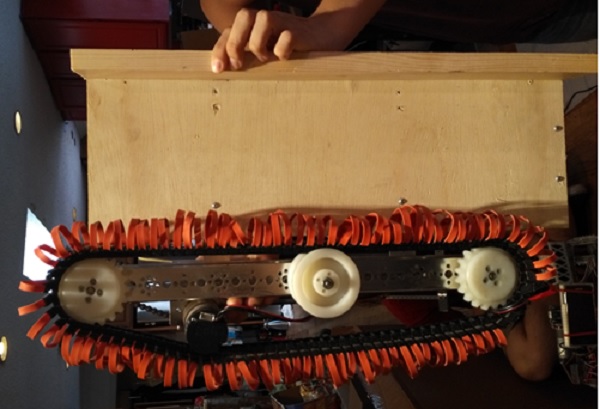
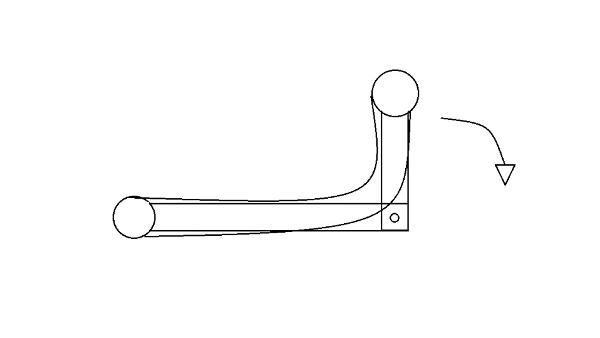
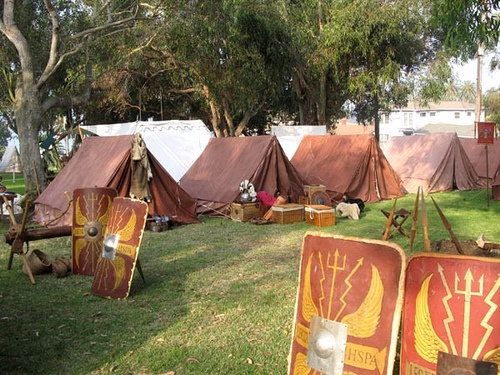
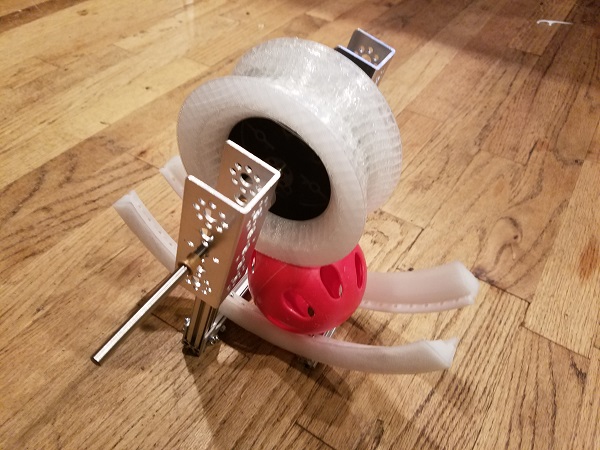
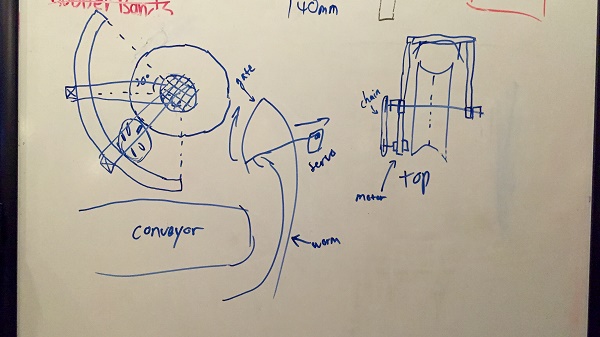


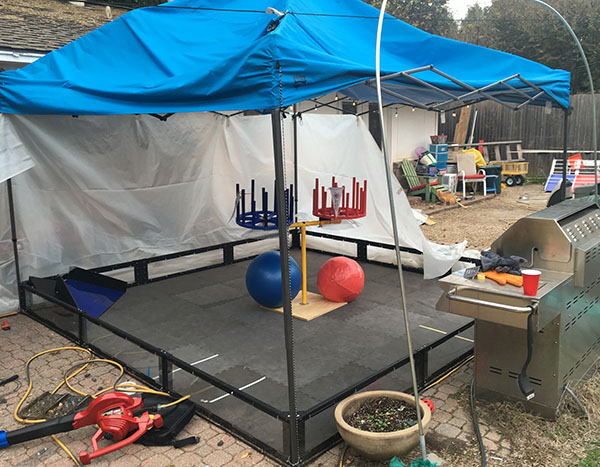
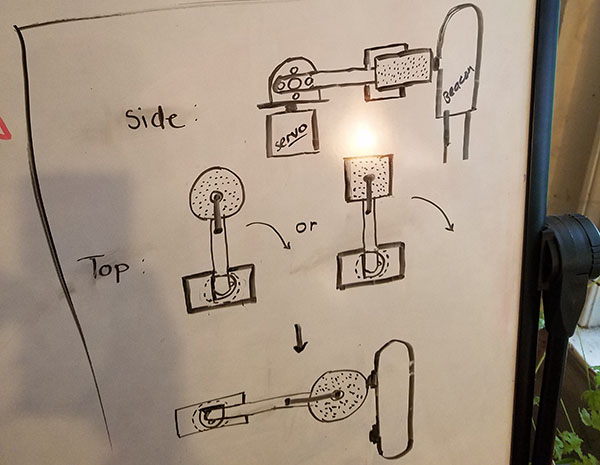
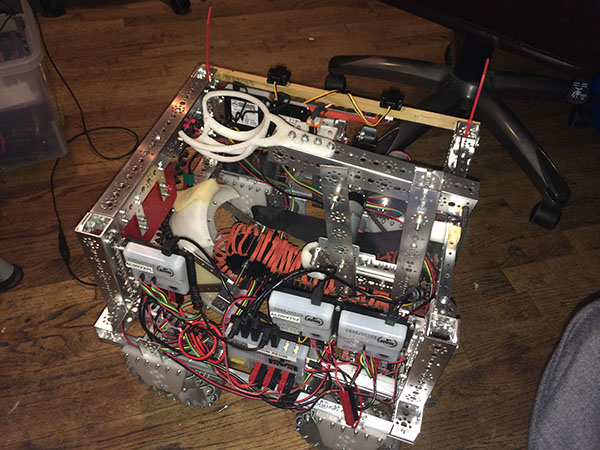
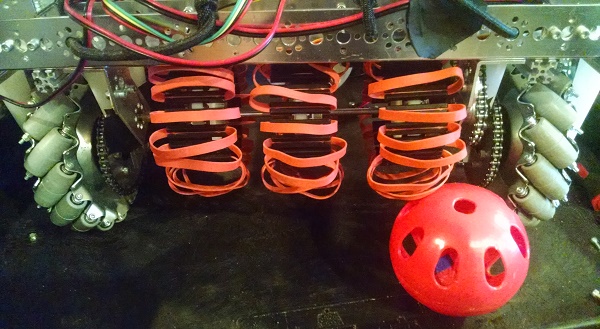
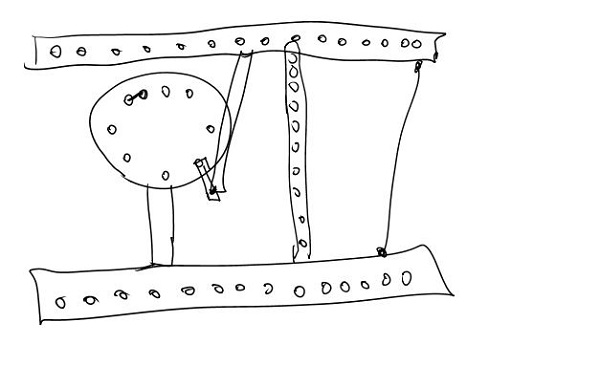
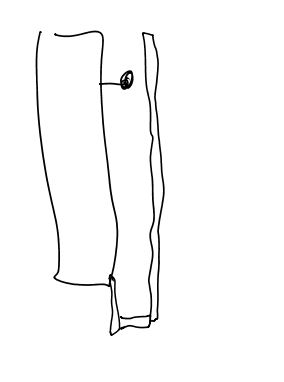
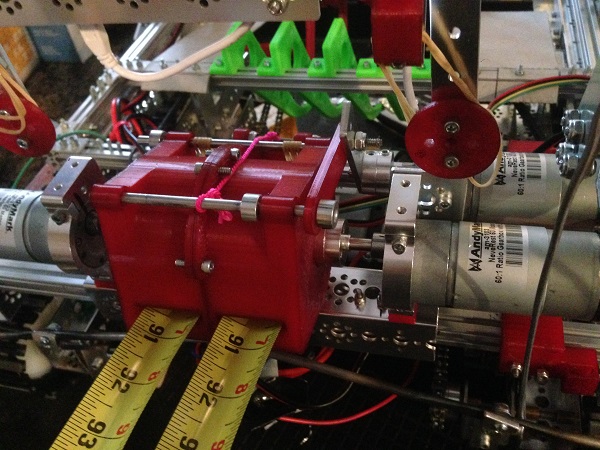
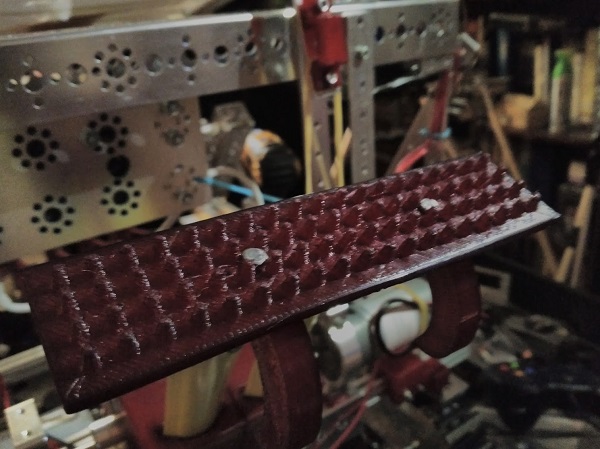
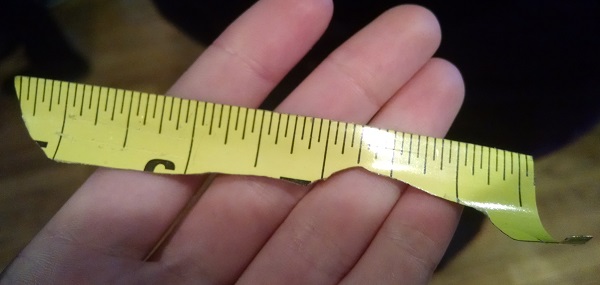
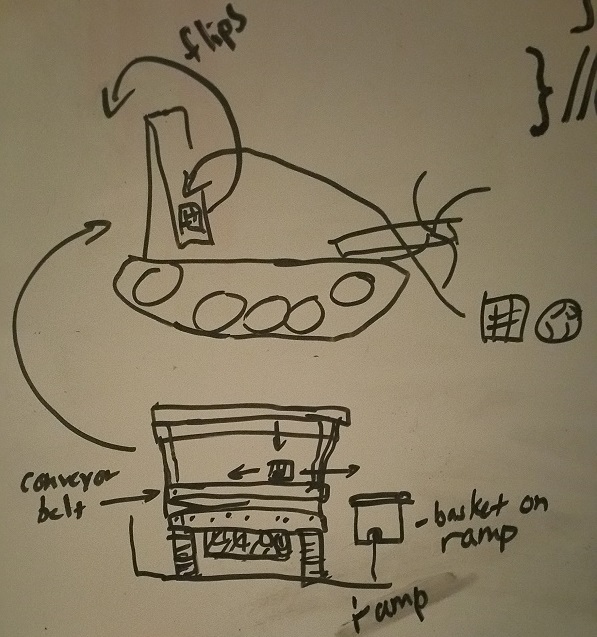
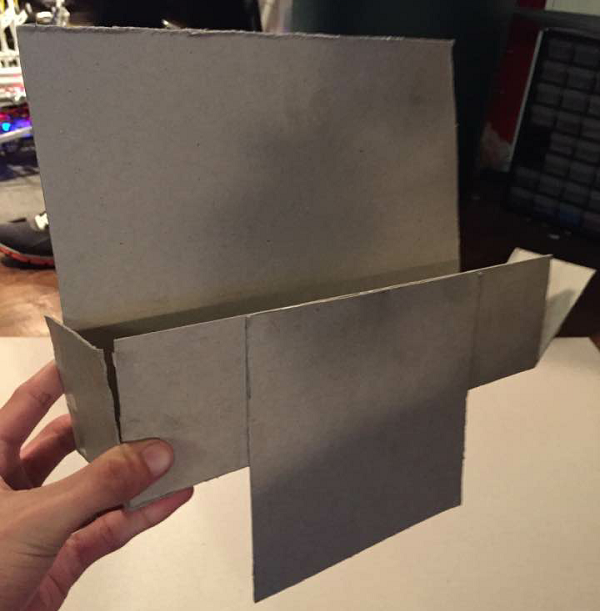
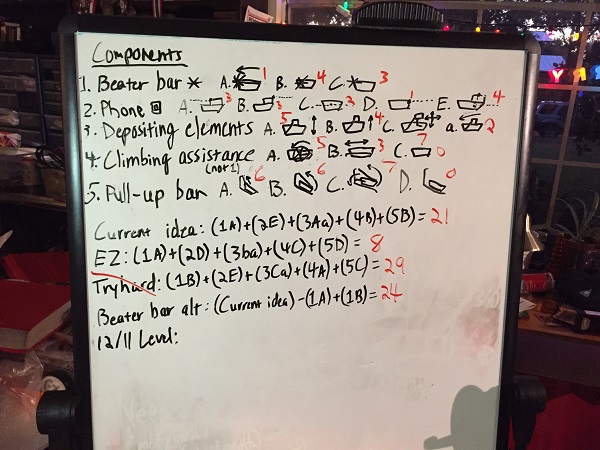
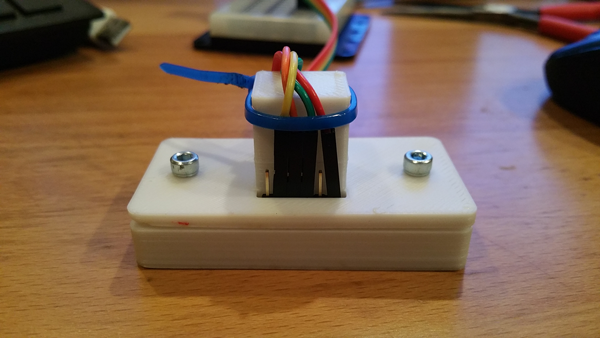
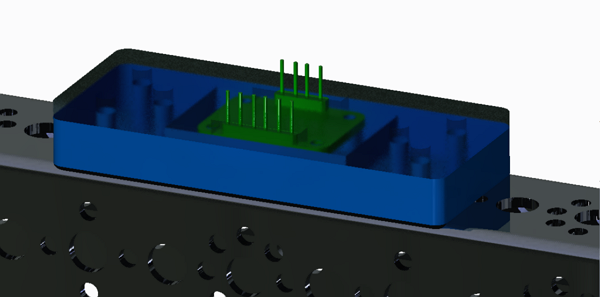
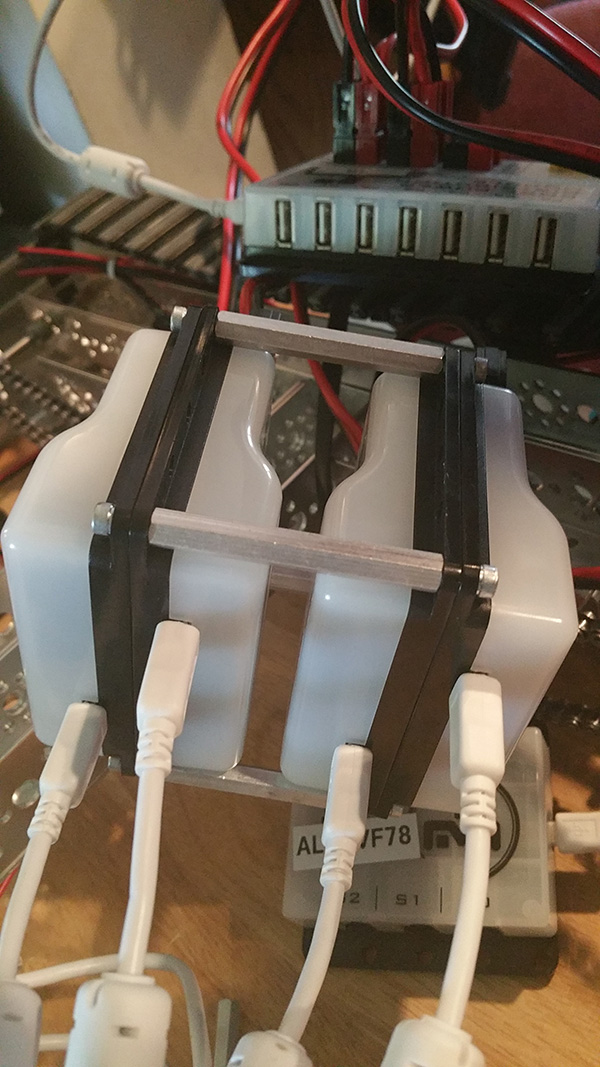 When placed on the robot,...
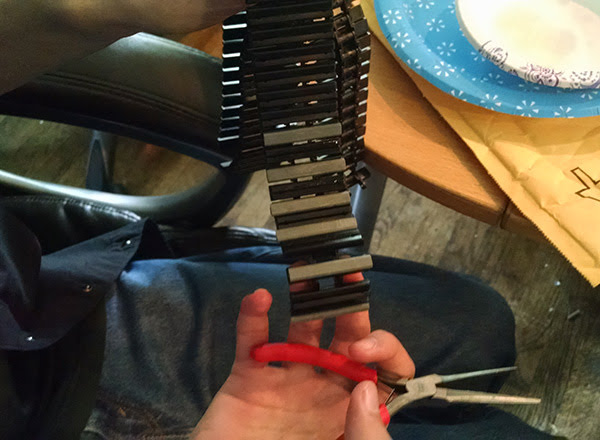
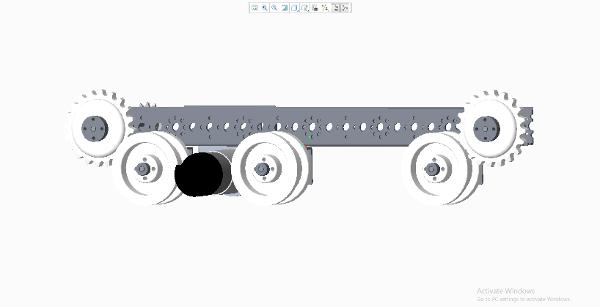 Since the robot game for this year came out about a week ago, we were thinking about which kind of drive system would work best for the challenge, which mostly involves climbing. Some of the concept we came up with were rocker bogies, rubber-banded tires and a tank drive with treads. Since we already had the preliminary design started for a tank drive, I started modeling that.